It's a bit hard to find good reference photos from the films, sinse they are usually covered by her hair. This photo I Think is from an official jewellery set that isn't available anymore, but since most of the more expensive official Harry Potter products are very accurate I decided to use them as my main reference.
Start with cutting a piece of jewellery wire, it needs to be a wire so that it can hold its own shape, not just a piece of string. I used around a meter, or an armlength of wire.
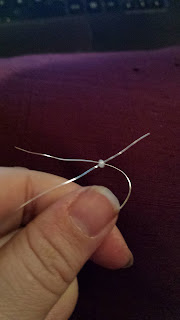
Start with a putting a single bead at the middle of the string, then loop one of the ends through the bead again.
Pull the wire taught around the bead.
Do the same with a new single bead.
Then take three beads. When you have pulled both ends of the wire taught around the bead they should make a curve, bend this curve to the right.
Repeat this step, but bend the next three beads to the left. You should now have a small circle of beads.
Next time use five beads and bend them to the right, and then five beads and bend them to the left.

Then take 8 red beads and bend them to the right, followed by 8 red beads that you bend to the left
The next row is 10 beads to the right, 10 the left.
The next row is 12 beads to the right, 12 to the left
The next row is 11 beads to the right, 11 to the left
The next row is 9 beads to the right and 9 to the left. But now when you have finished each side you push it not just to the side, but also a bit upwards.
This will start closing the top of the plum.
The last row is 7 beads on each side. If there is still a gap at the top you can do another row of beads with 5 beads on each side.
Do a small twist on the wire to close it.
Then it's time to start with the leave. Use the same technique of pulling both ends of the wire through each row, but this time you make sure that the rows lie flat after each other, instead of bending them into arches.
The rows of the leaves are as follow:
2
3
4
5
5
4
3
2
Now I varied all my leaves a bit, doubling different rows to give them all an individual shape. If you want to be really accurate you should use two different kind of green beads, and alternate them. I only had one colour of green though.
When the leave is finished you tread the wire back through the last rows and cut off the excess.
For the next two leaves you need to cut a new piece of wire for each and thread it through the top of the plum.
And here are my finished dirigible plums
Attach an earring hook, or some other kind of fastening to the top and they are ready to wear.
The number of beads in each row is as follows:
1 - white
1
3
3
5
5
6
6
8 - red
8
10
10
12
12
11
11
9
9
7
7
2 - green
3
4
5
5
4
3
2


No comments:
Post a Comment