The first thing I did with Lady Poe was to cut out the pieces for the petticoat, but then it was straight into the making the main robe.
The gown is constructed on the lining, so it's necessary to first make a lining that fits well.
For the lining I used the pattern that I had made for my pet en l'air. The whole construction is made from experiences with making the pet, as well as following the American Duchess Guide to 18th century dressmaking. The lining is made from a cotton sateen that I had in my stash. I didn't have enough linen to be able to make the lining out of it, and after all cotton was used in the 18th century.
The pattern was still very much a rough guide though, so I had to continue fitting it both on the dressform and on myself. I concentrated on making sure that the back and sides looked good and smooth.
For the outer fabric I cut out the side of the back piece, but I kept the full width of the fabric. Historically silk fabric was not made in the width we use today, the looms were only around 50 cm wide. My fabric is 1 m wide. In order to fake a more historical width I made a tiny fake seam in the middle of each fabric piece.
The fake seam is made with running stitches holding in a tiny fold. Both the lining and the outer fabric is sewn by hand with silk thread.
For the back piece I followed the instructions of the American Duchess, unlike when I did the pet en l'air. I have a cut out panel and it's adjustable with four pairs of ribbons. Unlike the pet en l'air there is no boning stabilising the back.
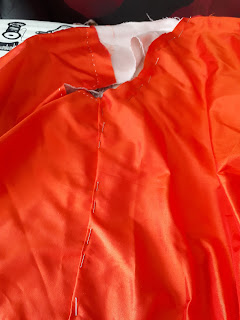
It took me seveal hours to align the outer bodice front with the lining, and make sure that there was no buckling of either fabric. I started with tacking the side seam to the lining, and then smoothing the fabric outwards and downwards and pinning, pinning, pinning until I was happy.
This is the front of the bodice. I am not totally happy with the shape of the opening, and the straps are too wide, but that is easier to adjust when the back is done. Also this is where I want to do the final fitting on myself, rather than the dressform. The bust area is where my dressform differ the most from my own body.
I then pinned the back piece to the side seam, armscye and shoulder seam.
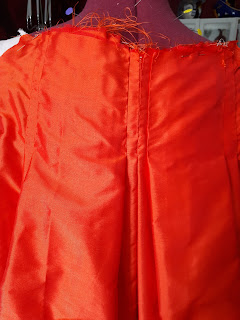
And then it was time to pleat all the extra fabric into a good looking back piece. For this part I followed the instructions of the American Duchess again. It was definitely tricky to get all the fabric to lie flat and nice.
The pleating produces three layers of pleat, two visible and one hidden in the bottom layer. Here they are marked with pins to make them easier to see.
The top of the pleats was sewn down with prick stitch, down to where the back opening is.
The back still needs to be fitted though, and here is a difference from the pet en l'air. I sewed the bottom layer of the outer fabric, under all the pleats, to the lining with prick stitches. This makes the back fitted, even if the pleats still flow out from the back.
The last part was to unpin the side seam, armscye and shoulder seam. I then smoothed the fabric over the lining before I sewed the outer fabric to the lining. I used prickstitch for the side seam and small running stitches for the armscye and shoulder seam, since those seams won't be visible when it's all finished.
Next step is to attach the front and side panels to the skirt of the robe.


No comments:
Post a Comment