Friday, 5 July 2019

A helmet for Obelix

Obelix needed a helmet and during our cosplay weekend I managed to almost finish it. This was my first time working with foam in a real build way, and that's why it was good doing at the weekend when I could get help and borrow tools, and not the least get encouragement.


The helmet is made in four parts from a pattern from Templatemaker.nl. I got it from one of our group that had used it to make a sphere, and I simply just used half the pattern pieces to make a half sphere. I had to cut out the points of each bit to make it totally flat in the bottom. The helmet is made in 5 mm high density foam, that I heated with a heat gun and then bent slightly. The dark spots above is where I heated it a bit too much. They are glued together with contact cement.

The helmet was still very angular so I borrowed a dremel and filed off the ridges where the pieces were glued together.

I used foam glay as a filler in the seams, and then I sanded them down with a very fine grit sandpaper. The top globe was freehanded in foam clay, and the horn holders were strips of the same foam that I rolled together. Then I decided to go away a bit from being accurate. I added the strip around the bottom of the helmet, and it looked a lot better even if Obelix helmet doesn't have one. I used googly eyes to mimic small bolts. When all the extra piecs were added I used wood glue, thinned with a little bit of water, to seal the foam and prime the helmet. In total I used four layers of glue.

I painted the helmet with spray paint and it is painted with one layer of grey primer, one layer of silvergrey paint, two layers of metallic and a clear top coat. The last thing I did was to add the horns, which are also made from foam clay and glued with contact cement to the helmet.

I want to weather the helmet a bit, not much, but just enough to take away some of the sheen, I also need to come up with a way of actually attaching it to my head, since it falls off when I move my head as it is right now. I'm thinking that I will add some kind of comb to it.

Tuesday, 2 July 2019

Obelix - the quest for a red moustache

One thing I'm lacking and that I will need to fake for y Obelix costume is facial hair. This is actually the part of the costume that I'm not looking forward to wearing. I simply will have to wear some kind of fake moustache. It turned out that it wasn't easy finding a moustache in red, especially not a red that mimics my own current hair colour.

I ordered a bunch of different cheap moustaches from the party shop Partykungen.se, none of them looked realistic or in the right colour. Thankfully Obelix is a comic figure, so I don't have to worry too much about the realism factor, but I still want it to look good and not just slap some orange fuzz on my face.

In the end I decided to go with the blonde moustache and try to dye it red.

Since it's a matter of a limited amount of hair I simply used sharpies to colour the moustache, the important thing is that the inc is alcohol based. You can see in the picture above where I did a first test.


I started with a sharpie in "poppy" colour. I really like this colour and think it would work great for a version of the comic style Obelix. My own hair has a lot more purple tones in it though, so to make it look more like my hair colour I had to paint it again.


This time I used a sharpie in "magenta" and this is really close to my current hair colour.

Now I can only cross my fingers that I will be able to make the moustache stick to m face when it's a warm summer's day, I've never worked with facial hair before. I have bought proper moustache and hair glue though.

Sunday, 30 June 2019

Introducing my NärCon Sommar 2019 project - Obelix

With less than a month to go to NärCon, the big annual cosplay festival, it was really time to start working on my project for that. Thankfully I'm not alone in having a lot of stuff to do before NärCon so this weekend Cosplay Dalarna arranged a weekend workshop that gave us two full days to work on our different costumes. I counted that it was 20 hours of just cosplay work time, these kind of build days are really effective compared to when you work by yourself. I'm going to divide my work on several posts, but here is the background to why I'm going totally out of my comfort zone and do a male character from a comic book.

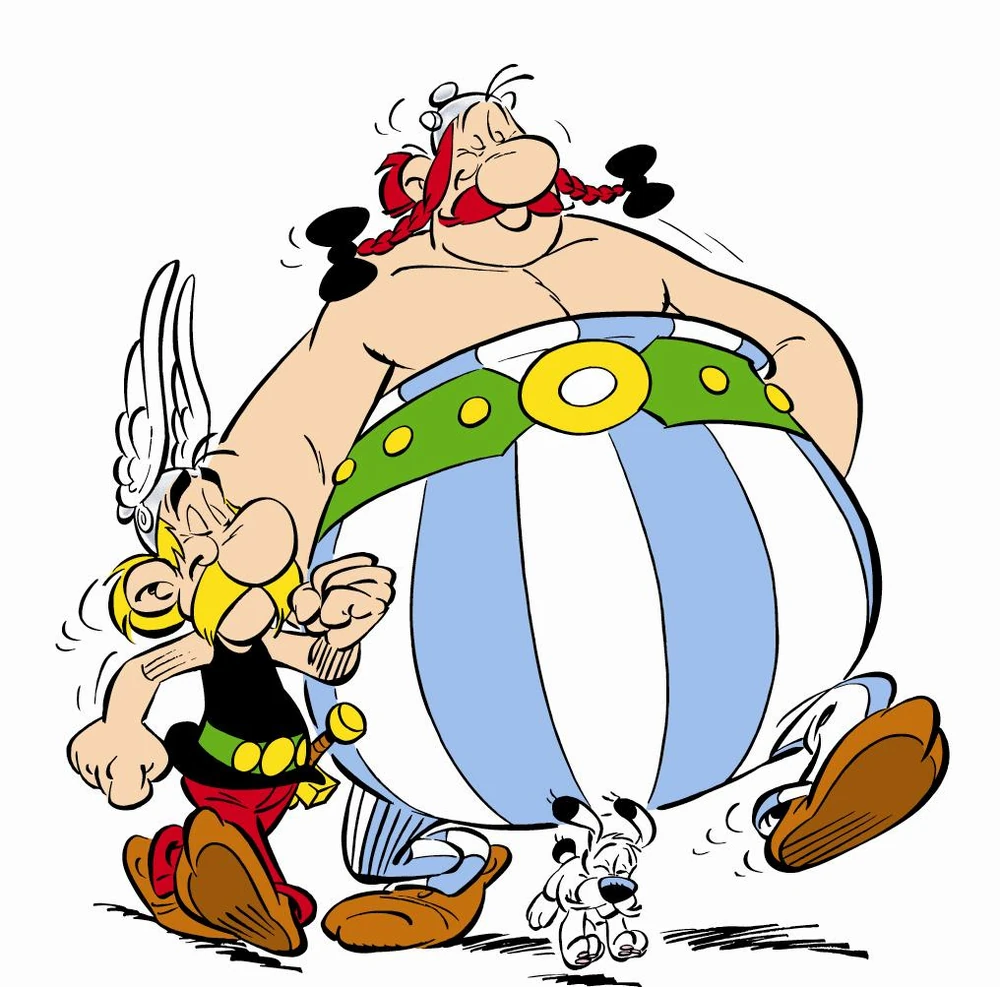
The French comic Astérix is my original fandom. I started reading them just when I had learnt to read by myself, and I collected every new album that came and one of my favorite family holidays was when my parents took me to Parc Asterix outside Paris when I was 9. I dressed up as Asterix for an Easter Masquerade as a kid, I don't have any photos of that though. I even managed to quote "Asterix and the Goths" in my BA thesis in archaeology. I have always thought that it would be fun to do Asterix costumes, but the women wouldn't be recognized by themselves so it wasn't something I pursued. Last year when my friends Ann-Sofie and Mattias debuted their Tintin and Captain Haddock at NärCon and got an overwhelming response we started talking about other childhood series that could work. We turned to Asterix, especially since Ann-Sofie is small and blonde. Well I'm big and curvy and have red hair, so I joined in and was happy to be Obelix to her Asterix.


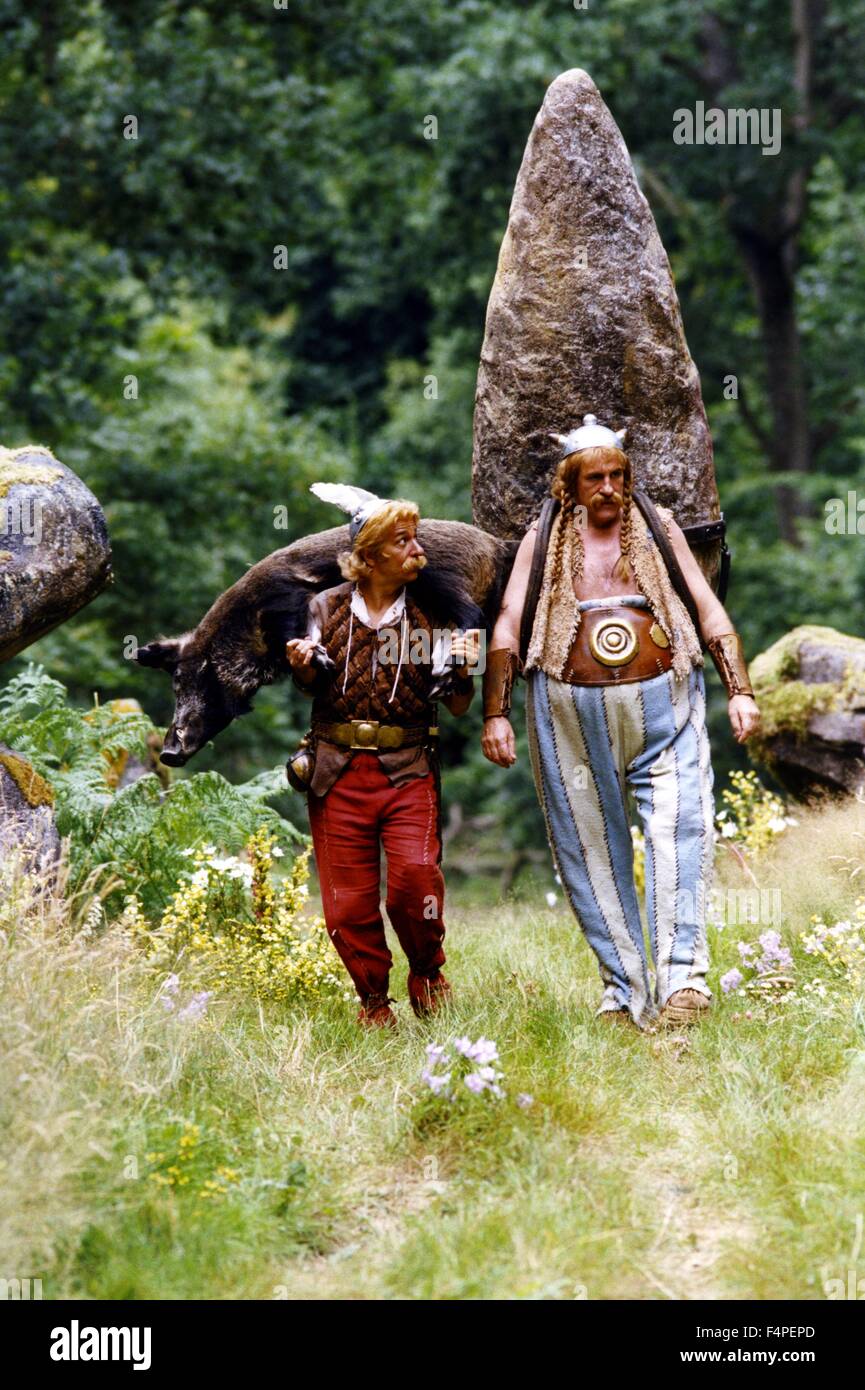
Now there are some obvious issues. I might be big, but I'm not as huge as Obelix. The size difference between Asterix and Obelix is also quite big. Now there are also a series of live action films made from the late 1990's and onwards, and there Asterix and Obelix look like this.


The siz difference isn't quite as pronounced and Obelix has a more "normal" bodyshape, even if it's on the big side. I decided to base my costume mainly on the film version, due to several reasons. The film makers have already figured out some solutions on how to bring the character from comic to real live for example. My main reason is the fact that Obelix is wearing a vest though. As you can see Obelix trousers end below the nipples, well I would not be comfortable with that. The vest will help to hide my own bust, and it will also allow me to add shoulder straps to the trousers, so I won't have any critical costume malfuntions. The belt is also easier to make in the film version. I have chosen to pick up some things from the comic though, such as the colour of the trousers and the horns on the helmet being white and not brown. Those details are more consistent with what people expect Obelix to look like.

After a full weekend of working this is how far I have come, and I actually feel quite relaxed about the project.


Friday, 28 June 2019

Some reflections on folk costumes

It's been Midsummer, the big holiday in Sweden where folk costumes are common. Now with it being the event of the year when people wear their folk costumes, up comes the discussions on how you are supposed to wear them. A word that usually comes up in discussions is "dräpo" which is a portmanteau of the Swedish words for "costume" and "police", and a play on the name of the Swedish secret service "säpo". In cosplay and costuming circles they would be called costumenazis and things like that.

I felt that I wanted to put my thoughts on what it means for me to wear a folk costume, and how I see the usage of them, into writing. Before I start with that I would like to quote Eva Andersson on Eva's historical costuming blog about the Swedish folk costumes.

Folk costumes in Sweden can be divided into three categories: preserved, reconstructed and created costumes. The former are those that were in continuous use until the second half of the 19th century or those who were well documented before that. For these costumes you have all the original garments in museums and there is often a large variation between clothes worn on greater holidays, lesser holidays, on normal days etc.  Many preserved folk costumes are from Dalecarlia, but you can find them in all parts of Sweden except in the far north and of course, close to towns.
    The reconstructed costumes are based on some preserved garments and contemporary descriptions of the clothing worn in a specific area. When a garment is "missing" from the concerned area you use a garment from a neighbouring area or from the time the rest of the costume is from to complete the costume. This is the type I own.
   The created costumes are made where there are no remnants of an older popular costume, but people still want to have something that signifies their local area. The costume is then created based on the idea of how a folk costume should look.
I would add though that the divide between a reconstructed and created costume can be a bit fluid, since a lot of created costumes have also been based on remaining pieces. My folk costume for example is usually called "created", but the the colours and patterns of the main fabric was taken from a piece of clothing that had been worn by a person in the parish.

Most people wear their costume because they want to show their connection to a geographical area. One of the most common questions in a facebook group I'm part of is "Which costume should I wear?". From having seen the discussion on the wearing of folk costumes there are two different factions on why and how you should wear your costume. Some people consider it an homage to the people who have gone before us, and they are usually the ones that are adamant that the costume should be worn according to certain rules and exactly as it has always been. These are usually the same people who thinks that the costumes should be made from fully handwoven fabrics and handsewn. The other group see the costume as more of a living tradition, where the costume can be changed and worn differently according to the preferences of the present day wearer. These people are usually fine with using sewing machines as well. I think it's important to acknowledge that people have these different starting points when it comes to folk costumes, and even if you don't agree with one side you can still respect it.

I have had my folk costume now for almost 20 years, and in that time I have changed my mind around it. Or rather my understanding and view of the costume has evolved, not the least as I've gotten more knowledge on the general history of fashion and dress. I started off seeing it as a relic from the past. I was really proud of it, and I wanted it to be worn like in the 19th century. For that reason I chose to have the skirt almost brush the floor, and I was serious about not wearing the cap to it since I was unmarried. The cap was the symbol for the married woman, while the unmarried woman just had a hair ribbon, in the same colours as the costume.

During the last years I have changed my attitude to the costume, and in fact that has made more comfortable in wearing it. I now consider it more of a history of me and my family, I'm just the latest in a long chain of people with a connection to this area, and all the peole who have gone before me have worn their clothes differently. The more I think about my costume like this, the more I also get happier with the small mistakes and faults in the costume, because I know the story behind them and that gives the costume an even higher emotional value, even if it isn't flawless.

Here is the story of my folk costume.

My costume is the costume of Vika parish in Dalarna, outside of Falun. On my father's side we can trace our family there to the 14th century. That single fact alone makes me very proud of my costume, and coming from Vika parish, and is why I would not be interested in wearing my mother's folk costume from Vingåker in Södermanland. The influential people in Vika were involved with the copper production from the Falun mine, they were master miners. They weren't farmers and they followed the latest fashions. That meant that folk costumes were not worn in the area. In the 1920's, when there was a trend for folk costumes, a costume for Vika was created based on different garments that had been found in storages around the parish. It is debatable if the costume is recreated or constructed.

For me it is important that the work on the costume was done in the 1920s. It is basically what people in the 1920s thought that a folk costume should look like with a nod back to the folk fashion of the 19th century. This gives me a good conscience to adjust the costume to our present day, since that is how it all started anyway.

I got my folk costume, or rather the money for it, as a combination of a confirmation gift and inheritance from my paternal grandparents, my grandmother had died the same year. This gives it a strong family value, not the least because it is my paternal side that is connected to Vika. I had known that I was going to get a folk costume long before that though. The oldest part of my costume is my neckerchief. It is actually a drndl neckerchief, bought in Seefeld, Austria, when I was around 5 years old. I still don't understand how my parents could let a small child choose an important piece like that, but I guess they felt that I should get one when my sisters (who are 10 and 12 years older) got theirs. Actually I picked out a green neckerchief and my oldest sister picked this pink one I'm wearing, but as we've both grew up we realized that we were both jealous of the other's neckerchief and we switched. The neckerchief connects to all the holidays my family spent in the Alps, due to my father's work with international skiing. It reminds me of all those memories in a very concrete way.

After a couple of years it was finally time for me to have my costume made up, and my oldest sister (the one I switched neckerchiefs with) decided to sew it for me, and also my other sister's costume. So my costume is all handsewn by my sister. Now she was a bit stressed when making two costumes in time for midsummer that year, and one mistake is that the wrists on my blouse are too small. I couldn't close them with the buttons, so she had to quickly add some hook and eye for the closure. It's also a bit too short in the sleeves. I know my sister doesn't like that my blouse doesn't fit, but to me it's quite charming knowing about it, and all the work she did to finish my costume.

Me in pink and my sister in the green neckerchief that I chose originally.
As I mentioned earlier my gown was very long to start with. The photo above is taken after I had hemmed up the skirt, but hadn't changed the apron. The more I learnt about folk costumes, and also about historical dress, I started to realize that having a long skirt wasn't necessarily the most accurate, it was also annoying when wearing it. Also as a teenager I didn't really know what it meant to have a well-fitted bodice, and mine was way too big. In 2015 I took the side seams of the bodice apart and remade it. I had gotten used to wearing historical garments, and realized that a tight bodice could be more comfortable than a loose and ill-fitting one. At that time I was weighing a lot less than I do know, but even if I have gained a lot of weight it still fits well. My own alterations are now part of the history of my costume.

This is how much I altered the side seam.

So my folk costume is my history, and as such I choose how to wear it. I of course want to be respectful of how I wear it, but the most important thing is that I feel comfortable and confident in it, and I enjoy wearing it.

I'm not wearing my silk cap when it's a risk of rain, and if I don't have the proper hanging pocket, a SW handbag works fine. Dräpo would not be happy about this look.

My mother, my brother-in-law and me
It's easier to have fun if you are comfortable in your costume. Folk costumes are perfect for all occasions, and I am happy to live in a region where they are worn for more than Midsummer celebrations. Don't be too serious and anxious about the rules, it is better that the costumes get worn even if they aren't totally correct than if people don't dare wearng them for fear of doing it wrong.

Sunday, 16 June 2019

Lady Poe v.1 finished

I wanted to have a post with just my finished Lady Poe.

I am calling this my v. 1. There are so many things I'm happy with, I really got the fit of the robe right, and the length is perfect. I still want to change some things though. The sleeves are a bit long, I would like to shorten them so that they really end at the elbow. The main thing I want to change is the trim though. Now I'm happy with the look of it, but unfortunately it wasn't enough to pink all the edges. It frayed dreadfully so I will have to take off the trim, repink it and stabilize the edges in some way. I also still have some tiny amount of fabric left so I can add more trim. I think I will try and make some trim for the petticoat, but I'm not sure it's going to be enough for that.

For now though here are some photos of the whole ensemble.

This photo was taken by the official photograper Viveka Sjölund. I love how this sideview really shows off the serpentine trim on the robe, and it's in no way visible that I taked it on the last thing in the night and morning before the ball. Also look at my giant sleeve ruffles!


A robe à la Francaise is at its best when you move in it though, here is a quick video of me walking in my robe. I was a bit stressed so I'm not exactly walking gracfully, so concentrate on the flow of the robe instead.


Friday, 14 June 2019

HSM Challenge 6 - giant sleeve ruffles (and a bonus stomacher)

Last year I finished all HSM challenges, this year it's taken me into June to do a single one. First it was all focus on Enfys, and then I wasn't able to really fit Lady Poe into the challenges.

The challenge for June is: Favourite Technique: make an item using your favourite sewing or embellishment technique

One of my favourite techniques is the rolled hem. It makes tiny hems easy and quick, it's definitely the fastest hemming technique I know. For Lady Poe I really wanted a pair of big lace ruffles. Way back when I did my 1787 revolutionary I had had to order the trim from a site in the US, and the freight was really expensive so apparently  decided to order more stuff to make up for that. One of the things I ordered was a gorgeous soft lace, that has just been sitting in my stash and waiting for the right moment, and now it was time to use it. 

The lace was wide, but not wide enough to make up the whole ruffle, especially since I wanted three layers of ruffles, and the bottom would have to be pretty big. I decided to add the lace to some cotton voile that I had. 


I started with cutting out three layers of cotton voile. I simply used the same calculations that you would for a half circle skirt or cloak. I seed them togeher and felled the seam. The voile is very fine and frays so in order to have something to attach the lace to, and to have a top edge that I would be able to attach to the sleeves I made rolled hems on all raw edges of the voile.

Then I added the lace to each ruffle, I used approximately 3 x the length of the bottom edge for how much lace I wanted to add to each ruffle. 

These are the three layers of ruffles. Then it was just a matter of stacking them together and tacking them on to the sleeves of the robe.

These sleeve ruffles might be my favorite thing with the whole outfit. They are just so fluffy and wonderful. In fact when working with the lace I fell so much in love with it that I wanted to use it for more embellishments and I decided to use it on the stomacher as well.

The stomacher was the last main piece that I did for the gown, and the reason was simple. I couldn't find any inspiraton for how I was supposed to decorate it. I looked through all my reference books, and went back to Patterns of Fashion 1. There is a description of a stomacher with rows of lace and pinked ribbon, and I decided to do that kind of stomacher.

I cut out the triangular shape of the stomacher in cotton coutil and the main silk. Stitched them together, but I also sandwiched a cotton grosgrain ribbon in between the layers in order to have something to put the pins holding the robe to the stomacher in place.


I decorated the stmacher with rows of lace and grey silk that I cut out and pinked.
I have realized after looking at photos that with these horizontal stripes it's important to look down and make sure that the stomacher is even, if it gets a bit crooked it's very obvious.

Anyway the stomacher was a bonus, here are the HSM facts.

The Challenge: 6 favorite technique 
I chose to work with rolled hems

Material: 0,5 cotton voile, several meters of lace

Pattern: a basic half circle shape

Year: 1760s

Notions: silk sewing thread

How historically accurate is it? I haven't really seen any examples of a wide lace added to a base pattern, it's either  a thin lace or the whole ruffle is from lace. I think they are 70 % accurate though since they are handsewn and in a pattern that is accurate

Hours to complete: 10
First worn: June 8th, for a 1762 ball
Total cost: I don't remember what the lace cost, it was expensive though, but that was for the whole roll of lace, and I still have a lot of it left.

Tuesday, 11 June 2019

Making my 1762 hairstyle

I was so happy with my hair for the 1762 ball, it's definitely the best 18th century hairstyle I've ever managed to make.

In order to get the result I'm mainly indebted to two sources - Madame Isis' Toilette and the book 18th century hair and wig styling by Kernda Van Cleave. I used Isis' instructions for the products that were used in the time, and Kendra's instructions for actually styling the hair.

The big difference for my hair styling result was that this was the first time I actually worked with hair powder, previously I have skipped it or used dry shampoo. When I tried to make a test run of the hairstyle a couple of weeks ago I realized that it wouldn't work. My hair is really red with bright pink sparks, and it definitely would both clash with my bright orange dress and definitely looked too modern. I would need to dampen the colour of the hair in some way. Well hair powder it was. Thankfully Isis has some recipes for hair powder and there was enough time to order ingredients from Swedish shops. There are shops out there selling all the finished products, but they are mostly based in the US so that wasn't an option for me.

In the end my hair powder was more of a "take what you have in your pantry" than an exact powder according to original recipes. I used a mix of corn and potato starch (I ran out of starch) and powdered chalk. I also added some ground cloves and cinnamon to give the hair powder some fragrance.

In order to get the hair powder to stick to the hair you need to have some products. In historical times they used pomade, and I had tried to make my own pomade a couple of years ago. That pomade wasn't a success though, but I found an off hand comment that you could use modern cold cream instead of pomade. Cold cream is also mainly made from beeswax and fat after all.

Then it was time to actually start the styling. The day before the ball I curled my hair. I used pincurls for the front part and bigger foam rollers for the back. I wetset them and had them in all the time until I got to the hotel.

I started with taking out the pin curls and got this messy hair. I then took a small strand of hair, put on the cold cream and brushed generous amounts of hair powder on it, with the biggest powder brush that I had. It is messy and the powder will get on you and around you. I'm just wearing my shift here. I was glad that I had added the cloves and cinnamon to the hair powder since I didn't like the smell of the cold cream and they helped mask it.

Here is my hair with cold cream and powder. I still have the foam rollers in for the back of the hair. I then followed Kendra's instructions to create the "tete de mouton" style, with tight sausages in the front. One thing that I want to emphasize is that you need a really tiny roll form to roll the "sausages". I have long and fluffy hair, and the first time I tried it they got too big. This time I used a chop stick, that's how small it needs to be.

The front of the hair was finished and it was time to start with the back.

This messy photo is to show the difference between the shiny and brighter hair straight out of the foam roll, compared to the powdered hair that is matte and a toned down in colour.

Here the back hair is powdered as well. Now what the hair powder does is that it builds volume, a lot of volume. I have a lot of hair, but it's very fine. As soon as I put it in a bun or a braid it shrinks and I get very small and sad hairstyles. When I did my test run of the hairstyle I made one braid in the back that I started a the nape and then pinned to the top of my head. Now with the powder applied I could make two fairly thick braids instead.

The final step was to add some flowers in the hair, not the least to mask the tip of the braids. I used two small hair ornaments and a small flower crown. The flower cown was attached to an elastic, that I cut off so that I only got the flowers and then I pinned them on to the hair. For the make up I used a gloss highlighter to give shiny and paler look, some of my regular rouge and a very red lip gloss. It would have been better with a more red rouge, bu this was what I had at thome.

The hair from the back
The hairstyle held extraordinary well. In fact I slept on it and it still looked good when I woke up. I was worried on how I was going to get the cold cream and powder out of the hair, but there was no reason to fear. It was actually more simple to get it all out, compared to when I've used strong modern hair products. I washed my hair with regular shampoo and conditioner and it was no problems at all to get all the products and tangles out of the hair. In fact my hair feels silky and smooth like if I had paid for a very expensive treatment of it. The last time I was at my hairdresser I did that, but this gave they very same effect. Cold cream and hairpowder for the win.

If I'm ever going to do a big historical hairstyle again I'm definitely going to use pomade and hair powder. It was a bit messy and it took some time, so I don't think I'm going to do it for more casual historical events though.