Showing posts with label hats. Show all posts

Saturday, 11 July 2026

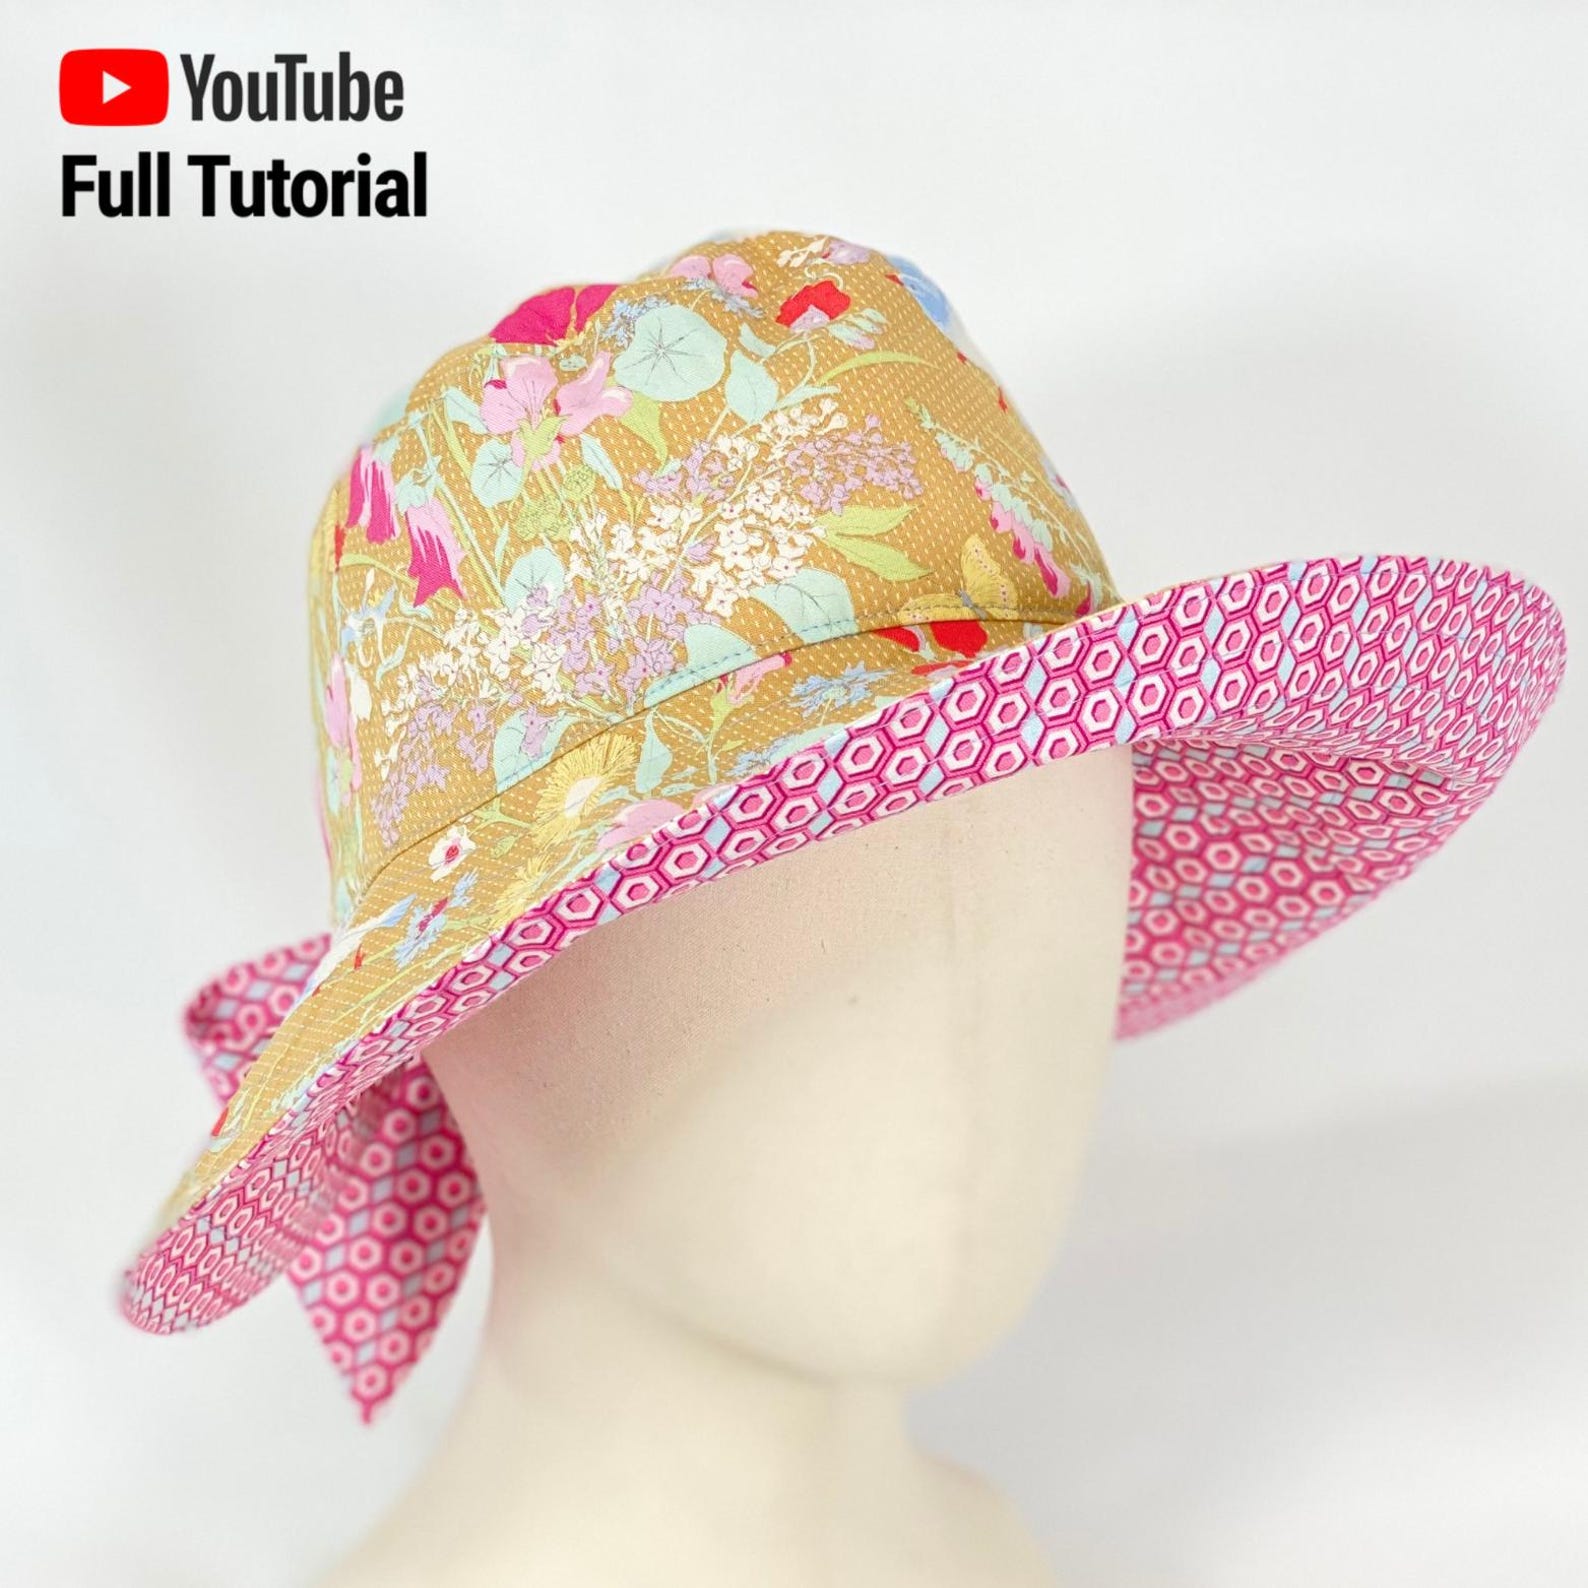
Two soft summer hats

 I am the kind of person who just can't handle contact lenses, last summer I tried and tried, but apparently one of my failures in life is that I just can't get them into my eyes, and my eyesight is such that even when I could get them in I couldn't see good, just better than withouth. Meaning I could just handle a phone with the lenses in, but I could not drive with them. So I decided that it wasn't worth the frustration, and the money for buying lenses, and I have to go with glasses, and be half blind when in costumes where the glasses don't fit. Since I am also too cheap to buy corrective sunglasses I felt that I needed a summer hat this season to get some shade. Over the years I have loved big summer hats, but to be honest they get lost, the blow off or I simply don't use them because they are too big. I needed something smaller and softer, but I didn't just want a bucket hat. Well I decided to make a hat and went to search for a pattern online.

I found this pattern from Notches Sewing studio on Etsy.  Etsy today is unfortunately full of AI slop and it important to go through the profiles and see if you can find a real person behind the store. This pattern was a bit more expensive than the cheapest patterns, but I liked that it was more than a bucket hat and the fact that there was a youtube tutorial showed me that a real person was behind it. 

For fabrics I went into a local op shop and found some cottons, including two curtains with some stains on. I couldn't really decide on what I would do, and since they cost a total of $10 I bought all of them. I had to buy 1 m of medium weight interfacing, but that was just enough for both hats. In total material and patterns costed around $40, and the fabric I have left will be great to make toiles out of.

My first colour choice was this blue version. The blue was some kind of poly/cotton sateen, with quite a nice shine to it.
A downside was that it felt quite paperly and crumpled quite a lot. 
The pattern is marked as beginner/intermediate. Now there are no written instruction, just the youtube tutorial. It is an easy pattern, and for me it would have been nice to just have some written instructions so I didn't have to stop and play the video all the time. The second hat I made I didn't have to follow the video at all though.
The pattern is one size, and it fit me really well, I think I am normally a size 56 in hats, I have quite a medium sized head.
The pattern is easy, but it is a bit fiddly. In order for it to look good you need to be comfortable with sewing round pieces to each other, and to make topstitching. It is optional to top stitch the brim, but it really helps to make the brim steadier than when just relying on the fusible interfacing. I found it was quite wiggly to attach sew the pieces together when I was working with several pieces that were interfaced. Not hard, but wiggly and fiddly.

The other hat I made was in a more subdued colour palette, with a sandcoloured outer fabric, and a softer lining. Now the hats are reversible so it is possible to just turn them inside out if I want the flowers on the outside. The brim is steady enough with all the top stitching so it is possible to shape the brim and it keeps that way.
And this is the size of the hat on me, and not on the tiny styrofoam head.

Now I have to summer hats, and it took me one evening and one morning to sew them together.

Sunday, 12 April 2026

HSM challenge 5 - A black 17th century cap

HSM Challenge 5 - pleats, tucks and trims

Make a garment or accessory that is either pleated to create shaping, or features pleats, tucks or trims as embellishment.

For my early 17th century wardrobe I really wanted to make a black cap. These black caps are seen in portraits of Swedish priest wives.


They are also common in Dutch art from the middle of the 17th century, a little later than my intended time period.

This is a painting of Gerard ter Borch from 1661. The Dutch seem to have a more tight fitting cap, and they have also added the peak in the front, but there are no under caps visible anymore.

I really had to go with artistic inspiration for my own cap, since I couldn't find paintings that showed the back, or surviving extant examples. The general shape is quite close to the the cap that is worn with most Swedish traditional costumes - "bindmössa". A bindmössa is usually made out of silk and mounted on an interior made from stiffened paper or fabric. The undercap has been changed into a loose piece of white fabric, usually with lace or embroidered, that is pinned in place before putting the cap on.
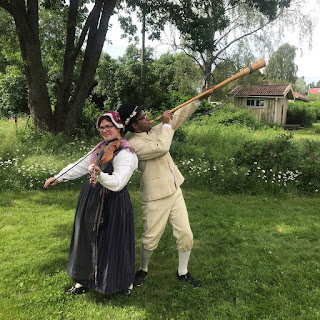

This image shows me wearing my cap together with my folk costume. Thankfully for these traditional caps there are patterns available online. If you are interested in traditional costumes I really recommend the site Digidräkt.se. It is a site dedicated to the costumes worn in Ovansjö parish, but they also have lot of free patterns made from extant pieces from mainly the 19th century. These patterns are great starting points for quite a few pieces that works for several time periods, including bodices, skirts, shirts, trousers and sewn and knitted hose. I printed their pattern for the skarpmössa/bindmössa. It is a cap that is made to fit snuggly thanks to several pleats in the back.

I first made a test version out of scrap wool to test the size. It is unlined, but bound with a strip of bias from the same fabric. The bias strip was important to make the edge firmer and keep its shape. It worked great, but I felt that it was a bit on the smaller size, especially when I put my hair up in a bun in the back.. I will use this as a more simple, poorer cap though.


So the pattern worked, now it was time to make the final version.


I started out with cutting the original pattern in four parts and spreading them out. The second image shows the new pattern in blue, compared to the original paper pattern.

I used cotton canvas as the foundation layer. Since blue canvas isn't historically accurate and since it wouldn't be seen I sewed it together on the machine. The original pattern had three pleats on each side, but with this larger pattern I added two more to get a good fit, for a total of five pleats on each side.

I used the cut out canvas as the pattern for the lining, a nice linen fabric from the stash.
I didn't do the same five pleats in the lining, but simply pleated it over the canvas until the two layers matched, which mean fewer but larger pleats compared to the canvas layer.
The lining was sewn to the canvas along the center seams and all along the edges. The lining was all handsewn.


The outer wool layer was constructed just like the lining, but here I made five pleats on each side in the back.

To finish the edge I used a fairly wide strip of bias and sewed it in place.


The finished cap is quite heavy and rigid and sits well on the head, it's not quite as pointy as it looks from the back.

Just the facts

What the item is: a fitted wool cap
How it fits the challenge: It is shaped by pleats in the back to create a tight fit
Material: 0,5 m wool cloth, 0,5 linen, 0,5 cotton canvas
Pattern: Based on a traditional cap from Ovansjö socken, available at digidrakt.se
Year: 17th century
Notions: Linen thread for the lining, regular sewing thread for the canvas and silk (because it's the only black thread I had) for the wool layers
How historically accurate is it? Very hard to say since the pattern is 150 years wrong, and it is very much my thoughts on how it might have been constructed in the 17th century to get the cap we see in art, also the canvas is a modern fabric and that part of the cap was sewn on machine, so maybe 30%
Hours to complete: One evening
First worn:  Will be worn at Vadstena Military days April 17-19
Total cost: $30


Monday, 1 September 2025

HSM 25 april: Procrastination - a 17th century loose hood

April: Procrastination (2016, 9th most popular): Complete a garment you have been putting off finishing. Or make something you have been avoiding starting.

I tried to find a post about it, but I am pretty sure that I started thinking about making a loose 17th century hood some time back in 2017 or 2018, when I was asked to dress historically at the annual Christmas fair at Falu Gruva. Most paintings and drawings of 17th century women show a tight hood, but I have always wanted to recreate this image from the margins of a map over Falun mine in 1683.

That loose hood or veil is quite distinct, the artist was local so he has probably used the local residents as models. I was also very happy when I found this extant example of a loose hood at the V&A museum. It is dated to 1610-1620, so earlier than the image of the map, but I still decided that they are so similar that I would use it as a model.


I found that I had some very fine linen in my stash, but the main issue was finding insertion lace. All the laces for sale in the (few) craft stores here only had cotton lace for edging, so with points. I also only found lace that was too wide to look good.

The solution was to go to second hand stores, and in the final one (ironically the smallest one and the one just across the street from where I live) I found a table cloth with white work embroidery, and handmade lace at the border.


I ripped off the lace border, and then I cut it in two to get a really nice and narrow lace that I could use.


Here I am midway in the project, and you can see the pieces of the hood. The original V&A hood only has the gore inserted in a slit, but I cut a separate front piece. I was sure that there was a seam all the way, so this is a lesson to actually look at images on the computer, and not just on your phone when doing decisions like that. So instead of just one piece with inserted gores I had a straight front piece, two gores and two curved back pieces that I sewed together to shape the hood. All the seams had lace insertions.

For the edging of the hood I was in a dilemma, I had a nice off white lace in my stash but it wasn't enough. And when I went to the craft store the only options was to buy either a bright white or ecru coloured lace. It was very good that I had brought the hood with me to hold up against the lace. I would probably have bought the white lace white, but when I held it to the hood it was glaringly white compared to the rest, so the ecru coloured lace was much nice. It was also daintier and more delicate than the white. Even if it isn't the same colour as the rest of the hood, the effect was quite nice and they went really well together.


When finished the hood was really soft and nice, so before wearing it I starched it, I am not sure yet if I prefer the look of the soft fabric or the starched, so I might destarch it before I wear it the next time.

This is me wearing the hood last Saturday at an event where my group demonstrated early 17th century.

I am actually pretty happy with my impression of the woman on the top image.

So here are the HSM facts

What the item is: A loose hood from the 17th century
How it fits the challenge: I had planned and talked about doing this style of hood for at least 5-6 years, and when I was finally getting the chance to attend a 17th century event it was time to make it.
Material: 1 m of fine linen, 1 lace edged table cloth, that I ripped the lace off to use as insertion lace in the hood
Pattern: My own, based on a hood in the V&A collections
Year: 1610-1690 (the hood is dated 1610-1620, I have based my costume on an image from 1683)
Notions: linen thread, 2,5 m of cotton edge lacing
How historically accurate is it? This is pretty close, both when it comes to materials and techniques so around 90%, (deductions for the machinemade edge lace and the quality of my stitches)
Hours to complete: 1 week
First worn: September 30th when celebrating the 400th anniversary of our local regiment
Total cost: linen from stash but $7 for the table cloth and $13 for the edge lace.


Sunday, 26 November 2023

HSM Challenge 5: Hair apparel - the finished renaissance flat cap

So in order to finish the flat cap that I started here I wanted to line it to make it warmer. I have a stash of fur pieces left, from when I made my pink furlined cape. It's old fur from a vintage furcoat that I bought several years ago on an auction. 

Just when I had finished that cape, or schaube, I learnt that the fur was usually attached to a separate layer, and I wanted to do this. This will also allow me to remove the fur if it is too warm, say in the summer. For the layer that I attached the fur to I used the pair of hose that I had made for David, but that had really split and are not repairable anymore. The fabric is really thin, but still wool so it doesn't unravel.


The fur was sewn with fairly large stitches to the interlayer and then the lining was whipstitched to the seam allowance on the inside of the cap, and sewn to the edge of the cap with prickstitches. 

We took the cap out to try it in the winter weather.


According to the wearer it's really nice and comfy, and he has enough space to put a modern thin cap under it as well if it gets really cold. 

Challenge 5, May 2023: Hair Apparel Make something worn in the hair or on the head.

Be sure to tell us the following:

What the item is: a renaissance winter flat cap
How it fits the challenge: it is worn on the head
Material: 1 m of wool, scraps but something like 0,3 m of fur
Pattern: inspired by internet tutorials for Tudor flat caps
Year: 1520s
Notions: sewing thread
How historically accurate is it? 60% - it seems as if the caps were mainly black, but I didn't have any black fabric, the main cap is also sewn on the machine while the lining is made by hand
Hours to complete: 3
First worn: not yet
Total cost: a stash project, but probably $30 if I had bought the material new

Sunday, 24 January 2021

HSM21: Challenge 6 on your head - a 17th century hood

 For our little get together outside yesterday I wanted to have something on my head to keep warm. My 16th century wulsthaube and hood are made of linen, and linen does nothing to keep you warm. I really wanted to make something from wool. Without any source for 16th century wool headwear I decided to go for 17th century. This was not an event where historical accuracy was important, so I'd rather be warm than correct. One day I am going to make 17th century clothes as well, so I might as well start.

In Dutch paintings from the middle of the 17th century one can find quite a few black hoods, especially for winterwear.

Old woman reading, by Rembrandt

Winter by Hollar
The black hood also shows up on women in the series of townscriers of London, from the second half of the 17th century.


I have not done a lot of indepent research on the black hoods, so I recommend reading the Costume Historian's Women's hoods 1600-1690. Nicole Kipar also had a great site with resources for the middle of the 17th century, and that is where I found the inspiration for my pattern. Even if I didn't use it exactly.

What I could pick up from a quick glance is that the hood was worn as outerwear. It is possibly a regional fashion for the Netherlands and England, rather than a general European fashion. It is always black. In the middle of the 17th century it was not a very fashionable thing, mostly worn by older women and lower class women. The painting by Rembrandt shows that the hood could be lined with fur. For many of the black and white drawings it's hard to see if the hood is lined or not. I get a sense that they are lined, but since I did not have any dark, suitable fabrics available I decided to do an unlined hood.


My pattern was very much decided by the piece of fabric I had. It was the last remnant of fabric from when I made my Enfys Nest cape. It's a black felted wool. _The top is placed on fold. The width is 48 cm, this was pretty long but since _I was going to wear it over my wulsthaube I exaggerated it a bit. The short backside is 25 cm, and then I cut the fabric in an angle. After I had a straight angle I recut it a bit to get the little point of fabric. I would have preferred to have the point be a bit longer, but that was where my fabric ended.

For yesterday I simply gathered the back and wore the hood with unfinished edges. I felt that it worked really well though, so today I took away the gathering and redid the hood with better finished.


I hemmed everything except the back. I did a single fold and then added a dark grey wool thread as a filler thread. I do not know if this was a technique that was used in the 17th century, but I felt that it's much prettier than just the single fold. Sewing with black thread on black fabric was not fun, it felt like I had to sew more by touch than by eye, so it took the whole day to do the hems.


This is the full piece, with three edges hemmed, but the short backside is unhemmed.


The back was gathered. For all sewing I use black, waxed linen thread.


I gathered the back as much as I could and tied the gathering threads together, this made the back form a loop, with a tiny opening in the middle.


To close the opening I sewed it shut, under the gathering thread.

The finshed hood stays in place even if I don't tie it under the chin. The head is wearing my wulsthaube under the hood.


Back of the hood


Profile view


The straps are just long enough to tie under the chin. It would have been better if they had been just a bit longer.

This is what the hood looked like when I wore it, without the finished edges. 

What the item is: a 17th century winter hood
How it fits the challenge: It's a hood to wear as outerwear to protect against the weather
Material: ca 1 m of black felted wool
Pattern: My own, with inspiration from Nicole Kipar's patterns of 17th century hoods
Year: mid 17th century
Notions: grey wool yarn and black linen thread
How historically accurate is it? 75% The pattern is there, I'm just not sure if the hood should have bene lined or not, and if a filler thread would have been used when hemming.
Hours to complete: 4
First worn: Yesterday for an evening outside in historical wear with some friends
Total cost: Everything from stash, but the fabric would have cost around $10.