Showing posts with label HSM. Show all posts

Sunday, 26 April 2026

HSM challenge 3 - a 17th century hip roll

 This is how to get big hips, and it's all lies. HSM challenge 3 was "comfort at home"

Make something to wear around the (historical) home or that would be generally only seen within the household (informal at-home wear, nightwear, undergarments).

I figured a hip roll, that would only be seen with the household could fit. Now when I started thinking about early 17th century I first didn't think about doing underwear, for a more simple look suitable for a farmer or some poor townspeople you don't really need them. But the more I thought about I wanted to make a proper hip roll to just get that typical silhouette.

Matthew Gnagy, the Modern Maker, has an instruction video on how to make the hip roll, and since I have his Modern Maker volume 2 with the pattern I decided to make one. The hip roll video is part of a series on how to construct a woman's full ensemble, and I really recommend watching it all. I used it to make my skirt, and I have been listening to them all and he gives really good advice on pattern making, fitting and how to make everything come together, even if you are not doing an exact copy of what he is making in the series.

One thing he mentions in the video is his argument for why this kind of construction is more likely than simply cutting out a tube or large crescent shaped pattern. The pattern is in his book and you need 16 pieces, something he mentions. Each piece is fairly small though so it was easy to cut it out from scrap pieces. I used a sturdy evenweave cotton, which was good because I couldn't get all pieces on the same grain, so some are cut on the cross grain as well. It is a modern fabric, and I decided to make the hip roll on the machine, since nobody will see it anyway.

I started out with sewing the piecces together, first 1x1, then 2x2 and so on.
All the pieces were sewn together, I used the wrong side of the fabric to not have such a loud colour pattern visible. I topstitched all the seams down to one side, to make them a bit sturdier. For a while I had thought about maybe using them as channels for boning, but I used too small of a seam allowance to be able to do that.


Then it was time to stuff the roll. Matthew Gnagy warns against using poly filling, since it usually gets warmer than using wool or cotton, but poly batting was what I had at hand, and this is a scrap project. I first rolled the batting into a roll before pushing it in. It was a bit complicated to get the filling in, I worked from both sides so that filling would meet in the middle.


I didn't stuff the roll very hard, both because I don't want an extreme roll and becausue it was so fiddly to get the filling into it.


The ends were gathered together and sewn shut. I also added two pieces of cotton tape to tie it in place.


Me wearing the roll. I got a bit surprised first that I had made it too big, then I realised that I had put around the waist, when I put it on the hips it fit perfectly.


Here I am wearing it under my supportive kirtle and to the right is the kirtle without the hip roll, to oshow the difference in the silhouette that it gives, but not too much difference in length of the kirtle.

I wore the hip roll at the 1620's weekend in Vadstena. I found that it felt like it was going to slide down all the time. Most of the time it stayed in place, but I had to push it up a few times. I am wondering if it would stay better put if I switch from tieing the tapes to having them fastened with a button instead?. The tapes were hard to get quite as tight, and I had to retie them from time to time, a button might keep everything more firmly in place.

Here are photos of me wearing the roll under the rest of my 1620s outfit.


Just the facts

What the item is: a stuffed hip roll
How it fits the challenge: It should only be seen while undressing at home
Material: scraps of cotton, probably less than 1 m in total
Pattern: Matthew Gnagy The Modern Maker volume 2
Year: early 17th century
Notions: poly batting, cotton tape
How historically accurate is it? There are no surviving patterns, but Matthew Gnagy gives a good reason on why he thinks this is a good pattern, also all the materials are modern and it is machine sewn so 30%
Hours to complete: It was quick and fun so max 3 hours
First worn: At Vadstena Military Days 17-19th of April
Total cost: really a scrap project, the fabric were from a pair of curtains that I got from work when they were switched for other ones. Maybe it would have cost around $15 to buy everything new.


Sunday, 12 April 2026

HSM challenge 5 - A black 17th century cap

HSM Challenge 5 - pleats, tucks and trims

Make a garment or accessory that is either pleated to create shaping, or features pleats, tucks or trims as embellishment.

For my early 17th century wardrobe I really wanted to make a black cap. These black caps are seen in portraits of Swedish priest wives.


They are also common in Dutch art from the middle of the 17th century, a little later than my intended time period.

This is a painting of Gerard ter Borch from 1661. The Dutch seem to have a more tight fitting cap, and they have also added the peak in the front, but there are no under caps visible anymore.

I really had to go with artistic inspiration for my own cap, since I couldn't find paintings that showed the back, or surviving extant examples. The general shape is quite close to the the cap that is worn with most Swedish traditional costumes - "bindmössa". A bindmössa is usually made out of silk and mounted on an interior made from stiffened paper or fabric. The undercap has been changed into a loose piece of white fabric, usually with lace or embroidered, that is pinned in place before putting the cap on.


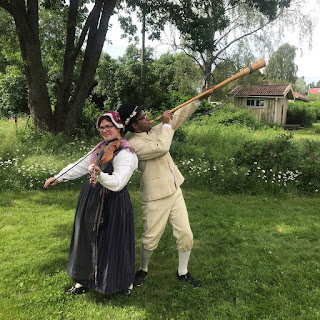
This image shows me wearing my cap together with my folk costume. Thankfully for these traditional caps there are patterns available online. If you are interested in traditional costumes I really recommend the site Digidräkt.se. It is a site dedicated to the costumes worn in Ovansjö parish, but they also have lot of free patterns made from extant pieces from mainly the 19th century. These patterns are great starting points for quite a few pieces that works for several time periods, including bodices, skirts, shirts, trousers and sewn and knitted hose. I printed their pattern for the skarpmössa/bindmössa. It is a cap that is made to fit snuggly thanks to several pleats in the back.

I first made a test version out of scrap wool to test the size. It is unlined, but bound with a strip of bias from the same fabric. The bias strip was important to make the edge firmer and keep its shape. It worked great, but I felt that it was a bit on the smaller size, especially when I put my hair up in a bun in the back.. I will use this as a more simple, poorer cap though.


So the pattern worked, now it was time to make the final version.


I started out with cutting the original pattern in four parts and spreading them out. The second image shows the new pattern in blue, compared to the original paper pattern.

I used cotton canvas as the foundation layer. Since blue canvas isn't historically accurate and since it wouldn't be seen I sewed it together on the machine. The original pattern had three pleats on each side, but with this larger pattern I added two more to get a good fit, for a total of five pleats on each side.

I used the cut out canvas as the pattern for the lining, a nice linen fabric from the stash.
I didn't do the same five pleats in the lining, but simply pleated it over the canvas until the two layers matched, which mean fewer but larger pleats compared to the canvas layer.
The lining was sewn to the canvas along the center seams and all along the edges. The lining was all handsewn.


The outer wool layer was constructed just like the lining, but here I made five pleats on each side in the back.

To finish the edge I used a fairly wide strip of bias and sewed it in place.


The finished cap is quite heavy and rigid and sits well on the head, it's not quite as pointy as it looks from the back.

Just the facts

What the item is: a fitted wool cap
How it fits the challenge: It is shaped by pleats in the back to create a tight fit
Material: 0,5 m wool cloth, 0,5 linen, 0,5 cotton canvas
Pattern: Based on a traditional cap from Ovansjö socken, available at digidrakt.se
Year: 17th century
Notions: Linen thread for the lining, regular sewing thread for the canvas and silk (because it's the only black thread I had) for the wool layers
How historically accurate is it? Very hard to say since the pattern is 150 years wrong, and it is very much my thoughts on how it might have been constructed in the 17th century to get the cap we see in art, also the canvas is a modern fabric and that part of the cap was sewn on machine, so maybe 30%
Hours to complete: One evening
First worn:  Will be worn at Vadstena Military days April 17-19
Total cost: $30


Sunday, 1 February 2026

HSM26 - challenge 1 - Joy for January

 My last post was about the male 17th century hairnet and that I wanted to make a better band. So while waiting for the January salary to come in I started reading up on weaving bands with a backstrap rigid heddle. Now I am quite confused by the different names of this in English, it's easier in Swedish where this is a craft that has never died out. What I wanted to use is a "bandgrind", and I am pretty sure that the best English translation is a rigid heddle with a backstrap, unlike a heddle loom. The best thing was to join a Swedish FB-group on bands and bandweaving and from there I got suggestions on what fibres to use and so on.

And then came the HSM 2026 challenge and the first challenge is "Joy for January".

Create an item that epitomises the joy you find in historical costuming - or simply something that would bring you joy at this time of year, whether it's dark and cold, or sweltering hot where you are!

I got so much joy from reading up on this new craft, and I was all giddy when I could pick up my heddle and yarn that I had ordered. It took me one evening to wind up the yarn, and then I couldn't keep myself from starting my first band, even if I had planned to wait until the next day when I knew I would have more time to actually sit down for some time. And this I think is the joy and excitement I love with costuming, to feel how your hands are just itching to continue working, and that I could actually see a result quite fast, and it wasn't bad. I chose to do a very simple band in one colour, not even a stripe, just to get into it. I do have a tendency to start with too complicated things, and now I forced myself to just learn the basics before it is time to go on. 


There are several stores selling equipment for weaving bands in Sweden, I went with Korps.se, which is catering to historical costumers and role players, heddle they are selling is from the company Stoorstålka, that is focusing on the Sami bandweaving tradition if you want to buy directly from them. I chose Korps because I know they are fast, they also have a very good yarn in colours that look plant dyed except for the heddle itself they had band attachment and shuttles in wood, the heddle itself is plastic, and I prefer wood to plastic. The yarn that I bought is "Grane 02", which they describe as a good yarn for weaving and bandmaking. It's definitely a lot tighter and thinner than the yarn I bought when starting with sprang, so I am looking forward to using this kind of yarn for my sprang as well. The heddle that I bought was a basic 47, meaning that it can take up to 47 threads in the warp. The smallest one is 31 and it would probably have been large enough for my needs, but to be on the safe side and in case I want to make wider ribbons in the future I bought the larger one.


I made a warp of 30 threads, and it was so much easier than when I warped for the tablet weaving. Using this yarn it seems as if 30 threads give me 1,5 cm, so half the number of threads. That is a pretty simple general rule to use in the future. Weaving a band takes some time, this one has taken med three full evenings, but the good thing is that I can set it up in front of the TV. 

After the band was finished I washed it in lukewarm water with some soap and dried it tied up on a bottle, don't know where I read that it was a good thing to do.

Now I am itching to start with patterned bands, but I do wonder if I need to get a book to really understand how to read charts and work the patterns.

What the item is: woven band
How it fits the challenge: It gave me realy joy to learn a new craft and produce something
Material: several meters of wool yarn
Pattern: none
Year: these kind of ribbons are know from at least the Middle Ages
Notions: I had to buy all the equpiment so a rigid heddle, a shuttle and band holder as well
How historically accurate is it? Except for the heddle being plastic 100%
Hours to complete: two full evenings
First worn: I sewed it onto my husband's hairnet and he wore it to a feast on January 31st.
Total cost: Since I had to buy all the equipment around $40, the next band will be a lot cheaper.


Tuesday, 30 December 2025

The HSM 2025 recap

This year I didn't think I would finish many challenges for the Historical Sew Monthly challenge, but with my end of year projects I realised that I had actually made 8 out of 13 challenges, so here they are in one post. IT definitely helped that I got interested in 1930s fashion, which just made them eligible for the cut off year of 1938.

The theme for this year were challenges from the past that had been the most popular challenges with the most entries.

January: Tops and Toes (2014, 12th most popular): Create an accessory that goes on your head or on your feet. - link to my post about my Christmas hat


 February: Under It All (2013 & 2014, 11th and 3rd most popular respectively): Make something that goes under your outer garments, to protect them from sweat/grime or provide the right shape/support. - link to post about my 16th century kirtle


March: Black and White (2014, 10th most popular): Draw on the opposite ends of the shade spectrum to create something in black, white, or both. Link to post about my 1930s skirt


 April: Procrastination (2016, 9th most popular): Complete a garment you have been putting off finishing. Or make something you have been avoiding starting. Link to my post about my 17th century headwear.

 May: Pink (2014, 8th most popular): Make something in the colour pink. Or make a garment that involves pinking/slashing as an ornamental feature. 

June: Accessorize (2013, 7th most popular): Accessories add polish to your outfits, helping to create the perfect historical look. Create the perfect period accessory for yourself. - link to post about my 16th century hairnet

 July: Stashbusting (2015, 6th most popular): Make something using only fabric, patterns, trims and notions that you already have in stash.

August: Make Do and Mend (2014, 5th most popular): Get your historical wardrobe in order by fixing/mending something that has worn out or gone wrong. Alternatively, you could focus on the historical precedent of making-do by re-making an old garment or remaking something into a historical garment (ex: a chemise from old bedsheets). Link to post about mending my favorite shift

September: Blue (2015, 4rd most popular): Make an item that features blue, in any shade from azure to zaffre. 

October: UFO (2013, 2nd most popular): We all have an UnFinished Object or two (or ten!) Now’s the time to complete one of your unfinished historical costuming projects. 

November: Foundations (2015, most popular challenge ever!): Make something that is the foundation of a period outfit. This can be a literal foundation (ex: a shirt, stockings or stays) or an item that is a “foundation piece” in your wardrobe (ex: a garment or accessory that can be styled in many different ways). Get creative with your interpretation! 


December: The Final Touch: Make an accessory or garment that is the finishing touch to an outfit.  - Link to my post about a 1930s belt


**Bonus Challenge** Since the HSM is celebrating thirteen years, we have an optional thirteenth challenge for 2025. Let’s show some love to the “Worst of All Time”, the challenge with the fewest ever entries—a mere five! The WOAT: As Seen on Screen (2022): Make something inspired by something you’ve seen on screen, whether it’s film, television, or YouTube. - link to post about my 1930s Christmas blouse

Looking back I think it's strange that I didn't do anything for the "pink" or "stashbusting" challenges, since my stash is quite full of small pieces of pink fabric. Well still 8 out of 13 challenges in a year when I didn't think I would finish almost any isn't too bad.

HSM 25 - The final touch - a belt

 As a final post about the historical sew monthly challenges it's quite fitting to have the "final touch" challenge

The Final Touch: Make an accessory or garment that is the finishing touch to an outfit.

The Christmas blouse that I made had a pattern piece for a belt, and belt were important in the 1930s, both for evening wear and everyday wear. I hadn't bought enough fabric to be able to get the belt out, and I was also out of time to find a belt buckle for it, so I skipped the belt when I cut out the blouse. After having finished the blouse, and realised that it was big enough that I could pull it over the head I really felt that it needed a belt to not feel too baggy. I took out the scraps of fabrics left and realised that I could get half the belt out, it just wasn't wide enough to double up. But I had a thick poly satin in my stash so I cut out half the belt in the green viscose satin and half of it in the in the poly satin. I added a fusible interfacing to the viscose satin, sewed the fabrics into a tube and turned them right. I added topstitching, a belt buckle that I found in my stash and added some eyelets to be able to adjust the width of the belt.

And here I am wearing it on Christmas Eve, with my mother beside me. To bling it up I added a small festive brooch to it, but that's hardly visible in the photo.


What the item is: An evening belt to go with a 1930s blouse
How it fits the challenge: The belt is needed to give the final silhouette of the blouse
Material: 10 x 150 cm of green viscose satin and 10x150 cm of heavy poly satin
Pattern: Lady Marlowe 8380
Year: 1930s
Notions: a belt buckle, eyelets with washers, fusible interfacing
How historically accurate is it? Pattern is correct, hard to say about the rest of the materials, so 50%
Hours to complete: 1 hour
First worn: On Christmas eve
Total cost: $20

And with that I have finished up posting about all the HSM challenges and projects for the year, so it's time to summarize the project year 2025 and look forward to 2026.

Sunday, 28 December 2025

HSM25 challenge "tops and toes" - a Christmas hat

 After having made my cute sprang mittens I wanted a cap that would match them, and my sprang book had a pattern for a cap with an interesting pattern made from switching from s to z twists, crearting diamonds and diagonal shapes. Should be easy peasy, or so I thought.

I followed the pattern, and there were 128 loops, and I could just barely fit that many loops on my frame. Going from z to s twists shouldn't be too hard, but I found it hard to do the edges. I also didn't have enough of the yarn that I used for the mittens, so in the end I used four different yarns, all with different stretch on them. In the end I kept dropping threads all the time, I really wasn't happy with the result. While I was working I couldn't really see any pattern forming either. Well I finished it, cut it off from the frame and realised that it was huuuuuge. I didn't want to waste all the yarn and time though and wanted to turn it into something I could wear.

I had looked around at quite a lot of 1930s fashion, preparing to make the Christmas blouse, and just with all the wonderful sleeves the 1930s also had quite a huge variety of fun hats. I didn't have a specific hat or pattern, but by folding the too lare bottom of the cap up to create a brim and adding some gathering threads in the back I could create a hat instead.


The final touch was to add a big yarn ball on top.


What the item is: a soft 1930s hat
How it fits the challenge: A hat to go on top of everything else
Material: Yarns in mostly wool, but probably some cotton as well
Pattern: The basic cap from Tine Abrahamsson's book "Språngning", but the shape was free handed by me
Year: 1930s
Notions: none
How historically accurate is it? It is inspred by the shape and style of hats in the 1930s, but I have never seen or heard about a hat made in sprang in that time period. Since it's inspired by I would set it around 20%
Hours to complete: Several weeks
First worn: On Christmas.
Total cost: All yarns were raided from my mother's yarn stash


HSM challenge "accessorize" - a 16th century hairnet

 The reason I started sprang is that I really want to have a hairnet similar to the one worn in the portrait of Katarina on Bora, wife of Martin Luther, in her portrait by Cranach.

I set out to try and make my own hairnet, after having failed on the male nets. I made mine in black wook, and it was quite a lot harder to work black compared to yarn in brighter colours. I got a net done, with just one row of mistakes. I still consider this as a proof of concept and that I can continue working on it, most importantly I want to make it in a finer yarn.

For the ribbon at the edge I decided to learn a new skill and that is tablet weaving. I had gotten a set of tablets in Christmas craft calender so I felt that I was a sign to actually try making my own ribbon.

Warping took longer than actually making the ribbon. It's definitely wonky, but it is a first try so if I want to I can make a tablet woven band in the future. I also liked that I found this pattern with squares in stade of the more normal v-shapes that are common in tablet weaving.

The band was sewn on to the sprang net for 2/3 of the way around, and for the final third I added a fingerlop braid that I weaved through the loops of the sprang, so that I could tie it in the back and adjust the size.

 
Just slapping the net on to my head made me really happy, even if it's just a text piece it actually gave me the shape I wanted and I could definitely see me wearing this at a 16th century event. I need to wear something under it to fill out the hairnet, my own hair is not enough.


Here is what it looks like on my tiny styrofoam head.

What the item is: a 16th century hairnet
How it fits the challenge: It is an accessory
Material: 2 ply wool yarn
Pattern: My own, but very much from the instructions by Carol James' paper on 16th century hairnets
Year: 1530s
Notions: Just the yarn
How historically accurate is it? I think it's mostly a matter of me lacking the skills so far that really make it into something that would fit in the 16th century, but the materials and techniques are all accurate, so 85%?
Hours to complete: 3 days
First worn: Not yet, this is more a proof of concept until I dare doing this in finer and more expensive materials.
Total cost:

HSM25 bonus challenge - "as seen on screen"

 This was a bonus challenge, picked up because it was the worst challenge of all time, with just five entries. 

Make something inspired by something you’ve seen on screen, whether it’s film, television, or YouTube.

This is really an inspired by, rather than an exact copy of something. This year I saw the wonderful series "Outrageous", about the fascinating Mitford sisters.


 The sisters moved around in the highest society and the whole series is filled with wonderufl 1930s costumes. Up until this year I hadn't really  been into the 1930s, I always felt that it was a decade that didn't suit my body type, since to me 1930s was a lot about slinky, bias cut dress that really only fit slim figures. Now I realised that all the draping  and crazy sleeves, I don't think I've ever seen a decade with such a variety of sleeve shapes, would definitely be something that I could make. Now Diana Mitford was a terrible person, but beautiful and her dresses and outfits were the most interesting. Unfortunately my ost faorite outfit of her was the one she wore when she got married to Oswald Mosley, the British fascist leader, and with Adolf Hitler as a witness. I really didn't want to make her wedding outfit.

I tried to take a screencap of it, and to me the destinguishin features were the huge sleves and the draping on the bodice, together with a tight fit over the waist and hips.

I found this pattern by Lady Marlowe, both available as a download pattern and going up to XL in size, it't not easy finding patterns larger than M when you want vintage patterns.


I used 3 m of a green viscose satin, making it a nice Christmas blouse. Now figuring out my size according to to the measurements wasn't easy. The size chart had my hips being too large for the largest size, but just, so I went with that size and cut some extra large seam allowances in order to have more margins to work with. The instructions for the pattern were quite bare, but easy to follow. If you have sewn garments before it shouldn't be a problem following them, but it's maybe not something for a beginner, especially since slinky, satin fabrics can be tricky in themselves.

In the end I probably picked it a size too large. I found that I could pull it over my head without a problem, which on the other hand meant that I didn't have to fiddle with a tricky and visible size closure. I felt that there was a bit too much fabric ove the bust though. For the sleeves to stay up it's necessary to have the lower part be really tight, and I had to take that in a few times on one side. Overall I should probably have shortened the upper sleeve a bit, but still the sleeves are my favorite part of the pattern. For a pattern like this the right underwear is also important. When I worked on it and fitted it I wore my normal underwear, and then I had to take in the waist but use a tiny seam allowance to make the hip area bigger. When I wore the blouse on Christmas I wore it together with some shapewear, and then it was obvious that I could have kept the regular seam allowance. I have cut out the pattern in another fabric as well, so I need to remember these alterations when I sew it up.


The finished blouse

Me wearing the blouse together with the skirt I made for the "black & white" challenge earlier this year, and my Irregular Choice Christmas shoes.

What the item is: A 1930s blouse
How it fits the challenge: Inspired by the costumes from the 1930s set tv series "Outrageous"
Material: 3 m green viscose satin
Pattern: Lady Marlowe 8380
Year: 1936-1938
Notions: sewing thread, poly satin binding
How historically accurate is it? Pretty accurate, it should have been proper silk satin, but that's too expensive, the pattern and the methods are correct though, so 90%
Hours to complete: 2 days
First worn: On Christmas Eve
Total cost: $40 for the fabric