Saturday 27 February 2021

Skiing in 16th century clothing

 Some years ago I came up with a brilliant idea. In 2021, when it's the 500th anniversary of when Gustav Vasa is supposed to have skied through Dalarna, why not commemorate that with skiing in clothes from the time period. I decided to do kort-Vasan, which is the shortest of the distances around Vasaloppet, the big ski race that goes 90 km in memory of Gustav Vasa's skiing. I got some more people interested in the idea, but things happend (like injuries and a pandemic). In the end I was the only one left. At this point I was thinking about just doing it in regular skiing clothes, but I also realized that I was not in a particularly good shape. If I'm going to go slower than I ha hoped for, well then I could just as well just do something fun of it. I decided just a few days before that I would go through with it in 16th century clothes.

At the start, you can see what other skiers wore behind me

The last week the beautiful winter also turned into a quick spring, with temperatures above freezing. This made it actually harder for me to decide what I would wear. My green wool gown would definitely be too warm, and my jacket that I had made a bit with this race in mind would also be too warm. In the end I decided to go with my first thin wool undergown and my shortsleeved teal gown. Both these gowns are my least historically accurate gowns, not the least because they are made in more modern kinds of wool, but that also means that I can throw them in a washing machine afterwards unlike my finer wool glothes. I also wear my old smocked shift, also a worn piece that I don't mind getting sweaty and can throw in the washing machine. On top at the start, when it was bit chilly I had the black cape that I actually made for my fandom fashion Enfys nest, my oldest wulsthaube and just a veil that I tied around the head. I also use the old wulsthaube since I didn't want my new one to get all sweaty. Under it all I also wore a modern set of under armor.


Taking a break at the resting place at the midway point, 13 km left after this.

The weather was lovely. Already during the first km I realized that my sleeves were too tight and they really restricted my movements. At the first control, after around 10 km, I had to ask the volunteers for a pair of scissors, and I got help with cutting up the sleeve seam. That was definitely a first for the people working the control. After that it was a lot more comfortable. Still it was very, very warm. I was sweating a lot. If I'm to do something like this again I definitely would need to bring my own water so I could drink in between the controls.

Overall I decided to not hunt for any times, just try to enjoy the weather and get to the finish eventually,
I did reach the finish line, about 40 minutes later than I had hoped, but still I did finish. You can also see that my wulsthaube had more or less slid off, this older one has stretched with age and is a bit too big to start with. I really missed that audience, usually on this race there are people almost all along the tracks, but of course with the pandemic that wasn't allowed this year. The few that saw me were very happy and it was fun to stop and talk with them. The other skiers also kept shouting to me and cheering me on. It was great being able to spread some joy in the track. Most people thought that I was skiing in a folk costume though.

Along the track there were some cameras, and they made a film from the clips they took there. (it's also an ad for the sponsoring car company). So if you want to see what it looked like when I moved.


I have tried to take some grabs from the film here.


Tuesday 23 February 2021

Starting a jedi undertunic

 Tonight I started on my undertunic. I only started because I realized that I didn't have any matching thread, I apparently have never sewn in brown before. I couldn't do any seams that would be visible, but it was enough to at least get me started and trying out a few ideas.

Now there are loads of tutorials out there for making your own jedi tunic. The Rebel Legion has a full forum of jedi tutorials with several of them containing patterns for jedi tunics. Jedi tunic is pretty basic, but I decided to go my own way of making it. I started with the undertunic, to see if my ideas would work.

There are a lot of undertunic options. You can make a complete tunic, or just a false upper part that is just visible at the neck opening. It can be sleeveless, but it is also popular to have long scrunchy sleeves. The more I was thinking about the more I wanted to make a false undertunic. Instead of having to deal with fastenings where the front pieces cross over I wanted a tunic that I could simply pull over my head. I have seen undertunics made out of knit fabrics, and in afterthought that would probably have been the best. But now I had my linen/viscose blend to work with.

I decided to use my Lena faux wrap dress from Simply Sew. I have made three dresses from this pattern, and I have liked the result everytime. I have also cut it out a bit too big, for my last dress I took it in quite a bit, this I figured would actually be a good thing since I am working in non-stretch fabric unlike the dresses that I have made from it. For the undertunic I like that it is already a bit of a crop top, since it's supposed to have a sewn in belt. So I cut out the front and back bodice pieces and sewed them together. I skipped the shaping darts though, since this is supposed to be a loose garment.


I pinned the fronts together as high up as possible. I could still pull the whole bodice over my head, so I can sew it shut instead of having to work with any kind of closure. I want the neckline to be smaller, but the collar will add a few cm and that should be enough. 

Now I just need to buy brown thread, make the collar and sleeves and I have the first part of my jedi librarian done.


Tuesday 16 February 2021

Time to launch my jedi librarian project

 I never thought that I would do a jedi, to be honest I was never really interested in those costumes or lightsabres. Still the last year I've gotten a bit bored with my x-wing pilot costume and I felt that I wanted a costume that was obviously Star Wars, but also nice and comfy to walk around in. So a jedi it was. 

The jedi librarian is modelled on the character of Jocasta Nu from Episode II.

There are some other librarians in the comics and games as well. The main thing that separates a librarian/historian/archivist is the geometric patterns on the tabards and obi, and that there is no leather belt. I was really happy to skip the leather belt and basically just have to make fabric costume. I had the project in the back of my mind, and then I suddenly found this heavy cotton fabric with a distinct geometric pattern.


I liked the scale, and that it was a cotton fabric, so I decided to go for the jedi. Now I of course needed fabric for the tunics as well, so I quickly threw together a moodboard at the same online store where I had found the above fabric. (stoffochstil.se)

The top fabric will be the undertunic, the golden brown will be the main tunic and the black is for the big black skirt and boots that I'm planning on using, and that I already have.


This is what the fabrics looked like after I had washed them. The reddish fabric for the undertunic is a linen-viscose blend and the golden brown fabric for the outer tunic is a linen-cotton blend. I really wanted to use linen, since it's so comfortable and also has a nice texture to it. The problem with linen is that it wrinkles like crazy, but the blended fibres help with that. 

The white fabric for the obi and tabards are too contrasting against the other fabrics, so I will try give them a tea bath to take the white off a bit. Also the pattern is quite faint, so I will work with embroidering the pattern with threads in the same colours as the tunics.

With that it's on to actually sewing the costume. I'm hoping to get started with that in the weekend. 


Sunday 14 February 2021

The historical jacket is finished

 To finish the jacket it needed some way to close it. For this I picked hooks and eyes. I needed a way to close it that would work from both sides, so buttons or a loose lacing strip on one side wouldn't work.

The hooks and eyes were Prym size 3 in black, the biggest that I could find in the regular sewing shops. I sewed them to a loose strip of wool. I also alternated the hooks and eyes, that really makes a difference in how they stay shut and don't slide up.


I sandwiched the hook and eye strip between the outer fabrics. I chose to put them correct for the black side, since that's going to be the "nice" side. That means that I will have to close the pink side backwards, it's a bit more fiddly but it doesn't really show when being worn. I also sewed a seam connecting all three layers to each other a few cm in from the edge. That is to make the strain more even when I close the hook and eye.


The box of hooks and eyes that I bought only contained 12 pais, but that was enough to make the closure go down to the waist.


The jacket looks really loose and unshapely over my dressform, that really isn't close to my own bodyshape anymore. I did wear it for an even with friends outside though and it fit perfectly over my shift, mustard kirtle and green longsleeved gown. Unfortunately it was too dark outside so I didn't get any photos of me wearing it.

I'm really happy with the end result, and now I have a jacket that I can easily pull on over my clothes when it gets cold at events.


Thursday 11 February 2021

More fitting and sleeves for the jacket

 I tried the jacket on after I had sewn it together. I was not happy with the fit. I had once again done the mistake of making things too big. As a large woman I'm used to clothes being too tight, and I really wanted this jacket to be big. The problem is that when you add too much fabric and make it too many sizes too big, well it looks bad and I felt really downhearted about it all. It was obvious that the problem was with the back.


This was the integrated pleat in the back. It was hardly visible, because there was so much fabric around it. So I turned it into a folded pleat, like the side pleats.


It was a bit fiddly, but the process was the same as on the side pleats. Cut a straight cut into the bodice and fold the excess fabric in under it.

This was the finished pleat in the back. I also took in several cm on the back seam to make the whole back pieces smaller. That is a reason why I always have a back seam, instead of a one piece back, it is always a lot easier to make adjustments with an extra seam.

So then it was on to the sleeves. And I could only realize that I didn't have nearly enough left of the pink fabric.

That is one sleeve cut out in the black fabric, and the total amount of pink fabric that I had left. Since the pink version is supposed to be a lower class garment I didn't mind piecing together, that would actually bring some character to the jacket. The black version is going to be more of a middle class garment, possible lower upper class, so to make that look better I decided to keep the pink fabric at the bottom of the sleeves. That meant that even if the pink was visible when wearing the black side out, it would look like the whole sleeve was just one piece of pink fabric.


I filled out the upper part of the sleeves with orange wool flannel. The piecing is done in a mix of machine and handstitching. A good thing with using the wool flannel at the top is that it's thinner and lighter than the pink wool, so it was easier to ease it into the armscye, without getting too much bulk.

Since the jacket is going to be reversible I had to attach both layers of the sleeve, without any raw or ugly edges. I did that buy sewing the black sleeve to both layers of the bodice, and then I placed the folded edge of the orange/pink sleeve over the seamline and prickstitched it in place. At this moment I realized that the orange fabric had become a bit larger than the black, but I decided to live with the sleeve on that side not looking quite as good as the black one.

With that I had finished the main part of the jacket, now it's the closure and hemming left.


Sunday 7 February 2021

An historical jacket takes shape

After that evening outside some weeks ago I have continued to think about winter wear. I was warm and cozy in all my layers and with my cape, but would it be enough if the temperature dropped even more. Right now the temperatures around here is around -10 Celsius, as compared to just below freezing on the evening I was out. Also I love my furlined cape, but if there was one place I felt a bit cold it was my arms, so it would be nice to have an outer garment with sleeves. Thankfully there are a lot of images of jackets.

I would really recommend reading Amie Sparrow's documentation of jackets worn by German peasants in the 16th century. There is a wide variation on jackets, some looser, some tighter, some with a waist seam and some without. 

Looking at the jackets without waistseam I really felt that this is a garment that you can see in many centuries, especially on working people.

This is from the print series Cries of London from the late 17th century

This woman is wearing a shortgown in the middle of the 18th century

I decided to make a jacket without a waistseam, and I would try to do it generic enough to be able to use it for several historical eras. It would be a classic time traveling garment.

Then it was time to go through my stash, and I still had a piece of wool left from when I made the cape. It was not as much as I thought though. I also felt that I wanted to line the jacket, since lined garments simply look better. It is a winter garment, so I didn't want to use linen. Linen can actually cool you down. The only wool that I had a lot of though was a fairly modern wool in speckled grey. It was a mistake buy, I thought it would work for TLJ Leia from the images online, but it didn't. Still the speckled grey was quite nice, and I figured that it wouldn't look too out of place in an historical context. Since I would not be able to use fabrics that were correct, I also decided that I would sew the jacket on the machine. Then the next thought came to me. What if I made the jacket fully reversible? The speckled grey wouldn't look too bad in a 17th and 18th century setting, where black and sombre colours were preferred by the upper classes in my town. Well then it was decided. A fully reversible jacket without waistseam, sewn on the machine.

For pattern I started with my latest 16th century bodice pattern, but that was for my tight 1520's court gown. Since the jacket would be worn over a lot of layers I simply added to it. I mainly used the shape as a guide and then drew the pattern. To still get a bit of flare over the hips I looked at patterns for 18th century jackets to see how I could make an integrated pleat. In hindsight it would have been a lot easier to just flare the pieces to create the skirt portion. But hey, why go for simple when you can do complicated.


The pleats were integrated by flaring the center front and center back seam. For the side pleat I made a square extension. Now I had a very limited amount of the pink wool fabric, so the length of the jacket was decided by that. I would have loved to make the jacket go down to midthigh, now it ends at my bum. Also the limited amount of fabric force me to winge some of the cutting lines, they are not totally straight, and I had to adjust that after I had cut all the pieces out.

I should also say that I was too sloppy with this pattern, the armscye ended up way too large. In order to take it in I had to lift take away a lot of excess fabric at the shoulder. With my limited amount of fabric that meant that I lost several cm that I would have loved to have added to the overall length, it also meant that the front piece got a bit too tight over the chest. I really shouldn't cut out patterns and do sewing when my blood sugar is on the edge of dropping to low. I get unconcentrated and irritated, and also take bad decisions, like continuing even if you feel that you should take a break and eat something.

Anyway. Before I started to sew the pieces together I finshed the side pleat on each piece. I've always been a bit confused on how to make the pleats, but this is what I did.

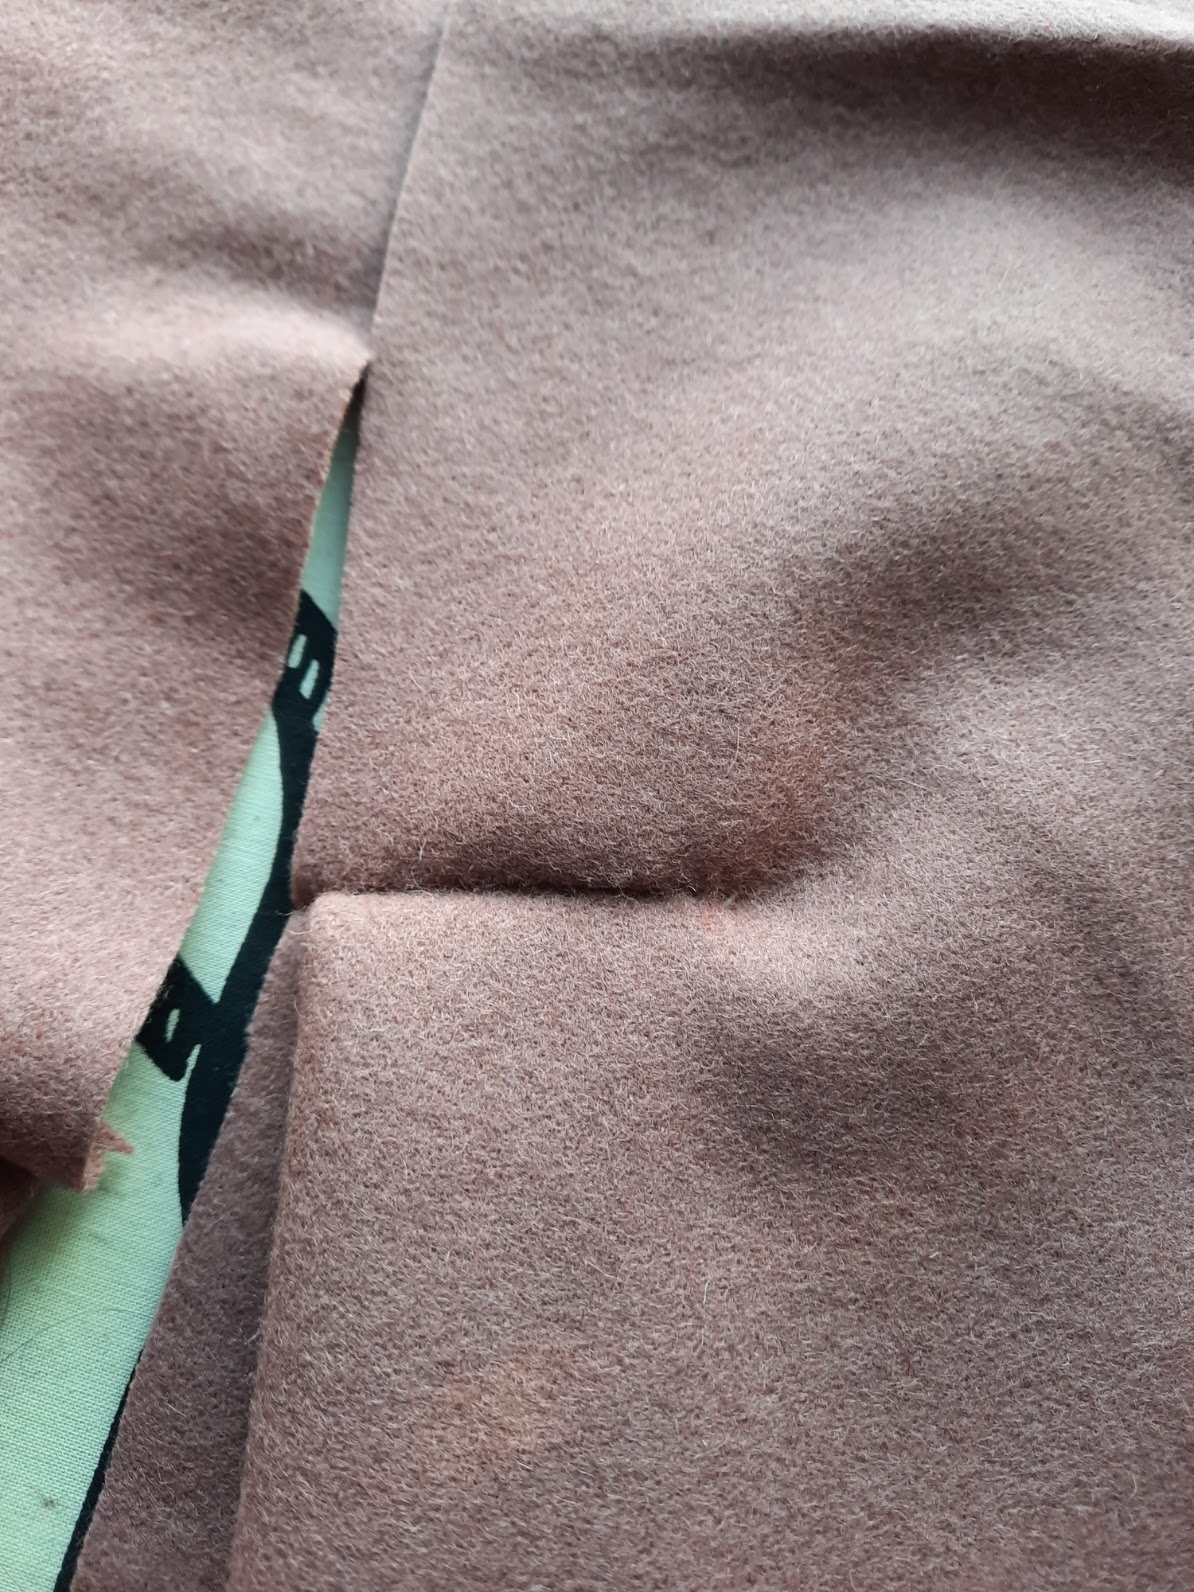
I start with cutting into the bodice. Just a straight cut at the waistline.

I then fold the excess fabric under the cut, this creates the pleat.


I sew the cut in the bodice together, catching the pleated fabric as well, I sewed the seam with backstitches and then I whipstitched the edge to give it more protection.


This is what the pleat looks like when it's finished. Then I just sewed the side seam as usual.

I sewed two layers of fabric as separate pieces, so in the end I had two identical jackets, a pink and a black one.

To be continued...


Monday 1 February 2021

crosstitch cuffs continues

 After I finished the neckline embroidery I started with some embroiderry for a pair of cuffs as well. I don't have any deadline, it's just something to keep my hands busy while I'm watching tv or doing other stuff.

I once again selected a pattern from the German patternbooks. This time I wanted to do something fairly big, but also a bit organic and not just geometric. 

This time I wanted to do the second pattern from the bottom. I liked the little flower buds. It was also a pattern that was a bit more complicated to figure out the best stitch order. In the end I started with the ribbon, and then I continued with each flower for itself. 


My embroidery got a bit squashed, I counted wrong so I missed one row going down on my first part of the ribbon, and rather than redoing it I made the ribbon in total two rows more narrow, one less on each top and bottom. I still have some more flowers to add, and then I'm thinking about adding a row above and below the pattern.


Over the weekend I've been up in the mountains in our cabin. We don't have tv, so it means some time to craft. I took advantage of being there with my mother, so that she could help me to untwist some bundles of silk embroiery thread, so that they are ready for use whenever I need them.

It was such a lovely weekend up in the mountains, even if it was a bit chilly. The temperature was down to -28c when we arrived. Saturday was the warmest day with -15c. I can't help but wanting to share some nature porn.

There are few things that are more lovely than an open fire.

When we arrived I first had to shovel enough snow for us to actually get into the cabin. Great fun when it's - 28, or not.

On Sunday I went out for some cross country skiing. There is a special stillness in the air when it's cold and you are totally alone with just the sound from your skis and ski poles against the snow.

The cabin from the ski track


The colours when it's this cold are also amazing. This is when dusk started to set in.