Showing posts with label gold handmaiden. Show all posts

Wednesday, 27 May 2020

Queen's Peril excitement

In June Queen's Peril by E.K Johnston will be released it's a Star Wars novel focused on Padmé and her handmaidens. When her book Queen's Shadow was released it was a moment that a lot of fangirls had waited for, finally there was a book with Padmé as the main character, and with her handmaidens as fully fleshed out characters as well, it only took 20 years after The Phantom Menace to make it happen. A couple of weeks I was asked by a friend of mine if I wanted to be part of a video to celebrate the release, and of course I wanted to. As a proud member of the Royal Handmaiden Society I of course chose to take part in my Gold Handmaiden costume.

Today the video was released when E.K Johnston posted it on her social media platforms.

You have to click the link


My segment was filmed in my kitchen, with Tom as my cinematographer. And here are some bonus segments from our filming.


Friday, 1 July 2016

I'm going to be in the Celebraton Cosplay contest

This week I got really surprised when I got an email saying that I had been accepted into the Star Wars Celebration Cosplay Contest, or Star Wars Celebration Europé Cosplay Championships as they officially call it. I had sent in my application back in February, but I hadn't heard anything, and in fact I had thought about withdrawing my application. Being in the contest would mean I had to pack the gold handmaiden, at the expense of a easier and more "fun" costume, and also it would mean that I set off the whole Friday for just the contest. Still when I got the email I felt quite honoured, and now when I've been accepted, of course I'm going to go through and take part.

My plan is to take the next weekend and go over to see if I can fix some things, including being able to actually walk in it, and also take the time to make a proper documentation on how I made the whole costume.

I don't think I'm going to win, there are usually such wonderfully made Amidala costumes with a higher degree of technical skills than me, but it's still an honour to have been selected.

Friday, 26 June 2015

Me on video from Anaheim

So while at Celebration Anaheim I met up with Holly from "How stuff works". Holly is a wonderful costumer herself, but here she was the reporter. After some mishaps, and trying to connect with each other, while I couldn't really use my phone, she interviewed me in my gold handmaiden costume.


 She talked with some other costumers as well, so it's not just about me.

Friday, 22 May 2015

Gold handmaiden photos

I'll just finish off my documentation of the handmaiden with a bunch of photos, these were all taken at Celebration Anaheim, with the bulky sash.


 It was quite nice to be able to take the hood off in the heat from time to time.
This is a photo taken with the newer, slimmer sash.

And for an extra I just loved the dramatic shadows in this photo
And this is my profile photo over at the Rebel Legion. I am quite proud that despite a lot of people having talked about it, and despite it being 16 years since The Phantom Menace I'm actually the first to have gotten this costume accepted into the legion.


Wednesday, 20 May 2015

Gold handmaiden sash

I still have a post or two to sum up my gold handmaiden.

One of the parts of it that I wondered about for a very long time was the sash around the waist. This is one example where I'm very happy that I waited to make it until I was good enough to be able to come up with what was going on.

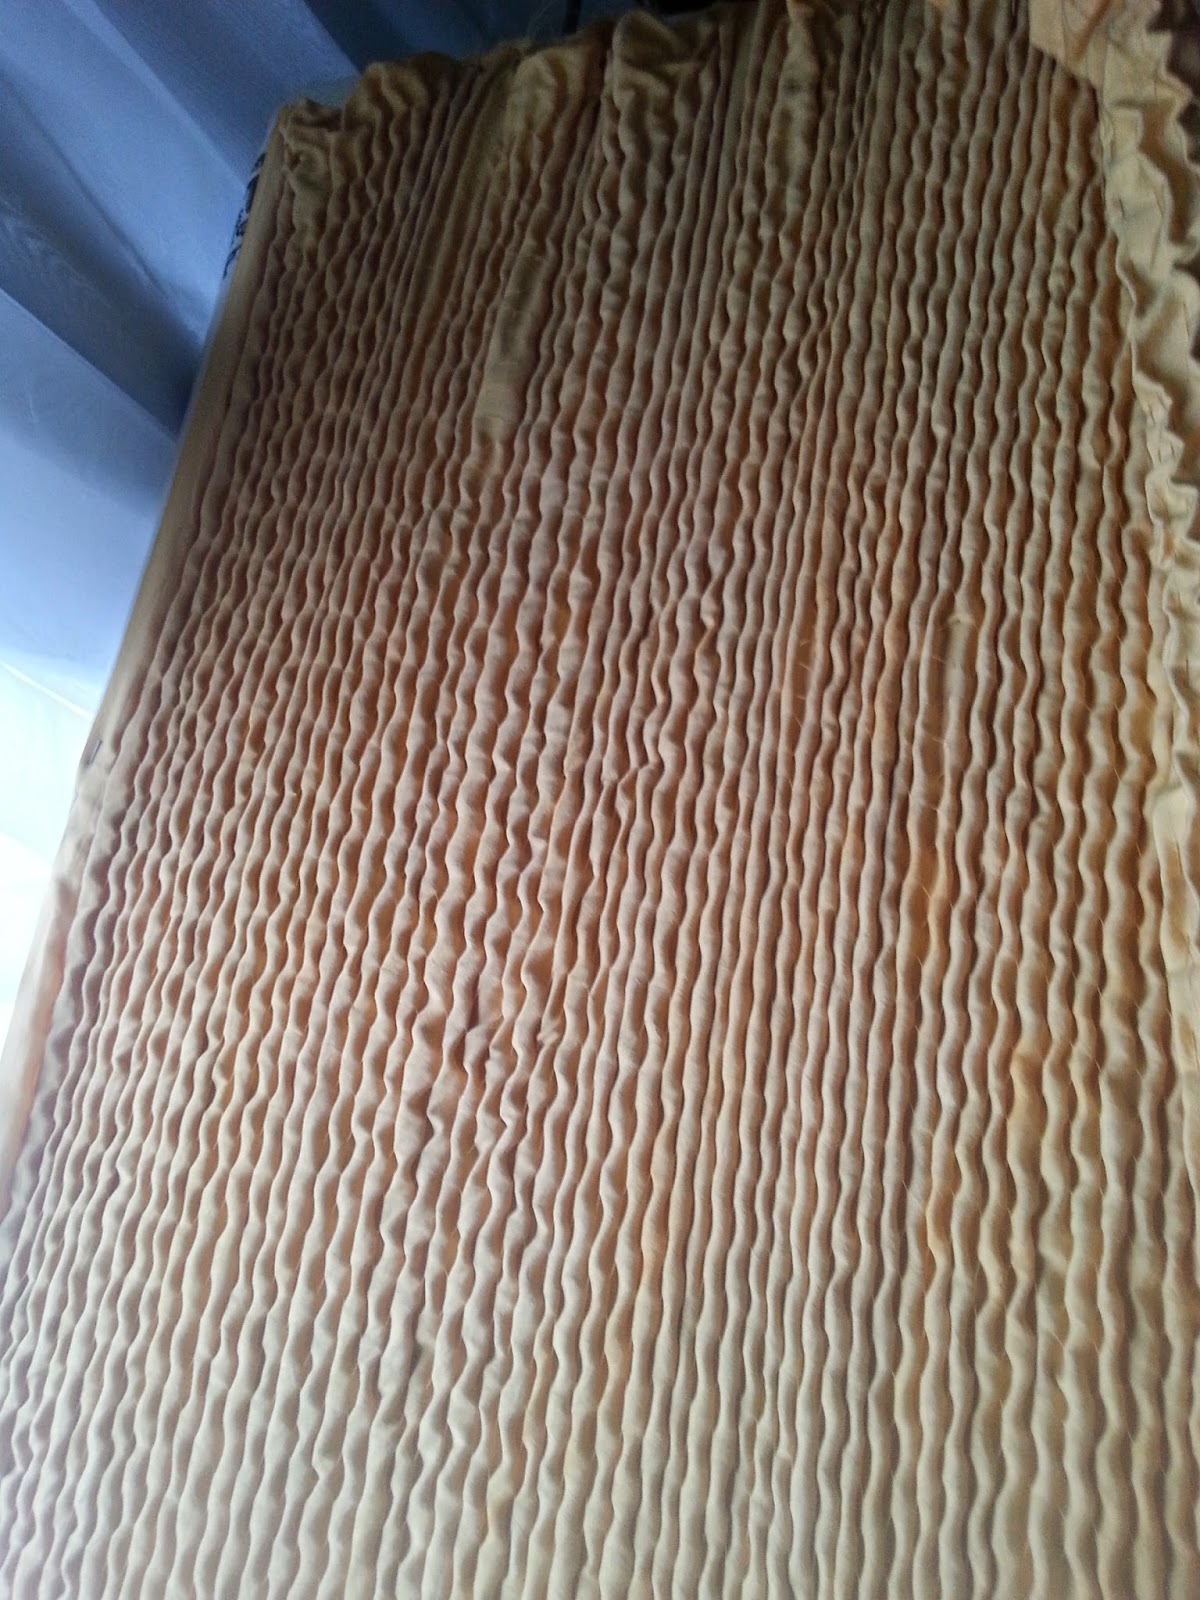
At first I thought that all the vertical lines came from ribbons that were sewn together. I had no idea on how I would find those kinds of ribbons. Well a couple of years later I've gotten better with identifying fabrics manipulation. Looking at my reference pictures I got convinced that the sash has been smocked. The lines comes from the smocking threads. After the smocking the sash has been folder time and time again when it's been wrapped.

Another thing is that this costume is obviously worn by columnshaped models, while I'm not. If figured that the sash would be very important to creat an illusion of a body without many curves. The answer was to make an underbust corset, that I would then attach an outer layer of fabric to.
This is a bad photo of the inside. The pattern was a very old underbust pattern that I dug up from my pattern archive. I actually think it started out as a pattern for an underbust Drndl bodice from a Burda magazine. I boned it with what pieces of boning I had in my stash, reused from old corsets. The important thing was to make a busk of several bones in the middle, to keep the tummy in check. The fabric was my last remnant of coutil from last summer's corsets.

For the outer fabric I used a silk charmeuse that I dyed with the same dye as the rest of the undergown. In fact this piece of fabric was actually my first test of dying in this project. I then sewed long gathering stitches all over the fabric. When I gathered the fabric I did make a mistake though, I simply gathered it too much. This made the fabric quite bulky when I tried to fold it, and the horizontal lines were hardly visible. Still this was the last thing I had to do before leaving for Anaheim, so I wore it like this at Celebration.
When I came home, and after some discussion with the RL costuming judges who didn't know about the smocking, I eased the tension a lot. In fact I could remove around 50 cm of fabric and it still covered the whole underbust.
I then simply folded the excess fabric and in order for the fabric to lie as flat as possible I also sewed down the folds to the foundation layer.


Friday, 8 May 2015

Gold handmaiden robe

So I still have a few posts about the construction of the gold handmaiden. Now since I was stressed about finishing it in time for Celebration I worked a lot, but didn't take a lot of photos of the process.

The robe was constructed from velvet. I chose to do a separate hood and robe. The robe itself had a few challenges, not the least in the sleeves. Whenever I looked at pictures I had a feeling that there was simply too much fabric. I saw a lot of folds, but couldn't really see if they belonged to the sleeves or the body of the robe.

Above is one of my photos where I simply tried to trace all the folds and pieces of fabric. I also went looking for a lot of other kinds of costumes to see if I could find something similar. Since I think the costume has quite a clear Japanese influence I looked up different kinds of kimonos, and come upon the more ceremonial kind called "furisode"
The picture above was the closes I could find in getting the same kind of folds in the fabric. The thing with a furisode is that the sleeves are big rectangles of fabric.

When I had cut out the velvet it was time to put the symbols on. I was very happy that KayDee had been to the Power of Costume exhibition in Seattle, and she had taken a lot of pictures of the sleeves for me, including pictures that showed the whole markings.

This is my sketch of the symbols. It consists of the same symbol repeated four times in a square. For the symbols on the hood I used a single symbol, but for the sleeves and robe markings I used the square. Now this sketch is not proportional, it's actually too big. I did not have enough space to be able to have three sets of symbols, in a _I_ formation, but had to only use a _ _ formation, or else one of the symbols would have ended up on my sleeve.

Painting the symbols was actually quite simple. The velvet I used was transparent enough in a strong light that I placed the sketch under the fabric, under a kitchen lamp. and then simply traced the symbols with a red fabric pen.

Here is one half of the robe, showing the symbols and the shape of it.

When sewing the robe I interlined the velvet with a gold organza and used an old gold satin as lining. The lining is not attached to the robe at the hem, but hangs loose. The sleeves are not sewn totally shut, instead they are tacked together at the front, just above the symbol, and then the back of the sleeve is sewn together. This creates two "points" at the bottom of the sleeves, that are clearly visible in this reference photos.
There is gold braid piping all along the sleeves and the opening of the robe, but not the hem.

These last two photos show the finished robe, and hood.


Thursday, 30 April 2015

My costumes at Celebration Anaheim

Costumes are one of the best things about Celebrations, it's just wonderful to see all the talent and creativity that are out there. My main costume was the gold handmaiden costume, and I did manage to finish it in time. I will try to do some more posts about finishing it, but since I was stressed at the end I didn't take a lot of photos.

I wore the handmaiden on the first day, so that I could bring it to the Rebel Legion Galactic Senate Detachment photo, that's the subgroup for senatorial and royal costumes.

I was happy to have my photo taken with "my" Amidala.


Wearing a corseted velvet hood and robe in the sun and heat was too much though, so even if I had planned to wear it the whole day I changed into my Endor Trooper for the rest of the day. It also wasn't easy to walk in it. The round circle held it's shape pretty well when I was standing, but I need to make it sturdier to I can kick it away from my feet when walking. I have an idea on how I can manage that though.

That evening the Rebel Legion and 501st Legion had a social event in the evening, and my Celebration/Convention companion David had come up with the idea that we should really dress up for the occasion, and so we did. It was a lot of fun, and that ballgown is a bit heavy, but it's perfect for travelling since it doesn't wrinkle at all.


On Friday it was the main Rebel Legion photo, and I wore the handmaiden for that, but then quickly changed into the Endor Trooper again. I love the Endor trooper at cons, it's so comfortable and has a lot of pockets for all the things you need to carry with you. In the afternoon I took part of the Rebel Legion Trooper march, where we trooped all through the convention centre in formation. I hadn't brought my backpack, and I have lost my wrist comm so I felt a bit underdressed, compared to the other troopers, but I got inspired to continue to add things to it.

Ready to march


On Friday it was also the Cosplay Contest, but I didn't go to it. I was part of a panel called "Ladies of the Legions" - about female Star Wars costuming and it was scheduled against the cosplay contest. In the panel we talked about opportunities, challenges and problemsolving revolving around female costuming.
The Running of the Hoods crashing our panel
 
Saturday was the day for the 501st photo shoot, so I had slated Saturday to be jawa day. Then I got scheduled to do a Queen Amidala make up presentation for Saturday as well. Then Del Rey, the publisher company for Star Wars books, had declared Saturday to be Aaron Allston appreciation day, and they were having an Aaron Allston tribute panel. Aaron Allston was a wonderful authour and person that passed away too soon. Since he was known for always wearing awful shirts one way of honouring him was to wear a hawaii shirt. That total mash up made me run around like this all day. The tiara was added when I looked myself in the mirror in the morning and I realised that I looked really silly and needed something to just top off the look, thankfully there was a Disney/Souvenir store in the hotel.


It was really comfy though, the jawa costume isn't very hot when you don't wear the mask, so this is definitely a costume that I'm going to develope for future cons. Well the Queen I'majawa look, not necessarily the hawaii shirt.

Here is me and Joslynn after our make up presentation, where I basically went through the tutorial from this blog, while Joslynn was putting on her make up live. I had removed the shirt and the hood for that.


After the presentation I dashed off for the 501st photoshoot, only to realize that it would take too much time, so I would miss the Aaron Allston panel. I chose to go to the panel instead. Being with friends talking and hearing stories about him was brought both tears of sadness and joy, which is exactly like Aaron did when his wrote his stories.

On Saturday the group that I spent most of the time with were pretty tired, and they were going to line up early to get into a specific panel on Sunday morning. I went up to my hotel room, but wasn't tired, so I decided to try and roll up my hair and do pin curls for the first time. I could actuallly sleep on the curls, unlike when I've used rollers, and even if I only did a fast and dirty job with them,  I can definitely see that it will be worth practicing doing them. I did roll up my hair because on Sunday I had decided to not wear a costume, but my Star Wars cocktail dress, together with a fabulous pearl necklace with an R2 pendant that I had picked up from Her Universe. There were definitely a lot of dresses made from Star Wars fabric, but I think I was the only one with  a tight skirt. Most others were variations of a corseted or tight bodice and a poufy skirt. Once again I was actually glad that I hadn't bothered to bring the can can trooper, since there were so many corset/skirt combos there.

When lacking a hyperdrive, some greenscreen magic can bring you to Bespin

I had a great time in Anaheim, but with more than 100 000 tickets sold there was a lot of people there, and the only sad thing is that I didn't meet all the people that I wanted to meet and talk to.


Monday, 6 April 2015

On the finishing stretch

So with not much time left, I don't have time to take photos of my progress and blog much. Over the weekend I've tried to get a lot of things done, unfortunately some things have been much slower than I tought. Not helped by the fact that I had bad blood sugar levels yesterday, I have diabetes type 1 (the auto-immune disease not the lifestyle one) and on some days I simple have problems focusing and I also get some impaired judgement, which unfortunately is visible in the results.

Anyway

Current status:

Hood - finished (yay)
Robe - not even started
Obi/Sash - Need to do some handstitching and add grommets for the back
Undergown - still needs to cut and starch the hem, otherwise it's done.


Wednesday, 1 April 2015

Gold Handmaiden skirt

After what have felt like an eternity of pleating I have a skirt for the gold handmaiden, and with that I'm starting to beleive that I will actually finish the whole costume and be able to bring it with me to Celebration.

There are still details left. One of the most important one being that I need to starch the circle and finish the edge of it, without hemming it. I have an idea on how I will solve it. The main problem though is that in order for it to lie completely flat, I have to stand inside it, since the feet for my dress form are creating the bubbling issues that you can see. That bubbling also happens as soon as I move around in it. It's actually not impossible to walk in it, but every time I move I have to bend down and flatten it out. I hope I can solve it with even more starch.

Also from the leftovers from the skirt I have managed to piece together a bodice as well. I had hoped to get it done as well tonight, but I feel dead tired, and that's not the correct time to start fiddling with something new. Still I will set a goal to finish the undergown on Friday, then I can take Saturday and Sunday to work on the robe and hood, and then I have Monday to work on the sash/obi. That's my plan anyway.

Monday, 30 March 2015

Pleating tutorial

So the pleating of the gold handmaiden is taking a lot of time, but it's worth it. When I started thinking about this dress I thought I was going to do proper box pleats and simply press them down. When I started to fiddle with the fabric I realized that I couldn't make them tiny enough though, so I had to come up with a different process.

First I marked up the whole fabric with straight lines, around 0,7 cm between them.

Then I used a running stitch and sewed two lines together. That forms a ridge.
This is what the whole piece looks like when I've finished making all the ridges.
Then I pinned the fabric to my ironing board, trying to stretch the fabric as much as possible. The more you stretch the straighter the pleats will be. Ideally I would have someone helping me to hold on to the fabric instead of pinning it, but being on my own the pinning had to do.
Then spray the whole fabric with starch. I'm using a strong start made from 1 table spoon potato starch and 150 ml of water. Use a spray bottle and make sure that all the fabric on the iron board is wet. Let the starch sink in for around 30 seconds-1 minute. Set the iron to a fairly high setting, I'm using the silk setting, and press the iron straight down to the fabric. Don't try to move the iron, but simply lift it straight up and put it straight down for the next section of the fabric. It really helps if you also try to use your hand to stretch the fabric. Go with the iron all over the fabric until it's dry, or at least almost dry.
Make sure that the fabric is left to dry completely flat, don't hang it.


Sunday, 22 March 2015

Back to square one with the velvet

Yesterday I felt that it was my last chance to dye the velvet for my gold handmaiden. I went home to my mother to be able to have full access to her big pots, big bath tub and tumbler. I had prepared the velvet by cutting out the general pieces for the robe and the hood, and I decided to first do a lot of tests with the velvet pieces that I had gotten as left overs from cutting out the pieces.

This is the result from the tests. At the top you can see a piece of the silk taffeta that I'm using for the gown and that's the colour I need to match. The colours here are a bit too light, since the photo is taken in direct sunlight. Also this is a good example of how different fibres take dye differently, since I used the exact same dye for both the silk taffeta and the velvet, which is rayon on a silk backing. It's the rayon that reacted differently, the silk backing got the exact same colour as the taffeta.

The furthest to the left was the velvet that I started with. Then I used RIT colour remover.and put the two swatches in. The first one was taken out after just two minutes, it had lost a lot of the red but was still too yellow. The other swatch was left in for 10 minutes and you can see that it lost all the red pigments but now it was definitely yellow and not gold/yellow. I made a last attempt to see what would happen if I added a tiny bit (1 gram to 4 litres of water) of Dylon Terracota Brown to it, but as you can see I was then almost exactly back to the colour of the swatch that I had removed after two minutes.

Now I started to despair. As interesting as it was to see the different results, none of the results were close to the same gold tone as the silk. If I was doing the Flame Handmaiden Gown I would have loved these colours.

Well I decided to go back to square one.Around a year ago I ordered a swatch of velvet from Beckford Silk in the UK. They are the company that custom dyed the velvet for my Travel Gown. Unfortunately they have since then changed their policy, and pricing, of custom dyeing velvet so that was not an option for me this time. I wasn't totally satisfied with the swatch, and that's the reason why I've gone through all these dye tests. Now with three weeks left to Celebration I must admit defeat and say that the original test swatch is a lot closer to the gold tone I want than any of my tries.

I have now ordered 7 meters of that velvet, and I hope it won't take more than two weeks for it to come here. In the mean time I've spent around $250-300 on the velvet and dyes, and not counting the hours and water I've used up, that I won't be able to use. If I had taken the decision from the start to go with this velvet I would have been a lot closer to finish the whole project.

I must say though that it has been a very interesting learning experience, and I'm definitely not afraid of using dyes anymore. I now sit here with a lot of velvet pieces in a beautiful, warm glowing shade of gold/orange. Thankfully the pieces are quite large, since they were cut out to be a free flowing robe so I should be able to use up and turn them into something else. I just need to come up with some kind of inspiration for it, who knows maybe I should go with the flame handmaiden sometime in the future.


Friday, 20 March 2015

No costume contest at Celebration

So today I received a rejection email that I was not selected to take part in the Cosplay Contest at Celebration. Of course I am disappointed, I was really looking forward to it, at the same time I couldn't send in a picture of the finished costume, and the gold handmaiden is a background costume so I definitely can see that they would prefer more recognized characters.

I still aim to have it finished by Celebration though, hopefully I can have it done in time so that I can send in application photos for RL and have it at the main Rebel Legion photo.
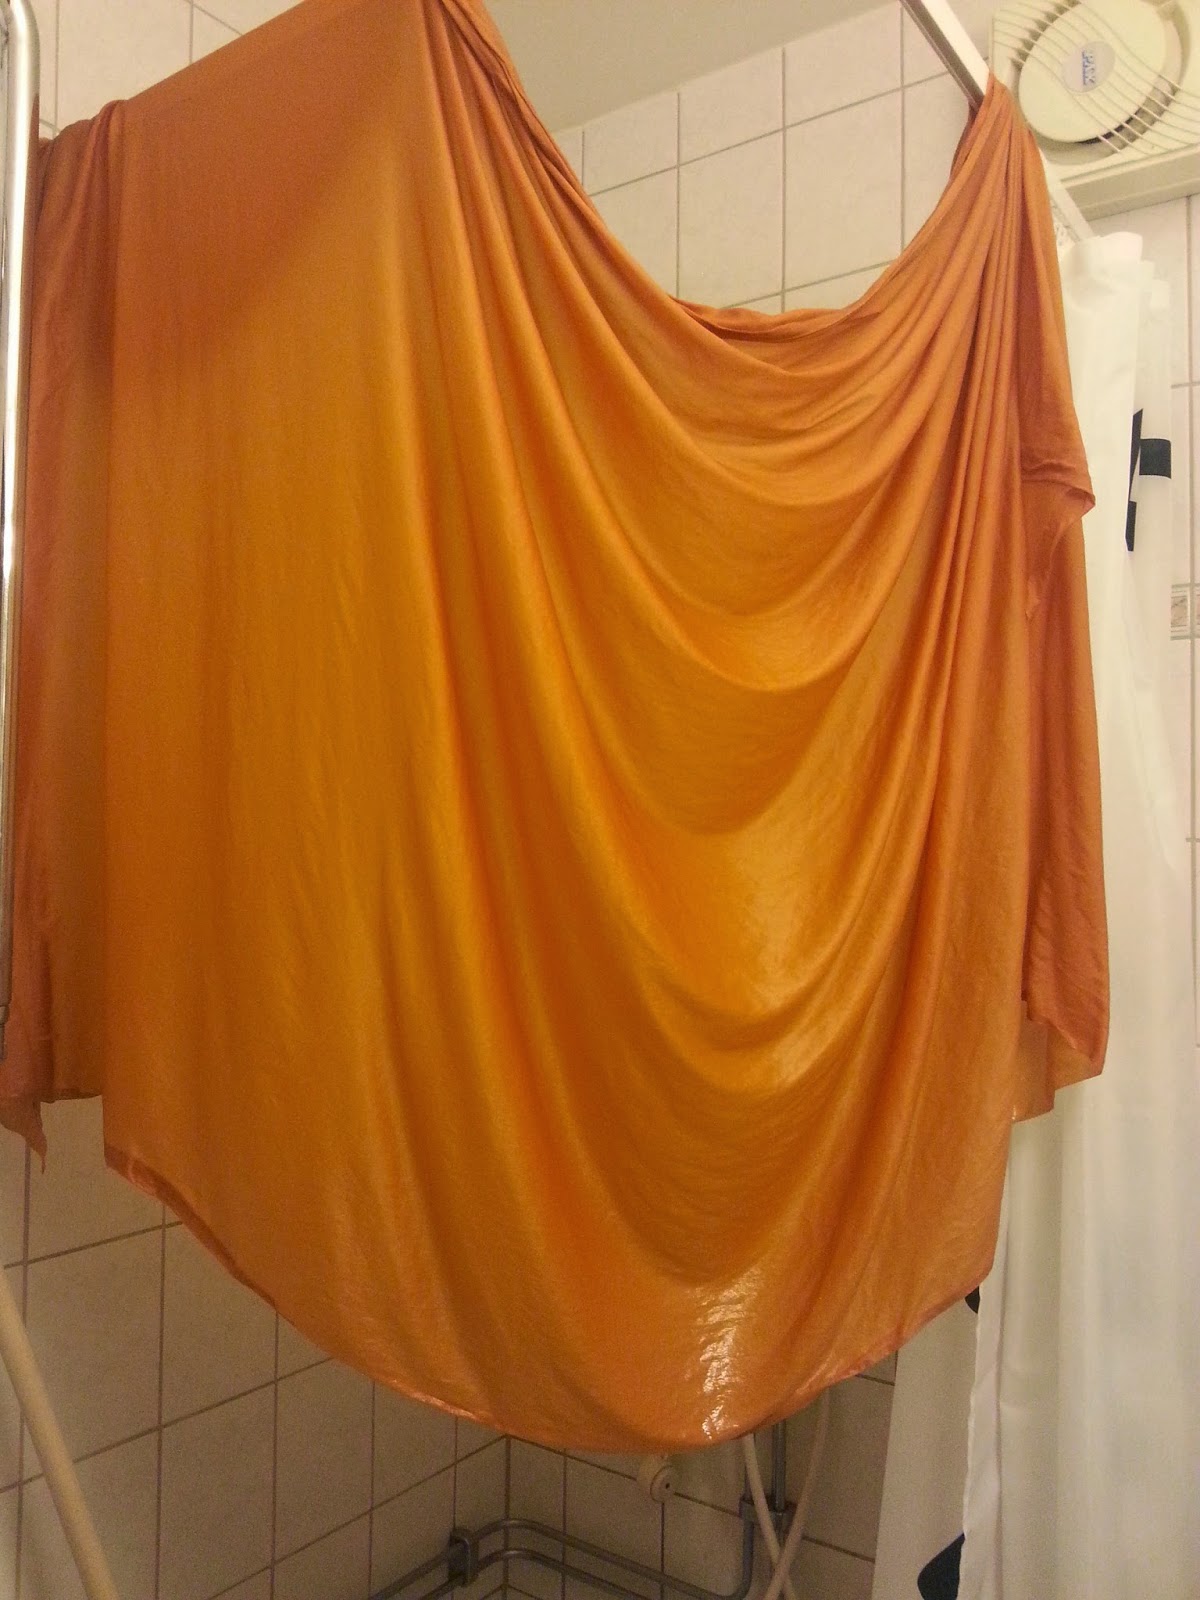
As of today I've just finished 2 out of 3 pleated panels for the skirt of the gown, so even if it's going to be tight I feel that I should have it done in time.

If I succeed in redying the velvet...

Saturday, 7 March 2015

So many pleats

I'm in full Gold Handmaiden mode right now, and it's the pleating that is taking so much time. I'm not going to go into the details on what I'm doing,until I'm finished, but here is the first panel done.

The stressing thing is that it's taken me the whole week to get this piece done, and this is just a small part of the whole gown. It's definitely been a learning curve, you can see that the pleats do differ in evenness, size and straightness over the piece. This is going to be a back piece so it's not going to be very visible, I'm going to practice on the other back piece before I start with the visible parts.

Tuesday, 10 February 2015

Adventures in dye-land

So last Sunday it was time for me to do what I had dreaded for a long time, it was time to dye the fabric for the gold handmaiden. I went home to my mother's house, since has both a good stove, larger pans than me, and a bath tub.

Before embarking on this adventure I was really scared of it, in the end I found that it's been pretty fun, especially if you aren't too picky with getting a certain shade but can accept some variety. Hopefully this will be helpful to some other who haven't dyed before.

First of all I washed my fabrics. Since it was silk I was a bit worried, but I was going to treat them a lot worse in the dye process than what the washing machine could do o them. I even put the silk/rayon velvet in the tumbler, and it turned out fantastic. I did this step last week.

When it was time to dye I started with soaking the fabric in really hot water in the bath tub. I had cut the fabric into three pieces, the general size of the pattern pieces.
 I used hot water since I didn't want the fabric to cool down the dye bath when I put it in. In the instructions it says to have the dye bath on the stove to keep the temperature, but that wouldn't be a good idea with a plastic container so I will have to do with the heat from the water when I pour it in.

While the fabric was soaking I boiled a lot of water on the stove, in my mother's biggest pots. I also put some water in the regular kettle. This water I poured into the container to heat it up, and then I poured it out again. I wanted the container to be hot when I poured the boiling water into it, so that it wouldn't cool down immediately.

Here you can see the two pots and the container, remember to protect the floor. One thing I also realized was that you don't need to fill the container. I filled it a bit more than half-full. You only need enough water, and space, so that the fabric can be moved around in it.

Now the velvet was very heavy when wet, so I had to split it in two batches for it to work. I put the first batch in and let it be there for 19 minutes, then I took it off, put it in the bath tub with cold water, reheated most of the dye bath in one of the pots and put the next batch in.

When the second batch had been in for 20 minutes I put them both in the washer and washed with a silk detergent in a cold water/hand wash cycle. Finally I put it all in the tumbler, on low heat.

While the velvet was in the tumbler I repeated the process with the silk taffeta. Only with this fabric I could put it all in one bath. I also didn't put it in the tumbler. Then I had to go home to my own place, so I hung all the fabrics up to dry in the bath room. (My mother's on a vacation trip, I wonder if she's going to be surprised when she gets home?)


Here are the fabrics hanging and you can immediately see that the velvet on the left, the first batch, has a totally different shade than the velvet on the right, the second batch. What must have happened is that the first batched sucked up most of the red pigments in the dye, leaving the second batch a more yellow/golde shade. The sad thing is that the second batch is perfect, so I will need to see if I can remove some of the dye from the first batch, or if it's possible to overdye it to become more yellow.

My plan now is that I have ordered some colour remover. I will cut up the velvet into the pieces I need to assemble the robe and hood, that should also leave me with a lot scraps so that I can do tests before trying to bring the both batches into the same colour. If I can't remove the red from the first batch I have another packet left of the original dye and then I need to dye the second batch again to give it more red.


Tuesday, 13 January 2015

First dye batch complete!

My main fabrics for the gold handmaiden are still underway, but I've started on the sash around the waist. I started with the last piece of the silk charmeuse for my sister's wedding gown. It was around 1,5 meters and weighing 200 grams. Now it was time to really take the bull by its horn and start with the dye. I felt that this was a good start though, if I failed with the dye I wouldn't have ruined a large amount of fabric. The dye that I wanted to try this time was Jaquard iDye for natural fibres in Gold Ochre. I would probably not have dared if it hadn't been for this tutorial from The Dreamstress, she had also used Gold Ochre and so in that way I had seen the colour that her fabric got from the dye. I also asked the HSF FB group for any advice when it came to what kind of pots and the like to use.

According to the instructions that came with the paint you should either use a toploading washing machine, or have a metal pot that you could keep on the stove. I didn't have any of those, instead I decided to use the largest plastic storage box I could find up on my attic. Then I started to boil a lot of water. I used my kettle and three pots. The kettle was the fastest, but the biggest impact when it came to the temperature were my two large 10 litre pots. I filled the plastic bin about half full with my second to last large pot, added the dye, fabric and vinegar, and then I raised the temperature again with the last 10 l of water. I had also presoaked the fabric in hot water, so that the fabric itself wouldn't lower the temperature. The temperature of the dye bath came to around 80 degrees C.

I used a big stick, actually a broom stick, to stir the fabric. I kept stirring in the pot, so that the fabric was never still for 25 minutes. Then I lifted up the fabric into my bathroom zink and washed it with a small amount of washing powder. I rinsed it until I couldn't see any colour of the water.
When I hung it up to dry I was worried that the colour was too dark. I had noticed it already in the dye bath, so that was why I took it up after 25 minutes instead of the recommended 30 minutes. I hoped that it would lighten up when it dried though.

And it did! This is my fabric all dry. I'm so happy with the colour and this photo does not give the fabric justice, it's so rich and shimmering.

With that I'm really happy that I have found a dye that works, and I've managed to do a proper dye. Now there are still some issues that I need to solve before dyeing the main fabrics. That's going to be a lot larger amount of fabric, and it will not fit in that same plastic container. I will probably have to cut the fabrics into smaller pieces and do several dye baths, but I would like to reuse the water, but then I need to be able to come up with a solution on how to reheat the dye bath. I don't want to put y plastic bin on the stove. So still some technical issues, but at least the dye works.


Thursday, 8 January 2015

Fabrics ordered

Over the weekend I finished the mockup for the robe and the hood for the handmaiden. It's not perfect, but it's good enough and I needed to know how much fabrics I need to order.


Not much can be seen of the robe, and I still need to make some adjustments. The annoying things after having made the mock-ups was to measure all the pieces, and realize that most of them come down to around 60 cm in width, just enough to be unable to get two pieces side by side on the fabric, since silks are usually sold in 100-110 cm widths. That means that I had to order a lot more fabric than I had hoped.

Another thing is that I need to use the width of the silk as the length of the skirt, but since the silk is only 100 cm long, and I'm going to need around 130, I will need to hide a horizontal seam somewhere on the skirt.

All in all I've ordered 8,5 meters of silk velvet, 8 meters of organza for flatlining the velvet, 6 meters of satin for lining the robe and 11 meters of silk for the undergown. Out of these meters I also need to get enough scrap pieces so that I can do dye tests on them.

Wednesday, 31 December 2014

Handmaiden lining is done

I've finished the lining as far as I can do. Now it's just to calculate the amount of fabric needed for the pleated overlayer and to start draping/patterning the robe and hood.

Even if it's just pinned together on my dressform I'm quite happy with the general shape. I'm not exactly tall and willowy, as the photomodels that wore the gown originally, but I think I've manged to create quite a sleek silhouette.

This photo, taken with flash, shows that the lining is actually quite shiny. I'm hoping that some of that shine will be visible through the outer fabric, at least in photos.

The playing around with the lining and how the light works on it has also made change my mind on what fabric was used for the original. I'm now pretty sure what I'm going to order, but it's going to be a lot more expensive than the cotton voile I had planned for. It also of course means that I can't do anymore dye tests until I get the actual fabric that I'm going to use.

I also need to go and measure my largest suitcase to make sure that the roundel will fit inside it. I think it's a tad on the larg side now so I am going to cut it down a bit, but it would be nice not having to do that because it will be unpackable.

My main issue was once again the sleeves. I used the basic sleeve pattern from Construction Historical Clothes, but I'm not too happy about it. I'm starting to think that my sleeve fitting issues aren't just due to the sleeves though, I need to work with the shape of the sleeve head and the armhole as well. I definitely think that I need to work with a shallower sleevehead to fit my chubby upper arms. Since the sleeves aren't going to be visible in this gown I didn't feel like starting over with a new pattern though. This one works well enough.

Monday, 29 December 2014

Dye tests

So today I started to test different dyes for the gold handmaiden. At the semi-local craft shop, meaning it's in the Yellow/Sunflower handdye and one Orange/Goldfish hand dye. I was pretty sure that the yellow would be too yellow and the orange too red, but I hoped that a mix of them would give me a warm gold colour.

 I made three quite large swatches of the fabric that I'm going to use for the undergown, it's a cotton voile. I also considered this quite a learning experience, so I made sure to follow the instructions. The only thing I did was to halve the amounts of dye/salt/water.

It was really simple. I heated the water to 40C, turned off the stove but kept the pot on the plate. I added salt and the dye, and then the fabric. I stirred quite a lot the first 15 minutes, and then I had the fabric in the dye for another 45 minutes, stirring occasionally.

Here are the three swatches. The yellow is actually darker and warmer than I thought it would be, it's not very far off the colour I'm after. The orange, to the right, I could see immediately that it was going to be red. For the middle swatch I mixed 25 grams of yellow with only 5 grams of the orange, but as you can see the orange was way too dominant.

If I was making the handmaiden flame gown, then I would be really happy with the results, but for the gold handmaiden I need to experiment more. I have ordered iDye in gold ochre, hoping that it will work without any mixing, but I've also seen people who have commented on that it's a lot more yellow than it should be. I have also ordered more of Dylon yellow and Terracotta/Brown, to see if I can find a mix that is just a bit darker than the Yellow on its own.

These dye aren't wasted though, since I will start experimenting with the pleating on them,


Sunday, 28 December 2014

Draping a bodice

Today I started with the bodice for the gold handmaiden.  Looking at the original gown it's a fairly loose gown, mostly shaped by the obi. The thing is though that I don't want too much bulk under the obi, and since my bust is quite full I felt that it would be best with a fairly fitted bodice.

 This was the start, simply one square of fabric for the front, and one for the back.
In order to accomodate the bust I added a side dart. The vertical tuck started as a dart just under the bust and one dart from the neckline and down towards the bust.
On the back I folded a long dart from the top of the armscye and down towards the back. I simply just held up the excess fabric and pinned.


At this point I had started to just work on one side of the bodice, so I cut off the other half since it was now mostly distracting and making the "good" half hang funny. When I was satisfied with the fit I followed all the seamlines with a pen and also drew a seam line that dived the front into a front and side front piece.
I took the bodice off the mannequin and cut where I had marked the seamlines. I then cleaned up and evened out some of the lines, and the resulting pattern can be seen above.
The skirt was mocked up. I used my basic pencil skirt pattern, only lengthened to reach the floor, and I added a circle of fabric to the bottom.