Showing posts with label corset. Show all posts

Wednesday, 6 July 2022

HSM22 challenge 10s - my 1916 underwear

October: A Perfect 10: It’s the HSM’s 10th anniversary, so make something 10 themed. 10th century, the something-10s, something that incorporates 10 of something? Be creative with it!
The whole set with combinations, corset and petticoat

I have come to like the fashion in 1915-1917 more and more, and with the need for some underwear for my wedding gown it also gave me a reason to make a new set of underwear. I'm not going for an historical wedding gown, but I like the silhouette and want to make my wedding gown from that. Up until now I have made to with my Scroop Pattern Rilla corset that I patterned tested and an 1980's romantic skirt that I have turned into a petticoat. I had already made the Wearing History 1917 combinations, so now it was time for the rest of the underwear. 

When I pattern tested the Rilla corset I got the finished pattern as a reward. Since then Leimomi Oakes has made another set of sizes for the Rilla so that it now comes in size pack A, B and C. I had the size pack A and B, and I was just on the outside of the largest size in B. I still decided to try and work with that, instead of rebuying the pattern. I shouldn't have worried. The Scroop Patterns are really true to size, in fact I would say that they have a tendency to run a bit large. Every time that I have made a pattern and gone up a bit to be on the safe side I have had to take them in back to the size I should have picked from the start.

Since this is a pattern that can be bought I don't want to talk to much about the construction, it's all there in the very clear and good instructions. The only thing I get a bit worried about is to choose the length for the boning. I bought the boning before starting to sew and I picked the middle of the road in the size options given. It works, but if I hade sewn the boning channels first I would probably have chosen to have the back bones be the shortest option, they really go down deep on my bum. 

A thing that made the materials for the corset more expensive was that apparently it's impossible to find spring steel with plastic dipped ends in the EU. All the Swedish and contintenal sellers that I could find only had them precut and wanted you to put metallic end caps on them. I had to order the boning from VenaCava in the UK, and with Brexit that means that I also had to buy customs and toll cleareance for them.

The Rilla corset doesn't have a lot of reduction, it simply smooths out the curves. This makes it really comfortable. I am really unused to the longline corset though, and in that way I feel more restricted from the waist down, compared to Georgian stays or Victorian corsets. I definitely need to practice more about simply going to the bathroom, and being able to pick up the flap on the combinations so that I can button them to the front. I might have to adjust where I have placed the buttons on the combinations as well.

Since this is my wedding corset I made it from white coutil, and I also used gold details on the busk and lace. 

When the corset was done it was time for the petticoat, made from Scroop Patterns Ettie Pettie, that is designed to cover the time period 1900-1910 and goes really well with the Rilla corset. I loved the idea of making a really fluffy petticoat, and there are two ruffles with lace on the version that I made.


Inserting several rows of lace and using lace for the hems was tedoius, but I loved the result. There is a lot of lace, which is reflected in the price tag of the materials, there simply wasn't a lot of options when I wanted pure cotton lace. The lace also made the petticoat surprisingly heavy, considering that the fabric is a very light cotton batiste.

One mistake I made when cutting out the pattern was that I didn't adjust for my length. I have very short legs, but I'm used to being able to adjust the skirt length either at the waist or at the hem, which is possible when working with large rectangular pieces that are gathered to the waist. Instead of recutting the pattern pieces I made two tucks just above the first ruffle, which is a common detail on period petticoats. One of the pattern variations have similar tucks on the ruffle itself.


Another mistake I made was to simply don't read the full instructions. So keep in mind that you should mark out eight points and not just quarter points when it is time to gather the ruffle, and the outer ruffle is not attached exactly the same as the dust ruffle. The result was that the ruffle is not quite as evenly gathered as I would have liked, and instead of cutting away the fabric behind the lace covering where the ruffle is attached to the skirt I just sewed the lace over the seam as a ribbon. It works fine, and is an option in the pattern, but I really like the more delicate look when the fabric is cut away.


The one thing left to do now is to starch the petticoat to get it really fluffy and crisp, but that is for later in the summer.

The Historical Sew Monthly details

What the item is: - A corset and petticoat
How it fits the challenge: It is from the 1910s
Material: corset - 1 m cotton coutil, petticoat - 3 m cotton batist
Pattern: Scroop Patterns Rilla corset and Ettie Petticoat
Year: 1915-1917
Notions: For the petticoat -  7,5 m cotton insertion lace, 5,5 m hemming lace, elastic waistband, snaps, hook and eye, for the corset - 1 busk, 48 grommets and 24 spring steel bones in varying size, 1 m grosgrain tape, 6 m of corset lacing, 2,5 m bias tape
How historically accurate is it? I have follwed the instructions, so I think this one is pretty closee.
Hours to complete: one month for both
First worn: not yet
Total cost: $200 for both pieces

Monday, 21 March 2022

HSM22: Challenge 11 - fitting. The 1780s stays

 It took a lot longer than planned, and in the end I hurried them, but I did finish the 1780s stays.


One thing that stalled me was when I couldn't find eyelets with washers in the right side, so I had to handsew the lacing holes instead. Now here I should say that I deviated fromt he instructions and instead followed the instructions from Scroop Patterns Augusta stays, which have instructions for making historically accurate stays. It gave me the confidence to make the lacing holes and that they would be strong enough to hold for the lacing. The stays were then boned with synthetic whalebone, I was lucky to have a roll of it at home and it was just enough to get the stays and the stomacher boned.

I wore the stays at party on Saturday, where I managed to get from the party without a single photo of me in costume. While wearing them it was obvious that they were too long for me, they kept poking me in my armpit. 

It is possible to see the foldlines. Before wearing them again I need to cut the stays down to the foldline and rebind them. One good thing with the plastic boning is at least that it's easy to shorten them.

Here you can see that one of the bones even poked through the fabric.

Overall I am happy with the pattern, even if I need to adjust them. There were some instructions that were really helpful, like how to bind the tabs by machine, while others were a bit unclear. I did also use the Augusta stays instructions when I felt that I didn't quite understand or had the ability to use the pattern. I'm hoping that with some tweaking at the armpit they will become a pair of comfortable stays.

What the item is: A pair of 1780s stays
How it fits the challenge: Stays need to fit well, and they are necessary for the clothes on the outside to fit as well. This pair of stays show that a small miss in fit can be really bad. I tried them a lot when making them, but when I finally wore them for real they were too long and poked me in the armpit, so in the end I didn't wear them for the whole party I had made them for. So fit is important, and this is a reminder to not rush in the end, or think that "it won't be too bad, I will be able to wear them and then go back and fix it". 
Material: 1 m cotton twill, 1 m coutil, 1 m floral patterned cotton
Pattern: Redthreadeds front lacing 1780s stays
Year: 1780s
Notions: plastic boning, cotton bias tape for binding, sewing thread
How historically accurate is it? 50% 
Hours to complete: 1,5 months
First worn: at a party on March 19
Total cost: around $120


Saturday, 23 December 2017

The Rilla 1910s corset

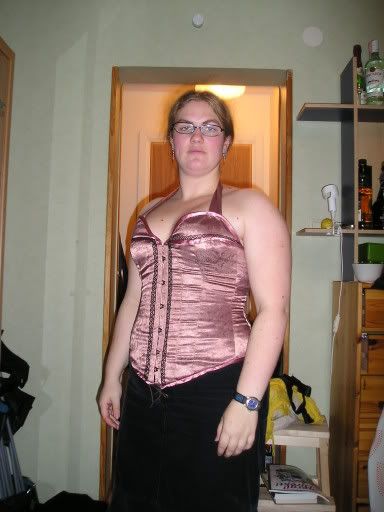
This was actually a Project that I spent most of my time in the summer with. I finished it and planned to take some nice photos of it, but it never happened. The corset is packed away for now, and the photos that I did manage to take are not really photos I would like to share, except for this one.

The reason why I made the corset is that I was offered by the Dreamstress to be a pattern tester for it. Since I have plans to someday make a 1910s outfit I felt it would be a fun thing to do, I was also honoured to be chosen as a pattern tester.

The reason why I have these quite ugly photos of me in them is because I had to send in photos together with my review of the pattern.

Overall I can really recommend the pattern for anyone trying out this era. I made sure to follow the instructions exactly as they were written, having done a few corset I could have jumped a few of them, but they were clear and I ended up with a corset with a perfect fit. In fact it was so perfect, according to the measurment instructions that I had to take it in a bit. It closes fully in the back, while I'm used to ending up with a gap.

Since I don't have a 1910s ensemble, I haven't been yet worn the corset for any length of time, but from the fitting and this photo session it felt really comfortable. It's definitely softer than what I'm used to from 18th Century stays or Victorian corsets.

A fun thing though was that when I took these photos I didn't have a shift around, since it's an underbust I needed something to make me a bit decent. Well I was at my mother's house, so in her storage I actually found a shift from my paternal great grandmother. The shape of it makes me pretty certain that it's actually an original piece from the 1910s. Now it was a bit too small fr me, but not worse than when I will start working on a 1910s wardrobe I will just add a small extension (1-2 cm) to the shoulder strap and I would be able to wear it comfortably.

If you want to make your own Rilla corset you can buy the pattern at Scroop patterns.

Wednesday, 13 August 2014

My outfit at the wedding

For the wedding I of course also wanted make something for myself. In my stash I had a piece of this wonderful gold/blue brocade that I had gotten from my sister and her (now) husband when they visited Cambodia and Thailand. It's gorgeous fabric, but I had really no idea what I should make with it. It's splashy with all the gold, and the fabric is quite stiff as well. It had always screamed corset to me, but I couldn't justify making another party corset, without knowing how much I could use it. Now when my sister decided to get married I felt that it would be a great opportunity to actually make something out of the fabric. My plan all along was to make a corset, skirt and jacket. The idea is that I can combine the pieces with other things, and then I might get more use out of them, compared to if I had made a cocktail dress out of it.

The skirt is B4451, the same pattern I used and tested for the HSF14: Plaid and Paisley challenge. The fabric has a very distinct border with three different rows of pattenrs before going into the main pattern of the fabric. Since this pattern ended with the selvage I didn't hem it but kept that selvage as the bottom of the skirt.

The corset is once again Truly Victorian TV110. I lengthened it a bit at the top, but if I'm making another corset that shouldn't be worn with anything under I would lengthen it a bit more. I couldn't lift my arms over my head without some serious spillage happening. For this corset I actually splurged out and bought a busk with gold fastenings. It just didn't feel right with the ordinary silver ones compared to all the gold of the fabric. The foundation layer is coutil and the boning channels are sewn between the brocade and the coutil. I've used two spiral steels on every seam, except for the back where I used spring steel around the grommets. It's bound with purple bias binding and I also used purple lacing. This corset has totally converted me to using spiral steel instead of spring steel everywhere but around the grommets. It's easier to move and bend in it, and it still laced just as tight as with the spring steel.

For the shrug I didn't use B4451, but instead a drndl-inspired pattern from an old Burda magazine. The fabric is some kind of shiny polyester that I stumbled upon when I discovered that there is actually a really good fabric store in Mora, only an hour or so away from here! I cut out pieces of the border of the fabric for the edging. The original pattern came with a very puffy sleeve, and I wanted long fitted sleeves. I decided to actually draft my own sleeve pattern for this. I used the instructions in Constructing Historical Clothes, and now I have a base pattern to work with for sleeves. It's not finetuned, and I definitely need to work more with learning how to shape the armscyes to make the whole sleeve fit better, but it's a better start than in a long, long time when it comes to sleeves. I should also say that this took a lot of trial and error, and at 00:30 the night before the wedding I cut off the sleeves that I had worked with and started over. For that reason the sleeves aren't lined and I couldn't find any buttons to close the cuffs.

Now as I mentioned in the post about the wedding I didn't get any photos taken with me and the bride, or even of myself.

Here I've dressed up my dressform in the outfit, and I could only pin the corset on so you can't really see the fit. It's also quite wrinkled and crumply after a day/night of dancing and being thrown into a bag when I decided to skip the corset and shrug and continue with just a tanktop and skirt.

My sister got a shot of the people waiting outside of the church, and it's the best I've seen of the outfit on me, unfortunately I'm in the shadow and holding my bag in front of me.

The facts
Fabric: 2 m of gold/blue brocade, 1 m of white coutil, 2 m of poly satin (?) (it was good that I had bought some extra when I needed to redo the sleeves), 70 cm of blue lining for the skirt.
Pattern: Corset - TV110, skirt - Butterick 4451, shrug - Burda drndl bolero and my own sleeve pattern.
Notions: busk, spiral and spring steel boning, bias binding, lacing, zipper
Hours to complete: 3 days
First worn: my sister's wedding August 9
Total Cost: The main fabric was free, since it was a gift, most of the cost was for the coutil, busk and boning. In total I end up with probably around $70

What I learned with this project
I drafted my own sleeve! It's not perfect, but it's not worse than any of the commercial sleeve patterns that I have used. I have written quite a lot of comments on the sleeve so when I implement them I hope that I can finally make nice looking sleeve.

Future plans
Now when I've made this outfit I want to use it again. I happen to be invited to ball, it's the 375th anniversary for a student organisation I was part of, and my first plan was to use some of my old ballgowns from those days or one of my 18th century gowns, now I'm thinking about using this corset and shrug and sew a late 19th century inspired skirt for them.

Fun story from the wedding day
The wedding was in the afternoon and I was going to deliver the wedding gown to my sister when she was at a hair salon in town. I did that, and then of course we wanted to eat lunch, something that was easy and not too messy. I ran down to a sushi place dressed in this and when I came in the women working there immediately recognized that the fabric must be from Thailand/Cambodia, it's apparently quite a special pattern on it.

Friday, 14 March 2014

Pattern review: Reconstrucing History 833

I have used this pattern twice now and since it is one of the easiest commercial patterns to obtain I thought that I would make a kind of review of the pattern.

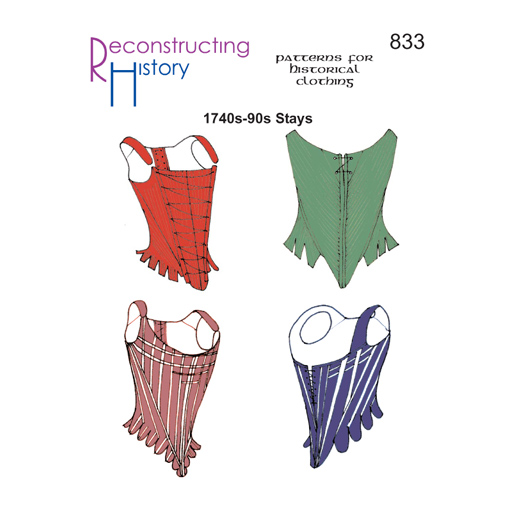
Why did I choose this pattern? As I said it was easy to find, in a good price range. I also liked the fact that it included four different corsets, so that I could make a pair of stays that fitted different time periods.

Paper quality: The pattern is made on a quite sturdy sheet of paper, there are no problems trying to fold it back into the envelope. All the pieces are on just one sheet. I have noticed that the ink has started to fade though after a couple of times being taken up and folded back again.

Instructions: Now I have made my fair share of 19th century corsets, and I have also tried to make my own pair of stays, as such I maybe didn't read the instructions as thoroughly as someone who's more new to sewing might do. In the end I didn't find them quite clear, and they are mostly instructions for how to handsew the garment, so I didn't follow that at all. One thing they are definitely lacking are instructions for boning placements. There are a couple of drawings on different kind of boning and some written explanation, but nothing is marked on the pattern pieces. My first pair of stays ended up in an earlier style than I had planned, just because I put the boning in the wrong place, for my second pair I looked at a lot of pictures from other places and just took a chance with the boning placement. I would also have liked to have the use or non-use of seam allowances clearly stated.

Pattern pieces: The pattern pieces are easy to trace, there are no markings except for "on fold" and grainline. I would have like to get some more information on where the pattern pieces should be attached to each other, especially since it's quite a big difference in length between them. I tried to figure out where the waist was on all pieces and tried to get those to match each other at least. The pattern also runs large. Since there are no markings on the pattern pieces for seam allowance I added seam allowance for my first pair, and it was not easy to alter that. For my second pair I had found a byline in the instructions about a seam allowance of 3/8" (0,95 cm), still I had to take them in any way and ended up using a 2 cm seam allowance and they still lace up fully closed in the back.

The pattern also calls for a mockup in cardboard or paper, where all alterations and markings should be done before cutting the fabric. I skipped this step, but I still think some more markings would have been good.

All in all I think the pattern is a good base. If you don't want to draft your own or enlarge something for a book this pattern will give you a good basic shape. It's not a pattern that you can just cut out and use though.

RH 833, wide front, wide side an regular back


Thursday, 6 March 2014

HSF 14: Under it All

I need a new pair of stays for my 1787 revolutionary gown. Since the challenge due March 1st is called "under it all" I felt that this was a good chance to really get going with the project. The bad thing is that I'm right in the middle of a month when I simply don't have much spare time. Sunday was a day when I didn't have anything planned though so I sat down  and focused on getting as much done as possible.

There are two reasons why I need a new pair of stays, eventhough I'm really happy with my other pair of stays. The first one is that the silhouette is a bit too early, eventhough I aimed for early 1780 with them they look more like in the middle of the century. For the quite extreme shape of the late 1780s I wouldn't be happy with them. The other reason is that, well the old pair of stays are blue and purple, and my revolutionary dress will be in a very sheer cotton, so I needed something that is a bit more invisible.

For the pattern I decided to go for the Reconstructing History 833 again, but this time I cut out the wide front and wide side pieces. All in all that means that there are only five pieces in the stays, front, sides and backs. For the strength layer I used cotton canvas, and then I had an unbleached linen for the outer fabric. At this point I didn't plan on any lining.

I definitely have issues with the pattern, and it runs large. Now I used a 2 cm seam allowance instead of the recommended 0.95 cm (3/8") and they still lace up fully closed. I've disregarded the instructions, but it would be nice with some kind of markings of where the pattern pieces are supposed to meet. I also find that the instructions really don't say much about boning placement, so in order to find that out I looked around a lot on pinterest to find references, both to original garments and reproductions. I gathered some of them on my underpinnings board. It will be interesting to see how the stays fit with boning placements that I chose, since it feels like quite a lot of guesswork and taking a chance. I used plastic whalebone for most of the boning, but where I could find suitable lengths of spring steel in my corset box I added that. The stays are halfboned, which is also a new thing. If it turns out that the plastic whalebone isn't strong enough for my body shape when it's used in halfboned stays I can probably change them to spring steel.

For practical reasons I've done quite a few deviations from historical accuracy. First of all it's fully machine sewn, I'm really not ready to make stays by hand yet. I've used metal grommets for the lacing, since I want it to be sturdy, and it's also quicker. I also chose to go with standard corset lacing instead of the accurate spiral lacing. I need to be able to get in and out of the stays by myself, and that is so much easier with corset lacing, especially since there isn't an opening in the front.

I think my shortcuts lowers the historical accuracy to around 40%. The materials and style is accurate, but not the construction.


At the last moment I also decided to add a lining. I had a beautiful light purple cotton, and since the outside is plain I wanted something fun for the inside.


My overall satisfaction with this project is so,so. Considering how little time I had I'm happy with the quality of the construction. It will work fine for this year's project, but I think that for the long term I will need to make a new pair, and in a smaller size.

Just the facts:

The Challenge: Under it All
Fabric: cotton canvas, unbleached linnen, printed cotton (from stash)
Pattern: Reconstructing History 833
Year: 1780s
Notions: plastic whalebone, spring steel, grommets, cotton bias tape, lacing, sewing thread
How historically accurate is it? 40%
Hours to complete: 12
First worn: In the house
Total cost: $20 (the fabrics are new, but I bought a lot more of them than I used for this project, everything else from the stash)

Sunday, 26 January 2014

shopping for materials

It's that time of the month when I have received a new paycheck and it's time to order the stuff I've been daydreaming about. I also had my sister over a couple of hours. She wants to make her first corset, so we ordered things for that as well. She isn't going to do an historical corset, but she is going to use Truly Victorian 110.

When the stuff we delivered arrives I should be able to start on my new pair of stays, and also have the material needed to start with the 1787 revolutionary gown.

Also I told her not to order any boning until she has finished sewing the corset together, so that she will now what lengths she need. That means that she needs to make another order, and I'm hoping that I will be able to order everything that I need for my gigantic hat to wear with the revolutionary.

Well, I'm excited, and I can't wait until the materials get delivered. I might start with cutting out the pattern for the stays though, since I'm going to use a new version of my Reconstructing History pattern.

Saturday, 25 January 2014

Time to loose the corsets

Today I have done something I have thought about a long time, but it has still been hard to really do it. I decided to go through my corsets and simply get rid of some of them.

Here are the corsets that I've made through the years, most of them have been paired with skirts to make ball gowns.The reason why it's been hard to go through them is that I still feel quite attached to them. Here's the story behind them,
Upper row from left to right
1. My copper corset. This was the second corset that I ever made. The pattern is Laughing Moon's Silverado. 2006
2. The silver corset. I found the fabric in the fabric district in LA. This is probably the best corset I've ever sown. I've used it both for a ball and under my 1860's gown. This is Truly Victorian 110, which is my favorite pattern. It was also the first time I tried to work with flossing. 2008
3. White/blue. For this one I overestimated my skills. I made it into a wearable state, but never finished it. I was probably very lazy when cutting out the pieces because when  I wore it felt lopsided, and my back started to hurt. I wore it under my 1880's  walking gown, but never more. The pattern was this free pattern from 1869.   2006
4. Black brocade. With this corset I learnt the difference it makes to work in a stiff fabric. The fabric was a black brocade, and it was the first one that I made that didn't wrinkle horribly.
Bottom row from leftto right 2006
1. Green underbust. My one and only underbust corset. I made the pattern myself by heavily adjusting a drndl-bodice from Burda Magazine. I wasn't happy about the shape it gave me, I think it looks so much better with an overbust than an underbust. I wore the corset over my Arwen gown to make it a ball gown. 2007
2. The first one. This pink corset was my first ever try at making a corset. As I posted about here I wasn't happy about it,  but still it was my first. I thought I had gotten rid of it, but I found it at the bottom of my corset box. The pattern is Laughing Moon's Silverado..2005
3. White brocade. This corset isn't badly sewn, it's just that the fabric is so horrible. I bought it on ebay, and instead of getting a satin brocade, the fabric has a feel that is more like a shower curtain, so it wrinkled like crazy. Laughing Moon's Silverado. 2006

So I took a closer look on the corset and decided to throw some of them away. I wanted to recycle some of the materials though, so I ripped away the busks and some of the boning. This mostly happened to the older corsets. At that time I didn't buy precut boning, so on some of the bones the endcaps fell off when I pulled them out of their channels. I also had to throw out some of the boning and one of the busks because they had been permanently bent.

In the end I decided to save these four corsets. The copper one has a piece of boning that has gone through the binding. Both the green and that one have been used for some masquerades, and the copper one is great for dressing up as a mine ghost. Since I also have a tendency to be asked about if I have some costumes to lend out I felt that it's still a chance that they might get used. The silver and black brocade were saved because they are well made. I need to try them and see how they fit though, .since my weight has gone up and down quite a lot since I made them. Then there is the material that was saved from the corsets that I got rid of; two busks, some boning, corset lazing, a blue sating ribbon and some pearl applique.

And when trying to date the corsets I found these pictures of me wearing them to different balls when I was a student in Uppsala, where balls are quite a big thing, and I made sure to always have a new gown each semester.
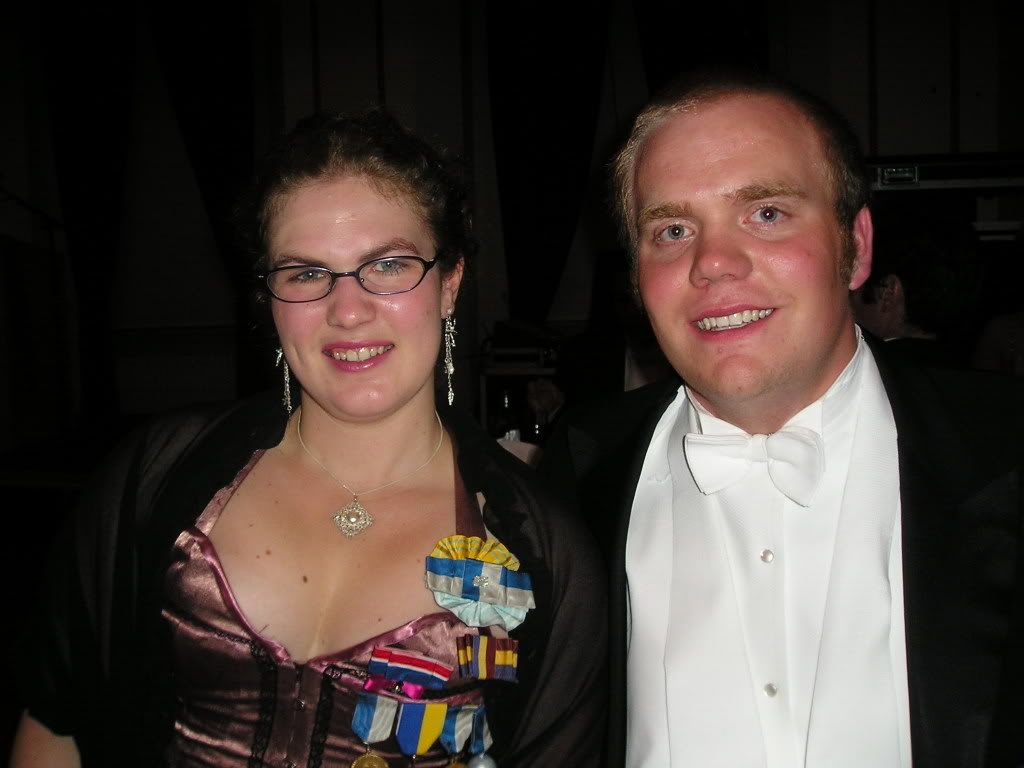
Me and a random guy I was placed beside at the table. I wore a simple black skirt under the corset.


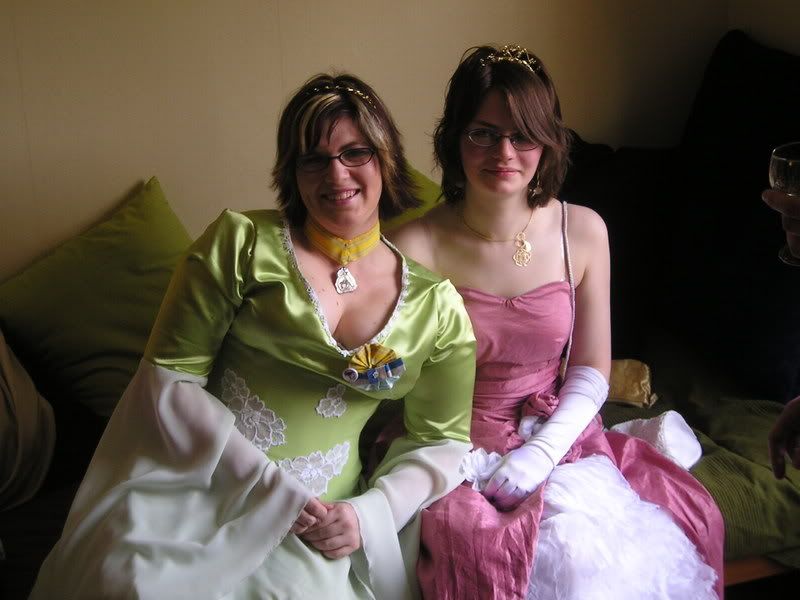
Couldn't find a full figure photo, it was worn with a blue satin circle skirt where I had pinned up the hem and added silver bows to.
Using the copper corset to dress up as the Lady of the Mine/ Mine spirit

Saturday, 7 December 2013

A pair of stays (18th century corset)

Individual pieces, with the boning channels
This winter I realized that if I wanted to go on and make proper 18th century gowns, then I needed proper underwear. I ordered a corset pattern from Reconstructing History, and material from my favorite corset supplier, VenaCava Designs in the UK. I wasn't too impressed with the pattern. In the end I didn't care much about the instructions, but rather followed my instincts and what I have learnt from years of making corsets. One thing that the pattern wasn't clear on was the boning placement, so I improvised and I'm not totally happy about the final result. If you buy a pattern from Reconstructing History you should be aware that they run big. Instead of just picking a size, I made sure to measure my upper body and then pick a size. Still the stays ended up too big, so I had to take in quite a lot from the side seams. Not an easy thing since I had made all the boning channels before sewing the pieces together. I had aimed for a gap in the back of about 10-15 cm, instead I just have a gap of around 5 cm, so if I loose weight I might not be able to adjust it much.

I will say though, that even if I sound critical I'm really happy with the quality of my work and the final look of the stays.


Finished stays
For the strength layer I used heavy cotton canvas, and the outer fabric is a piece of fabulous silk brocade that my mother bought when she visited China in 1992. I just had a scrap left, but it was enough to make the stays. For the first time I used synthetic whalebone for the boning. Up until now I've been weary of using plastic, having preferred to use steel boning. The synthetic whalebone works great though. The stays are fully boned, I can't guarantee that it would work as good on half-bone stays. I also used steel boning around the eyelets in front and the back. The eyelets by the way are not accurate, I simply used metal grommets instead of handsewing the eyelets. Metal grommets do hold up better in my experience than handmade ones.

Me with the stays one
My next historical costume will probably be a white gown, so I might have to do new stays, since the strong purple colour might show through the white fabric. If I make a new pair of stays I will definitely change the placement of the boning, so that they go more diagonally in the front, in order to get a better 18th century shape. To me the final shape of the stays are a bit early, more baroque than late 18th century. They do wonders with my boobs though.

Sunday, 10 November 2013

Nini Legs-in-the-air Windmill gown

So as mentioned previously I wanted to make a proper cancan gown. The plans were great, the execution not so much. I used decent fabric, but I couldn't get the bodice tight enough, so wrinkles. I never had time to finish the ruffles on the petticoat, and there are a lot of loose threads everywhere, since I just tried to zick-zack the edges of the fabric and cut off most, but definitely not all of them. There are windmills on the skirt, but they look quite crooked.

Original costume
November 2005

Status: non-existing

I still have the petticoat though, and it's a great base for fantasy/gypsy-inspired costumes.


Friday, 8 November 2013

First corset

After 2005 I thought that I wouldn't do that much Star Wars costuming anymore. Me and a friend decided to make can can gowns for a ball though, and I realized that it was my chance to make a costume from one of my favorite costume films: Molin Rouge.

First step was to make a corset though. The friend and I ordered a pattern, from Canada I think, and after much looking we found a place in Sweden where we could order steel and busks for the boning of the corsets. The pattern is Laughing Moon's Silverado. I made a lot of rookie mistake with this corset. First of all I didn't cut the pieces carefully, meaning that the lining and the outer layer weren't exactly the same, which meant that the corset got really wrinkled. Also when I first tried it on I panicked when I couldn't close it, so I added an extra panel in the back, which of course meant that when I laced it properly it was too big. Still it was my first try with a corset, and I was definitely hooked on sewing corsets.

October 2005

Status: Non-existing.

It was last seen when I lent it to a guy for a performance in a student show (studentspex) in 2006)