Showing posts with label trim. Show all posts

Sunday, 4 June 2017

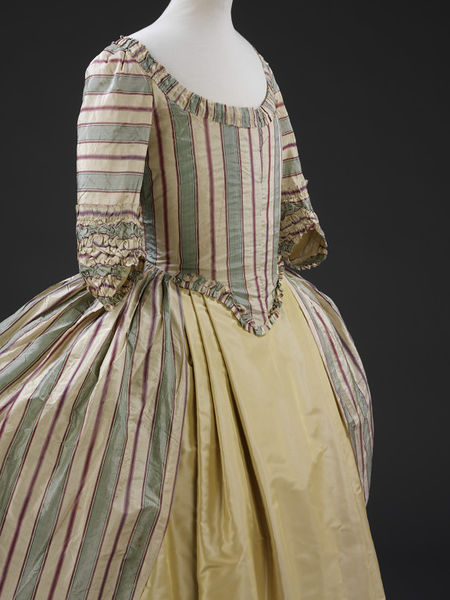
The finished pet en l'air

or what a difference some trim makes.

After I had finished the main part of the pet en l'air I started to think about how to close it and trim it.


I'm still hoping to loose some weight, so I wanted to make a closure that can easily be adjusted. So I decided to use ribbon bows, with a stomacher under it.

For the stomacher I simply statrted with pinning a piece of scrap fabric in the gap and cutting it into a nice shape. I realized that such a Sharp point would be tricky to look nice, so I made it more rounded. 
I cut the stomacher in two layers of fabric. The underlayer is a sturdy old tablecloth in some kind of linen blend, and then the outer fabric is the same as the main jacket. I folded the edges toward each other and sewed them together. The stomacher has no boning and is made to be pinned to the jacket.

Then I took what remained of the fabric and cut it into strips. I pleated it directly onto the pet en l'air while it was on the dressform. I had to be quite generous with the spacing between the pleats, because there wasn't quite as much fabric as I wanted left. In fact this is all that remained of the fabric that I had bought.


I also sewed three pairs of ribbon on under the trim. There are no robings on the pet, but the trim acts as robings to hide where I've attached the ribbons and will pin the stomacher. One reason why I didn't do robings is because the fabric is so thick. It's close to an upholstery fabric, and I felt that it was better to go for trim than robings. And then the pet en l'air was finally finished.


I love how the trim turned the pet en l'air into quite and frothy little cupcake. It was well worth the work of putting it on.

Thursday, 30 January 2014

HSF14 - Challenge 2: Innovation

Challenge 2: innovation To celebrate the way inventions, introductions and discoveries have impacted fashion, make an item that reflects the newest innovations in your era.  Be sure to share the research you did on your innovation, as well as your finished item.

Ok, so this is a bit of a stretch, but rather than just choosing an innovation that changed fashion, I found it interesting to see how the history of this thing has been affected by innovations. The innovation I chose to focus on was bobbin lace. The stretch is that I've chosen to use the innovation for an era around 200 years after it was invented.

First though some background and family history. In my stash I have many meters of lace, quite a few worn out pillow cases with lace and other bits of pieces with different kinds of lace and decorations on them. These come from my great grandmother on my father's side. My great grandparents were quite well off farmers, according to my father they were the kind of people who never spent anything unless necessary, and made as much as possible at home. My great grandmother was skilled in the crafts needed for woman taking care of proper household. . I can't be 100% sure, but I'm pretty certain that all these of lace are probably made by her, which would date them to the early 20th century.

Lace has been made since antiquity using just a needle. In the 16th century bobbin lace was invented. When doing bobbin lace you bound the yarn up on bobbins, hence the name, and then you twist and turn the threads in a pattern, the lace that is made is wound up on a lace pillow. With bobbin lace it was possible to make a lot more lace, and work a lot faster, than with just a needle. The fashion exploded with lace, and several regions in Europe came to be famous for their lace-making. This continued up until the early 19th century. Then the first mechanical lace machine was invented. At first this led to the bobbin lace makers only making their laces more and more complicated, since the early lace machines couldn't do too complicated patterns. In the end though bobbin lace was replaced by meters and meters of machine made lace. The bobbin lace retreated into a craft for women to do in their spare time, and the laces they made were not fine enough to put on clothing. Except for in folk costumes, the home made bobbin lace was no used to decorate things for the homes, table cloths, bedlinen and so on. This is where my pieces of lace come in, they are prime examples of this kind of lace decorated bedlinen to which the bobbin lace had been relegated.

For the HSF challenge I decided to make this bobbin lace return from the bedroom to the salon, so I've made a pair of flounces that I will be able to use with my 18th century gowns.

This is the piece that I wanted to use. It's a very soft fabric, I don't know if it's worn or if the fabric was this soft from the start. The piece has been cut up, probably to just save the lace at the end, there were also some small holes in the middle of the piece.
Here's a closer look on the lace. The piece, I think it's been a pillow case, is sewn with a machine and I can't help but wonder if it was made on the old treadle machine that I remember standing in a corner when I grew up. Today I would have loved if we had kept it, so that I could use it.
The piece wasn't very wide, just enough so that I could cut it in half to make the flounces. So I cut it in half on the width and then cut off the excess fabric on the top. I sewed it together to form a tube, and hemmed the top edge.
Here are the finished flounces. They are not something that I would wear to a very fancy gown, but they will do really nice with some of the more "casual" gowns. For now I've attached them to my anglaise of printed cotton.


Fabric: An antique pillow case with bobbin lace

Pattern: none
Year: 18th century

Notions: regular sewing thread

How historically accurate is it? Not very. Except for the lace itself it's all made by machine, and the pillow case wasn't wide enough to make very flowy and wide flounces. Still they do well to masquerade as 18th century pieces

Hours to complete: 40 minutes

First worn: never

Total cost: $0 - all from my stash

Monday, 13 January 2014

HSF14 Challenge 1 Make do and Mend

The challenge: Make do and Mend
Snow White (October 2013)
 Let’s start of the year with a clean slate, and with a bit of a tidy up.  Use this challenge as an opportunity to get your historical wardrobe in order by fixing any little bits that have worn out and gone wrong. 

For the first challenge of the year I decided to go over my Snow White gown that I made this autumn.

It was a masquerade costume and I wanted to turn it into a more "normal" 18th century costume, also even though it was the newest one I had noticed some things that I wanted to fix.

I started with removing the cape, collar and cuffs. That was simple since I had just tacked them on.


At the bottom of the bodice I had had problems with the silk starting to unravel at the edge, when I had fixed it the white lining had become visible. The neckline was also a tiny bit too wide, meaning that I had to worry about showing too much of my breasts all the time. None of this was about construction, but rather more about hiding the imperfections. The Snow White gown was also quite plain, and the only trims I had were the cuffs, the cape and the collar. I decided to go all out and hide the bottom edge with some trimmings, as well as raising the neckline a bit.


bottom of bodice with the visible white lining.
Thankfully I still had saved the bigger pieces that remained of the blue silk taffeta, so I started to cut it up into strips of fabric. My plan was to make a box pleated trim, similar to this gown. You can see the trim at the point of the bodice and along the neckline.

When I had cut the strips of fabric I felt faint when I thought about the amount of tiny hems I would need to make, and decided that that was simply not feasible. Also a hem would make the whole trim bulkier than I wanted, and I've never seen fray-check or anything like that sold in the stores around here. Thankfully I remembered an advice I heard in Kalmar, when the horrors of hemming and trimming many meters by hand were talked about. I can't remember who said it, so I can't give credit to this person, but I am very thankful for it. The advice was to use regular wood glue, but mixed with water to thin it out. Thinking about it I guess one reason why wood glue works is that it's supposed to bond natural fibres, so it won't hurt the textile.


The wood glue worked fine. I mixed the glue with the water until it was really thin, but still had a white colour, then I simply brushed it onto all the edges. First I was quite hesitant and made sure to only brush the edge of the fabric, but after a while I used the full width of the brush. When the glue/water had dried it was invisible and the edge didn't fray.


Then it was on to cutting strips, painting the edges and doing all the box pleats.

I didn't measure my pleats exactly, so they are a bit uneven, but that is something you can see on original gowns as well. I tried to keep the pleats to about the same width as my fingers. Since I was going to sew the trim on in the middle I also secured the trim with some stitches along the middle of the trim, before removing the pins and pressing the whole piece of trim flat. Then I pinned the trim onto the gown and sewed it on by hand.

I'm very happy that I did have enough fabric so that I could go al the way down the sides of the skirt of the gown, as well as replacing the red cuffs with this new pleated trim. I had removed the white small flounces at the sleeves together with the cuffs, I sewed them back on, and all of a sudden they were a lot more visible.

I can only say sorry for the bad photos, I didn't feel like getting all dressed up, and since I don't have a dressform I just put the robe on the floor and snapped some photos.


 The new ending of the sleeve with a pleated trim and a visible flounce.

 The full robe with the trimming along the neckline and the front (with flash)

 The full robe with the trimming along the neckline and the front (without flash)

Fabric: blue silk taffeta
Pattern: none
Year: ca 1780
Notions: wood glue, polyester thread
How historically accurate is it? The trim itself is accurate, but I doubt that they used wood glue and polyester thread.
Hours to complete: 10-15, and most if just sitting and doing the pleats
First worn: never

Total cost: $5 for a small bottle of wood glue, the rest was from my stash.

What did I learn with this project?
The handy thing of using wood glue for the fabric edges instead of having to do tiny hems or cut with my modern pinking shears when I want to do trim will definitely come in handy in the future.

I also saw this as my first try with doing box pleats, and it wasn't much harder than the knife pleats that I usually make. This was my first try with doing box pleats, and with silk taffeta, so in a way it was dry run for when it's time to start on my Gold Handmaiden gown. I definitely want to use the same kind of fabric for it since it was easy to manipulate into straight creases and pleats.

From now on when I talk about this gown I'm going to call it my navy anglaise rather than Snow White.