Showing posts with label everyday wear. Show all posts

Sunday, 20 September 2026

A cute autumn dress (Scroop miramar)

 This year I haven't sewn as much regular clothes as I did last year. One reason is that I haven't felt that I have needed so much new clothes, another has actually been that I feel that as much as I love the N'gaio blouse pattern, I got a bit bored with it. I needed something more to be a base pattern for small everyday projects. Once again I turned to Scroop patterns. I like them a lot, as is probably obvious from my other posts, but I am also now quite used to sewing them so I know that they work, I know my size and I know that I will understand the instructions without having to think too much about how it should go together. 

Earlier this year I bought the Miramar pattern. I liked that it was versatile, being able to be used both as a dress and top, I'm personally not a tunic fan, with two sleeve lengths and that it had an interesting neckline. When I make my own clothes I want them to have something that makes them different from something I can buy in a store, some kind of detail and this was the neck. It is also made for knits, and have instructions for how to sew in knits with a regular machine. I mostly wear soft and knitted clothes, so having a base pattern that is made for knitted fabric is really good.


In the summer I for once happend to pass a physical fabric store so I picked up this fabric. At first my plan was to make a top, but I realised that I really wanted it as a dress so changed my mind. The Miramar pattern is not the most conservative when it comes to fabric needed. Part of its simplicity is that there are only three pieces, two fronts and one back, but with the sleeves cut in one with pieces a long sleeved dress takes in my size takes almost 2 m in my size. It is also a pattern that is not suited for obvious ups and downs with the suggested cutting layout. This fabric had the cute cherries and on the front they are hanging down, but on the back they are facing upwards instead. 

The boring part with sewing, if you ask me at least, is cutting out the fabric. But that is why I love our cosplay group meetings every week, nowadays we are in a school crafting area with full access on the sewing side to sewing machines and a good cutting table. So when I don't have obvious projects that I work on I have started to bring fabric there, and I can cut them out and take the cut out pieces home, so when I feel like sewing I can just bring them out and start with the fun part - the sewing.

I cut the pieces out some week ago and this weekend I could sew them together. The pattern is really simple, the only fiddly bit was to figure out how the facing should be attached, but when I just followed the images it worked out fine. When attaching the facing it is a good thing to pin it in place before sewing. I had to make that seam smaller than suggested, and it would not have been fun to unpick the stretch seam.


As usual from Scroop pattern I enjoyed sewing it and it went together like a charm. One mistake that I did was that I wasn't attentive and missed that when I used a knit stitch on my machine it shifted the needle position, so the back neck seam got a wider seam allowance before I realised it. That's probably why I had to fiddle a bit with the neck facing as well, but it didn't change the size too much. The only modification I did was to lengthen the sleeves as much as possible, by simply drawing straight lines from where the pattern ended to the edge of the fabric. I am not a fan of 3/4 sleeves and this way I could get them a bit longer at least.


Saturday, 11 July 2026

Two soft summer hats

 I am the kind of person who just can't handle contact lenses, last summer I tried and tried, but apparently one of my failures in life is that I just can't get them into my eyes, and my eyesight is such that even when I could get them in I couldn't see good, just better than withouth. Meaning I could just handle a phone with the lenses in, but I could not drive with them. So I decided that it wasn't worth the frustration, and the money for buying lenses, and I have to go with glasses, and be half blind when in costumes where the glasses don't fit. Since I am also too cheap to buy corrective sunglasses I felt that I needed a summer hat this season to get some shade. Over the years I have loved big summer hats, but to be honest they get lost, the blow off or I simply don't use them because they are too big. I needed something smaller and softer, but I didn't just want a bucket hat. Well I decided to make a hat and went to search for a pattern online.

I found this pattern from Notches Sewing studio on Etsy.  Etsy today is unfortunately full of AI slop and it important to go through the profiles and see if you can find a real person behind the store. This pattern was a bit more expensive than the cheapest patterns, but I liked that it was more than a bucket hat and the fact that there was a youtube tutorial showed me that a real person was behind it. 

For fabrics I went into a local op shop and found some cottons, including two curtains with some stains on. I couldn't really decide on what I would do, and since they cost a total of $10 I bought all of them. I had to buy 1 m of medium weight interfacing, but that was just enough for both hats. In total material and patterns costed around $40, and the fabric I have left will be great to make toiles out of.

My first colour choice was this blue version. The blue was some kind of poly/cotton sateen, with quite a nice shine to it.
A downside was that it felt quite paperly and crumpled quite a lot. 
The pattern is marked as beginner/intermediate. Now there are no written instruction, just the youtube tutorial. It is an easy pattern, and for me it would have been nice to just have some written instructions so I didn't have to stop and play the video all the time. The second hat I made I didn't have to follow the video at all though.
The pattern is one size, and it fit me really well, I think I am normally a size 56 in hats, I have quite a medium sized head.
The pattern is easy, but it is a bit fiddly. In order for it to look good you need to be comfortable with sewing round pieces to each other, and to make topstitching. It is optional to top stitch the brim, but it really helps to make the brim steadier than when just relying on the fusible interfacing. I found it was quite wiggly to attach sew the pieces together when I was working with several pieces that were interfaced. Not hard, but wiggly and fiddly.

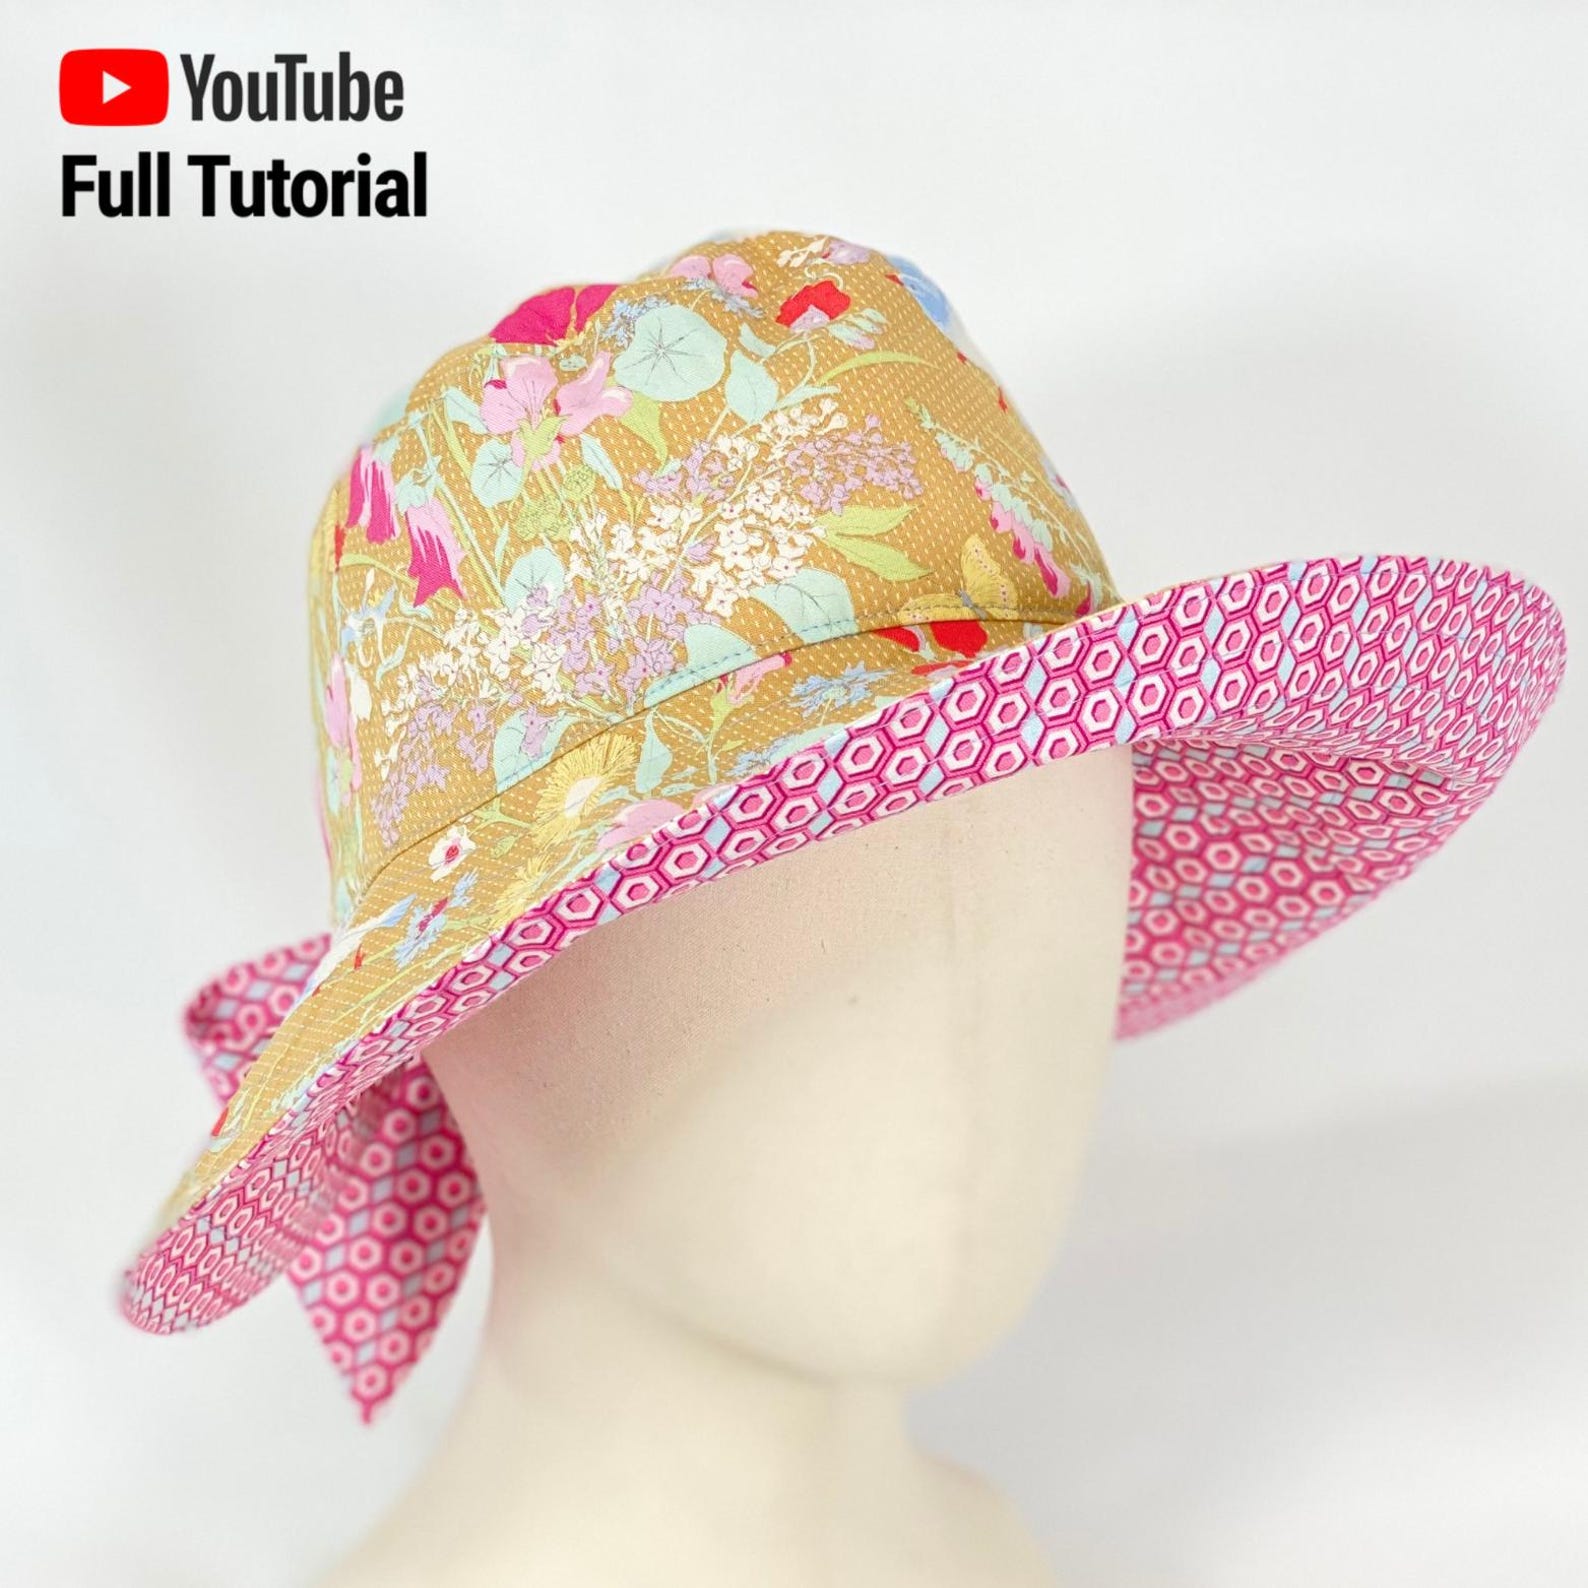
The other hat I made was in a more subdued colour palette, with a sandcoloured outer fabric, and a softer lining. Now the hats are reversible so it is possible to just turn them inside out if I want the flowers on the outside. The brim is steady enough with all the top stitching so it is possible to shape the brim and it keeps that way.
And this is the size of the hat on me, and not on the tiny styrofoam head.

Now I have to summer hats, and it took me one evening and one morning to sew them together.

Friday, 2 January 2026

2025 recap part 1 - a year of 1930s and yarn

 2025 took a strange turn for my costuming and crafting. Before going into this year the 1930s was a decade that I considered had a lot of elegant clothes, but not a style that would suit my body type. I also was still firm in my opinion that I really disliked working with yarn. Now looking back this is the year when I started bying yarn and most of my projects were 1930s related. I will split this recap into three parts, everday wear, cosplay projects and historical costuming. Since as usual it felt like I didn't do much, but when starting to summarize the post turned out to be too long.

My costume plans for 2025 were 

  • more cuff warmers
  • one or two tops or blouses for everyday wear
  • Toadette from Supermario
  • A lengberg bra/supportive kirtle
  • Female tusken raider
  • and for my husband a 16th century shaube

I also went into 2025 with a challenge to myself to see if I could go a year without buying any new clothes, with the exception for clothes that I can't make myself. I didn't really make this public, since I didn't want to make it into a big thing, and also to not be too disappointed if I didn't succeed. Now I can say though that the only pieces of clothings that I bought this year were a pair of jeans (I can't make them) and sports wear. I did make quite a few pieces or my self to wear for everyday wear, and that is definitely a new category of sewing for me.

I started out the year with a gothrough of my stash and UFO pile. Before my weight started to fluctuate I had cut out the pattern pieces for this dress. Today it would probably not have been a fabric that I had chosen and the pattern included very large ruffled sleeves. I used the sleeves to cut out some narrower sleeve and a waistband to make it longer in the bodice, and this turned out to be one of my favorite pieces of clothing of the whole year. - The post about the dress

When summer came along I really wanted a new summer dress, so I made this. I still think it's very cute, but the fabric was a bit too prone to wrinkling and wasn't as comfy as I thought, so this became more of a special occasion dress than the carefree summer dress that I had planned. I am still happy with the result. The post about the dress.


I wanted to find an easy, but still a bit special, top/blouse pattern that I could make a lot of variations from, and still look more unique than if I had bought. The Ngaio blouse pattern from Scroop Patterns turned out to be like that and in the end I made four different tops, that I used a lot the whole year from it. the favorite being the long sleeved version. I made a post about the first blouse, but not the others.


The pattern also led me into 1930s fashion, and I also added a 1930s black skirt, that turned out to be the year I used all summer long at work. The post about the skirt.


I finished the year with a festive 1930s blouse from a vintage pattern. The post about the blouse


As for the cuff warmers that were also on my list, well I did make a pair of cuff warmers, but not the embroidered ones that I had planned, but rather a pair using sprang technique.


I can also add this sprang cap/hat to the list of items that I did for everyday wear. The post about the hat

As I sad I would never have thought that I would do this much 1930s clothing and then add some pieces in sprang, meaning that I who have always hated knitting and crocheting all of a sudden found myself enjoying working with yarn.


Sunday, 8 June 2025

A cute summer dress - Burda 6133

 Sometimes it's fun to just do something without a great plan or deadline. Since I have said that I will try to not buy any clothes this year and summer seems to be finally showing up I really wanted a new summer dress. My favorite dress of the last few summers is definitely too big now, I can wear it belted and I will see if I can take it in, so when I set out to buy wadding for project Toad in the only fairly local fabric store, I also decided to pick up something that would make a nice dress.

First I needed to find a pattern. I wanted a base pattern that wasn't too complicated, but still more interesting than just a sack with a belt. I also wanted a pattern that I could see myself modyfing and working with to make other dresses. In the end I went with Burda 6133. I liked the flare sleeves, but I could also see how I could change them for more regular sleeves. The panels in the skirt and the bodice also added interested and I could see how I could combine different fabrics for the bodice and the skirt for example.


I picked up the fabric in the store, and this is what really is the joy of physical shopping. I am normally not very fond of florals, but this was a more modern floral, and the colours matched my har perfectly.

The pattern was a dream to work with. Burda nowadays does a lot of its patterns as e-patterns, so I bought it and printed it. The pieces weren't terrible large, so I didn't have to tape too many pages together at ones, that also meant that it was fairly easy to place on the fabric and cut out as well. The only thing I will say about the pattern is that I didn't see, or I missed the notches for the front and back of the sleeve.


The fit of the pattern was interesting, especially for me that hasn't worked with a big pattern company pattern in a long time. I bought the pattern in the size that I have when buying clothes, which was the largest available for this pattern. Then I took a look at the measurments given, and according to them I should have a size 2-3 sizes bigger, my waist measuremnts was almost 10 cm larger than what was recommended on the pattern. commercial patterns have a lot of ease in them, and in the end the waist fit perfectly. The only thing is that it is slightly tight over the bust. For future use I will probably just use a slightly smaller seam allowance at the front bodice seam. I used 1,5 cm and 1 cm would probably have made it even better. One things about the pattern is that unlike all other commercial patterns I've worked with it didn't include any seam or hem allowances, so I had to add them in myself. For the length of the skirt I used the B length, but I added 4 cm, which made it end up somewhere between the A and B length.

The pattern was really easy to sew. I don't think I even looked at the pattern instructions. The most complicated thing is to install the invisible zipper in the back. The one thing I changed from the pattern was that I didn't close the slit in the front, instead kept it open, and I used bias tape as a hem facing instead of regular double folded hem. In all it took me one evening to cut out the pattern, both from paper and fabric, one day to sew the dress, I then had it hang over night before hemming the skirt and sleeves.


For once I actually took care to make sure that inside looked nice as well, normally I just zigzag the edges on the inside. I want this to stand up to a lot of wear and washing, so for this I encased all the seam allowances. Where I could I used french seams, which is starting to get a favorite seam of mine. It doesn't take much longer than first sewing the seam and then overcasting it, especially on straight seams, and almost all seams are straight on the pattern. Where I could I rolled the seam allowances up and sewed them so that now raw edges were visible.


All in all it was a fun and easy project I can definitely see myself using this pattern more and make dresses in different lengths and with different sleeves from it.


Sunday, 13 April 2025

A 1930's blouse for everyday wear

 This year I am trying to go a year without buying new casual clothes. It's not a promise or aim that is set in stone, I just want to see if I can size down my clothing consumption, due to a lot of reasons. Now I haven't been a huge shopper for clothes, but some new dresses for summer and winter and it adds up. I will buy outdoor and sports wear if I need it and underwear and stuff like that though. The idea came in the autumn when I made the Tara skirts, but I then realized that if I want to make more of my own clothes, then I need to step up from dresses and skirts and actually start making tops and things to wear on the upper body. I haven't done much of that kind of sewing , I don't think it's fun to make something that I could just as easily buy cheaper and that wouldn't look so homesewn. I started to look out for pattern that I could use and bought the Ngaio pattern from Scroop Patterns.


I liked that there are no closures, you just pull it over your head, the gathered front adds some interest to it that make it stand out from what you can buy in a store, and it had sleeves. It is inspired by the 1930s, which isn't my fashion decade at all, but I bought it to make clothes for everyday wear.

I had the pattern and then at our cosplay meet on Tuesday there was a box of fabric that said "take home and reuse". Most of the fabric pieces were too small to be able to use for any clothes but I found three larger pieces that I liked. Today I decided to make the Ngaio and discovered that there wasn't enough fabric. One of the fabrics was big enough to get everything but the sleeves, so I started with cutting out that, and then with some piecing I could also make two sleeve pieces.

When I had all the pieces cut out in the grey/floral I used them to start puzzling out on the other fabric, which I actually like even better and was more excited about. I realised I couldn't get the whole blouse out if, so I will have to make the back in another fabric, but that might be in another post.

I spent the rest of the day sewing up the grey/floral. As usual with Scroop Patterns the pattern went together so well, and the instructions were really clear. The sizing is also spot on, I am a size 42 with them, and I didn't do any adjustment for the fit. I made one small mistake in that I have actually cut out two right sleeves instead of one right and one left, but I don't think it's really visible.


The final result is a really comfy and casual blouse and now I feel the need for a nice 1930s skirt to go with it and the other blouse that I have cut out and only need to sew up.


Sunday, 9 February 2025

A UFO dress

 So with new inspiration I want to start on my sewing projects, but I also decided that I first needed to do a proper clean up of my sewing space. I live in a two room apartment, so my sewing space is a corner in my living room, not very big and it had gotten cluttered. So I sat down and made sure to sort everything back into its boxes, you know haberdashery, sewing thread, small craft things. While doing that I also found a bag with fabric in it. 

It turned out it was cut out pieces for a dress, and the description for the pattern was in the bag as well. It was the base pattern that I have used for the I heart SW dress, the little Greedo dress and the big Greedo dress. The last time I used this pattern was apparently in 2018 so I had no idea about the size of the pattern or what I had thought with it.

I sewed up the bodice and it fit. It's a very short bodice though, so I wanted to see if i could lengthen it, something I have done with the other dresses well. I didn't quite understand why I had cut out a variation fo the bodice with collar and decorative pleat down the side, which gives the dress a very vintage 1960s feel, and then I had cut it out in this very soft and patterned jersey, I had also cut out two sleeve ruffles for it.

Why I like this pattern is that it is very easy and goes together really quickly. I hadn't cut out a lining for the collar, so I folded it double instead, which made it quite narrow. I also skipped the sleeve ruffles and use the fabric from them to add a waistband to make it longer. All in all it took me around 2 hours to sew it together, of course it helps that I it's a knit fabric where I didn't have to finish any edges on the inside, and I now have a new dress and one less UFO in the sewing corner.


Tuesday, 10 December 2024

The Tara skirt with and without pinafore

Earlier I pattern tested the Seatoun skirt from Scroop patterns, but to be honest I was even more excited about the modern skirts, the Tara skirt, and especially the Tara skirt with pinafore. I loved my corduroy pinafore skirt that has now become way too large, so it was time for a new one.

I started with the Tara skirt without the pinafore though, since I figured that would be the easiest pattern and I could learn how to make it before making the more complicated version.


For the fabric I used a silk noil from Gårda textil in a pink check pattern. I made it in size 42, which worked both for the Seatoun and my Summit dress, so I guess for Scroop patterns I am a straight 42. The pattern gives an option for flatfelled and french seams, and for this one I used the flatfelled seams. I think they are a bit tricky, and I wasn't able to totally catch the folded fabric in the second seam, especially on the curved seams. 


I made two alterations to the pattern. One was that instead of the narrow turned hem in the pattern I used a hemfacing, following the instructions from the Seatoun skirt. I also raised the pockets. I did that by copying the pocket placement lines from the skirt pattern piece and making a pattern template from it that I then pinned to the skirts and drew new pocket placement lines from. This is also when I realised that I am lopsided, no matter how much I measured the pockets didn't end up level, so in the end I had to use my eye measurement to get them level. 


The pockets are bagging out, which is a feature, and sometimes when sitting down there is a bit of risk of things falling out of them. I also realized that my hips are a bigger size, so it's a bit of a squeeze to get the size 42 waist over them when I get dressed, and in fact I could probably take the waist in a bit but then I wouldn't get the skirt up.

Then it was time to to the Tara with pinafore option, At first I had planned to make the other version of pockets, but I read that one of the pattern testers couldn't fit a phone in them, and I want nice big pockets at work. This fabric was also a silk noil from Gårda textil, but this was stiffer and heavier, it also frayed like crazy. I love how the stiffer fabric holds out the skirt, but it was problematic to work the waistband with this fabric compared to the pink fabric in the other skirt. I cut out the B length instead of the fuller length version and when it was time for the pockets I moved them more to the front and sewed them on flat against the fabric instead of having them bag out like in the pattern, and what I did with the pink skirt. 

For this skirt I used french seams, also a chance to get a bit of variation, and I think the french seams worked the best. Since this fabric was fraying so badly it would not have worked with any other seam. The only thing I changed there was to use a 2 cm seam allowance rather than the 1,5 in the pattern.

If I make another version of this skirt there are some things I would change with the pinafore. I would have liked to have the straps a tiny bit wider, which shouldn't be hard to do by just increasing the width of them. I would also make the pleats on the bottom a bit deeper and add two pleats at the top, to make the pinafore sit more smoothly. This isn't a criticism of the pattern, but simply a fact that we are shaped differently and I could get the fit even more snug with some small changes.. Also when it was time to fasten the straps there are no real directions on how long they should be. I tried them on and sewed them on, but now after having used the skirt for a couple of days I think that I could have made them a few cm shorter. I might take them in a bit, on the other hand it's easy to get in and out of the pinafore when they are bit on the loose side.


Here is my triple of Scroop skirts with the Seatoun, Tara, and Tara with pinafore. This is a straight forward and fairly fast pattern. After I had cut out the Tara pattern pieces it took me two evenings to make the skirt without the pinafore and three evenings to make the pinafore version. I could probably have done both of them in one evening less, but I didn't feel the need to push and stay up late when I didn't have a deadline. Also it didn't help that I did some stupid mistakes and had to unpick the waistband twice on the blue version, and the pockets on the pink skirt also had to be unpicked and resewn on. 

Sunday, 22 September 2024

Scroop patterns summit dress

 I rarely make clothes for everyday wear. I simply think that my finishes aren't good enough. But when Scroop patterns released the "Summit dress" I felt that this was a pattern that I really wanted to make.


With my changing body after my gastric bypass last year I need some new clothes. I wanted a new autumn/winter dress. I have also wanted a dress that is  nice and neutral, but gives an air of historical fashion when doing lectures. The pattern is based ont he 14th century Herjolfsnes finds, but with modern construction methods and an option between modern lantern sleeves and historical sleeves, and different skirt lengths. I have made a simple medieval gown by measuring and cutting rectangular and godet pieces, with this pattern I also got a medieval pattern that I can use if I want to make another one, I only need to replace the machine sewing with handsewing and lengthen the 3/4 length historical sleeves.

The basic pattern is a very loose fitting dress. The size chart contains both your body measurements and the measurement sof the finished garments. I was exactly on the size 44, but having seen the tester makes I went down a full size to 42, and it is still very loose. I could probably have gone down another size on the main gown, but then the arms would have been on the small side. If I make this as an historical pattern one day I will probably go down to 40.

With the original pattern there were two things I wanted to change and that was the length and the sleeves. To shorten the dress I used the view B length, but I also shortened it 8 cm by the "shorten/lengthen" line on the lower part of the pattern. I didn't just cut off everything at the hem since I wanted the full width at the bottom. The sleeves, both the historical and lantern version, are 3/4 length, and since I wanted to use this in the autumn/winter I wanted to have full length sleeves. The lantern sleeves would make it hard to wear a cardigan or something over them to keep warm.


I made a quick pattern for where the bottom part is the length of the sleeve opening on piece K - lower sleeve, the lenght is the length of my forearm and the width at the top is width around my wrist. In a spur of th moment I added the point at the end of the sleeve. I added a facing in the same fabric instead of hemming it, to keep the nice point, and then sewed my pattern piece to piece K before sewing pieces J and K together as the pattern called for. 

The finished sleeves

The pattern for the bottom of the sleeve

The sleeve right side out

The sleeve wrong side out, with the facing


The sleeve is just enough wide at the wrist that I can get my hand through, so I don't need any closures there.


I definitely prefer to wear the dress belted, and that also gives some oppportunities to give some pop of colour to this rather plain dress. I usually wear a lot more colours and patterns in my everyway wear, this dress I can match with different belts and thights to keep it fun.

The dress is made up of a wonderful wool/viscose blend that I found at a real bargain online, so in the end the dress cost around $35. The patterns instructions were easy and good to follow, the mistakes that I made were totally up to me being sloppy. The one advice I would give for anyone making the dress is to switch the order and insert the back godet before the front godet. That was the most fiddly part of the pattern and my back godet went in better than the front, since it was the second one I made.

If you are curious about the pattern Leimomi/the Dreamstress and creator of Scroop patterns has one post about the pattern and two full posts about tester makes, here and here. 

And for full disclosure I have been a pattern tester for Scroop patterns and it is probably my favorite pattern makers out there, I bought this pattern with a discount code that I got from answering a customer survey earlier in the summer. This was the first time I made something from its range of modern patterns rather than historical patterns.


Sunday, 12 September 2021

Photos from the silver smelting plant in Falun

 Today I worked with guiding and lecturing at the silver smelting plant that is still intact in Falun. Well I also went there an hour before I needed so that I could take some fun photos in a really exciting location.

I used a variation of my jedi, with black pants and visible boots instead of the long skirt. It was hard with a phone and selftimer to work with the light, with the lightsabre, so it was more fun to play around outside of the slmeting plant.


I'm thinking that I should return and take some photos from the other side of the wall as well, to make a sequence that looks like I'm jumping over the wall.

I've also realized that I only have photos of myself in costume, so I decided to take some of myself in more regular clothes, that I can use when people want photos of me.