Monday, 2 December 2019

Shiny, dangly lightsabres

The people that I talk SW fandom fashion with knows that I quite often moans over the fact that there are so few nice looking earrings. I love big chandelier-style earrings, but most SW earrings are studs or just a small ship. There have been some nice lightsabre earrings, but now when I went out to search for them I though they were too expensive. Well then I decided that I could make my own. I went out to some Swedish bead and jewellery making sites and ordered some beads and looked for what I had at home. I don't do a lot of beading, but I have some supplies after my Luna Lovegood jewellery.


The beads I used were two tubular clear tubular rhinestone beads (tubpärlor med klar strass) and 6 mm firepolished czech glass beads in a deep capri colour. To that I also added a small bead cap, and at home I had wire, clamping beads and ear hooks. For best effect I would have preferred a silver or transparent wire, but black is what I had at home.

First  I put the base bead on in the middle of a piece of wire. 

For the next bead I threaded both pieces of wire through the bead, so the wire is inside all the beads except for the base bead.

In total I used 7 beads.

I then added the bead hat, to look a bit like the emitter on the lightsabre.

And finally the tube rhinestone bead. After this I put a clamping bead above the tube bead to push all the beads down on to the base bead. This was tricky and I had to redo the first earring a couple of times because the clamping bead ended up too high, which meant gaps between the blue beads and not a nice unbroken row.

Then I added another clamping bead, pushed the wire through the ear hook, and then I pushed both pieces of wire back through the clamping bead. Before I clamped the bead closed I tried to get the wire loop and ear hook as close to the other beads as possible.

The finished earring. I made the second earring a lot faster than the first one, and it also looked better so I definitely got better with practice.

Now I have a nice pair of dangly and sparkling SW-inspired earrings. I think most SW fans will see the lightsabres, but non-fans will probably just see a row of sparkling beads. 

Sunday, 24 November 2019

HSM2019 . challenge 11 Above the belt - 16th century rosaries

Earlier this autumn I started thinking about reenactment and religion. Religion in the Middle Ages was everywhere and the Christian rituals were part of everyday life and with very few exceptions all people in Europe were part of the Catholic church. Still it's rarely spoken about, except for a few people who might come to medieval events as monks. I think there are a lot of personal reasons for this, and I totally understand that people might feel uncomfortable bringing in religion, especially if they don't share the beliefs of the Middle Ages. I'm not a Catholic but I decided to dive into the rabbit hole of researching late medieval religiosity and looking for religious accents to my 16th century wardrobe. Some information on the usage of rosaries can be found on my Swedish blog, historiekullan.

At the same time, of if this maybe was the inspiration I don't remember. Studio Västsvensk konservering published this photo of a rosary.

It was found in a grave from the excavations of Nya Lödöse. Nya Lödöse was a planned effort from the state to build up a new trading port on the only access that Sweden had to the North Sea during the years 1473-1624. It was hard to attract people to Nya Lödöse, but today it's successor Gothenborg is the second largest city in Sweden so in the end it worked out. If you are curious about Nya Lödöse they have a really good and informative site on the project here. The rosary itself consists of 49 small beads and 5 large beads made of an unknown wood. The string has disappeared and the years in the ground have darkened the wood to almost black.

I didn't know the size of the beads, so I ordered beads in two different three different sizes 8 and 10 mm for the small ones and 12 mm for the large ones. I first strung the 10 mm and 12 mm beads together.

I could see straight away that there wasn't much difference between the 10 mm and 12 mm beads, so if I were to use them as a rosary it would be hard knowing when I got to the larger beads. I also wasn't happy that the beads were glossy. To take away the varnish I put the beads first in a bowl of white vinegar (ättika) and water and let it lie there for a couple of hours. The white vinegar stripped away the varnish and the water started to turn some of the beads grey. After that I put them in a bowl of cooking oil for a while as well.

The aging process worked and the beads looked a lot better. On the photo above I also have the rosary I made from 8 mm and 12 mm beads. Those beads were untreated, so since I've made them I have instead taken to sitting and rolling the rosary between my fingers, to give them a used look. they have definitely turned darker from the treatment.

Rosary of 8 mm and 10 mm unvarnished beads
Rosary of 10 mm and 12 mm beads
 The beads are strung fairly tight. When I tried to roll the smaller rosary between my fingers, imitating the way you would use it during prayer it was also cear that it was hard to really feel the individual beads, due to them being so close to each other. This was something I had in mind when I made a third rosary. 

These simple rosaries of wooden beads are great as accessories for the simpler wardrobe I use at medieval events, but I am also working on an upper class wardrobe so I wanted a rosary suitable for that as well. 

Looking at 16th century portraits rosaries of red and gold beads were very popular. I really liked this rosary of red beads with golden, corrugated beads.

It turns out that coral was very popular for rosaries, because it was also seen as bringing good luck. I couldn't find large coral beads, but I did find 8 mm coral beads. Now an important thing about coral. Coral is the shell of sea creatures. Today many of the world's coral reefs are severely threatened by pollution and increased sea temperatures, there are also many cases of coral reefs being plundered to provide souvenirs and jewellery. I was very hesitant on using coral, since I don't want to help with the destruction of the reefs, but I found a Swedish supplier that explained that their coral beads were made from coral that's been farmed and harvested and doesn't come from wild coral reefs. Alternatives to using coral, and something I thought about, is agate, there are surviving medieval rosaries made of agate as well.


For the gold beads I found corrugated brass beads that looked very much like the painting, these I had to order on etsy though since I couldn't find any nice gold beads from Swedish suppliers. I strung the beads on silk cord for this rosary, and I made a knot between every set of 10 small beads so they wouldn't move around too much. For this rosary I didn't string them quite as close as the wooden rosaries, so it's easier to feel every individual bead.

The three rosaries side by side
I'm putting the rosaries in the "Above the belt" challenge since it was common to wear the rosaries on the belt, like the painting I posted above.

Even if the lady is holding the rosary it is attached to the belt


This is the smaller rosary being worn on the belt, it also shows the size of the smallest rosary.

The Challenge: 11 above the belt
Material: 8, 10, 12 mm wood beads, 8 mm coral beads, 5 brass beads
Pattern: none, made after several paintings
Year: 16 century
Notions: The wooden rosaries are strung on linen thread, the coral one on silk chord
How historically accurate is it? 85% As far as I know this is as close as you can get, but of course the beads are not made produced as they were in the middle ages
Hours to complete: 30 min total
First worn: not yet
Total cost: The wooden rosaries - $5 the coral rosary - $15

Saturday, 2 November 2019

Spirit of the Mine 2019

Over the autumn school holiday and Halloween we have special tours in the mine that talk about the scarier histories. This is the time when actually talk about gruesome deaths and the mine spirit - the Lady of the Mine/Gruvfrun also makes an appearance.

I like playing the Lady of the Mine, but I have to work with what we have. There is an old white gown that has been used for a very long time in the mine and last year I bought several meters of organza to use for these special tours. I don't like the Lady being only dressed in white, since that according to folklore is a special sign and there are other stories of her being dressed as a rich woman in colorful clothes. Also during the tour I need to be able to run, quickly get out of the gown and back in again, so it still needed to be a loose garment. The solution was to simply pin swathes of organza on the white gown. My aim was to make the skirt look like she grew out of the floor and took a solid shape just above the waist

I also brought with me my own make up to try and paint her. I did use some UV paints in red and yellow to accent some features, because I show up in the dark in a segment. That's why I have a red stripe on my nose, but I still thought it looked good.

This is what I ended up looking like. The photos are taken with my phone, so they are a bit washed out, my hair and the organza are much brighter in real life.


And for some mysterious vibes


Friday, 1 November 2019

AvestaCon photos

As I said in my previous post I had the opportunity to have photos taken with Red Island Media and he has already sent some of them to me.

My main priority was to finally get decent photos of my pilot. I have had several sessions with photographers for the pilot, and then they have disappeared without sending me the photos. This has made me weary about using photographers who don't get paid, or whom I don't already know. Thankfully I know this photographer, he is also the one who did the beautful Melisandre photos last year at AvestaCon.


Then I had just recently dyed my hair and I was really happy with the result, so I chose to do some photos of me as a regular Hogwarts student, so I could show off the hair. I'm calling these photos Autumn at Hogwarts


I had to have at least one photo of me as Luna as well though, and with some nice scenery around I wanted to have her in nature where she belongs


One of the best things with AvestaCon is the location, there are simply so many interesting things in a place made from slag bricks and with nature just around the corner.

Tuesday, 29 October 2019

AvestaCon 2019 report

I managed to hardly take any photos at AvestaCon, but I got the chance to do some photoshoots with red island media and I'm looking forward to sharing them with you later on.

Anyway me and Tom set off to Avesta on Friday and arrived there by lunch. Tom has been working really hard all year with AvestaCon, since we had decided that the Cosplay Dalarna network should be in charge of all cosplay related things. We had decided that instead of having a crafting corner we should have an actual exhibit to show off the variety of cosplay projects in our group.

AvestaCon is held in Verket, an old iron foundry and the main area is divided into several smaller rooms. Cosplay Dalarna had one of the rooms, and in one of the corners Wolfdog Cosplay also set up a 3d printer to show off what you can do with that.


I had brought my Melisandre costume for display, but managed to forget the necklace. That's when we came up with the idea of printing photos of us in our costumes to show what they look like when worn.

On Saturday I wore my x-wing pilot, so then my Ravenclaw outfit was on display. I wore the pilot because we did an actual troop with the Nordic Legions. It was me, two stormtroopers from Västerås, Alexandra as Leia and Ann-Sofie as Tintin. AvestaCon is the most local con so it was also fun meeting up with friends who usually don't see me in costume.

Photo from my friend Niklas and his son. Brita (Brutus Cosplay) in the background as Fiddlesticks from League of Legends
On Saturday Cosplay Dalarna also organised the Dalecarlia Championships in Cosplay.

Top 3 in the Cosplay Competition
After the cosplay competition there wasn't much going on, but the convention was still open, so we rigged up some PlayStation SingStar and I might have been the most enthusiastic about singing a lot of old pop songs.

On Sunday I wore my Ravenclaw outfit, first as a regular student and later as Luna Lovegood, so the X-wing costume went on display.


It was nice sitting and chilling in our sofa the sofa in the cosplay exhibit.


Niclas did some workshops with helping children make magic wands of chopsticks and worbla, so I made one of myself, so I don't have to always use Luna's wand. I just need to prime and paint it.

The con ended on Sunday with a scrapheap cosplay contest, where teams of up to four people could raid a load of trash and ten had 30 minutes to create a cosplay. Me and Tom hosted and judged it, together with Ann-Sofie.

The entries in the scrapheap cosplay contest, photo by woodsling

This was so much fun to watch, but really hard to judge. I think everyone taking part, or watching the contest had a great time. Then it was time to pack up everything and get home. It was an exhausting weekend, like it is when you are helping out with organizing stuff. AvestaCon is still a new con and still needs to solve some things, but overall it was a success compared to the previous year and there were more visitors as well. It still has a lot of potential to grow though.

Saturday, 19 October 2019

A fun dress for work

This spring a friend of mine who is in a bunch of sewing FB groups told me about a limited sale of a special printed fabric, and when I saw the fabric I knew that I to be in on it. It took me a while, but this is the finished dress that I made from the fabric.


I fell love in the fabric because of the symbols and the colour. While most people see this symbol as a female sign


it's also the old chemical sign for copper. There is a connection since it was originally a symbol for the love godess Afrodite or Venus, and according to Greek/Roman mythology she was connected to the island of Cyprus, and on Cyprus there were a lot of copper mines. Afrodite/Venus was early on connected with copper, in fact the word copper comes from latin "cuprum" meaning metall from Cyprus. The male sign is likewise also the sign for the war good Ares/Mars and iron.

I work at Falu Gruva - an historical copper mine, even if there are a lot of other stuff there as well, and a UNESCO world heritage site. The mine has used the symbol since at least the 17th century and it can also be found in the Falun coat of arms. This is the current logo for the Falun mine.


The orange and navy colours were also a reason why I liked the fabric. We use a lot of orange in our graphic profile, and the combination of orange and blue is also used in the traditional folk costume of Falun (Stora Kopparberg). As a feminist I also think it's fun to play around with the symbol, and I'm definitely aware that for most people it doesn't mean copper.

Anyway it took me a while to come up with a pattern for the dress. I had a limited amount of fabric and I was also a bit bored with my standard jersey dress pattern. In the end I found the pattern company Simple Sew patterns and decided to order some patterns from them. For this dress I chose the Lena wrap dress, which is actually a faux wrap dress and not a full wrap dress.

When I had cut out the patterns I realized that I didn't have enough fabric for it, but I found a scrap piece of blue jersey from my "I heart SW-dress" and a really thin piece of jersey from my fandom fashion Enfys that I could use for a lining. I used the blue fabric for the waist band and I had to cut the sleeves in half, with one part of the printed fabric and one in the blue, to get a full sleeve. I think that gave it a fun detail though. I also chose to skip the bottom of the skirt and instead I simply cut out the skirt and the bottom as one piece. The skirt is quite big though and takes up a lot of fabric, but if you have enough fabric you get a nice swirly skirt.

The pattern was a real joy to work with. It says that the skill level is adventurous beginner, and I thought it was a very easy pattern to use. One should note that the lining pieces are exactly the same as the outer fabric pieces so I chose not to cut them out and instead just used the outer fabric pattern pieces for the lining as well. All the markings are clearly marked, and there are not a lot of them either. The instructions are well illustrated, the one thing that's not in the pattern itself is the setting of the sleeves, but there it says that if you are unsure about setting sleeves you should go to their video instructions online. I also like that you had all the sizes in one pattern envelope, you don't have to wonder if you should buy the plus size or regular pattern.

The pattern ended up a bit big in the bust for me, but that's not uncommon for wrap dresses. My bust simply is proportionally a bit too small for my size. When I wear the dress for work I will have to put a safety pin or some tacking stitches or else it might be too revealing

This is a pattern that  can definitely recommend and I look forward to trying out more patterns from Simply Sew.

The dress with flash


Thursday, 10 October 2019

HSM19 Challenge 10 - details, another smocked apron

It's funny I think I made my first smocked apron for the October HSM18 challenge, and now it's time again. I think a big reason is that I enjoy sitting in front of the TV on a dark evening and a smocked apron is just the right size to work with in the sofa. October is also a bit of a calm month after the summer costume season, but before any Christmas stress or other things pick up, perfect for some smocking.

This time I didn't do an apron for myself though. This is for a friend, who due to physical issues can't handsew. She's going to help me with some other things, so it will be an exchange of services. It also means that I had to keep proper track of how much money I spent and how much time it took.

For the fabric I used a linen from Handelsgillet.se which is unbleached and has the feel of being handwoven. I have bought more of it to make a shift for a working woman for myself out of it. For the apron I bought one meter, and then I cut out strips off the sides to create the waistband, but otherwise I use the full width of the fabric.

I started the project on a really cozy crafting evening at a friend's place. Where there were four of us sitting in a wooden loft and made 16th century stuff.


I started with hemming the bottom and the side of the apron, and then it was time to make the gathering stitches. I use a regular sewing thread in a visible colour for the gathering stitches. You actually don't need to be too fuzzy about the exact measurments for the stitches, but they need to be equal.


I prefer to make the rows of gathering stitches fairly tight horizontally, because then I can use the gathering threads as guidelines when working the smocking stitches. I usually do six rows, and I tie the gathering threads together in pairs, since that makes it easier to pull them later on.


Here is the fabric with the gathering threads pulled together.

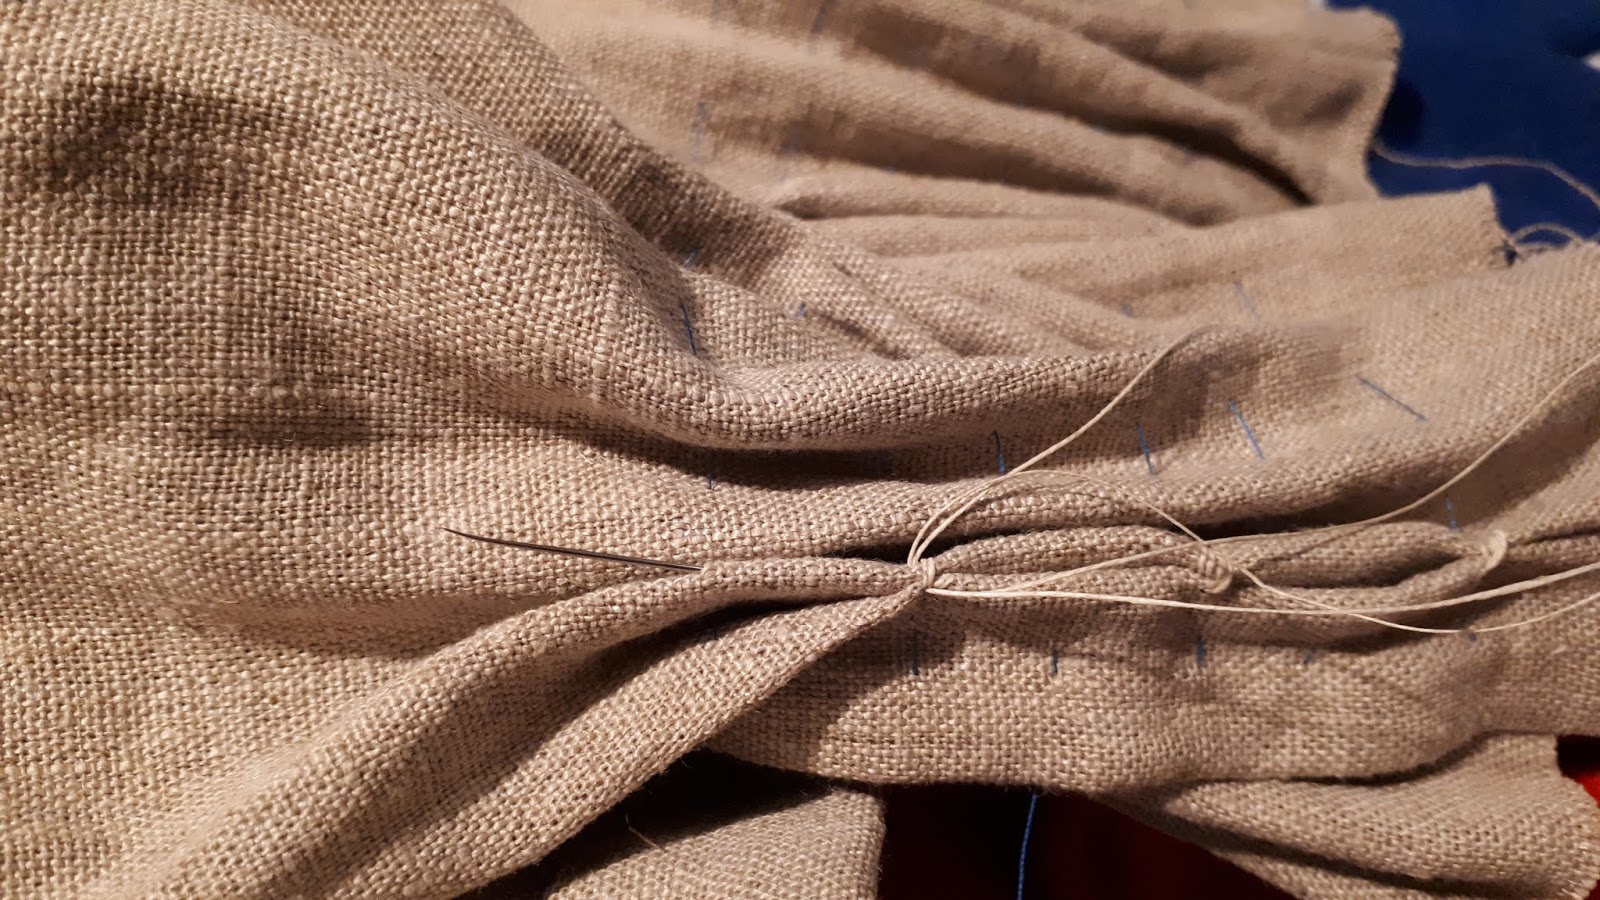
Now it's time for the smocking itself. I start at the top gathering thread, hold folds 1 and 2 together and do two to three backstitches to sew them together. Then I go to gathering thread number 3 and 5 and do the same thing. It usually looks a bit wonky at the start, but it will look better with more rows done. 

On the way back up you hold fold 2 and 3 and make stitches at the 6, 4 and 2 gathering threads. The aim is to get rows of altrnating stitches that will make up the honeycome pattern.


Once you have gone the full width of the fabric remove the gathering threads and decided how wide you want the apron to be. The honeycome smocking is quite elastic so it's easy to adjust the size. 


 The last thing to th finished apron is to add a waistband. It's a simple folded band, from strips of the same fabric. I like making the waistband extra long so that I can tie it in the front, which is a lesson I learnt when I had my shoulder problem and lost a lot of my mobility and simply couldn't tie anything behind my back.


As for details, the theme of the challenge. Since this apron wasn't for my personal use I really took the time to be careful with the stitches. I'm happy with the smocking, but I'm even more satisfied with what you can't see. I managed to make the hems invisible from the right side, and the waistband is sewn together with tiny slip stitches.

Invisible hem

The slipstitched waistband

What the item is: a smocked apron
How it fits the challenge: All the tiny seams that are totally invisible, until you get really, really close
Material: 1 m of unbleached linen
Pattern: My own
Year: smocked aprons were used in the late 15th and early 16th centuries.
Notions: unbleached linen thread and wax for the thread
How historically accurate is it? As far as my knowledge this is as close as you can get the materials and patterns of the time, but since I'm not sure I put it at 85%
Hours to complete: 15
First worn: Not yet
Total cost: $22