Tuesday 26 April 2016

London visit

Last week I took off and went to London for a few days. I felt that I needed a bit of holidays before work gets really busy in May-June. London is a paradise if you love clothes, fabric and costume and I took my chances to do some exploration, I still have a lot of things that I need to see though...

First on my list was to go to the Victoria and Albert museum and their new exhibition Undressed: A brief history of underwear. It was pure heaven. I actually got goosebumps when I saw that this was the first item in the exhibition.

(the photos aren't mine since it was strictly forbidden to take photos or do sketches). This is my favorite pair of 18th Century stays, and it was so Beautiful. It really looked tiny. I also liked that it's clearly visible that even if the stitches in the boning channels are small, they are not extremely tiny and they are a bit uneven. Makes my confidence in my own handsewing grow.

This was probably my second favourite item, even if I'm not big on hoop skirts. It was new to me that the steel bands are wavy, and not round, all to make the fabric of the skirt fall more gracefully.

In all I spent almost two hours there. The shop also had a lot of interesting things but I only bought a tote bag with a corset on. They have released a new book in the V&A Fashion in Detail series, and this time it's only underwear, so I think that one will go onto my wish list.

After V&A I met up with a friend and as two good Star Wars fans we took the Jubilee line to Canary Wharf. Whe the trailer to the new Star Wars film Rogue One was released, a few weeks ago, it was quickly identified that a scene in the trailer had been shot at that tube station.

Here I am waiting for the next train to the Death Star.
The next day I spent at the Camden Markets and Portobello Road. The Camden markets were a bit of a disappointment, but if you are into steampunk/goth/Lolita-inspired clothing you can find a lot there. Just when I was leaving I stumbled upon a little shop with 50's style dresses, in all sizes, and I just had to buy this really cute dress.


Portobello Road is most busy in the weekends, but I did pick up a nice pearl necklace that will work fine when I want just a plain necklace with my 18th century outfits. It was cheap, so I doubt it's real pearls, but it looked a lot better than the kind of fake pearl necklaces you can buy in standard accessories stores.

The next day I met up with another friend and we had a total girls' day out in central London. Talking a lot about Star Wars, buying hats and she showed me Berwick street. This is a street with just fabric shops, with gorgeous fabrics. Pricey, but still gorgeous. I think the most expensive fabric I saw was £150/meter, and most of them were in the £25-55 price range. I blew my budget on a glorious silk dupioni. I've never bought such an expensive fabric before, and I'm really going to be nervous when I cut it, but I just couldn't resist.


New hat selfie

Overall I had a great time in London, and now I'm filled with inspiration for projects.

Monday 18 April 2016

Some photo collections

As you see I have made a new header for the blog. Now I don't know anything about photo editing, so I just used a free online tool. Still I thought it was fun to play around with a and create some collages of my costumes, so that I can easily show people what I do.

Looking at it like this I think I have quite a variety in the styles of costumes I make.

For historical costumes I'm a bit stuck in the 18th Century, but hopefully that will change a bit this year.

For the Star Wars costumes my range is all the way from a dirty Jawa to a refined Queen.


Sunday 17 April 2016

X-wing application is in

I just sent in my photos to get the X-wing pilot approved with the Rebel Legion. Despite having been a member for so many years, and having submitted quite few costumes, I'm always so nervous when I do that. What if I have missed something that should have been obvious, or if I have to redo a lot of the costume. This time I'm mostly worried about the flak vest, and the fact that I didn't notice that my legflares had slid down while I took the photos.


I played around to see if I could get some nice "wind in the hair" photos, they only got blurry, but I still think they were quite nice.


Monday 11 April 2016

X-wing pilot flak vest

In my last post I talked extra about my flakvest, but I've gotten some questions on it and since this was the trickiest bit of the costume I figured I could try and make a kind of tutorial.

References:

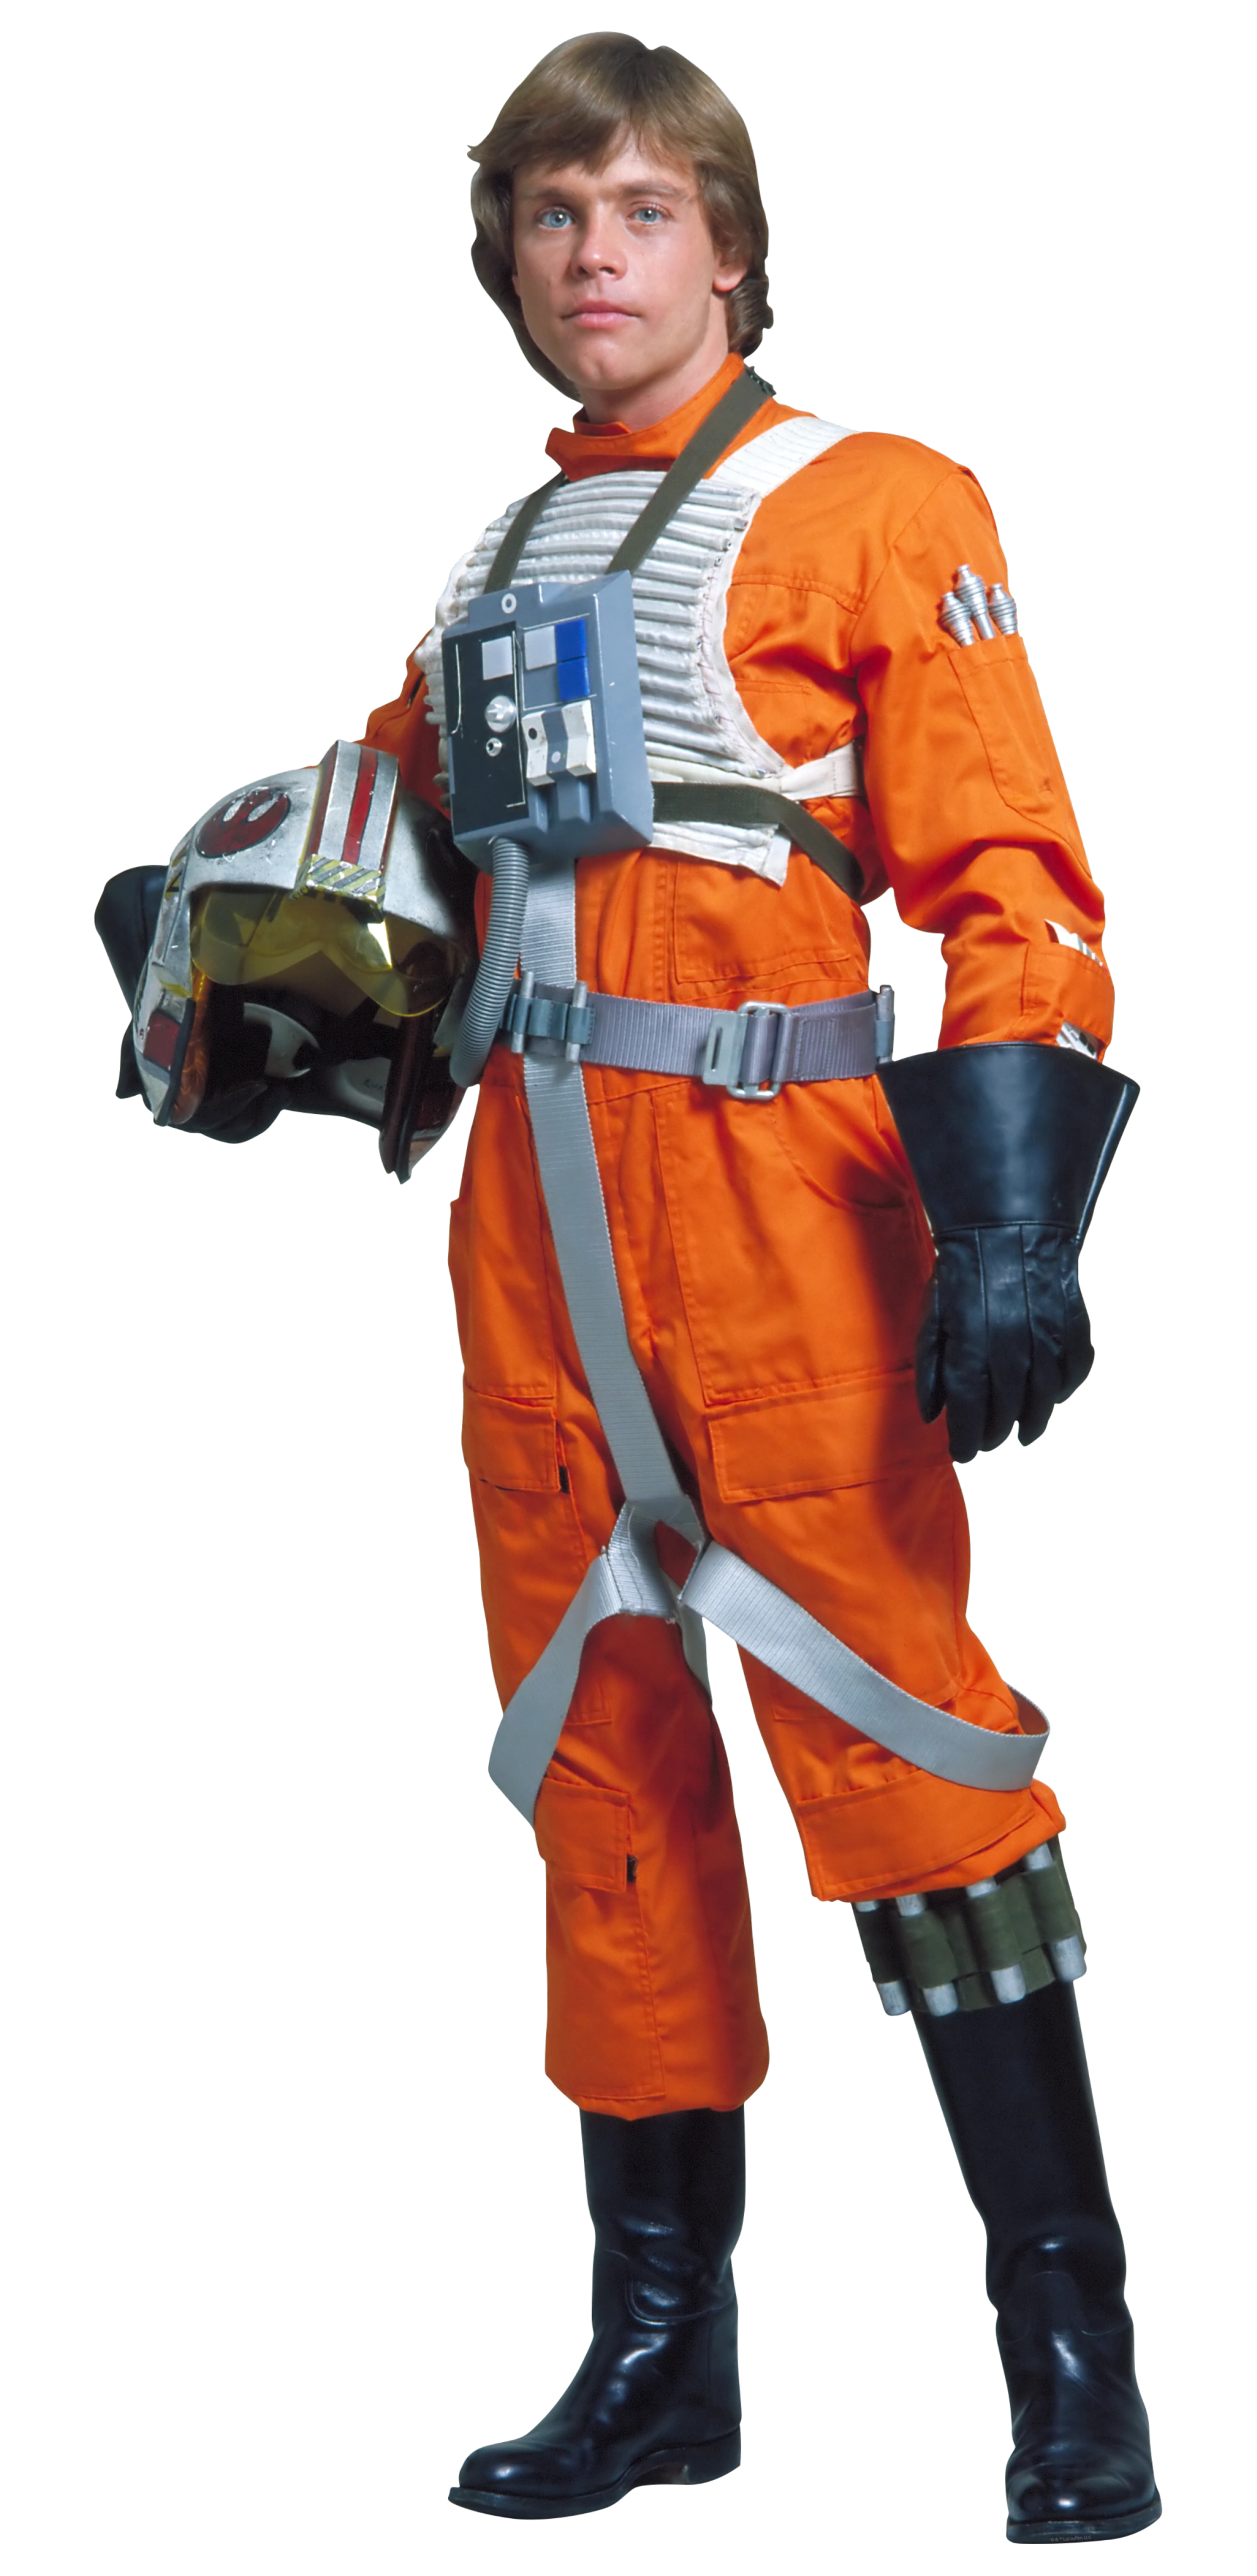
The references that I used for the vest are the photos of Luke from A New Hope in Costuming in a Galaxy, Far, Far away, the official costume book to the old trilogy of Star Wars films. Beware that in ESB the flak vests were worn backwards, and the X-wing costume has been presented like that in many exhibitions as well.

Then it was the X-wing pilot standards in the Rebel Legion forum. If you are aiming for Rebel Legion approval you need to read up on the standards and know what is required.

In the X-wing pilot forum there is also a tutorial with measurements for a flak vest, and I'm pretty sure but not certain that those measurements were taken from a screen used vest.

Material:

  • In the original some kind of nylon was used. It's a thin fabric and when looking on references the fabric is a bit translucent. I couldn't find a nylon so I used what remained of a plastic coated thin fabric that I used for the flak vest for my A-wing pilot. Nylon is probably easier to work with.
  • The side buckles and adjustment buckle were ordered from WampaWear. The tutorial I linked to above have links to where you can buy them, or what search words to use if you want to look for them online.
  • A small scrap of white leather, I used a fake leather that remains from when I did my Princess Leia belt.
  • A roll of plastic tubing. I chose a clear plastic tubing with an inner diameter of 3 mm and an outer diameter of 5 mm.
  • White cotton grosgrain tape
Pattern

I started off creating a pattern from the RL tutorial above on a piece of cheap cotton. When I had a pattern piece that I thought looked good I tried it on my dress form.


At this point it looked like I would have to have some kind of dart in the front to fit my bust. I also got a bit of panic when I started working on making the channels in the fabic that would create the ribs. The RL standards call for 16 ribs, and I could get 8 maybe 9 on to the backside. I had started with planning to use 5 mm tubing, but that would mean fewer channels. I switched to the smaller tubing and sewed the back. The backside is constructed from two pieces of fabric, with the tubing sandwiched inbetween.

This was the resulting back of the vest. I was not happy with it though. The ribs should be as large as the empty space between them, and I felt that the empty channels were too wide. I also thought that the curve on one of the sides simply didn't look good. After a whle fiddling with trying to even the sides I realized that I kept thinking "this will do for now, but on my next vest I'm going to do like this instead". It was clear that I wouldn't be satisfied with the vest so I started over. I made a new pattern and cut out new pieces for the back and front.

This time I started with finishing the bottom layer, with a simple turned hem, and then putting a smaller piece on top of it. The smaller piece, that will help create the channels is smaller on the sides, but reaches the top and bottom of the other piece. I sewed the two layers together just a few mm from the top edge, so that they wouldn't shift. As you can see the fabric is very creased, and of course since it's plastic I can't iron it. The good thing is that it doesn't ravel so I don't have to worry about finishing the edges.


The straps for the vest were made by first cutting a piece of cotton, and then folding a piece of the plastic fabric around it. Then I sewed line after line after line to give it a flat ribbed appearance. I had hoped that the cotton backing would pad the strap a bit and make the quilting more prominent, but in the end it made no difference.

The straps were pinned to the back of the two pieces before I started to sew the channels.


The plastic did warp while sewing. As you can see I'm using my roller foot, I tried at first with a regular foot and the fabric wouldn't move under it.

The trick in making the channels and rib look like they are the same size when the tubing is inserted is that they are not the same size. I made the channels that were going to be ribs 1 cm wide, while the channels that were going to be empty were 0,5-0,75 cm wide. I switched the width by changing the needle position on the machine between each row. The distance between the middle and the outer position is 0,5 cm.

Another thing that will happen when you insert the tubing is that the whole piece will shrink. Not a lot but enough that it affects the total length of the piece. Make it a bit longer from top to bottom than the finished length that you are planning on. It's easier to adjust by cutting off the excess from the bottom, than having to figure out how to get it long enough when all the ribs are finished.

To finish the backpiece I made a short sleeve of fabric and sewed it on over the channel that would have had the 2nd rib from the botton. I then inserted the cotton tape through it and fastened it with the adjustment buckle.

For the front I started wtih a new pattern as well, and instead of the dart I could fix the gaping issues by working with the curve of the side and placement of the side strap.

Otherwise the front was made in the same way as the back, except of course the section without any ribs. There I just sewed 0,5 cm channels, but they aren't filled with anything. The side buckle is attached to a small piece of leather that is then attached to the side of the flak vest. It connects with the strap from the back. Here it simply took a lot of trial and error, while wearing the fight suit, to get it to fit just right. In order for the strap to stay put I have sewed it closed, and sewed it to the back piece. That means that I can't adjust it, but it's not a hard thing to replace if it wouldn't fit any longer.

A final thing about the flak vest. In the Rebel Legion standards it's made clear that the flak vest needs to be proportional to the wearer. The most common reason for denying a pilot costume is that the flak vest is too long, reaching almost all the way to the waist, or to the belt. A danger with ordering a flak vest from the common vendors is that they usually only ask for circumference of the torso, not length which might give you a flak vest that is too long. If you look closely on my vest you will see that it does not conform to the Rebel Legion standards of how many ribs each piece should have. I have chosen to shrink my vest a bit, since I'm 10 cm shorter than Mark Hamill and the standards are made from the photos of him wearing a vest. That's also a reason why I went with the 3 mm tubing instead of the 5 mm. On the front my bust made my measurements almost the same, since that increased the length of fabric needed to cover it, but in the back I have fewer ribs than called for. I think this does look more proportional, and a lot better, but I don't know how the legion costume judges will judge the flak vest and the fact that it's lacking the correct number of ribs.


edit/ this flak vest has been approved, and I didn't need to change anything


Sunday 10 April 2016

X-wing costume done, with extra flak vest woes

So I'm basically done with my X-wing pilot. As I suspected it's been pretty weird not having to do much sewing to fix a costume. The sewing that I did was the flak vest though, and it turned out to be a bit worse than I had thought when I started it.


Let's start from the beginning. The flak vest is the white thing worn over the orange jumpsuit, but under the plastic chest box. Here modelled by Luke Skywalker, even if he's wearing it backwards in this photo like it was done in Empire Strikes back.

The flak vest is also one of the trickier parts of the costume, since it's not a one size fits all. One of the most common reasons for getting a pilot costume rejected is becase the flak vest is too big and goes all the way down to the waist.


I started out with simply cutting out a pattern in cotton and trying it on my dressform. The problem was that when I got happy with the look of it, I would not be able to get as many channels with ribs in, as the Rebel Legion standards call for. After having asked a Rebel Legion Costume judge if it was ok to continue, with less ribs than in the original I got the impression that would be ok.

This was the first version of the backside of the flak vest. Some things with it seemed off though. The ribbed pattern comes from making channels in the vest, it's actually two layers of fabric, and then inserting plastic tubing into every other channel. The empty space between each rib should be equal the size as the rib, and to me it looked as if the empty space was larger. After doing some tests on scaps of paper I realized that the channels are not all the same size. When you put tubing into a channel it takes up some of the fabric and the channel looks more narrow.

So I redid the backside now with each channel for a rib being 1 cm, but the channels between the ribs were 0,5-0,75 cm. Here is the finished backside


The front had a bit of a challenge, since I'm not as flatchested as the male original pilots. In order for the front of the flak vest to actally curve around my breasts I had to make a sharper curve than what I had seen on other flak vests.

It was also important to put the strap on the right spot, so that it helped to shape the vest in the right spot.

Some woe with the vest came from my decision to use an ugly plastic coated fabric.  The only way to be able to feed it into the machine was to use my roller foot, but it still  slid a bit uneven when I was working with two layers.

The buckles were all bought from wampawear, where I ordered my flightsuit as well. To me the side buckles look a bit on the large side. For the tubing I used the 3 mm (outer diameter 5 mm) clear plastic tubing from Clas Ohlson.


Here I am in the full gear, I'm hoping to get some feedback Before I take proper application photos and send them in to the Rebel Legion.


Tuesday 5 April 2016

A tablet envelope

The HSM challenge for March was protection and even if I didn't finish anything historical I did something protective. A couple of months ago I got a tablet. It has a weird size though so I haven't found a good looking cover for it. I want to be able to wear it in my handbag without scratching it so now I decided to make my own personal cover for it.


The construction is simple. I cut out a long rectangle of an outer fabric and a piece of lining gabric 2/3 of the outer fabric. I then sandwiched a layer of poly padding between them. I quilted the pieces by running a series of straight lines over all the layers. I strengthened the unlined 1/3 with a piece of fusible interfacing and closed the envelope by binding the sides with some cotton bias tape.

Back

Inside of the closing flap

Friday 1 April 2016

Picking a flightsuit size

By now all the parts for my X-wing costume have arrived. I have started on the flak vest, but there are confusing instructions in the Rebel Legion costume standards and I have asked for clarification before continuing. The basic problems is that the standards ask for a certain amount of ribs, but also that the flak vest shouldn't be longer than a certain length. I will have to choose between either an incorrect number of ribs or an incorrect length.

Anyway my phone has also died and is on repair, so  I don't have a camera to post any photos. Instead I'm going to right a bit about choosing size when you are a female and the sizing is made for men. This comes in regards to the X-wing flightsuit.

I am quite short (162 cm) and overweight, with quite an hourglass figure. I definietly have big hips and huge thighs. These measurements are my most crucial when ordering something online. In European size I'm quite a spot on for 44 or L. When wearing men's clothing I always have to have them too big in the waist to get them to fit over the hips and thighs. I have a long torso, but unproportonaly short legs.

For the X-wing flightsuit I decided that I definitely wanted to prioritize comfort, since I'm hoping this will be my "go-to" costume for long convention days. Comfort also means that I want to be able to wear a layer of clothes under flighsuit as well, for example t-shirt and shorts or something like that.

Going over the sizing info from Wampa Wear and ignoring all the lengths measurements I fit quite well in the L bracket. I don't have to look at the lengths to know that it would be too long for me. The L size correspons to European C52-54, which happens to be the size I have for my work pants. Still looking at the hip and thigh measurments I got a bit unsure, I also know that I would not be able to fit anything under my C52 trousers. Since it would be hard for me to return the flightsuit once it arrived I decided to go for XL.

When the flightsuit arrived my predictions turned out right. It's very roomy, I could probably have fit an L without a problem, but the extra space is comfortable and a loose fitting flightsuit looks better than a tight fitting one over the stomach and upper thighs. It's way too long so I will have to shorten the legs quite a lot, but the torso and arms can be kept in check with the belt and cuffs. For the price I think it was as good as I can get it.

If you are a curvy female and want a better fit there are some options out there.
The most expensive options is to have it made or you can create your own pattern and use that.

If you want to make your own X-wing flightsuit I would recommend reading this progress thread from two of the girls in the Nordic Base and also to pay close attention to this sketch of the X-wing flightsuit that shows all the necessary details.