Showing posts with label construction. Show all posts

Tuesday, 24 July 2018

Melisandre - sleeves and closure

When it was time for the sleeves I decided not to line them. It's going to be really hot at NärCon, and the less fabric in the costumes the better. 

I did modify the shape of the sleeve compared to the pattern.

The trumpet part of the sleeve starts further down, just by the elbow, and I didn't have enough fabric so it's a bit shorter than the pattern. That's not a problem for me though since I'm short and have short arms.

I didn't want to have an ugly unfinished seam visible on the inside of the sleeve, so I felled the bottom seam on both sleeves. I didn't do that on the upper seam though, since that one is not visible. There I have just finished the edges with a zigzag stitch.


I will close the gown with two sets of strings. One invisible on the inside.


And a visible string on the outside.

I am thinking about changing the outer string to a ribbon made in the same fabric as the gown, but that will be for ComicCon. I will also carry a bunch of pins with me in case I notice that there is risk for a costume malfunction with the opening.

And with that Melisandre is finished and just waiting to be packed down for the trip to Linköping.

Thursday, 19 July 2018

Melisandre gown, main part

The main part of the Melisandre has taken shape. As you will see on the photos the fabric is quite impossible to photograph. The photo below shows the fabric in both shadow and sunlight. Going from tomato red to a deep wine.


I did decide to line the full gown, firt I had only planned to maybe just line the bodice. I used a quite heavy cotton for the lining.

I made the full lining so that I could try out if I needed to do any modifications, but it turned out to be good straight off the pattern. I then sewed the main fabric together. I attached the outer fabric and lining to each othe by zigzagging the front edge, neck and arm scyes together.


The fabric was so beautiful when it pooled on the floor, but I have to be a bit practical and have it just reach my toes. When I cut the fabric off I made a huge mistake though, and managed to cut off too much. I simply had to reattach the fabric again, and press the seam like crazy to hide it.

The seam is visible, but only if you look really close, and I think most people will only think that it's the hem.

Along the front edge I added a deep facing. The facing is cut on the straight, unlike the gown itself where the front edge is on the bias. The straight facing will hopefully keep the front edge from getting distorted.

I also added a deep hem facing, rather than just hemming it. The hem facing will protect the outer fabric, and it will be possible to remove it and wash it if it gets too dirty.

The front edge facing is sewn in place. For me that's used to invisible seams it felt strange to have something that's so visible, but it's clearly there in the reference photos.

This is the finished gown, now I only need to add the sleeves.

Friday, 13 July 2018

Melisandre from Game of Thrones

One of my redheaded costumes for the year will be Melisandre from Game of Thrones. More precisely I want to do her travelling outfit.


I want to do the travelling outfit, since that will allow me to use my own hair and just hide it under the hood of the cloak so that I can hide that it's not long enough.

My plan is to do the gown she's wearing under the cloak for NärCon in the end of July, and then do the full cloak for ComicCon in September.

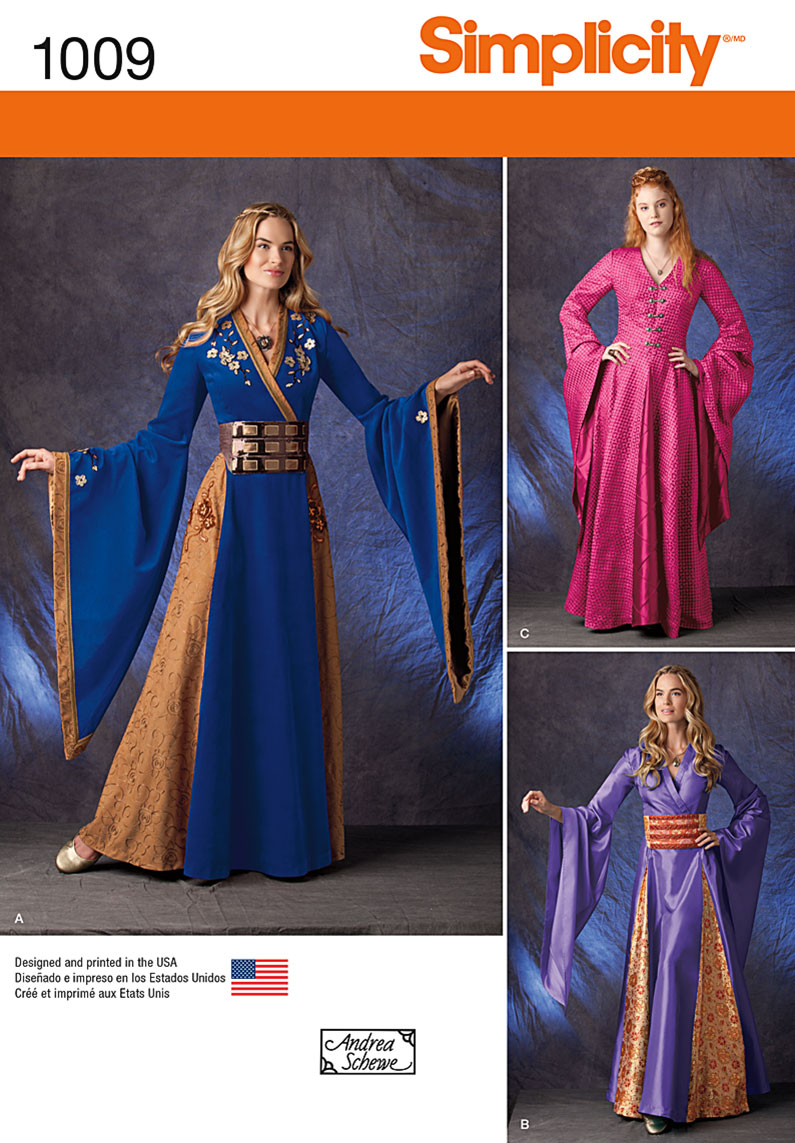
I started off with Simplicity 1009 as a base for the gown.

It's clearly a pattern modelled on the costumes from Game of Thrones, but simplified. In its original it is a bodice with a separate skirt, with the waist seam hidden under the belt. The gores are sewn into the skirt and not a separate underskirt. I only used the bodice pattern, and then I lengthed it to make a full gown.


The original pattern has sewn the front pieces to each other, but I have made the fronts so that I can wrap them properly over each other.

The fabric that I'm using is a polyester dupioni, with a lovely drape. I would not guess that it was a poly fabric at all. It's really hard to photograph though, it looks a lot more red/orange than in real life.

After having cut out all the pieces I had to pin the pieces together just to get a feel for the fit of the gown.


The general shape is quite nice, but on the big side. The next step will be to make a lining for the bodice that I can fit closer to the body, and then fit the fabric to the lining.

Wednesday, 4 April 2018

HSM Challenge 4: A gollar edged with fur

As mentioned in my post about thread covered buttons I decided to make a gollar for the HSM April challenge. I think this is a reason why I really like the HSM, it pushes me to make accessories and learn new things. A gollar is a very common part of the 16th century German wardrobe, but I wasn't really thinking about doing one, instead just concentrating on the shift and the gown. Well here was a challenge I had to come up with something to do, and on the way I also learned a new technique, and I foresee more buttonmaking in the future.

The gollar is a garmen that covers the top of the bodice, from the neck down to the bust.
A lot of examples show it lined with fur, and with contrasting strips of fabric as decoration.


The main inspiration for this project was this tutorial on a fur-lined gollar from Handcrafted History.

I started with making a pattern from some scrap fabric.
I decided to make my gollar in two pieces, to make it easier to fit it. A gollar is not a full or semi-circle. My pattern started out as a circle, and then I folded and folded and folded away fabric until I had a pattern that fit. For an even better fit you could also make a shoulder seam, but I decided that a back seam was enough. It's important to mark out the grain line on the template, neither the center front nor the center back ended up on the grainline after my modifications.

I then cut out the gollar in one layer of wool and a layer in some kind of linen blend. It's an old fabric that looks quite like linen, but it doesn't feel like it so I guess I bought it before I was very accurate when it came to fabrics.

I sewed the center seam and added a straight strip of the wool fabric as a collar. At this point I also made and attached the threadcovered buttons and the button loops I talked about in an earlier post.

Then it was time for the fur. I don't have a trouble working with fur per se, as a meat eater it woud be hypocritical of me to not be able to work with all parts of an animal. I do not like the idea of breeding animals for the fur, in dreadful conditions though. For that reason I wouldn't buy  new fur, unless I was sure that the animals had been treated well, but I don't have a problem reusing old furs, or wearing old fur. There are few things that are more comfortable on a cold winter than a fur.

My mother had a fur hat from my grandmother. It had both shrunk a bit and my mother's cats had found it and played with it. It wasn't usable as a hat anymore.

I took the hat and disassembled it. It consisted of a brim and a top.


The fur was quite fragile in places, where it had gone dry and brittle. Still I could cut the brim in two parts and when I had cut off the most damaged parts it was just enough to line the collar and the front edges with the fur.

I sewed the fur to the wool right side to right side and turned it. I couldn't press the fur, but I used my fingers to press the edges flat.


Then I sewed the linen lining and attached it securely to the seam allowance of the collar. I folded the fur to the back, sandwiching the linen lining between the fur and the wool along the neck and the front edges, and attached the fur to the lining.


This is the inside of the gollar, showing the shape and the lining.


Front of the gollar, with my two handworked buttons visible.

It can also be worn unbuttoned, if I really want to show off the fur.

The making of the buttons and button loops have been documented here.

The Challenge: 4  buttons and fastening
Material: 0,5 m of red wool, 0,5 m of linen blend, 1 fur cap
Pattern: My own
Year: 1520s
Notions: Thread for the buttons and the button loops, linen thread to sew with
How historically accurate is it? 60%
Hours to complete: One day
First worn: -
Total cost: All the materials were from my stash or had been given to me, if bought new, except for the fur, I think around $20. 

Saturday, 31 March 2018

Thread covered buttons

My plan for Easter was to really get going on TLJ Leia or Admiral Daala, but when neither the lining for the TLJ Leia or piping for Admirala Daala showed up before the holiday I had to change my plans. Still a long weekend with a lot of time is a great time to sew. I started to think about the April challenge for Historical Sew Monthly, and realized that I had no idea what I wanted to do. The Theme for April is "Buttons and fastenings" and I wanted it to fit with my 16th century project. I needed to work with what I had at home as well.

One common accessory for the 16th century is the gollar, a kind of short cape that only goes down to the bust. It's small so I could use some of my red wool, that I got from my mother, without eating too much into it, and it's of course necessary to close the gollar with something.

Woman in green with a red/brown gollar
Now most pictures of gollars show them closed with either clasp or an invisible closure, probably hooks and eyes. I decided to go for buttons and to make the buttons myself. I will cover the gollar in a later post, this will be about the buttons.

I found this great tutorial on how to make thread covered buttons at Matsukaze Workshops. Instead of just repeating it, here are my comments to it.

The first try
 First you need to make a base for your button. If you don't have any wood blanks around you can make it out of fabric. I used this tutorial from the Medieval Tailor.

It takes more fabric than you think to make a button. Here is one of my cloth buttons laying on the paper template I used to cut out the fabric. Now of course you can make saller buttons, but I wanted them to be fairly big and visible.

Once you start covering the buttons you need more thread than you think. My first try button didn't get completely covered, eventhough I wasn't covering it very tightly. It is a bit fiddly working with the long pieces of thread, both the shank thread and the thread you are using for covering but it worked out in the end. I used some kind of cotton thread/yarn that I found in my mother's stash among the embroidery threads. It's not floss, and it's only one strand of thread to work with. Of course using cotton doesn't make it totally accurate, but it looks accurate enough.


The finished buttons.

To fasten the buttons I made button loops.
To get the right size ont he loops I first sewed the buttons on, so that I could measure around them for the loops. I made the loops quite snug, and the inside diameter stays the same even if the loop gets thicker. For the loops I used three strands of the same thread as I used for the buttons, and then I covered the strands with a blanket stitch in double thread. The bottom loop was my first try, you can see that I got the blanket stitches more even on the top loop. In hindsight I'm thinking that it might have been enough to use just one strand for the blanket stitch to make it a more even. I used this tutorial for the button loops.

Saturday, 3 February 2018

Working on my 16th cenury shift, and a magic pen

I have started working on the 16th century shift, and despite all my talk about doing something suitable for the local people, I couldn't help myself. I have started a shift with so much fabric that it's clearly an upperclass/nobility shift. I guess that only means that I need to make another more suitable shift, but I actually enjoy making them.

For the general pattern and instructions I have followed the tutorial from Katafalk. It gives a total circumference, and neck to be smocked, of 4,5 m. That's a lot of fabric.

This is where I have marked the dots for the smocking and sewn my gathering threads. For such a long length I have divided it into several parts, and I use different coloured threads to sort them out. It gets a bit complicated when it's time to gather them, but I rather to it this way than work with a single length of thread and all the potential for tangling and breaking.

Working with marking all the dots got a lot easier when I found a magic pen. I read the Dreamstress post about Pilot Frixion pens some time ago, and decided to try them. Frixion pens are erasable pens, the secret though is that they are erasable with heat. When you use a pen on paper you use an eraser to create heat with friction, but in the sewing studio there is another source of heat - an iron.

This is a video I made when I tested the Pilot Frixion pen, I didn't dare put bright red dots all over my white linen until I had tried it.


The Dreamstress has made a lot more tests with the pens than I have, so I really recommend reading up on them. For now though I think I will never use chalks or tracing paper again.

All that fabric was eventually gathered into a collar.

To keep the gathers in place I have fastened them at the top and bottom with a stem stitch in white silk. I keep the gathering threads in place, I will just remove them when all is finished and secured.

As of now I need to decide how I want to smock the collar, and with what thread. Until I have decided that I will smock the end of the sleeves.

Saturday, 25 November 2017

The Last Jedi Leia coat pattern

I finished the pattern for the Leia coat, and even if I didn't take a lot of photos of the process I will share what I did. It also shows how I usually work when I make my patterns.

I cut up my first mock-up. I cut it off at the hips, since it's not fitted below the hips it felt a waste of fabric to work on a full-length version, when I only needed to fit it on the upper body. I also cut the back piece in half, since I had discovered that there was a center back seam.


On this photo the left side looks smoother and better fitted than the right. That is because I start working on both sides, by pinning and repinning the pieces to each other. Once I feel that one side is starting to look better than the other I concentrate on that side and don't work on both sides. I don't take it off though, since I still need the other side so I can hang the mock up on my dress form and on myself.

This stage is a lot of testing. Once I'm happy with what it looks like on the dress form I make sure to test it on myself. The dress form is a great help, but it also has an idealized shape, while I have lumps and bumps and soft flesh that makes me less than ideal.

Most of the shaping was done on the back seam, I also cut the shoulder seam shorter, which make the armscye larger than the first version.

Then it was on to the sleeves. The sleeves were made through trial and error. I simply started with two large square pieces of fabric that I sewed together to create what looked like an oversized pillow cover, with two open sides. Then I folded more and more fabric away, and cut off the excess until it had a shape that I liked.

The last thing I did was to sew the sleeve to the bodice to make sure it all fit together.

back of the mock up

Front of the mock up
The fabric that I'm using is a little bit too flimsy to hold the shape of the sleeve. I will try to make the sleeve with just the main fabric, but I am prepared to do some kind of reinforcing to make it stiffer. I won't know until I have started working on the actual fabric though.

While the mock up is still on the dress form I make sure to write all notes I will need. The most important is of course which piece it is, and how much seam allowance I have used. I also make marks where the pattern pieces should join up.

After I have made all the markings I need on the mock up I cut it up, I do that by simply cutting the seams. During the work I have usually changed the seam allowances while adjusting the fit, by cutting at the seamline I know it will all go together and I can then add my own seam allowance when cutting the main fabric.

These are my final pattern pieces. Top left - back piece, top right - front piece, bottom left - back sleeve, bottom right - front sleeve.

Here is also a close up of the sleeve pieces. They should be joined at the bottom and where they face each other.


Friday, 24 November 2017

The Last Jedi Leia choice of seams

Now when I'm working on the mockup for my TLJ Leia I just want to post about my observations on the grey coat, and why I've chosen to put seams where I have them.

 In my last post about the Project I was unsure on whether there was a back seam or not. After looking at some more photos, especially from the trailer I'm now sure that there is a back seam.

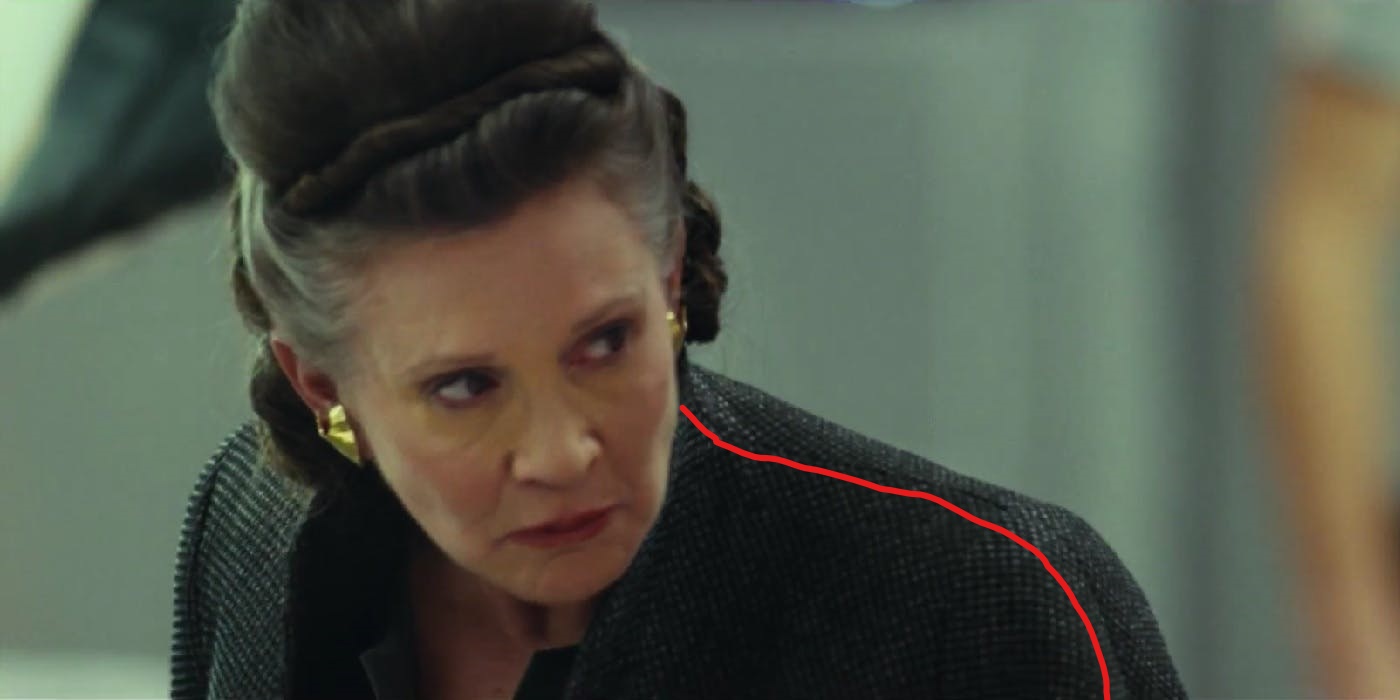
This photo has been adjusted and it's quite small, but there are better versions of this particular shot out there, still the seam is visible. This of course made me happy since it's much easier to make a well fitting back piece with a seam in place.

At the shoulders there are a couple of visible seams.

There is the shoulder seam and a seam connectinc the sleeve to the armscye. There is also a visible seam on the sleeve itself.

In this close up it's possible to follow the seam from the neck and down the sleeve, meaning that the fitting of the sleeves need to be really good to make sure that there is no break in the seam.

This last photo give some more information. One is that the sleeves are not connected all the way around the armscye, less fitting there yay!.

When it comes to the lower part of the coat the red lines do not indicate seams, it's rather to show how the front and back piece falls in different directions. The front piece is more or less straight, while the back piece has more of an angle.

Well that's it, now I'm on to more work on the mock up.


Thursday, 9 November 2017

Starting the Last Jedi Leia

With around a month to go until the premiere of the film I really need to start working on it. I have started on a mockup for the coat. I'm going for the grey version, with a distinctly patterned fabric and a lower standing collar, compared to the more dramatic brown version.

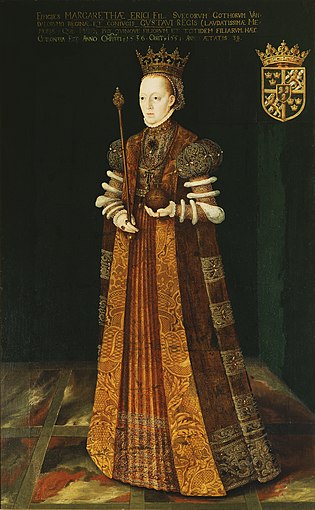
Since I'm interested in historical costumes as well I tend to find inspiration from history, and the TLJ Leia coat has screamed mid-16th Century loose gown for me.

Margareta Eriksdotter Leijonhufvud (1516-1551)
Margareta Eriksdotter (Vasa), dead 1536 Copy after: Mäster Hillebrand

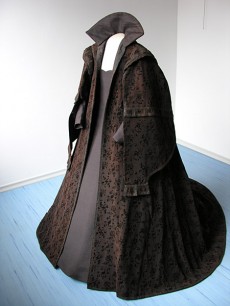
Then I found a photo of this extant dress 

garment of Margaretha Francizka Lobkowicz née Dietrichstein, 1st half of the 17th centuryRegional Museum, Mikulov
It has the open, hanging sleeves and the dramatic collar, so it just screams TLJ coat inspiration to me.

With inspiration from this time period I opened up my "Creating historical clothes" and used their pattern for a 16th century loose gown as the basis for my mock-up.


I changed the neckline in the front though to continue as a straight edge from the center front, this gives the collar a large lapel.

I trimmed the collar down and curved it to match the references.

There was a crease going from the shoulder seam and all the way to the front though, so I added a dart that continued up from the shoulder seam.

I was very happy when I found this reference photo that shows that there is a continues seam, from the sleeve, over the shoulder and up all the way to the collar.

I still want to tweak the collar a bit, but then it's on to the sleeves.

One thing that is guesswork at this time is the back. I don't know if there are any seams there at all. At this moment I'm going to treat the back as one large piece, if we get a reference for the back it's easier to add the seams in later, than if I make seams and it turns out that they aren't there.