Showing posts with label navy anglaise. Show all posts

Friday, 7 August 2015

An afternoon at Staberg

Today I had the opportunity to get some photos taken of me in my costumes. I Went to my favorite photo Place, Gamla Staberg, with its 17th Century mansion, early 19th main building and 18th century garden. Now the houses are private property so it's the garden that you can stroll around in. I of course wanted to use my new Daisy hat, and with that I felt that the navy Anglaise was the only matching choice. I quickly made a new petticoat for it, so I wouldn't have yet another photo of me in the navy Anglaise with the yellow skirt.

In front of the early 19th century house

Looking out over the garden, with the 17th century mansion in the background

By the hop garden
By one of the outhouses
The daisy hat is definitely a hat where you need to be aware of the wind direction

Wednesday, 20 August 2014

Venetian ball

In my professional life I'm working as a museum pedagogue in an historical mine, and World Heritage Site. Around 1,5 hours drive from us is another historical mine and during the summer we try to keep up a tradition to go and visit each other and have fun together. This year the other historical mine, Sala, invited us to a Venetian masked ball in their underground ballroom, they have been doing quite a few 18th century events and tried to profile them as 18th century.

I decided to wear my navy anglaise. As for the rest of the people going we had had a bit pf presentation of 18th century fashion, some of them had watched costume dramas and then they had created a lot of nice outfits, not historically correct but great for having fun in an 18th century way.

We were a couple of people who arrived early in Sala to get dressed. I had had minor disaster with my wig when I tried to restyle it, so this is what it looked like.

Photo: Frida Unnerud-Björsland
Still I had made two rats, one was a net stocking that I simply filled with foam to make a long roll and one was a donut that I had covered with some dark loose hair that I had. I managed to pin the wig over the rats and into something decent. Since I dyed my hair bright red it's no way that I can hide my own hairline though, so the next time I'm going to an event I need to get a wig that I can work my own hair into.
Photo: Frida Unnerud-Björsland
I'm quite happy with the result, I pinned some feather on top as well. This was the first time that I wore the anglaise with the trim that I added earlier this year, and I love how it has transformed the whole gown.

Except for me wearing my anglaise there was a mix of how people had come up with their clothes. I had lent out my printed anglaise to one of the girls, one of them had borrowed from our museum, one has a mix of her traditional folkcostume and a wedding gown she found in a second hand store, three of them (including the guy) had sewn most of their outfits, and then there was another second hand store.
Photo: Frida Unnerud-Björsland
When we got underground there was of course dancing. We learnt one polonaise, one renaissance dance I can't remember the name of and one anglaise. My feet and legs hurt a lot the day after, since my shoes have very thin soles and we were jumping/dancing on the bedrock, so now spring in that dancefloor.

Compulsory "I'm all dressed up and underground" photo.

A full body picture of me in the anglaise.

Thursday, 6 February 2014

Early birthday gifts

It's my birthday in February and I've bought myself two, ok three, birthday gifts this year. Two of them have arrived quicker than I expected so I already have them, even if it's just the beginning of February.

The first thing was the book Creating historical clothes: Pattern Cutting from Tudor to Victorian time by Elizabeth Friendship.
I bought it after reading this review over at American Duchess. I can only agree with the assessment in the review, that the book covers everything, but there are few pictures of actual garments. I've just flipped through it and to be honest all the diagrams and numbers and points seem a bit daunting to me. I'm hoping that once I read through the instructions carefully and just follow them step by step, then it will be a lot clearer. I still think this is the kind of book I need though in order to be able to finally make the patterns I want to, without having to buy new patterns for every single piece. I also like that it covers such a wide time period, since I have promised myself that I am going to make a 17th century outfit one day, and I can't help that I'm dreaming of making a really nice 1880's ensemble as well.

This book together with draping will probably be very helpful. Draping brings me to my major birthday gift to myself. I've finally bought a dressform.
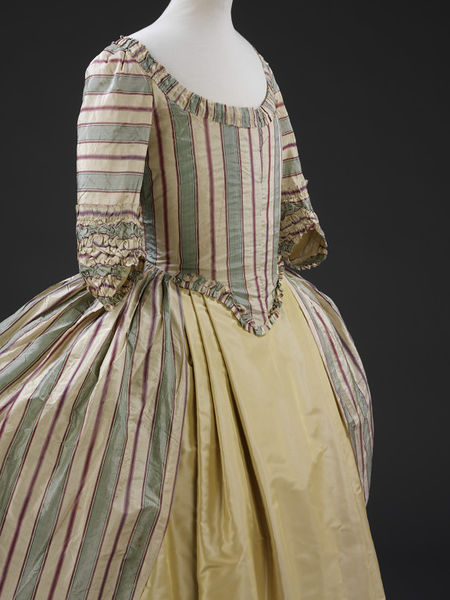
Here she is dressed in my navy anglaise. It was really hard to choose which size I would go for, since I am a bit between sizes, especially when I'm wearing historical undergarments. In the end I decided to go for a medium sized, rather than the small. The dressform actually arrived in less than two days and after assembling it and adjusting it I can only say that it fits my natural measurements great. Unfortunately as you can see I can't close my navy anglaise at the bust. I have adjusted the bust measurements to the smallest available, but my squishy bust is pushed upwards  when I wear stays and this gown, while the dressform of course has a bust that refuses to move. There is also a difference between the navy anglaise, which is on the verge of "I can't breathe" and the printed cotton anglaise which is probably half a size larger, and that one I could close over the bust.

If I want to make something 18th century as tight as the navy anglaise I will simply have to do the final adjustments on my body rather than on the dressform. The reason why the navy anglaise is so tight is also because I used a dressform in size small, and even with padding it was too small compared to myself.

Also even if I'm in an 18th century phase at the moment, I do quite a lot of other clothes as well, and then the dressform can be adjusted to my exact size.


Monday, 13 January 2014

HSF14 Challenge 1 Make do and Mend

The challenge: Make do and Mend
Snow White (October 2013)
 Let’s start of the year with a clean slate, and with a bit of a tidy up.  Use this challenge as an opportunity to get your historical wardrobe in order by fixing any little bits that have worn out and gone wrong. 

For the first challenge of the year I decided to go over my Snow White gown that I made this autumn.

It was a masquerade costume and I wanted to turn it into a more "normal" 18th century costume, also even though it was the newest one I had noticed some things that I wanted to fix.

I started with removing the cape, collar and cuffs. That was simple since I had just tacked them on.


At the bottom of the bodice I had had problems with the silk starting to unravel at the edge, when I had fixed it the white lining had become visible. The neckline was also a tiny bit too wide, meaning that I had to worry about showing too much of my breasts all the time. None of this was about construction, but rather more about hiding the imperfections. The Snow White gown was also quite plain, and the only trims I had were the cuffs, the cape and the collar. I decided to go all out and hide the bottom edge with some trimmings, as well as raising the neckline a bit.


bottom of bodice with the visible white lining.
Thankfully I still had saved the bigger pieces that remained of the blue silk taffeta, so I started to cut it up into strips of fabric. My plan was to make a box pleated trim, similar to this gown. You can see the trim at the point of the bodice and along the neckline.

When I had cut the strips of fabric I felt faint when I thought about the amount of tiny hems I would need to make, and decided that that was simply not feasible. Also a hem would make the whole trim bulkier than I wanted, and I've never seen fray-check or anything like that sold in the stores around here. Thankfully I remembered an advice I heard in Kalmar, when the horrors of hemming and trimming many meters by hand were talked about. I can't remember who said it, so I can't give credit to this person, but I am very thankful for it. The advice was to use regular wood glue, but mixed with water to thin it out. Thinking about it I guess one reason why wood glue works is that it's supposed to bond natural fibres, so it won't hurt the textile.


The wood glue worked fine. I mixed the glue with the water until it was really thin, but still had a white colour, then I simply brushed it onto all the edges. First I was quite hesitant and made sure to only brush the edge of the fabric, but after a while I used the full width of the brush. When the glue/water had dried it was invisible and the edge didn't fray.


Then it was on to cutting strips, painting the edges and doing all the box pleats.

I didn't measure my pleats exactly, so they are a bit uneven, but that is something you can see on original gowns as well. I tried to keep the pleats to about the same width as my fingers. Since I was going to sew the trim on in the middle I also secured the trim with some stitches along the middle of the trim, before removing the pins and pressing the whole piece of trim flat. Then I pinned the trim onto the gown and sewed it on by hand.

I'm very happy that I did have enough fabric so that I could go al the way down the sides of the skirt of the gown, as well as replacing the red cuffs with this new pleated trim. I had removed the white small flounces at the sleeves together with the cuffs, I sewed them back on, and all of a sudden they were a lot more visible.

I can only say sorry for the bad photos, I didn't feel like getting all dressed up, and since I don't have a dressform I just put the robe on the floor and snapped some photos.


 The new ending of the sleeve with a pleated trim and a visible flounce.

 The full robe with the trimming along the neckline and the front (with flash)

 The full robe with the trimming along the neckline and the front (without flash)

Fabric: blue silk taffeta
Pattern: none
Year: ca 1780
Notions: wood glue, polyester thread
How historically accurate is it? The trim itself is accurate, but I doubt that they used wood glue and polyester thread.
Hours to complete: 10-15, and most if just sitting and doing the pleats
First worn: never

Total cost: $5 for a small bottle of wood glue, the rest was from my stash.

What did I learn with this project?
The handy thing of using wood glue for the fabric edges instead of having to do tiny hems or cut with my modern pinking shears when I want to do trim will definitely come in handy in the future.

I also saw this as my first try with doing box pleats, and it wasn't much harder than the knife pleats that I usually make. This was my first try with doing box pleats, and with silk taffeta, so in a way it was dry run for when it's time to start on my Gold Handmaiden gown. I definitely want to use the same kind of fabric for it since it was easy to manipulate into straight creases and pleats.

From now on when I talk about this gown I'm going to call it my navy anglaise rather than Snow White.