Showing posts with label 1910s. Show all posts

Friday, 25 October 2024

The Seatoun 1916 skirt

 Did I have the time to thrown in a random project last month? No. Could I stop myself when Leimomi Oakes of TheDreamstress and Scroop Patterns asked for pattern testers for a mid-1910s skirt? Also no. I already have the Scroop Patterns corset, petticoat and blouse for the time period and this would be perfect to get a whole outfit finished. The fashion 1915-1917 with the crinoline revival and swishy skirts is probably my absolute favorite historical era, after all it's no coincidence that I modelled my wedding gown after it. 


Leimomi said that it took her around 4,5 hours to make the skirt, so I figured it would a fairly straightforward project, and it was. It would have been even easier if I had chosen another fabric. I used a very dark navy herringbone twill in cotton, and it was so dark that all the seams simply disappeared. I couldn't see them, which led to me chosing a simpler finish on the long seams and missing some when installing the placket. I really like Scroop Patterns because of the instructions though, they are so so easy to follow and I know that even if something feels daunting I could just take a breath and follow the instructions step by step and I will end up with a nice end result.

The changes I made to this pattern was that shortened the skirt with 6 cm at the hem and I used slightly larger seam allowances on the waist belt. I made a size 42 and my belt ended up 92 cm instead of the 91,5 if I had made the pattern with the indicated seam allowances. 

Another thing that I changed was that I raised the pockets. Mostly to make them reachable for my arms, but it also had the bonus of covering my wonky sewing at the bottom of the placket. In order to mark the new placement for the pockets I simply cut out the pocket placement marking from the pattern and placed it on the skirt until I was happy with where it was, then I marked it on the skirt and sewed the pocket on.


I am wearing the skirt with a Wearing Historys combinations, the Rilla corset, the Ettie Petticoat, my own pattern of a corset cover and the Selina blouse. This combination of clothes really illustrates the changes my body has gone through the last few years. The Rilla from 2017 is size 44 and it is slightly too large now, I had to fully close it in the back and I could have cinched it some more if I could have. The Ettie is made in size 48 or 50, and in order for it to stay up I made a hole in the casing for the elastic and then shortened the elastic quite a lot. This large Ettie was maybe a bit too large to get all the fabric properly under the skirt, it felt a bit bulky, especially since it is starched. The Selina is a size 46 and it definitely feels too big now. The hat is a summer straw hat from H&M that I've simply added a giant bow and some feathers to.


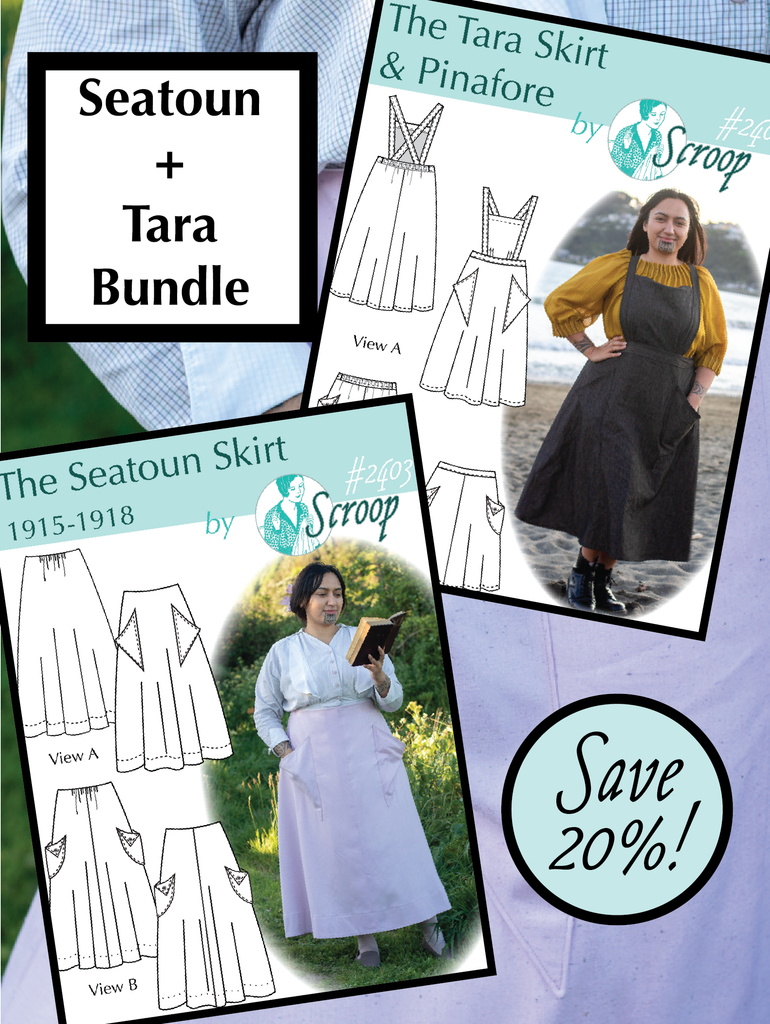
The pattern is now launched at Scroop Patterns and it also comes with a modernised version, the Tara skirt and pinafore. I was so happy with the Seatoun that I have already bought fabric so that I can make the Tara versions to use as everyday wear.


Wednesday, 6 July 2022

HSM22 challenge 10s - my 1916 underwear

October: A Perfect 10: It’s the HSM’s 10th anniversary, so make something 10 themed. 10th century, the something-10s, something that incorporates 10 of something? Be creative with it!
The whole set with combinations, corset and petticoat

I have come to like the fashion in 1915-1917 more and more, and with the need for some underwear for my wedding gown it also gave me a reason to make a new set of underwear. I'm not going for an historical wedding gown, but I like the silhouette and want to make my wedding gown from that. Up until now I have made to with my Scroop Pattern Rilla corset that I patterned tested and an 1980's romantic skirt that I have turned into a petticoat. I had already made the Wearing History 1917 combinations, so now it was time for the rest of the underwear. 

When I pattern tested the Rilla corset I got the finished pattern as a reward. Since then Leimomi Oakes has made another set of sizes for the Rilla so that it now comes in size pack A, B and C. I had the size pack A and B, and I was just on the outside of the largest size in B. I still decided to try and work with that, instead of rebuying the pattern. I shouldn't have worried. The Scroop Patterns are really true to size, in fact I would say that they have a tendency to run a bit large. Every time that I have made a pattern and gone up a bit to be on the safe side I have had to take them in back to the size I should have picked from the start.

Since this is a pattern that can be bought I don't want to talk to much about the construction, it's all there in the very clear and good instructions. The only thing I get a bit worried about is to choose the length for the boning. I bought the boning before starting to sew and I picked the middle of the road in the size options given. It works, but if I hade sewn the boning channels first I would probably have chosen to have the back bones be the shortest option, they really go down deep on my bum. 

A thing that made the materials for the corset more expensive was that apparently it's impossible to find spring steel with plastic dipped ends in the EU. All the Swedish and contintenal sellers that I could find only had them precut and wanted you to put metallic end caps on them. I had to order the boning from VenaCava in the UK, and with Brexit that means that I also had to buy customs and toll cleareance for them.

The Rilla corset doesn't have a lot of reduction, it simply smooths out the curves. This makes it really comfortable. I am really unused to the longline corset though, and in that way I feel more restricted from the waist down, compared to Georgian stays or Victorian corsets. I definitely need to practice more about simply going to the bathroom, and being able to pick up the flap on the combinations so that I can button them to the front. I might have to adjust where I have placed the buttons on the combinations as well.

Since this is my wedding corset I made it from white coutil, and I also used gold details on the busk and lace. 

When the corset was done it was time for the petticoat, made from Scroop Patterns Ettie Pettie, that is designed to cover the time period 1900-1910 and goes really well with the Rilla corset. I loved the idea of making a really fluffy petticoat, and there are two ruffles with lace on the version that I made.


Inserting several rows of lace and using lace for the hems was tedoius, but I loved the result. There is a lot of lace, which is reflected in the price tag of the materials, there simply wasn't a lot of options when I wanted pure cotton lace. The lace also made the petticoat surprisingly heavy, considering that the fabric is a very light cotton batiste.

One mistake I made when cutting out the pattern was that I didn't adjust for my length. I have very short legs, but I'm used to being able to adjust the skirt length either at the waist or at the hem, which is possible when working with large rectangular pieces that are gathered to the waist. Instead of recutting the pattern pieces I made two tucks just above the first ruffle, which is a common detail on period petticoats. One of the pattern variations have similar tucks on the ruffle itself.


Another mistake I made was to simply don't read the full instructions. So keep in mind that you should mark out eight points and not just quarter points when it is time to gather the ruffle, and the outer ruffle is not attached exactly the same as the dust ruffle. The result was that the ruffle is not quite as evenly gathered as I would have liked, and instead of cutting away the fabric behind the lace covering where the ruffle is attached to the skirt I just sewed the lace over the seam as a ribbon. It works fine, and is an option in the pattern, but I really like the more delicate look when the fabric is cut away.


The one thing left to do now is to starch the petticoat to get it really fluffy and crisp, but that is for later in the summer.

The Historical Sew Monthly details

What the item is: - A corset and petticoat
How it fits the challenge: It is from the 1910s
Material: corset - 1 m cotton coutil, petticoat - 3 m cotton batist
Pattern: Scroop Patterns Rilla corset and Ettie Petticoat
Year: 1915-1917
Notions: For the petticoat -  7,5 m cotton insertion lace, 5,5 m hemming lace, elastic waistband, snaps, hook and eye, for the corset - 1 busk, 48 grommets and 24 spring steel bones in varying size, 1 m grosgrain tape, 6 m of corset lacing, 2,5 m bias tape
How historically accurate is it? I have follwed the instructions, so I think this one is pretty closee.
Hours to complete: one month for both
First worn: not yet
Total cost: $200 for both pieces

Sunday, 15 May 2022

Wearing history's 1917 combinations

 I have been intrigued by combinations, the one piece garment that combined the chemise with drawers to be the layer between the skin and the corset in the first decades of the 20th century. One reason for that is because my thighs are so big that I get chafing if I don't wear some fabric between them. In older periods I simply wear a pair of linen or cotton shorts under the clothes, unhistorical but comfortable. With the longline corsets of the 1910s I have had problems with that. If I have the shorts under the corset it is really complicated to go to the bathroom, and if I have them over the corset it's hard to pull them up because the corset is so long.

Wearing history has several combination patterns and I decided to go for the ca 1917 pattern.

It is based on this original pattern

It has just a crotch flap instead of full drawers, and I felt that if the crotch flap didn't work out it would be simple to just cut it off and have a nice and cute chemise.

As usual with the Wearing history patterns there are not a lot of instructions, but they are not needed either because it is really just two pieces that needs to be sewn together. Leimomi Oakes of The Dreamstress was a pattern tester for this and she has also made a good post about it, that I used for some further inspiration.


The pattern ended before my size, but looking at the measurements given I realized that the pattern is very roomy, and since I didn't want a lot of extra fabric under the corset I had no problem going down a size to the largest available on the pattern. It is still a roomy and comfortable garment.

I opted for the straight top, with just a pair of satin ribbons for shoulder straps. This was simply because I didn't have enough fabric to cut out both the shoulder straps and the crotch flap. I also felt that the straight top felt a bit more "modern" and forward looking to the 1920s. 


The seams are sewn with french seams, if you don't know how to do it there are a lot of tutorials out there for french seams. In the back the fabric needs to be pleated into a box pleat, I hid the raw edges of the fabric under a piece of cotton tape.

With inspiration from the Dreamstress I baglined the crotch flap. Unlike in the instructions I didn't make button holes, instead I just metallic snaps to fasten it.

There are no instructions on where the crotch flap should be fastened. At first I simply fastened it at the bottom of the front, but when I tried the combinations on the crotch flap hung so low that it didn't do anything to prevent my thighs rubbing each other. After some experimentation I raised the fastening quite a lot. 

Now I have tried the combinations on while just walking around at home and they feel really comfortable, I still haven't tried them under a corset. It will be then that I discover if the raised crotch flap will be a problem, and if they really will help against the chafing. 


Friday, 31 December 2021

Favorite photos of 2021

 Despite a pandemic there were still some events taking place, the biggest being Medieval Week in Visby and ComicCon in Stockholm. I also got better at taking photos by myself with a tripod and selftimer. So here are my favorite photos of 2021, without any specific order.


Saturday, 17 April 2021

More photos of the Selina blouse

 On April 8th, in between snow, hail and glaring sun I managed to get into costume and have my mother help me take some photos on her porch. It was really fun, and it really helped that I had borrowed a tripod so my mother didn't have to hold the phone, only see that I was actually in frame. I have already posted some photos, but here are some more.


HSM21 - Challenge Joy - the Selina blouse.

 When Leimomi of Scroop Patterns asked for testers for a new 1910s blouse I submitted an application, and was happy when I got chosen as a pattern tester. I have tested the 1910s Rilla corset from Scroop Patterns, and I have really like when I have sewn other patterns from her as well. This was a reason why I hurried to finish the jedi, so that I could work on this pattern. It had to be secret until the pattern was released though. Now it's released and I can post about.

It should be noted that this is the test version of the pattern, and there are some differences to the final pattern.

The first step of the process was to make a mock-up for the general fit. This is actually my second mockup. I was just on the measurements for size 46, but sized up to size 48 and that was too big. The Scroop Patterns are definitely true to size. This is quite a roomy fit, eventhough the raglan sleeves can feel a bit restrictive.

The fabric for the final blouse was a polka dot cotton, the only thin and fairly historical pattern I could find at the local fabric store. I liked the fabric a lot more when I switched sides and used the wrong side as the outside, where the dots were more faded.

As a pattern tester I made sure to take notes on everything. I should say that they Selina pattern comes in two views A and B. I made view A, and I had a bit of an issue visualizing the faux waistcoat, but it really helped when I saw photos of the other pattern testers. For the finished pattern Leimomi has added a modern photo as well as line drawing to show off View A, which I think is good. I also recommend visiting her blog to see more photos of the variations. 

I think if I did the pattern again I would either make view B, without the waistcoat effect, or choose a contrasting fabric for that piece to make it more visible. Overall the pattern went together really well though, and there were just very minor things that I had to give feedback on.


This was the finished blouse. It has a slightly raised waist, so when I wore it as a historybounding piece with a modern pair of jeans I felt that my belly was a bit too exposed. In the final pattern the front has been lengthened compared to the test version. In the pattern there is now also a full document about alterations, and that includes lenthening the bodice even more.

Also some testers had an issue with the peplum not being wide enough. Leimomi came up with fitting instructions for that as well, and those are included in the final pattern. I didn't have a problem with the peplum, but it definitely fit better when I wore it over my longline Rilla corset, that smoothes out the stomach and hips.


Overall I would definitely recommend this pattern for anyone wanting a nice and comfy blouse, either for historical costuming or modern day wear. I have bulky arms and hate fitting sleeves, so I love that it has raglan sleeves, and no pesky armscyes.

Here it is worn over my Edwardian underwear and with the Wearing History 1916 skirt.


Me being filled with joy while wearing the blouse

What the item is: a blouse
How it fits the challenge: I'm putting this one down for the joy challenge, because it was a real joy to work with it, and to be part of the pattern tester group. I was also really happy with the result, so I have already gotten a lot of joy out of this project. It also brought me joy to get some really nice photos done with it. 
Material: 2m of thin cotton
Pattern: The Selina blouse from Scroop Patterns
Year: 1916
Notions: regular sewing thread, 5 mother of pearl buttons
How historically accurate is it? This is pretty spot on, I tried to follow all the constructions to make it as accurate as possible, and the only thing is that I used regular polyester sewing thread. So 90%
Hours to complete: 2 days (including the mock-up)
First worn: For a photoshoot on April 8th
Total cost: $20 (cost of fabric and buttons)


Saturday, 10 April 2021

Edwardian underwear

 Last summer I made some Edwardian underwear, a petticoat and a corset cover. The only photo I had of them though was a bad mirror selfie, in my dirty mirror.

Today I finally got a chance to dress up in them and take some photos. 

The petticoat still held its shape and was nice and stiff from the starching I did last summer.

The photo was taken on my mother's porch, in typical April weather that contained snow/hail/thunder and glaring sunshine almost all at once. I also borrowed the shoes from her. they are a bit big on me, but that also meant that I could wear my white folk costume knitted socks in them, and they were warm and comfy on a day like this.


Sunday, 12 July 2020

HSM 2020 challenge: no buy - my Edwardian underwear

For my visit at Hildasholm I needed some underwear. I had the Rilla corset from Scroop patterns, but I should have something to go under it and over it. When looking at my stash I realized that I am actually starting to run out of regular white cotton. I also didn't really have the time to do a full set of underwear. I decided to use a modern shaping slipdress under the corset, it would give enough support for my bust as well, and then concentrate on a petticoat and corset cover.

I've already written about the petticoat, and afterwards I realized that since everything was from stash I can include it in this challenge.

This was the challenge
No-Buy: Make something without buying anything. Whether it’s finishing off a UFO, using up scraps of fabric from earlier challenges in the year, sewing entirely from stash, or finding the perfect project for those small balls of yarn, this is your opportunity to get creative without acquiring more stuff.
From my small amount of white cotton I just managed to squeeze out one back piece and two front pieces for a corset cover. I have made a corset cover before, but I just can't find it which is a shame since it had some antique lace on it. It probably wouldn't have worked though since it was quite a cream colour that would probably have been visible under the bright white viscose that I used for my Elsie blouse.

Even if I didn't find the corset cover, I did find the pattern and I used it again. I wanted to add some extra seam allowance, but I didn't have enough fabric, and in the end it worked out well without the extra margins.


This was done the evening before I went to Hildasholm, so I cheated on the inside. The raw edges have just been zigzagged, and the hems are zigzagge and then just folded over. There is a tape at the waist level, to be honest I think I put it in a bit too high, to make a channel for a drawstring and on the neckline there is a drawstring as well.


It is closed with two sets of snaps. I had planned to make button holes and use mother of pearl buttons, but snaps were faster. I was happy when I found a piece of lace in my "miscellanous lacy stuff" box. That was also where I found the ostrich plume that I used for the hat. The lace is shiny and probably polyester, but it was a nice way of adding something to the plain corset cover.


Here I am wearing the petticoat and the corset cover. I also realized how dirty my mirror was after having seen the photo. As mentioned I'm wearing a Rilla corset under it all. The Rilla was quite comfy, but I didn't manage to tight it quite enough. It's laced with interlocking laces, like shoe laces, and that makes it harder to tighten it. Even if my shoulder is a lot more mobile than it was just a year ago I still have a problem reaching stuff on the back. On the one hand it was a lot easier to sit down and drive to Leksand in a quite loose corset, on the other hand I could feel it sliding arond a bit when I was just walking around at Hildasholm.

A new experience for me was that I felt that a longline corset with attached garters was more complicated when you wanted to use the bathroom, compared to when I've worn 18th century or 19th century corsets. It's probably just necessary to find the right way of doing it.

Anyway here are the facts for the challenge

The Challenge: No buy

Material: 1 m of cotton fabric, one 1980s romantic lace skirt

Pattern: The petticoat was a reuse, the cotton cover is from the 1911 Textbook of Domestic Art

Year: 1910s

Notions: Snaps, cotton tape ( a wide for the waist tape, narrow for drawstring). 1 m of polyester lace

How historically accurate is it? 30% It gets the look, but is made from a mix of modern and historical materials, and the inside is not finished in a period correct way.

Hours to complete: 1 evening

First worn: On a visit to Hildasholm on the 8th of July

Total cost: This was all from stash, but probably around $20 if it would have been bought new.

Friday, 10 July 2020

On my head at HIldasholm

For my visit at Hildasholm I needed to do my hair, and find a hat. I did some very quick solutions, that I was actually really happy with.


The hat is a regular sun hat from H&M. I bought it two or three years ago, and I use it regularly during summer. In order to pimp it for the early 20th century I added some trim though. The band around the crown and the bow are made from cheap poly satin. I made a tube and turned it inside out for the band, and then I pressed it. The bow is made from two rectangular pieces, one larger than the other one, and then I put another smal tube of the same fabric around it in the middle to create a bow shape. The bow wasn't pressed, since I didn't want it to loose it's quite fluffy appearane. I also found a plume of ostrich feather, that I didn't know that I had. It's made from two feathers sewn together to create volume.


Everything was just tacked on the hat with regular sewing thread.I didn't do it too well, since I want to continue to use the hat for more regular wear.

Under the hat I also needed to make something about my hair of course.

The hairstyles of the later 1910s had lost the big pouf and rolls of hair from the earlier Edwardian era. It was still an updo though, not a short cut style.


The evening before I washed my hair. I pinned the front part into smaller pin curls and the rest of the hair on large foam rollers, and then I slept on it. The rollers created quite a lot of volume, that I rolled into a bun in the back. I basically parted the back hair in three parts, the middle part was bigger and made up the most of the bnn, the side parts were twisted and pinned into the larger bun, and also hid the hairpins that kept the larger bun in place. The pin curls in front were drawn and pinned into place, on one side I was quite happy with the waves they created, but the other side didnt get that much of definition to the waves. Still it was a very simple and fairly quick hairstyle, if you exclude the time the hair was on rollers.

Wednesday, 8 July 2020

HSM 2020 : Sewing secret

Earlier in May Marlene that I've met through Cosplay Dalarna shared a photo of her early 1900s skirt and that she wanted to go to Hildasholm in costume. I of course jumped at the idea, since I also have some outfits from the early 1900s. Well then I decided that I wanted to finally make the 1916 outfit that I've wanted for some time, it is one of my favorite fashions. So I quickly ordered Wearing History's e-patterns for the Elsie blouse and 1916 suit, and some fabric for the blouse. I had already found a piece of purple cotton sateen that I could use for the skirt.

Hildasholm in Leksand was the summer cottage for the famous physician Axel Munthe and his much younger wife Hilda, and when they separated Hilda kept her attachement to Hildasholm. The house was built in 1910-1911 and since Hilda was from England it's like a little island of arts and crafts-style in the middle of Sweden. I think the whole house is adorable. I also happen to know their chief guide there, through work, and when I mentioned that we had planned to go there in full costume he got so happy and told use that he would give us the chance to eat and drink in the salon. We had planned to go last week, but the weather forecast was dreadful, so we pushed it to today, even if the weather didn't look promising. We got there and it was quite nice, unfortunately the rain started pouring down when we were walking in the garden, so we didn't get any photos from outside the house.


We had tea/coffee in the salon, and got to sit on the original late 18th century Sheraton set, while drinking from the antique china and using the same linen as the family. The napkins had "AM" for Axel Munthe embroidered on them We were both a bit nervous about using the napkins, especially since we had first gotten a quite messy tomato/mozzarella bread roll.


 During the tour we got to try on some original hats. The black one was worn by Hilda Munthe and the cream one was worn by Swedish queen Viktoria during her visit. When trying the hats on it was obvious that they were made for much larger hairstyles, since the crown was way to big for my modest hairstyle.


I'm wearing the Elsie blouse. I'm not going to make a full post about it, since there are better descriptions of it out there. I made sure to look at Wearing History's youtube videos about the blouse. If I make another version I would probably take it down a size in the front, it's very poofy, and make it a bit longer so that I have a bigger skirtpart to tuck into my skirt. On the indoor photos I'm wearing a cardigan I found at a regular streetchain (Lindex), since I needed something more than a blouse when the temperature was just hovering around 10 degrees Celsius. I had no time or fabric to make the jacket for the suit.


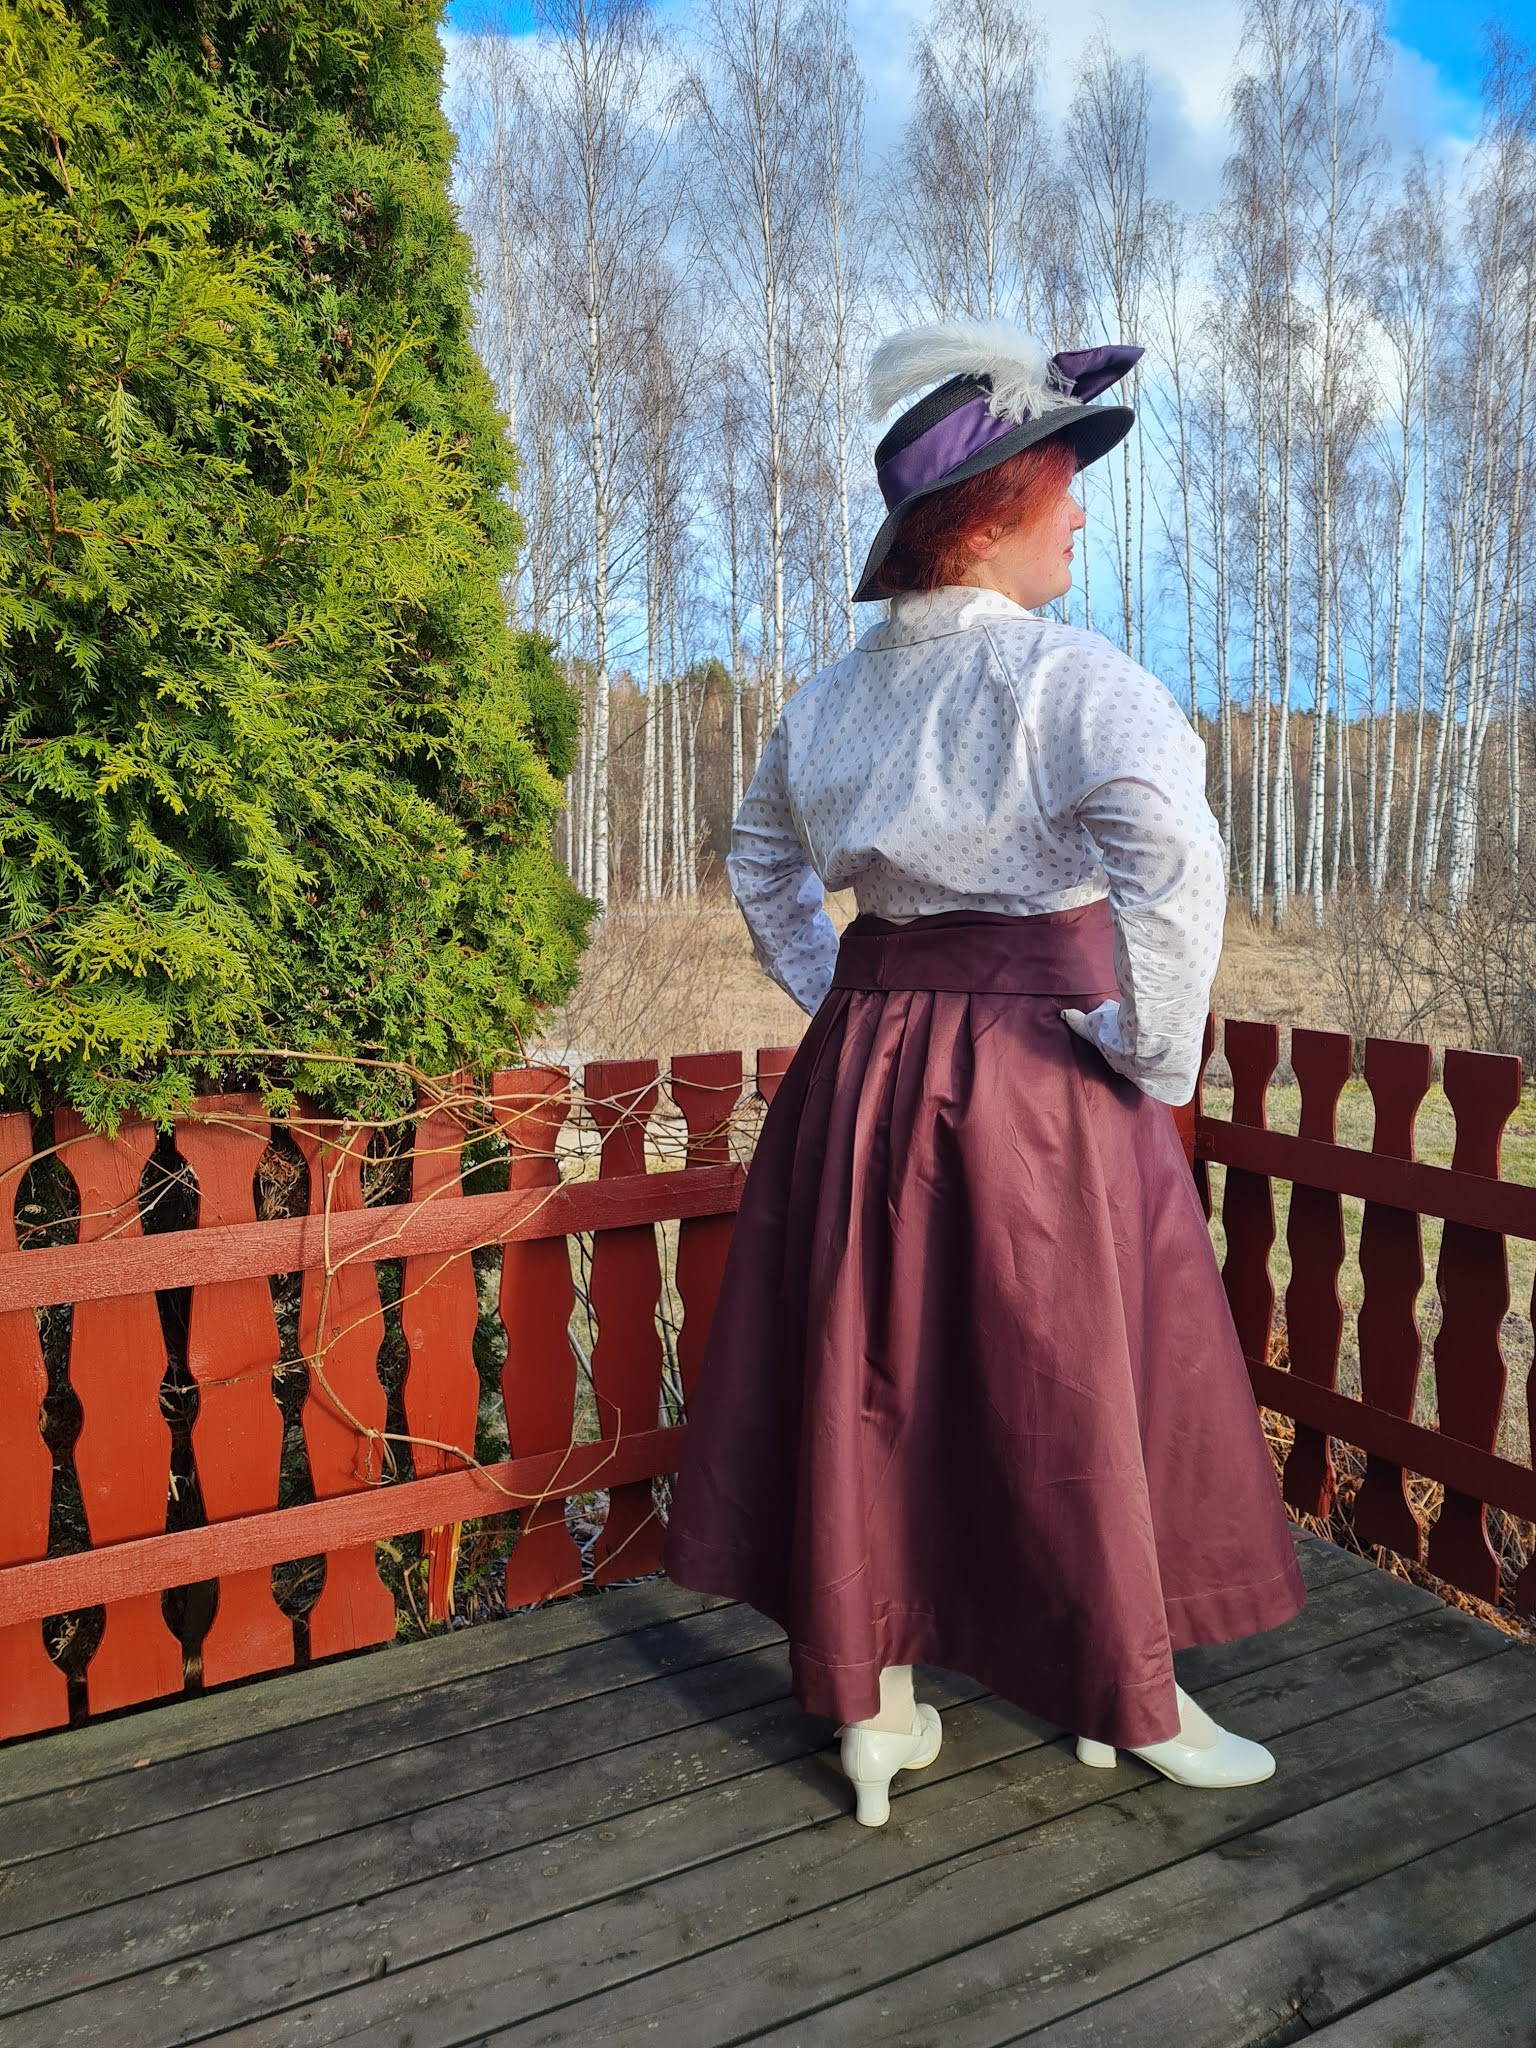
The skirt is the skirt from Wearing History's 1916 suit pattern. I did screw up printing the e-pattern though, since I did manage to print it doublesided. When I realized that the skirt gores were quite regular gores, I winged them and used the same pattern piece for the front and backs, I just added some extra width to the back pieces so that I could get some pleats in the back.

The HSM challenge for September is Sewing Secrets: Hide something in your sewing, whether it is an almost invisible mend, a make-do or unexpected material, a secret pocket, a false fastening or front, or a concealed message (such as a political or moral allegiance).

When I was making the skirt it happened that I realized that I didn't have enough fabric. Thanfully I'm short enough that I could use the shorter length of the pattern, and it was long enough for me. Fo the belt though I just could get the double pattern pieces now matter how I tried. In the end I added a seam in the center back and that way I could get at least one side of the belt in the same fabric as the skirt. I needed somethng else for the inside of the belt though. When going through my stash I had found a quite ugly green linen fabric that I used for the hem facing. Now I started thinking that my skirt is almost purple, and the suffragettes used purple, green and white as their colours. I decided to make a fully reversible belt with the purple on one side and the green on the other side.

So when I go about my ordinary business I can use the purple/burgundey side of the belt, and then I can switch to the green when I want to get political. This also inspired me to make purple trim for my hat. The big buttons are also non-functional, since the skirt is closed with some hidden snaps, also a sewing secret.

As a bonus, when I started working on the skirt I actually took the pieces to the treadle machine in our miner's cottage. And if I wanted to be there and use it, I had to look the part.


It was the first time I tried a treadle machine, and I had problems getting started on it. In the end I did sew the inner waistband on the treadle, but did the rest on my modern machine. Also it was 30 degrees the day I used the treadle so I was basically melting while sitting there.

The Challenge: Sewing Secrets

Material: 2 meters of cotton satin, 0,5 m green linen, 0,2 m cotton duck (for the inner waistband)

Pattern: Wearing History 1916 suit

Year: 1916

Notions: Güterman thread, 6 velvetcovered metal buttons, 3 sets of snaps and 1 hook and bar for the closure.

How historically accurate is it? Around 60%

Hours to complete: 2 days

First worn: On a visit to Hildasholm July 8th

Total cost: Around $40 (If I had bought all materials new, everything except the buttons was from my stash though)