Showing posts with label snow white. Show all posts

Wednesday, 12 February 2014

Getting dressed the 18th century way

Here is what I do when I want to get ready in my 18th century gowns. This is a series of photos I took when getting dressed in my Snow White costume.

Step 1. Put on the chemise, stockings and shoes. It's important to put the shoes on almost first, because when the stays are put on and laced tight it can be hard to bend down and fiddle with the fastenings.

step 2.
Step 2. Put the stays on, don't pull it so tight that it's uncomfortable.
step 3
Step 3. Fix the hair so it's ready. Also if you have worn the stays for a while you can usually pull them a bit tighter, since the body has adapted to them. I'm doing the hair fairly early in the process. I don't like fiddling with the hair, and if something goes wrong it's better to have started early than having it be the last thing that you need to rush to be finished.

step 4
Step 4. Put the false rump on, or if you are wearing pocket hoops or panniers. My false rump started it's life as an 1880's travelling bustle. There are three layers of ruffles of some stiff fabric, inbetween two of the layers I also have a small stuffed pillow. In order to get the 1880's silhouette I had strings that shaped it into a narrow but bulging bustle, for the 1780's silhouette I removed strings and that gave it a flatter and more rounded shape.
step 5
Step 5. Petticoat time. For a long time I didn't understand why people where going on about the needs for many petticoats. Surely one was enough. Well I was totally wrong. I used to just have one made out of old sheets. Then last year I made two cotton voile petticoats, and what a difference. The second petticoat works miracles when it comes to attaining a bigger, poofier shape, it's needed to hide the support structures, and it makes the outer skirt/petticoat lay smoother. For my 18th century outfits it made them look better, but it wasn't gamechangning, but a second lightweight petticoat was what was needed to hide the hoops of my hoopskirt to the Amidala Travel Gown, and make the skirt to that one lay flat. It's better to have more petticoats out of soft and light fabrics than one heavy petticoat.
step 6
Step 6. Put on the main petticoat (outer skirt). Tie the loose pocket on over the petticoat. It's possible to have the pocket under the petticoats, since they have openings in the sides, but I prefer to wear it like this since it's easier to get to the pocket. I've embroidered the pocket so I don't mind showing it either. I try to fix the last details on my hair and make up now, before putting the robe on. I have a problem lifting my hands up over my shoulders in the robe.
step 7
Step 7. Put the robe on, fix the last things and have fun. In fact this is the one step that I think is the hardest to do by myself. The bodice and sleeves are so tight that it would be a lot easier to have a handmaid, but I can make all on my own.

This is just me wearing my 1780's ensemble, but the principle for how you get dressed is basically the same as long as there are corsets and supports involved.

Monday, 13 January 2014

HSF14 Challenge 1 Make do and Mend

The challenge: Make do and Mend
Snow White (October 2013)
 Let’s start of the year with a clean slate, and with a bit of a tidy up.  Use this challenge as an opportunity to get your historical wardrobe in order by fixing any little bits that have worn out and gone wrong. 

For the first challenge of the year I decided to go over my Snow White gown that I made this autumn.

It was a masquerade costume and I wanted to turn it into a more "normal" 18th century costume, also even though it was the newest one I had noticed some things that I wanted to fix.

I started with removing the cape, collar and cuffs. That was simple since I had just tacked them on.


At the bottom of the bodice I had had problems with the silk starting to unravel at the edge, when I had fixed it the white lining had become visible. The neckline was also a tiny bit too wide, meaning that I had to worry about showing too much of my breasts all the time. None of this was about construction, but rather more about hiding the imperfections. The Snow White gown was also quite plain, and the only trims I had were the cuffs, the cape and the collar. I decided to go all out and hide the bottom edge with some trimmings, as well as raising the neckline a bit.


bottom of bodice with the visible white lining.
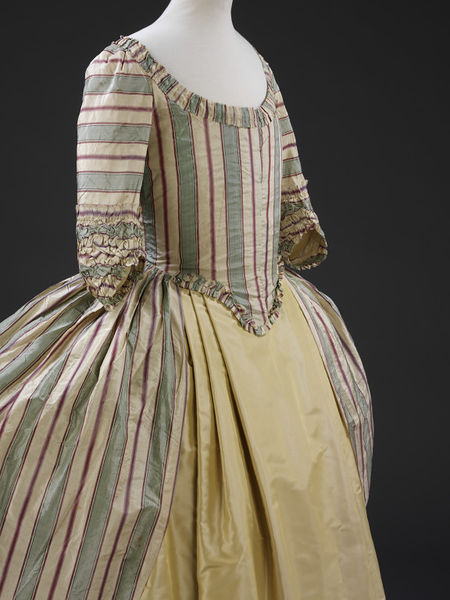
Thankfully I still had saved the bigger pieces that remained of the blue silk taffeta, so I started to cut it up into strips of fabric. My plan was to make a box pleated trim, similar to this gown. You can see the trim at the point of the bodice and along the neckline.

When I had cut the strips of fabric I felt faint when I thought about the amount of tiny hems I would need to make, and decided that that was simply not feasible. Also a hem would make the whole trim bulkier than I wanted, and I've never seen fray-check or anything like that sold in the stores around here. Thankfully I remembered an advice I heard in Kalmar, when the horrors of hemming and trimming many meters by hand were talked about. I can't remember who said it, so I can't give credit to this person, but I am very thankful for it. The advice was to use regular wood glue, but mixed with water to thin it out. Thinking about it I guess one reason why wood glue works is that it's supposed to bond natural fibres, so it won't hurt the textile.


The wood glue worked fine. I mixed the glue with the water until it was really thin, but still had a white colour, then I simply brushed it onto all the edges. First I was quite hesitant and made sure to only brush the edge of the fabric, but after a while I used the full width of the brush. When the glue/water had dried it was invisible and the edge didn't fray.


Then it was on to cutting strips, painting the edges and doing all the box pleats.

I didn't measure my pleats exactly, so they are a bit uneven, but that is something you can see on original gowns as well. I tried to keep the pleats to about the same width as my fingers. Since I was going to sew the trim on in the middle I also secured the trim with some stitches along the middle of the trim, before removing the pins and pressing the whole piece of trim flat. Then I pinned the trim onto the gown and sewed it on by hand.

I'm very happy that I did have enough fabric so that I could go al the way down the sides of the skirt of the gown, as well as replacing the red cuffs with this new pleated trim. I had removed the white small flounces at the sleeves together with the cuffs, I sewed them back on, and all of a sudden they were a lot more visible.

I can only say sorry for the bad photos, I didn't feel like getting all dressed up, and since I don't have a dressform I just put the robe on the floor and snapped some photos.


 The new ending of the sleeve with a pleated trim and a visible flounce.

 The full robe with the trimming along the neckline and the front (with flash)

 The full robe with the trimming along the neckline and the front (without flash)

Fabric: blue silk taffeta
Pattern: none
Year: ca 1780
Notions: wood glue, polyester thread
How historically accurate is it? The trim itself is accurate, but I doubt that they used wood glue and polyester thread.
Hours to complete: 10-15, and most if just sitting and doing the pleats
First worn: never

Total cost: $5 for a small bottle of wood glue, the rest was from my stash.

What did I learn with this project?
The handy thing of using wood glue for the fabric edges instead of having to do tiny hems or cut with my modern pinking shears when I want to do trim will definitely come in handy in the future.

I also saw this as my first try with doing box pleats, and it wasn't much harder than the knife pleats that I usually make. This was my first try with doing box pleats, and with silk taffeta, so in a way it was dry run for when it's time to start on my Gold Handmaiden gown. I definitely want to use the same kind of fabric for it since it was easy to manipulate into straight creases and pleats.

From now on when I talk about this gown I'm going to call it my navy anglaise rather than Snow White.

Saturday, 21 December 2013

Snow White III - accessories and final gown

In order to finish the Snow White look I needed to add some details. I decided to add her standing white collar and a red cape. I also wanted to make her sleeves a bit more closer to the original slashed sleeves, so I added red cuffs to them.

 The sleeve was probably not very historically accurate, but it still looked good. I started with a half circle and added three darts to give it some shape.

The base layer was heavy cotton canvas, and on both sides of each dart I added boning tape and put short pieces of synthetic whale bone in.

The outer layers were heavy poly satin. I had planned to actually use some nice silk for it, but it was too flimsy. Instead I found this heavy poly satin in my stash and decided to use it. I also
added some iron on interfacing to them. Then I sewed the two outer pieces together, so that they formed a pocket, I kept the lower, straight edge open. I then slid the canvas layer, with the boning, into the pocket and closed it with a piece of cotton bias tape. 

The cape was a rectangular piece of silk charmeuse that I hand hemmed. The top of it was gathered into a piece of red cotton bias tape. I sewed the cape on to the dress by folding it over the neckline and tacking the bias tape to the lining. The reason why I had used biast tape was simply because I didn't want to to stitch through the silk, since this is a cape that is going to be taken on and off.


At this stage I also realized that Snow White's cape is tied in front, so I had to make two ribbons and attach them. This turned out really well though since the red ribbons gave a nice frame to the front neckline. After the cape was sewn on I also attached the collar by tacking it to the lining.

I don't have any pictures of the cuffs, but they were basically just tubes that I sewed on to the hem of the sleeve, folded up and attached to the sleeve. I also added some small flounces of silk chiffon to the sleeves.

Here you can see the dress from the back/side. Together with a gorgeous Little Red Riding Hood. One thing I hadn't calculated was that my hair was actually so big that it pushed the collar more backwards than I had planned.
Here's the dress from the front/side. Quite late at night in a hot room, so excuse the glazed and seaty face.

My plan for the future of this gown is to turn it into a more historical costume. I still have some of the blue taffeta left and I want to make a lot more trims for it. I had planned to make some bows for the skirt from the red cape fabric, but simply ran out. I also want to make bigger flounces. This was to try to make the flounces from the RH822 pattern, but I'm more happy with the ones I've made from tutorials on the internet.


Thursday, 19 December 2013

Snow White II - sleeves

As mentioned in my posts about my other two robe anglaises I had a big problem with the sleeves. For Snow White I wanted that fit well and went down to below the elbow. I also knew that some day I want to make a gown with a full length sleeve. So for the first time in a really long time I decided to take my time and draft a pattern that fit me, and that I would be able to use for other projects as well. I didn't start from scratch though.

 To the left is the lining of the sleeve for my 1760s jacket, that i ripped out, and to the right is my modified sleeve pattern for the RH822 gowns. The 1760's sleeve had a good size and the other one had a good shape, but was too big in the sleeve head and too short after my modifications.

I measured the length of the sleeve head from the good fitting sleeve and put markers on the good shaped sleeves. Then I took a good look at the sleeves in Arnold and freehanded a line that followed both the markings and the shape of both sleeves.
The sleeve was still too short though, so I cut it in half and spread it out, I think I added around 10-15 cm.


This is the final pattern for a full length 18th century sleeve. I didn't just measure though. It took a lot of pinning and marking with pen until I had a good fit.

The resulting sleeve goes all the way down to my wrist, is shaped so it doesn't just hang straight down but has a nice curve, and I have no problem getting my fat over arms into it.


Here are the sleeves attached to the bodice. As you can see these sleeves are just 3/4 sleeves. In order to shorten them I folded away the middle of the sleeve pattern above, so I would keep the curves at both ends of the sleeve.

Unfortunately the sleeves didn't fit perfectly, but it has more to do with shape and size of the armscye. It was too small, so I had to make more pleats than planned to get the sleeve the fit, and I got a bit of a bulge in the back as well

Still I'm happy with the sleeve pattern, and this one of the most self drafted pattern pieces I have ever made, so it has given me confidence in trying to do more of that in the future, as well as managing better with scaling up patterns from books.

Read more in Snow White III

Tuesday, 17 December 2013

Snow White 1780

In October it was time for my biggest 18th century event ever. A ball held at a private mansion in the south of Sweden. It was a masquerade and the theme was fairytale. Since I still consider myself a beginner when it comes to 18th century costuming I realized that I wouldn't be able to make the most accurate or the most stunning costume, but I could make one with a lot of humor. I decided to dress up as a Disney princess, but as if she had lived in the 1780's. My choice fell on Snow White, since her colour scheme and style is easily recognizable.

The basic idea was simple:
Dark blue bodice with puffy sleeves lined with red, a red cape and white stand up collar
Yellow skirt

My first thought was to do a short blue jacket and plain skirt, but when I imagined it I realised that the puffy sleeves would look too unproportional to that. Adding a flounce to the skirt might help, but I haven’t seen any flounced skirts to that kind of jacket. It could work with a jacket with a short skirt or tails, but I don’t have a pattern for that, and I don’t trust myself when it comes to draping totally new patterns. Then I found this extant gown from the Metropolitan Museum.

It’s still a robe anglaise, so I could use the same pattern I used for my spring gowns, but the skirt of the robe is put so far back that it wouldn't overwhelm the yellow skirt. So when I had decided what style I going to use I had a plan of attack.

Then came the fabric decisions. I can only rely on websites to find suitable fabrics, but that means taking risks when it comes to the actual colour and feel of the fabric. The big decision was if I should use silk or not. Silk is expensive, but the feeling is just so much better than everything else. In my heart I had probably decided that I wanted to make a silk dress, but it took some time to be able justify the extra cost. For the petticoat I’m using a gold/yellow brushed cotton though. Also making a cotton petticoat means that I can use it for some more every day attire in the future. Still since it’s brushed it’s a bit shiny, and heavier than just a normal cotton.

Petticoat breakdown
Materials used: 4 yards of 110 cm wide brushed cotton. I made a mistake and didn’t notice that the webshop took orders in yards and not in meters so I thought I had bought 4 meters. The difference isn’t that big, but since I used absolutely all of the fabric, wit 4 meters I could have gotten a deeper flounce rather than just a small ruffle as a trim. I also used a couple of meters of cotton ribbon for the waistband. It’s white, but it won’t be visible and I rather use white but sturdy cotton than the yellow but slinky satin ribbon that I had.

Historical accuracy: I sewed the side seams and the waist band on the machine but hemmed the petticoat and the ruffle by hand. The ruffle is also attached by hand. I’ve only used pure cotton, no polyester or other synthetic materials
The Robe
 I got to borrow my sister’s dressform, so that I could get started. I really need to buy a dressform for myself, it’s been so much easier to be able to try and pin stuff togeter before cutting and sewing.

I used the RH822 again and started with cutting out the lining out of cotton canvas. As you can see it was too big and the neckline was really high. I took out most of the width in the side seams and then I simply cut the neckline wider. To be honest I cut it a bit too wide, but it works, I just have to fiddle a bit to make sure that the upper binding or the straps of the stays don't show through.


This is the bodice, just before finishing the neckline and the bottom. The outer fabric is a navy silk taffeta. It's closed with hook and eye tape, sure that's not the most historically accurate but it works really well. You can also se how far back the skirt of the robe is set. From the front you will see the petticoat and the bodice, but not much of the skirt of the robe.

Read more in the next post: Snow White II