Showing posts with label craft. Show all posts

Sunday, 1 February 2026

HSM26 - challenge 1 - Joy for January

 My last post was about the male 17th century hairnet and that I wanted to make a better band. So while waiting for the January salary to come in I started reading up on weaving bands with a backstrap rigid heddle. Now I am quite confused by the different names of this in English, it's easier in Swedish where this is a craft that has never died out. What I wanted to use is a "bandgrind", and I am pretty sure that the best English translation is a rigid heddle with a backstrap, unlike a heddle loom. The best thing was to join a Swedish FB-group on bands and bandweaving and from there I got suggestions on what fibres to use and so on.

And then came the HSM 2026 challenge and the first challenge is "Joy for January".

Create an item that epitomises the joy you find in historical costuming - or simply something that would bring you joy at this time of year, whether it's dark and cold, or sweltering hot where you are!

I got so much joy from reading up on this new craft, and I was all giddy when I could pick up my heddle and yarn that I had ordered. It took me one evening to wind up the yarn, and then I couldn't keep myself from starting my first band, even if I had planned to wait until the next day when I knew I would have more time to actually sit down for some time. And this I think is the joy and excitement I love with costuming, to feel how your hands are just itching to continue working, and that I could actually see a result quite fast, and it wasn't bad. I chose to do a very simple band in one colour, not even a stripe, just to get into it. I do have a tendency to start with too complicated things, and now I forced myself to just learn the basics before it is time to go on. 


There are several stores selling equipment for weaving bands in Sweden, I went with Korps.se, which is catering to historical costumers and role players, heddle they are selling is from the company Stoorstålka, that is focusing on the Sami bandweaving tradition if you want to buy directly from them. I chose Korps because I know they are fast, they also have a very good yarn in colours that look plant dyed except for the heddle itself they had band attachment and shuttles in wood, the heddle itself is plastic, and I prefer wood to plastic. The yarn that I bought is "Grane 02", which they describe as a good yarn for weaving and bandmaking. It's definitely a lot tighter and thinner than the yarn I bought when starting with sprang, so I am looking forward to using this kind of yarn for my sprang as well. The heddle that I bought was a basic 47, meaning that it can take up to 47 threads in the warp. The smallest one is 31 and it would probably have been large enough for my needs, but to be on the safe side and in case I want to make wider ribbons in the future I bought the larger one.


I made a warp of 30 threads, and it was so much easier than when I warped for the tablet weaving. Using this yarn it seems as if 30 threads give me 1,5 cm, so half the number of threads. That is a pretty simple general rule to use in the future. Weaving a band takes some time, this one has taken med three full evenings, but the good thing is that I can set it up in front of the TV. 

After the band was finished I washed it in lukewarm water with some soap and dried it tied up on a bottle, don't know where I read that it was a good thing to do.

Now I am itching to start with patterned bands, but I do wonder if I need to get a book to really understand how to read charts and work the patterns.

What the item is: woven band
How it fits the challenge: It gave me realy joy to learn a new craft and produce something
Material: several meters of wool yarn
Pattern: none
Year: these kind of ribbons are know from at least the Middle Ages
Notions: I had to buy all the equpiment so a rigid heddle, a shuttle and band holder as well
How historically accurate is it? Except for the heddle being plastic 100%
Hours to complete: two full evenings
First worn: I sewed it onto my husband's hairnet and he wore it to a feast on January 31st.
Total cost: Since I had to buy all the equipment around $40, the next band will be a lot cheaper.

Thursday, 29 January 2026

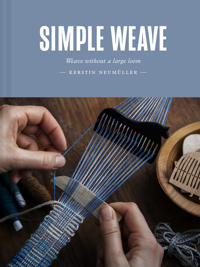
Simple weave by Kerstin Neumüller

Throughout January I have read a lot of tutorials and seen a lot of youtube videos on how to weave bands with a heddle backstrap (bandgrind in Swedish). I had it figured out, but since I have a tendency to run before I can walk I felt that maybe I needed to invest in a book on the subject. I had put in a reservation in my library for a book about it, but I am number 2 in the reservation queue so it will be a while until I can get my hands on it. There are a a number of books on bandweaving but in the end I decided to buy "Simple weave" by Kerstin Neumüller. It is available both in Swedish and English. I chose this book because it was the cheapest, and it was available as an ebook, so that I could get my hands on it instantly.


I had a feeling that the book wasn't quite what I needed and I was right. The book itself is an introduction if you are interested in starting with weaving, but without having to start with having a large loom. There is a focus on the backstrap heddle, but only one short section about making traditional patterned bands, what I am interesting in. I think that since there are quite a few books out there about just band weaving, then the focus was on other techniques, like weaving kelim and images and moving on to backstrap looms. Still the few pages on  patterns was exactly what I needed to get a clear idea on how I am supposed to warp up to make the patterns. It also had nice explanations of yarn weight and how to create striped bands. Overall the language and instructions are very clear and easy to follow, and that is the best part of the book.

One thing I missed was pictures. I suppose it's a budget issue, but the images are mostly hand drawn sketches, and for the band themselves it would have been really nice to see what they looked like when finished, not just on grid pattern. 

So all in all the book gave me a few hints and advice that I hadn't picked up on free web resources, but if you are willing to scour the web you will be able to start fine without this book. It is a book that is better suited for those interested in weaving, but not if your main focus is to make traditional bands. I will probably pick up a book that is just about band weaving in the future, as of now I will use this to try and make my first patterned band, and have it handy when I get curious on how to finish the bands. 


Friday, 17 October 2025

Sprang - learning a new craft

 I have forced myself to a hiaturs in sewing projects, since I need to finish a non-sewing related thing. So what did I do instead, well I've been trying out different kind of yarn and string crafts instead. So yes the deadline for that other thing is approaching and I haven't worked as much as I should on it. After a Sunday with a lot of wasted yarn trying to come to terms with braiding garters, weaving ribbons and making string I decided to pick up this book that I have had in my shelf for many, many years.


I had read through it, but without really understanding the instructions. The last 5 years språngning, or sprang in English, has really picked up steam within the crafting and historical recreating community, so nowadays there are also a lot of tutorials out there. My biggest help was this tutorial by Sally Pointer - "Make a sprang bag with handles"

The book and tutorials made me confident to set up a test piece on an embroidery frame and with some acrylic yarn. And this was the result


Yes it is totally uneven, but I could see that I had figured out the principles, and compared to the string making and braiding I could see a result forming fairly quickly.

The next thing was to get hold of a loom that was a bit sturdier than the the wobbly embroidery fram. And for that I went to the second hand store across the street.

A large picture frame, some knitting needles and chop sticks and I was ready to set up my first bigger sprang project.

Ha, or so I thought. In my overconfidence I spent two days warping 72 pairs of string, that turned into a total twisted and knotted mess. The problem was the tension. On my first text piece I had had a tight tension and it had become impossible to continue the sprang quite far off from the end, so this time I thought it might work to have a looser tension, but it was too loose for my skills obviously. I gave up and removed it. I then found this tutorial on how to warp on a board. And that made it so much easier. The clear plastic that had been in the frame worked perfectly, and was of course in a good size for the frame. Or so I thought.

When I put the warp on the frame it was once again too loose. I removed it (again) and made a new warp, but this time on the short side of the plastic, and finally I had a good tension on the frame. The short side was also exactly the length that I had planned from the start. This time I also cut back on the number of threads, making 60 loops instead of 72, so that it would be easier to keep track of them, but still getting a width on the finished piece that could hopefully be used for something.

So I started spranging, and soon I once again had a bit of a mess. I totally understand that I would miss some threads, but I thought it was fixable. Reading up on this tutorial on "sprang errors and how to fix them" I understood that dropping threads must be corrected by unraveling. So I unraveled everything and took really good care to make sure that I would have the correct number of threads and twists on each row,  and not thinking that was something that could be fixed in the next row.

Here is my current status. It is working. The first rows were definitely tricky so I had to undo several and go back, making sure that I had not dropped a thread. After a while and with good tension on the warp it has started to become easier. The blue knitting needles that are holding the warp are not just tied on to the frame, they are winded up, so I can keep a good tension and when it gets too tight I can just unwind them a bit to make it easier to handle the threads. I haven't seen this solution so there might be some downfall to it that I discover when I'm done, but it works fine for me so far.

I actually got in quite a nice flow and felt that I got a nice net structure going - and then two things happened. I felt that the sticks were in the way for my hands, not between the warp threads but rather where I kept the palms of the hands while the fingers were working, and my mother called. Somewhere here I totally lost track of where I was. I tried to repair it, I tried to switch to lifelines rather than sticks and felt that it might work. But then the bottom of the warp fell of the whole knitting needle. With the mess that it was in I decided to stop.


This is what I could salvage, what is basically the top part. Yu can see that I had some net structure, but then I started to make really big holes. Well instead of getting something usefull I have to consider this another practice piece.

I'm not giving up yet though. For my next piece I want to try with a thicker yarn, I probably have to go to the expensive traditional craft store and get suggestions on what to use, and I want to see if I feel that it works with lifelines rather than sticks, once I have gotten the starting rows correct. I also need to work some with how I position myself so that I don't get such a stiff neck after a while. Well, well, maybe I can get a usable net out of the next piece.