Showing posts with label pattern. Show all posts

Sunday, 28 December 2025

HSM25 bonus challenge - "as seen on screen"

 This was a bonus challenge, picked up because it was the worst challenge of all time, with just five entries. 

Make something inspired by something you’ve seen on screen, whether it’s film, television, or YouTube.

This is really an inspired by, rather than an exact copy of something. This year I saw the wonderful series "Outrageous", about the fascinating Mitford sisters.


 The sisters moved around in the highest society and the whole series is filled with wonderufl 1930s costumes. Up until this year I hadn't really  been into the 1930s, I always felt that it was a decade that didn't suit my body type, since to me 1930s was a lot about slinky, bias cut dress that really only fit slim figures. Now I realised that all the draping  and crazy sleeves, I don't think I've ever seen a decade with such a variety of sleeve shapes, would definitely be something that I could make. Now Diana Mitford was a terrible person, but beautiful and her dresses and outfits were the most interesting. Unfortunately my ost faorite outfit of her was the one she wore when she got married to Oswald Mosley, the British fascist leader, and with Adolf Hitler as a witness. I really didn't want to make her wedding outfit.

I tried to take a screencap of it, and to me the destinguishin features were the huge sleves and the draping on the bodice, together with a tight fit over the waist and hips.

I found this pattern by Lady Marlowe, both available as a download pattern and going up to XL in size, it't not easy finding patterns larger than M when you want vintage patterns.


I used 3 m of a green viscose satin, making it a nice Christmas blouse. Now figuring out my size according to to the measurements wasn't easy. The size chart had my hips being too large for the largest size, but just, so I went with that size and cut some extra large seam allowances in order to have more margins to work with. The instructions for the pattern were quite bare, but easy to follow. If you have sewn garments before it shouldn't be a problem following them, but it's maybe not something for a beginner, especially since slinky, satin fabrics can be tricky in themselves.

In the end I probably picked it a size too large. I found that I could pull it over my head without a problem, which on the other hand meant that I didn't have to fiddle with a tricky and visible size closure. I felt that there was a bit too much fabric ove the bust though. For the sleeves to stay up it's necessary to have the lower part be really tight, and I had to take that in a few times on one side. Overall I should probably have shortened the upper sleeve a bit, but still the sleeves are my favorite part of the pattern. For a pattern like this the right underwear is also important. When I worked on it and fitted it I wore my normal underwear, and then I had to take in the waist but use a tiny seam allowance to make the hip area bigger. When I wore the blouse on Christmas I wore it together with some shapewear, and then it was obvious that I could have kept the regular seam allowance. I have cut out the pattern in another fabric as well, so I need to remember these alterations when I sew it up.


The finished blouse

Me wearing the blouse together with the skirt I made for the "black & white" challenge earlier this year, and my Irregular Choice Christmas shoes.

What the item is: A 1930s blouse
How it fits the challenge: Inspired by the costumes from the 1930s set tv series "Outrageous"
Material: 3 m green viscose satin
Pattern: Lady Marlowe 8380
Year: 1936-1938
Notions: sewing thread, poly satin binding
How historically accurate is it? Pretty accurate, it should have been proper silk satin, but that's too expensive, the pattern and the methods are correct though, so 90%
Hours to complete: 2 days
First worn: On Christmas Eve
Total cost: $40 for the fabric

Sunday, 13 April 2025

A 1930's blouse for everyday wear

 This year I am trying to go a year without buying new casual clothes. It's not a promise or aim that is set in stone, I just want to see if I can size down my clothing consumption, due to a lot of reasons. Now I haven't been a huge shopper for clothes, but some new dresses for summer and winter and it adds up. I will buy outdoor and sports wear if I need it and underwear and stuff like that though. The idea came in the autumn when I made the Tara skirts, but I then realized that if I want to make more of my own clothes, then I need to step up from dresses and skirts and actually start making tops and things to wear on the upper body. I haven't done much of that kind of sewing , I don't think it's fun to make something that I could just as easily buy cheaper and that wouldn't look so homesewn. I started to look out for pattern that I could use and bought the Ngaio pattern from Scroop Patterns.


I liked that there are no closures, you just pull it over your head, the gathered front adds some interest to it that make it stand out from what you can buy in a store, and it had sleeves. It is inspired by the 1930s, which isn't my fashion decade at all, but I bought it to make clothes for everyday wear.

I had the pattern and then at our cosplay meet on Tuesday there was a box of fabric that said "take home and reuse". Most of the fabric pieces were too small to be able to use for any clothes but I found three larger pieces that I liked. Today I decided to make the Ngaio and discovered that there wasn't enough fabric. One of the fabrics was big enough to get everything but the sleeves, so I started with cutting out that, and then with some piecing I could also make two sleeve pieces.

When I had all the pieces cut out in the grey/floral I used them to start puzzling out on the other fabric, which I actually like even better and was more excited about. I realised I couldn't get the whole blouse out if, so I will have to make the back in another fabric, but that might be in another post.

I spent the rest of the day sewing up the grey/floral. As usual with Scroop Patterns the pattern went together so well, and the instructions were really clear. The sizing is also spot on, I am a size 42 with them, and I didn't do any adjustment for the fit. I made one small mistake in that I have actually cut out two right sleeves instead of one right and one left, but I don't think it's really visible.


The final result is a really comfy and casual blouse and now I feel the need for a nice 1930s skirt to go with it and the other blouse that I have cut out and only need to sew up.


Monday, 24 March 2025

Constructing a 16th century bodice with the bara system

 So I have said that before I make my next bodice, gown, or whatever I need to make a pattern that actually fits well. I wanted to restart from scratch rather than using my old pattern pieces. Since I made my first 16th century gown I had also heard about the magic of a curved front bodice, that can support the bust, and the bara method. 

Well it was time to see what I could do. The first explanation of making a curved bodice pattern was in a landsknecht facebook group, and that started with a modern bodice that fit well, and then you altered that to remove darts and princess seams. Well I haven't sewn a modern bodice in a long time, and it looked just as fiddly as starting something from scratch. I then found this pattern and tutorial on Magnifica Sylvie la chardonnière blog - Research dumping grounds. I will say this even if I personally haven't felt attracted to the SCA, as an historical costumer I am very much indebted to all the wonderful people in that group who share their knowledge freely with us all through their blogs.

The pattern was built around the "bara"-system. I had heard about it and now I decided that it was time to dwelve into it. The bara system is a measurement and pattern system as used in Spanish manuals from the late 16th century. Mathew Gnagy of The Modern Maker has created a modern instruction on how to use it and published patterns based on it. The basics of it is that you use your own measurements (chest, waist, hip and length) and create a tape for each measurument, that tape is then divided into pieces (quarters, thirds and so on) and since it is all based on your own measurements it makes it possible to make a proportional pattern only using those four tapes. He explains everything in his book "The Modern Maker volume 2"  I also bought volume 1, since I didn't quite understand which one was best. Volume two is all about creating the pattern and lets you set up your own bara system and then use that for several patterns, the volume one is about construction one specific garment, a man's doublet and has more information about the construction of the garment. There is also a volume 3 that is all about the handsewing techniques needed, but I haven't bought that one (yet). In order to make your own bara and understand the pattern drafting you need to buy the Volume 2. 

So on Sunday me and my friend Emma set out to create our bara measurements and make a bodice pattern.

Creating the different bara tapes was quite straight forward, but it was good to have one person doing the dividing of the tape, and one person reading what should be done and then mark it. When doing the third tape it happened that I said "I know what's next", and then Emma said "no, it's this step".

There was one measurement we had a problem with, but thankfully the Research dumping ground pattern had a mathematic formula that we used to calculate it. Then it was an issue of measuring and drawing out lines and connecting the dots. The one issue we had from the bodice pattern was how to find out where to put the waistline on the front, but with the help of the book rather than the pattern we figured it out.

This was my first draft of the bodice, and it is the best bodice pattern I have made. If the plan was to make an overgown I would just have scooped out the neckline and made the armholes larger (I hadn't been too careful when drawing them out so that they ended up small has more to do with me than the pattern).


I want this to be a bust supporting underkistl though, so I needed to get it tighter. To help with the fitting I added a zipper in one of the side seams, so that I could really sew the front closed, and not just pin it to fit. I definitely needed my husband to help me close the zipper, so even if I do the fitting myself it is a two peson job, and knowing that I should probably have put the zipper in the back so that I could fudge with the side seams as well. During this process I also decided that this kirtle will have be closed in the sides, since I haven't done that before and I hope that will help with creating a smooth and supporting front. I am also doing the fitting over a thin cotton top, since the kirtle will be worn over a shift. The most important thing is that you get a really tight fitting band under the bust that acts as a bra band, and will keep everything else from riding up or down. I could take in around 2,5 cm on each side at the front jus under the bust to get that fit.

My main issue so far is wrinkling over the bust. It starts just over the the tight fitting band. I am starting to think that when I took my chest measurements, I did them too tight, on the other hand all the measurements except the main bust, that is built around the chest measurement fits really well. 


Hee is the first bodice pattern, with an adjusted armscye and neckline, tigher under the bust, you can see the seamlines moving inwards.


Here is the origional paper pattern to the left and the new one to the right. There is a very visible curve outwards over the bust. The next mockup will use this new pattern, and I might also adjust the sideseam to get some more room over the bust


And here are the front and back pattern pieces, I have done no alterations to the back piece since it fit perfectly from the start. I really want this to end up perfect and I am almost there, so I will take the time to make more mockups before cutting out the real pieces. It is already a lot better than the bodices on both my pink gown and mustard kirtle though,


Tuesday, 10 December 2024

The Tara skirt with and without pinafore

Earlier I pattern tested the Seatoun skirt from Scroop patterns, but to be honest I was even more excited about the modern skirts, the Tara skirt, and especially the Tara skirt with pinafore. I loved my corduroy pinafore skirt that has now become way too large, so it was time for a new one.

I started with the Tara skirt without the pinafore though, since I figured that would be the easiest pattern and I could learn how to make it before making the more complicated version.


For the fabric I used a silk noil from Gårda textil in a pink check pattern. I made it in size 42, which worked both for the Seatoun and my Summit dress, so I guess for Scroop patterns I am a straight 42. The pattern gives an option for flatfelled and french seams, and for this one I used the flatfelled seams. I think they are a bit tricky, and I wasn't able to totally catch the folded fabric in the second seam, especially on the curved seams. 


I made two alterations to the pattern. One was that instead of the narrow turned hem in the pattern I used a hemfacing, following the instructions from the Seatoun skirt. I also raised the pockets. I did that by copying the pocket placement lines from the skirt pattern piece and making a pattern template from it that I then pinned to the skirts and drew new pocket placement lines from. This is also when I realised that I am lopsided, no matter how much I measured the pockets didn't end up level, so in the end I had to use my eye measurement to get them level. 


The pockets are bagging out, which is a feature, and sometimes when sitting down there is a bit of risk of things falling out of them. I also realized that my hips are a bigger size, so it's a bit of a squeeze to get the size 42 waist over them when I get dressed, and in fact I could probably take the waist in a bit but then I wouldn't get the skirt up.

Then it was time to to the Tara with pinafore option, At first I had planned to make the other version of pockets, but I read that one of the pattern testers couldn't fit a phone in them, and I want nice big pockets at work. This fabric was also a silk noil from Gårda textil, but this was stiffer and heavier, it also frayed like crazy. I love how the stiffer fabric holds out the skirt, but it was problematic to work the waistband with this fabric compared to the pink fabric in the other skirt. I cut out the B length instead of the fuller length version and when it was time for the pockets I moved them more to the front and sewed them on flat against the fabric instead of having them bag out like in the pattern, and what I did with the pink skirt. 

For this skirt I used french seams, also a chance to get a bit of variation, and I think the french seams worked the best. Since this fabric was fraying so badly it would not have worked with any other seam. The only thing I changed there was to use a 2 cm seam allowance rather than the 1,5 in the pattern.

If I make another version of this skirt there are some things I would change with the pinafore. I would have liked to have the straps a tiny bit wider, which shouldn't be hard to do by just increasing the width of them. I would also make the pleats on the bottom a bit deeper and add two pleats at the top, to make the pinafore sit more smoothly. This isn't a criticism of the pattern, but simply a fact that we are shaped differently and I could get the fit even more snug with some small changes.. Also when it was time to fasten the straps there are no real directions on how long they should be. I tried them on and sewed them on, but now after having used the skirt for a couple of days I think that I could have made them a few cm shorter. I might take them in a bit, on the other hand it's easy to get in and out of the pinafore when they are bit on the loose side.


Here is my triple of Scroop skirts with the Seatoun, Tara, and Tara with pinafore. This is a straight forward and fairly fast pattern. After I had cut out the Tara pattern pieces it took me two evenings to make the skirt without the pinafore and three evenings to make the pinafore version. I could probably have done both of them in one evening less, but I didn't feel the need to push and stay up late when I didn't have a deadline. Also it didn't help that I did some stupid mistakes and had to unpick the waistband twice on the blue version, and the pockets on the pink skirt also had to be unpicked and resewn on. 

Friday, 25 October 2024

The Seatoun 1916 skirt

 Did I have the time to thrown in a random project last month? No. Could I stop myself when Leimomi Oakes of TheDreamstress and Scroop Patterns asked for pattern testers for a mid-1910s skirt? Also no. I already have the Scroop Patterns corset, petticoat and blouse for the time period and this would be perfect to get a whole outfit finished. The fashion 1915-1917 with the crinoline revival and swishy skirts is probably my absolute favorite historical era, after all it's no coincidence that I modelled my wedding gown after it. 


Leimomi said that it took her around 4,5 hours to make the skirt, so I figured it would a fairly straightforward project, and it was. It would have been even easier if I had chosen another fabric. I used a very dark navy herringbone twill in cotton, and it was so dark that all the seams simply disappeared. I couldn't see them, which led to me chosing a simpler finish on the long seams and missing some when installing the placket. I really like Scroop Patterns because of the instructions though, they are so so easy to follow and I know that even if something feels daunting I could just take a breath and follow the instructions step by step and I will end up with a nice end result.

The changes I made to this pattern was that shortened the skirt with 6 cm at the hem and I used slightly larger seam allowances on the waist belt. I made a size 42 and my belt ended up 92 cm instead of the 91,5 if I had made the pattern with the indicated seam allowances. 

Another thing that I changed was that I raised the pockets. Mostly to make them reachable for my arms, but it also had the bonus of covering my wonky sewing at the bottom of the placket. In order to mark the new placement for the pockets I simply cut out the pocket placement marking from the pattern and placed it on the skirt until I was happy with where it was, then I marked it on the skirt and sewed the pocket on.


I am wearing the skirt with a Wearing Historys combinations, the Rilla corset, the Ettie Petticoat, my own pattern of a corset cover and the Selina blouse. This combination of clothes really illustrates the changes my body has gone through the last few years. The Rilla from 2017 is size 44 and it is slightly too large now, I had to fully close it in the back and I could have cinched it some more if I could have. The Ettie is made in size 48 or 50, and in order for it to stay up I made a hole in the casing for the elastic and then shortened the elastic quite a lot. This large Ettie was maybe a bit too large to get all the fabric properly under the skirt, it felt a bit bulky, especially since it is starched. The Selina is a size 46 and it definitely feels too big now. The hat is a summer straw hat from H&M that I've simply added a giant bow and some feathers to.


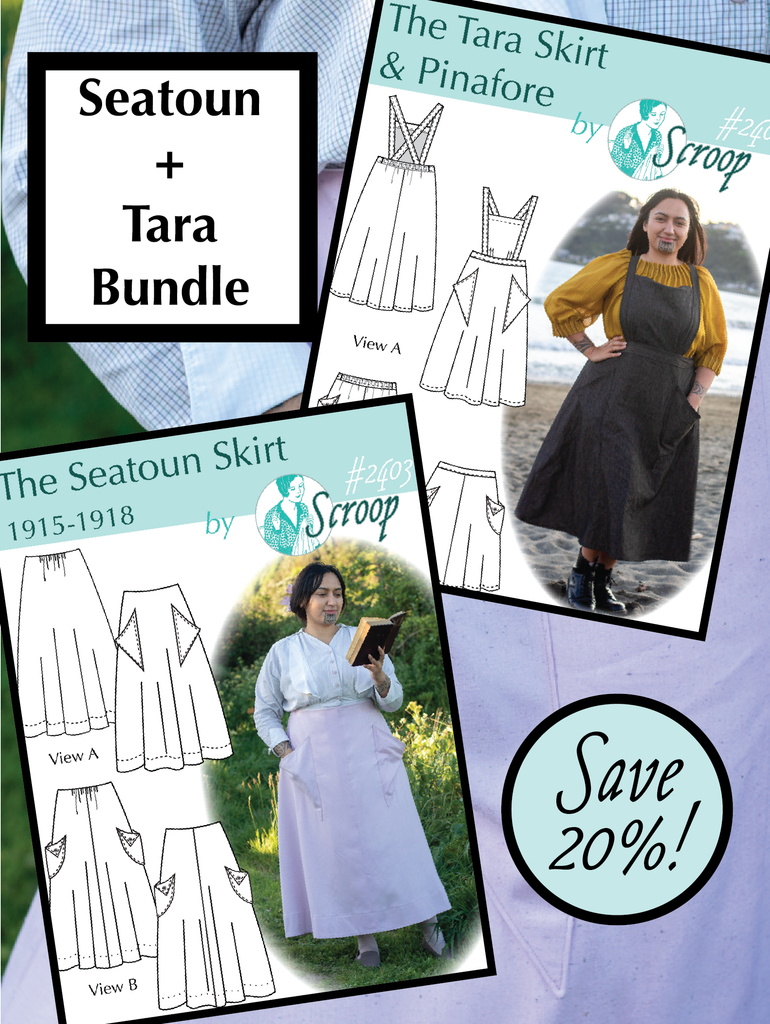
The pattern is now launched at Scroop Patterns and it also comes with a modernised version, the Tara skirt and pinafore. I was so happy with the Seatoun that I have already bought fabric so that I can make the Tara versions to use as everyday wear.


Sunday, 22 September 2024

Scroop patterns summit dress

 I rarely make clothes for everyday wear. I simply think that my finishes aren't good enough. But when Scroop patterns released the "Summit dress" I felt that this was a pattern that I really wanted to make.


With my changing body after my gastric bypass last year I need some new clothes. I wanted a new autumn/winter dress. I have also wanted a dress that is  nice and neutral, but gives an air of historical fashion when doing lectures. The pattern is based ont he 14th century Herjolfsnes finds, but with modern construction methods and an option between modern lantern sleeves and historical sleeves, and different skirt lengths. I have made a simple medieval gown by measuring and cutting rectangular and godet pieces, with this pattern I also got a medieval pattern that I can use if I want to make another one, I only need to replace the machine sewing with handsewing and lengthen the 3/4 length historical sleeves.

The basic pattern is a very loose fitting dress. The size chart contains both your body measurements and the measurement sof the finished garments. I was exactly on the size 44, but having seen the tester makes I went down a full size to 42, and it is still very loose. I could probably have gone down another size on the main gown, but then the arms would have been on the small side. If I make this as an historical pattern one day I will probably go down to 40.

With the original pattern there were two things I wanted to change and that was the length and the sleeves. To shorten the dress I used the view B length, but I also shortened it 8 cm by the "shorten/lengthen" line on the lower part of the pattern. I didn't just cut off everything at the hem since I wanted the full width at the bottom. The sleeves, both the historical and lantern version, are 3/4 length, and since I wanted to use this in the autumn/winter I wanted to have full length sleeves. The lantern sleeves would make it hard to wear a cardigan or something over them to keep warm.


I made a quick pattern for where the bottom part is the length of the sleeve opening on piece K - lower sleeve, the lenght is the length of my forearm and the width at the top is width around my wrist. In a spur of th moment I added the point at the end of the sleeve. I added a facing in the same fabric instead of hemming it, to keep the nice point, and then sewed my pattern piece to piece K before sewing pieces J and K together as the pattern called for. 

The finished sleeves

The pattern for the bottom of the sleeve

The sleeve right side out

The sleeve wrong side out, with the facing


The sleeve is just enough wide at the wrist that I can get my hand through, so I don't need any closures there.


I definitely prefer to wear the dress belted, and that also gives some oppportunities to give some pop of colour to this rather plain dress. I usually wear a lot more colours and patterns in my everyway wear, this dress I can match with different belts and thights to keep it fun.

The dress is made up of a wonderful wool/viscose blend that I found at a real bargain online, so in the end the dress cost around $35. The patterns instructions were easy and good to follow, the mistakes that I made were totally up to me being sloppy. The one advice I would give for anyone making the dress is to switch the order and insert the back godet before the front godet. That was the most fiddly part of the pattern and my back godet went in better than the front, since it was the second one I made.

If you are curious about the pattern Leimomi/the Dreamstress and creator of Scroop patterns has one post about the pattern and two full posts about tester makes, here and here. 

And for full disclosure I have been a pattern tester for Scroop patterns and it is probably my favorite pattern makers out there, I bought this pattern with a discount code that I got from answering a customer survey earlier in the summer. This was the first time I made something from its range of modern patterns rather than historical patterns.


Wednesday, 6 July 2022

HSM22 challenge 10s - my 1916 underwear

October: A Perfect 10: It’s the HSM’s 10th anniversary, so make something 10 themed. 10th century, the something-10s, something that incorporates 10 of something? Be creative with it!
The whole set with combinations, corset and petticoat

I have come to like the fashion in 1915-1917 more and more, and with the need for some underwear for my wedding gown it also gave me a reason to make a new set of underwear. I'm not going for an historical wedding gown, but I like the silhouette and want to make my wedding gown from that. Up until now I have made to with my Scroop Pattern Rilla corset that I patterned tested and an 1980's romantic skirt that I have turned into a petticoat. I had already made the Wearing History 1917 combinations, so now it was time for the rest of the underwear. 

When I pattern tested the Rilla corset I got the finished pattern as a reward. Since then Leimomi Oakes has made another set of sizes for the Rilla so that it now comes in size pack A, B and C. I had the size pack A and B, and I was just on the outside of the largest size in B. I still decided to try and work with that, instead of rebuying the pattern. I shouldn't have worried. The Scroop Patterns are really true to size, in fact I would say that they have a tendency to run a bit large. Every time that I have made a pattern and gone up a bit to be on the safe side I have had to take them in back to the size I should have picked from the start.

Since this is a pattern that can be bought I don't want to talk to much about the construction, it's all there in the very clear and good instructions. The only thing I get a bit worried about is to choose the length for the boning. I bought the boning before starting to sew and I picked the middle of the road in the size options given. It works, but if I hade sewn the boning channels first I would probably have chosen to have the back bones be the shortest option, they really go down deep on my bum. 

A thing that made the materials for the corset more expensive was that apparently it's impossible to find spring steel with plastic dipped ends in the EU. All the Swedish and contintenal sellers that I could find only had them precut and wanted you to put metallic end caps on them. I had to order the boning from VenaCava in the UK, and with Brexit that means that I also had to buy customs and toll cleareance for them.

The Rilla corset doesn't have a lot of reduction, it simply smooths out the curves. This makes it really comfortable. I am really unused to the longline corset though, and in that way I feel more restricted from the waist down, compared to Georgian stays or Victorian corsets. I definitely need to practice more about simply going to the bathroom, and being able to pick up the flap on the combinations so that I can button them to the front. I might have to adjust where I have placed the buttons on the combinations as well.

Since this is my wedding corset I made it from white coutil, and I also used gold details on the busk and lace. 

When the corset was done it was time for the petticoat, made from Scroop Patterns Ettie Pettie, that is designed to cover the time period 1900-1910 and goes really well with the Rilla corset. I loved the idea of making a really fluffy petticoat, and there are two ruffles with lace on the version that I made.


Inserting several rows of lace and using lace for the hems was tedoius, but I loved the result. There is a lot of lace, which is reflected in the price tag of the materials, there simply wasn't a lot of options when I wanted pure cotton lace. The lace also made the petticoat surprisingly heavy, considering that the fabric is a very light cotton batiste.

One mistake I made when cutting out the pattern was that I didn't adjust for my length. I have very short legs, but I'm used to being able to adjust the skirt length either at the waist or at the hem, which is possible when working with large rectangular pieces that are gathered to the waist. Instead of recutting the pattern pieces I made two tucks just above the first ruffle, which is a common detail on period petticoats. One of the pattern variations have similar tucks on the ruffle itself.


Another mistake I made was to simply don't read the full instructions. So keep in mind that you should mark out eight points and not just quarter points when it is time to gather the ruffle, and the outer ruffle is not attached exactly the same as the dust ruffle. The result was that the ruffle is not quite as evenly gathered as I would have liked, and instead of cutting away the fabric behind the lace covering where the ruffle is attached to the skirt I just sewed the lace over the seam as a ribbon. It works fine, and is an option in the pattern, but I really like the more delicate look when the fabric is cut away.


The one thing left to do now is to starch the petticoat to get it really fluffy and crisp, but that is for later in the summer.

The Historical Sew Monthly details

What the item is: - A corset and petticoat
How it fits the challenge: It is from the 1910s
Material: corset - 1 m cotton coutil, petticoat - 3 m cotton batist
Pattern: Scroop Patterns Rilla corset and Ettie Petticoat
Year: 1915-1917
Notions: For the petticoat -  7,5 m cotton insertion lace, 5,5 m hemming lace, elastic waistband, snaps, hook and eye, for the corset - 1 busk, 48 grommets and 24 spring steel bones in varying size, 1 m grosgrain tape, 6 m of corset lacing, 2,5 m bias tape
How historically accurate is it? I have follwed the instructions, so I think this one is pretty closee.
Hours to complete: one month for both
First worn: not yet
Total cost: $200 for both pieces

Saturday, 19 October 2019

A fun dress for work

This spring a friend of mine who is in a bunch of sewing FB groups told me about a limited sale of a special printed fabric, and when I saw the fabric I knew that I to be in on it. It took me a while, but this is the finished dress that I made from the fabric.


I fell love in the fabric because of the symbols and the colour. While most people see this symbol as a female sign


it's also the old chemical sign for copper. There is a connection since it was originally a symbol for the love godess Afrodite or Venus, and according to Greek/Roman mythology she was connected to the island of Cyprus, and on Cyprus there were a lot of copper mines. Afrodite/Venus was early on connected with copper, in fact the word copper comes from latin "cuprum" meaning metall from Cyprus. The male sign is likewise also the sign for the war good Ares/Mars and iron.

I work at Falu Gruva - an historical copper mine, even if there are a lot of other stuff there as well, and a UNESCO world heritage site. The mine has used the symbol since at least the 17th century and it can also be found in the Falun coat of arms. This is the current logo for the Falun mine.


The orange and navy colours were also a reason why I liked the fabric. We use a lot of orange in our graphic profile, and the combination of orange and blue is also used in the traditional folk costume of Falun (Stora Kopparberg). As a feminist I also think it's fun to play around with the symbol, and I'm definitely aware that for most people it doesn't mean copper.

Anyway it took me a while to come up with a pattern for the dress. I had a limited amount of fabric and I was also a bit bored with my standard jersey dress pattern. In the end I found the pattern company Simple Sew patterns and decided to order some patterns from them. For this dress I chose the Lena wrap dress, which is actually a faux wrap dress and not a full wrap dress.

When I had cut out the patterns I realized that I didn't have enough fabric for it, but I found a scrap piece of blue jersey from my "I heart SW-dress" and a really thin piece of jersey from my fandom fashion Enfys that I could use for a lining. I used the blue fabric for the waist band and I had to cut the sleeves in half, with one part of the printed fabric and one in the blue, to get a full sleeve. I think that gave it a fun detail though. I also chose to skip the bottom of the skirt and instead I simply cut out the skirt and the bottom as one piece. The skirt is quite big though and takes up a lot of fabric, but if you have enough fabric you get a nice swirly skirt.

The pattern was a real joy to work with. It says that the skill level is adventurous beginner, and I thought it was a very easy pattern to use. One should note that the lining pieces are exactly the same as the outer fabric pieces so I chose not to cut them out and instead just used the outer fabric pattern pieces for the lining as well. All the markings are clearly marked, and there are not a lot of them either. The instructions are well illustrated, the one thing that's not in the pattern itself is the setting of the sleeves, but there it says that if you are unsure about setting sleeves you should go to their video instructions online. I also like that you had all the sizes in one pattern envelope, you don't have to wonder if you should buy the plus size or regular pattern.

The pattern ended up a bit big in the bust for me, but that's not uncommon for wrap dresses. My bust simply is proportionally a bit too small for my size. When I wear the dress for work I will have to put a safety pin or some tacking stitches or else it might be too revealing

This is a pattern that  can definitely recommend and I look forward to trying out more patterns from Simply Sew.

The dress with flash


Saturday, 25 November 2017

The Last Jedi Leia coat pattern

I finished the pattern for the Leia coat, and even if I didn't take a lot of photos of the process I will share what I did. It also shows how I usually work when I make my patterns.

I cut up my first mock-up. I cut it off at the hips, since it's not fitted below the hips it felt a waste of fabric to work on a full-length version, when I only needed to fit it on the upper body. I also cut the back piece in half, since I had discovered that there was a center back seam.


On this photo the left side looks smoother and better fitted than the right. That is because I start working on both sides, by pinning and repinning the pieces to each other. Once I feel that one side is starting to look better than the other I concentrate on that side and don't work on both sides. I don't take it off though, since I still need the other side so I can hang the mock up on my dress form and on myself.

This stage is a lot of testing. Once I'm happy with what it looks like on the dress form I make sure to test it on myself. The dress form is a great help, but it also has an idealized shape, while I have lumps and bumps and soft flesh that makes me less than ideal.

Most of the shaping was done on the back seam, I also cut the shoulder seam shorter, which make the armscye larger than the first version.

Then it was on to the sleeves. The sleeves were made through trial and error. I simply started with two large square pieces of fabric that I sewed together to create what looked like an oversized pillow cover, with two open sides. Then I folded more and more fabric away, and cut off the excess until it had a shape that I liked.

The last thing I did was to sew the sleeve to the bodice to make sure it all fit together.

back of the mock up

Front of the mock up
The fabric that I'm using is a little bit too flimsy to hold the shape of the sleeve. I will try to make the sleeve with just the main fabric, but I am prepared to do some kind of reinforcing to make it stiffer. I won't know until I have started working on the actual fabric though.

While the mock up is still on the dress form I make sure to write all notes I will need. The most important is of course which piece it is, and how much seam allowance I have used. I also make marks where the pattern pieces should join up.

After I have made all the markings I need on the mock up I cut it up, I do that by simply cutting the seams. During the work I have usually changed the seam allowances while adjusting the fit, by cutting at the seamline I know it will all go together and I can then add my own seam allowance when cutting the main fabric.

These are my final pattern pieces. Top left - back piece, top right - front piece, bottom left - back sleeve, bottom right - front sleeve.

Here is also a close up of the sleeve pieces. They should be joined at the bottom and where they face each other.