Showing posts with label dye. Show all posts

Friday, 14 March 2025

The female tusken gown

 I realised that I had never posted about the gown that I will wear as the base layer for the female tusken.

I sewed it up in the summer, because me and my friends were planning a dye day.


It was a day when we had access to our combined large pots, an outside kitchen and a garden with both garden hoses for water and a place to hang the fabrics to dry.


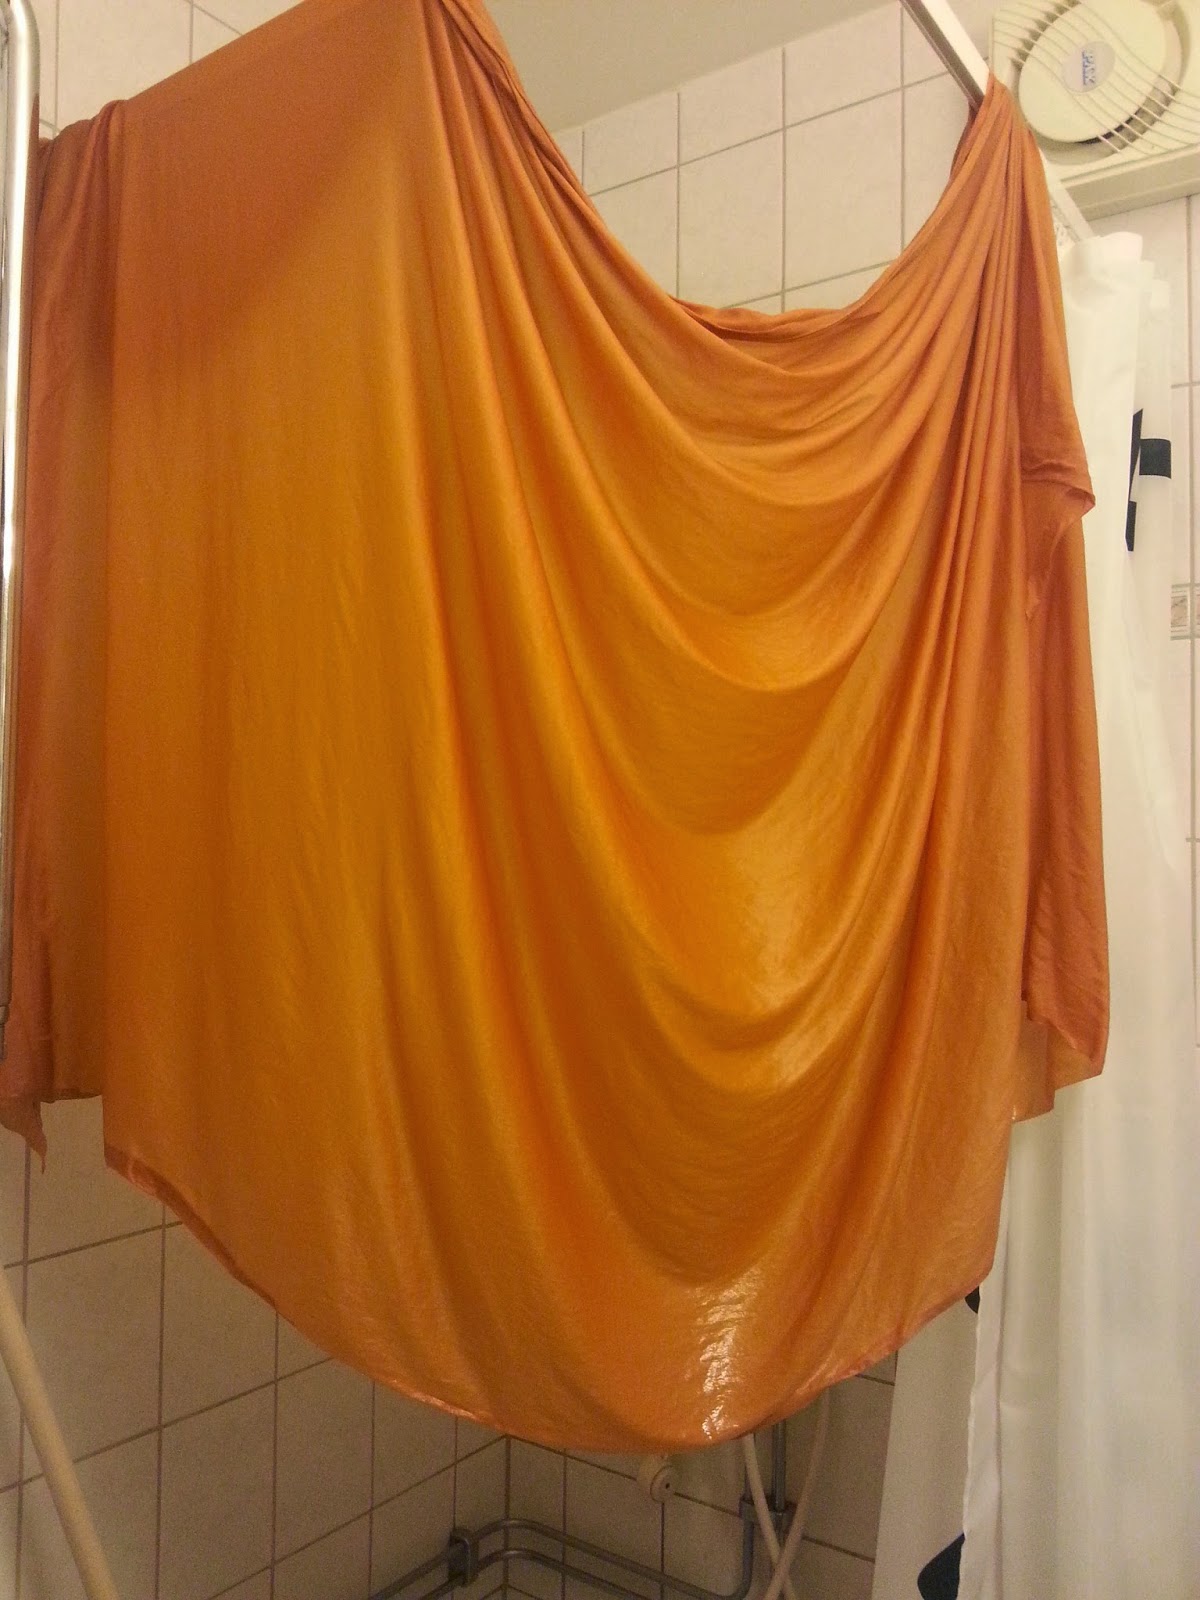
I had problems finding a good dye. The fabric in the dress is raw silk and viscose, while the shawl is polyester. I also didn't want to dye them brown, just sand coloured. In the end I used a dye that was called "caramel" and it didn't really dye as dark as I wanted it to. The photo above shows the fabric for the shawl and the gown when they were still wet.

And this shows the fabrics when they were dryed. It's also very clear how different the fibres take on the dye, with the viscose taking on the most and the polyester the least. That was also why I needed to make a really strong dye bath for the shawl to darken it a bit more.

The fabric for the skirt and sleeves is a gorgeous, slubby raw silk, or silk noile. I only had a limited amount of it, that's why I made the bodice out of viscose, since that won't be visible anyway. For the tusken you can opt for short or long sleeves. For my old tusken I had rather short sleeves, but it was always hard to make sure that the arm wraps stayed up well enough to leave no gaps between the sleeves and the wraps, so this time I went for longer sleeves. 

Thursday, 11 March 2021

Dyeing fabric for the jedi obi and tabards

 I haven't finished the outer tunic yet, but I decided to work on the fabric for my obi and tabards.

Here you can see the white fabric that I had planned to use. I definitely felt that the white colour was too much of a contrast to the brown fabrics. I first decided to just tone it down with a tea bath.


This was the result after a quite concentrated tea/coffe bath. One shouldn't expect more than a different in shade when using tea/coffee. Worse though was that there must have been some red dye residue in my big pot, becase even if you can't see it clearly here, there was a lot of pinkish splotches on the fabric. I also started to feel that even the toned down colour was still too much of a contrast to the browns. Looking at many of the jedi in the films, most of them keep to just one base colour, I really wanted to get a more brown fabric.

I went to the paint store that also carries limited supplies of dye. The problem was there was only a brand that should be used in the washing machine, and they only had one brown option. Well I went for the brown option and decided that I could probably go ahead and dye on the stove top, or rather in my big plastic vat in the bathroom that I've used before.


Now at least the fabric got brown, and not dirty white. It was obvious that the fabric that I thought was a cotton was a blend of cotton with some synthethic fibre that didn't take the dye at all. Still the cotton fibres took enough dye that the base fabric turned very lightbrown. An unexpected effect was that fibres in the pattern took the dye very differently, so the geometric pattern went from almost invisible to very clear. This means that I will not have to embroider the pattern to make it stand out.


I got some bad splotches, apparently the dye hadn't quite dissolved when I put the fabric into the dye bath. It's a lot less thant he pink splotches that were there before the brown dye, and I will be able to work around that part of the fabric and still get enough of fabric left for the obi and tabards.

Here is the fabric just draped over the dressform with the inner and outer tunic. The gemoetric pattern actually have the same colour as the inner tunic so now I feel that all the colours and fabrics blend in a lot better. I think I'm going to call this my chocolate-caramel jedi.


Saturday, 21 October 2017

Misadventures in Dyeland

I Think it's quite fun to dye fabric. The process of changing a fabric, by quite a long process and you can't be quite sure what it will look like until it's all dry. The frustrating part with dyeing is when you are after a specific colour, or hue, and the end result ends up something really different. That happened to me this week when I tried to dye my fabric for the undergown of TLJ Leia.

First I want to go through the process I use when dyeing fabric, since I don't have a giant pot that I can put on the stove or my own washing machine.

 When I'm not actively dyeing I keep all my dye stuff in a plastic box up on the attic. In the box I keep the dyes, one large steel pot, a plastic bowl, a plastic whisk and a plastic coat hanger. I make sure to keep my dye utensils clearly separate from other kitchen utensils, since we are talking about chemicals and I don't want to the risk of them getting into any pots or bowls that I might use for cooking. In the box I also have a bottle of white vinegar, since that's used for setting the dye when working with silk.

When dyeing fabric you need  a big pot of hot water. I simply use the same plastic box that I pack the dye things in. The problem is of course to get the hot water into it, since I can't place it on the stove. I simply need to heat up water in other pots and pour it into the box. How fast this goes depends on the cooking stove. When I used my old electrical stove it could easily take up to an hour to just fill the box with enough water, now when I have and induction stove it goes a lot faster. I use two 5L pots and my 1,7L kettle to heat the water.

Here I am in the process of filling the box. I do the dyeing in my bathroom, since I have a new kitchen floor and I don't want to risk it getting stained. I put a big towel under the box, both to protect the bathroom floor from the heat and from stains.

When I have enough hot water in the box I used my dye pot to dissolve the dye and pour it into the box with hot water. Then I add the pre-wetted fabric and stir, for as long as the instructions tell me. The large amount of hot water keeps the heat well enough, so I don't need to add any more hot water once I start the process. 

I try to book time in my house washing basement though so that I can take the dyed fabric and wash it properly in a mashine, and not just rinse it in water.

Now that's all fine and dandy, but as I mentioned as the start even if I dyed the fabric I didn't end up with the wished for result.

The fabric I tried to dye was 5 m of cream coloured silk crepe de chine. I wanted it to be a nice grey colour so I used iDye in silver grey.

My first mistake was to not do it as described above but use my mother's front loaded washing machine. I don't know if I hadn't dissolved the dye well enough, or if the fabric was still too folded when I put it into the washer. When I was done with the washing the fabric had ugly brown stays in regular intervals where the dye must have attached extra to the fabric. I also felt that the fabric that had dyed grey was too light. If you look up in the photo of my dye set up yo can see the fabric lying in the zink, it's wet so it's a bit darker than it was when it had dried.

My second mistake was to think that I could use the two packets of dye that I had left and overdye the fabric, hoping to both hide the stains and to make the fabric darker. Now I would do it by hand and not by machine though, so that I had more control over the process. As soon as I put the fabric in the box with dye it was obvious that I wouldn't get the desired colour though. Apparently the dye contains quite a lot of brown pigment, and it was obvious that with this stronger dye mixture it was the brown pigment that dominated.

Still I went through with the process, hoping against hope that something would magically happen with the fabric when it dryed. It didn't.

This is the end result. Now in some lights it defintiely looks grey, but in other lights it's clearly brown, and especially if you hold up the fabric against true grey fabrics. So now I have 5 m of silk in a light dirt brown colour, if it had at least been dark I could have used it to make a new underdress for Mon Mothma, now I don't know what I'm going to do with it. The quality of the fabric is Lovely though.

On a more positive note I could pick up the fabric that I have ordered for the TLJ Leia coat. It's not perfect, but with a price of $15/m instead of $130/yard it definitely looks good enough for a first version.

Next step is that I need to order more silk crepe de chine, and more dye. I'm thinking of either using Dylon's grey or use the iDye gun metal grey instead of the silver.


Sunday, 18 June 2017

Trying to dye

Today the weather was warm, but cloudy and windy, and I decided to take advantage of being at my mum's with access to a garden.

I wanted to dye my 1520's undergown. The fabric dyes that I had at home were Dylon Terracotta brown,  Goldfish orange and Sundlower yellow. I had a third of a packet of the brown and orange and hoped it would make some kind of golden brown. I was wrong. As soon as I put the dress in the dye bath it was obvious that the orange totally overpowered the brown. To dampen rhe bright orange I added all the yellow that I had, 1,3 packages. That was all the dye I had, so I would have to live with the result.

Another thing was of course that the gown is made out of wool. It says on the package that wool will take a lighter shade than cotton or linen but while I was stirring the gown in the dye bath it looked like it didn't take any dye at all.
 The linen lining took the dye well.

 Still when I compare the dyed gown with the original fabric there is a clear difference.

Even if I didn't get a nice golden brown gown it has taken on a warmer and more earthy shade. I think it looks better than before the dye. But be wary if you are planning on using the Dylon Goldfish orange, it's really strong.

Monday, 12 October 2015

HSM Challenge 10: Sewing secrets

I made a pocket, after inspiration from the examples I had posted about in my inspiration post.


In addition to the pocket itself being a garment that's supposed to be unseen and secret it hides three different secrets.

First off for the fabric I had gotten a bunch of stuff from my sister earlier, among others some curtains and a table cloth. The table cloth had some stains on it that just wouldn't go away, so I had planned to give it away. The town has a collection where you can leave fabric pieces and remnants so that they can be used by in creative projects in preschools. I hadn't had time to do that though, and looking through pictures of surviving garments it was clear that brocades and coloured fabrics so I figured it would be a nice fabric for that, if I dyed it..

This is the original table cloth. I cut out two pieces for the pocket, and tried to find an ornament that could be contained in the pocket.

The size of the pocket was decided by the very non historical measurment of "my mobile phone + credit card holder". I then used some of the leftovers from my dye projects in the spring. I started off with about 2/3 of Dylon goldfish yellow and 1/3 terracotta brown. As soon as I put the fabric in the pot on the stove it was clear that it was going to be too orange so I added more brown straight into the water.

The result was a gorgeous golden orange colour, that really made the pattern on the fabric pop. Unfortunately me adding some extra brown straight into the dye bath meant that it hadn't quite dissolved and I had some brown spots on the fabric. The first secret of the pocket is that I've hidden those spots under the blue embroidery.

The second secret is that I only used the nice orange silk for the front and a piece of the back. This is the inside of the pocket, where I used a piece of that old curtain my sister had given me. The pocket may look fancy, but most of it is a sturdy cotton/linen blend.

This is the backside, the blue cotton tape that I used to bind the edges make sure that nothing of the simple fabric is seen when it's worn.

The third secret is the embroidery. Looking at extant examples of pockets from the late 18th early 19th century quite a few of them had initials embroidered on them. I embroidered my initials on it, including my middle names so the embroidery says "I M K N". If you can't read those letters it's because they are not in the latin alphabet, they are written in Dalecarlian runes.

Many people know that the vikings used runes for writing. The usage of runes didn't end with the vikings though, quite a few examples of writing with runes have survived from the Middle Ages in Norway and Sweden, in most parts of Scandinavia they disappear in the 15th century though. In Dalarna, the region where I live, the runes didn't only survive, but took on a development of their own. Instead of giving up on the runes when the latin alphabet got more widespread they people around northern Lake Siljan and Älvdalen started to invent runes of their own. The vikings only used 16 runes, but in order to make the writing of runes follow the spelling with the latin alphabet quite a few new runes were created. This is the alphabet that is today called "Dalecarlian runes". The usage of runes around Lake Siljan ended some time in the 17th century, but they survived in the parish of Älvdalen. With time more and more of the runes where switched in favor of latin letters, so that by the end of the 19th century it was more a case of a mixed alphabet. It's generally considered that the last genuine inscription with Dalecarlian runes was written in 1900.

The inscriptions that have survived are inscriptions on wood and stone, I don't know of any embroidered runes. The inscriptions are so diverse though, including psalms and communications between villages, that the knowledge of runes must have been fairly widespread. I don't think it's unlikely that some girl in Älvdalen would have written her initials on a pocket using the familiar runes rather than the latin alphabet.

The facts

What the item is: A pocket
The Challenge: 10 Sewing secrets
What's the Secret?: 1. Only the visible parts are of a nice fabric, the unseen parts are of a simpler fabric. 2. I hid some dye stains with embroidery. 3. I embroidered my initials in Dalecarlian runes, an alphabet that was used at the time but is secret to most people today.
Fabric: 30 cm of a cotton/linen curtain, 30 cm of a damast table cloth
Pattern: My own after extant pockets
Year: 1795 (the specific versions of runes that I used are found on an inscription dated to 1795.
Notions: 2,5 m cotton tape, sewing thread
How historically accurate is it? I would say that it looks like and original but the fabric was dyed with modern methods and I haven't seen any extant textiles with runes on them, so 20% maybe?
Hours to complete: 4
First worn: Not yet

Total cost: All from my stash, and the fabric was gifted to me so really nothing.

Sunday, 22 March 2015

Back to square one with the velvet

Yesterday I felt that it was my last chance to dye the velvet for my gold handmaiden. I went home to my mother to be able to have full access to her big pots, big bath tub and tumbler. I had prepared the velvet by cutting out the general pieces for the robe and the hood, and I decided to first do a lot of tests with the velvet pieces that I had gotten as left overs from cutting out the pieces.

This is the result from the tests. At the top you can see a piece of the silk taffeta that I'm using for the gown and that's the colour I need to match. The colours here are a bit too light, since the photo is taken in direct sunlight. Also this is a good example of how different fibres take dye differently, since I used the exact same dye for both the silk taffeta and the velvet, which is rayon on a silk backing. It's the rayon that reacted differently, the silk backing got the exact same colour as the taffeta.

The furthest to the left was the velvet that I started with. Then I used RIT colour remover.and put the two swatches in. The first one was taken out after just two minutes, it had lost a lot of the red but was still too yellow. The other swatch was left in for 10 minutes and you can see that it lost all the red pigments but now it was definitely yellow and not gold/yellow. I made a last attempt to see what would happen if I added a tiny bit (1 gram to 4 litres of water) of Dylon Terracota Brown to it, but as you can see I was then almost exactly back to the colour of the swatch that I had removed after two minutes.

Now I started to despair. As interesting as it was to see the different results, none of the results were close to the same gold tone as the silk. If I was doing the Flame Handmaiden Gown I would have loved these colours.

Well I decided to go back to square one.Around a year ago I ordered a swatch of velvet from Beckford Silk in the UK. They are the company that custom dyed the velvet for my Travel Gown. Unfortunately they have since then changed their policy, and pricing, of custom dyeing velvet so that was not an option for me this time. I wasn't totally satisfied with the swatch, and that's the reason why I've gone through all these dye tests. Now with three weeks left to Celebration I must admit defeat and say that the original test swatch is a lot closer to the gold tone I want than any of my tries.

I have now ordered 7 meters of that velvet, and I hope it won't take more than two weeks for it to come here. In the mean time I've spent around $250-300 on the velvet and dyes, and not counting the hours and water I've used up, that I won't be able to use. If I had taken the decision from the start to go with this velvet I would have been a lot closer to finish the whole project.

I must say though that it has been a very interesting learning experience, and I'm definitely not afraid of using dyes anymore. I now sit here with a lot of velvet pieces in a beautiful, warm glowing shade of gold/orange. Thankfully the pieces are quite large, since they were cut out to be a free flowing robe so I should be able to use up and turn them into something else. I just need to come up with some kind of inspiration for it, who knows maybe I should go with the flame handmaiden sometime in the future.


Tuesday, 10 February 2015

Adventures in dye-land

So last Sunday it was time for me to do what I had dreaded for a long time, it was time to dye the fabric for the gold handmaiden. I went home to my mother's house, since has both a good stove, larger pans than me, and a bath tub.

Before embarking on this adventure I was really scared of it, in the end I found that it's been pretty fun, especially if you aren't too picky with getting a certain shade but can accept some variety. Hopefully this will be helpful to some other who haven't dyed before.

First of all I washed my fabrics. Since it was silk I was a bit worried, but I was going to treat them a lot worse in the dye process than what the washing machine could do o them. I even put the silk/rayon velvet in the tumbler, and it turned out fantastic. I did this step last week.

When it was time to dye I started with soaking the fabric in really hot water in the bath tub. I had cut the fabric into three pieces, the general size of the pattern pieces.
 I used hot water since I didn't want the fabric to cool down the dye bath when I put it in. In the instructions it says to have the dye bath on the stove to keep the temperature, but that wouldn't be a good idea with a plastic container so I will have to do with the heat from the water when I pour it in.

While the fabric was soaking I boiled a lot of water on the stove, in my mother's biggest pots. I also put some water in the regular kettle. This water I poured into the container to heat it up, and then I poured it out again. I wanted the container to be hot when I poured the boiling water into it, so that it wouldn't cool down immediately.

Here you can see the two pots and the container, remember to protect the floor. One thing I also realized was that you don't need to fill the container. I filled it a bit more than half-full. You only need enough water, and space, so that the fabric can be moved around in it.

Now the velvet was very heavy when wet, so I had to split it in two batches for it to work. I put the first batch in and let it be there for 19 minutes, then I took it off, put it in the bath tub with cold water, reheated most of the dye bath in one of the pots and put the next batch in.

When the second batch had been in for 20 minutes I put them both in the washer and washed with a silk detergent in a cold water/hand wash cycle. Finally I put it all in the tumbler, on low heat.

While the velvet was in the tumbler I repeated the process with the silk taffeta. Only with this fabric I could put it all in one bath. I also didn't put it in the tumbler. Then I had to go home to my own place, so I hung all the fabrics up to dry in the bath room. (My mother's on a vacation trip, I wonder if she's going to be surprised when she gets home?)


Here are the fabrics hanging and you can immediately see that the velvet on the left, the first batch, has a totally different shade than the velvet on the right, the second batch. What must have happened is that the first batched sucked up most of the red pigments in the dye, leaving the second batch a more yellow/golde shade. The sad thing is that the second batch is perfect, so I will need to see if I can remove some of the dye from the first batch, or if it's possible to overdye it to become more yellow.

My plan now is that I have ordered some colour remover. I will cut up the velvet into the pieces I need to assemble the robe and hood, that should also leave me with a lot scraps so that I can do tests before trying to bring the both batches into the same colour. If I can't remove the red from the first batch I have another packet left of the original dye and then I need to dye the second batch again to give it more red.


Tuesday, 13 January 2015

First dye batch complete!

My main fabrics for the gold handmaiden are still underway, but I've started on the sash around the waist. I started with the last piece of the silk charmeuse for my sister's wedding gown. It was around 1,5 meters and weighing 200 grams. Now it was time to really take the bull by its horn and start with the dye. I felt that this was a good start though, if I failed with the dye I wouldn't have ruined a large amount of fabric. The dye that I wanted to try this time was Jaquard iDye for natural fibres in Gold Ochre. I would probably not have dared if it hadn't been for this tutorial from The Dreamstress, she had also used Gold Ochre and so in that way I had seen the colour that her fabric got from the dye. I also asked the HSF FB group for any advice when it came to what kind of pots and the like to use.

According to the instructions that came with the paint you should either use a toploading washing machine, or have a metal pot that you could keep on the stove. I didn't have any of those, instead I decided to use the largest plastic storage box I could find up on my attic. Then I started to boil a lot of water. I used my kettle and three pots. The kettle was the fastest, but the biggest impact when it came to the temperature were my two large 10 litre pots. I filled the plastic bin about half full with my second to last large pot, added the dye, fabric and vinegar, and then I raised the temperature again with the last 10 l of water. I had also presoaked the fabric in hot water, so that the fabric itself wouldn't lower the temperature. The temperature of the dye bath came to around 80 degrees C.

I used a big stick, actually a broom stick, to stir the fabric. I kept stirring in the pot, so that the fabric was never still for 25 minutes. Then I lifted up the fabric into my bathroom zink and washed it with a small amount of washing powder. I rinsed it until I couldn't see any colour of the water.
When I hung it up to dry I was worried that the colour was too dark. I had noticed it already in the dye bath, so that was why I took it up after 25 minutes instead of the recommended 30 minutes. I hoped that it would lighten up when it dried though.

And it did! This is my fabric all dry. I'm so happy with the colour and this photo does not give the fabric justice, it's so rich and shimmering.

With that I'm really happy that I have found a dye that works, and I've managed to do a proper dye. Now there are still some issues that I need to solve before dyeing the main fabrics. That's going to be a lot larger amount of fabric, and it will not fit in that same plastic container. I will probably have to cut the fabrics into smaller pieces and do several dye baths, but I would like to reuse the water, but then I need to be able to come up with a solution on how to reheat the dye bath. I don't want to put y plastic bin on the stove. So still some technical issues, but at least the dye works.


Monday, 29 December 2014

Dye tests

So today I started to test different dyes for the gold handmaiden. At the semi-local craft shop, meaning it's in the Yellow/Sunflower handdye and one Orange/Goldfish hand dye. I was pretty sure that the yellow would be too yellow and the orange too red, but I hoped that a mix of them would give me a warm gold colour.

 I made three quite large swatches of the fabric that I'm going to use for the undergown, it's a cotton voile. I also considered this quite a learning experience, so I made sure to follow the instructions. The only thing I did was to halve the amounts of dye/salt/water.

It was really simple. I heated the water to 40C, turned off the stove but kept the pot on the plate. I added salt and the dye, and then the fabric. I stirred quite a lot the first 15 minutes, and then I had the fabric in the dye for another 45 minutes, stirring occasionally.

Here are the three swatches. The yellow is actually darker and warmer than I thought it would be, it's not very far off the colour I'm after. The orange, to the right, I could see immediately that it was going to be red. For the middle swatch I mixed 25 grams of yellow with only 5 grams of the orange, but as you can see the orange was way too dominant.

If I was making the handmaiden flame gown, then I would be really happy with the results, but for the gold handmaiden I need to experiment more. I have ordered iDye in gold ochre, hoping that it will work without any mixing, but I've also seen people who have commented on that it's a lot more yellow than it should be. I have also ordered more of Dylon yellow and Terracotta/Brown, to see if I can find a mix that is just a bit darker than the Yellow on its own.

These dye aren't wasted though, since I will start experimenting with the pleating on them,