Saturday 30 November 2013

baby tusken

Original uli-ah costume
As an accessory to my female tusken I have also made a uli-ah, a tusken child. My first wish for accessory was a big tusken rifle, but unfortunately I discovered that that was impossible since I can't lift my arms enough in the shawl to be able to carry a rifle. I'd like to get a gaffi stick one day though. Anyway, since I am a seamstress I figured that I could sew something instead of building or sculpting a weapon.

I didn't have a fully grown child to go with me, but instead I took one of the dolls I had saved from my childhood. The doll that I still had left was my favorite doll, which meant that for sentimental reason I had to make the clothes fully removable. One day I'd like to buy a cheap doll and dress it in the costume so I can return the original doll to its cute clothes it had when I played with it. For the materials I simply used leftovers that I could find in my stash.


Step one was to make a pair of tights for the doll I used a doll pattern that I had from making doll clothes to my nieces and a piece of sand coloured stretch fabric. It was the same stretch fabric that I had used to make gauntlets to put my arm wraps on for my female tusken.


Then I added a skirt made out of crinkled cotton. The dirt is simply watered down hobby paint that I've sprayed on to the fabric. I also wrapped the feet and hands with small strips of teadyed cotton to make it resemble boots and gloves. The fabrics for these were all leftovers from my own female tusken costume


Then came a tunic made from the last remnant of the wool coat that I had used to make the flak vest for my A-wing pilot costume.


The last thing was a little pouch and belt, made from what was once a suede bag I found for 10 SEK at a second hand store and that I have used when I needed strips of leather.

I didn't do a fully constructed mask, but rather a hood that I sewed some casing into and put a bit of wire so that it could hold its shape. The vest and the hood are made from the same cotton as my female tusken shawl, and then teadyed.


Friday 29 November 2013

tusken female

original costume
After having been a member of the Rebel Legion for 8 years, I felt it was time to go to the dark side as well, and I wanted to make a costume that would be approved with the 501st Legion. The choice was simple. I'm a seamstress, and I wanted something that I felt would be interesting to sew, I also wanted a contrast to all the fine details and finishing of my last projects. I decided to make a female tusken raider. The female tusken raider is just visible for a short while in Episode II, before they are cut down by Anakin Skywalker. Still there were a lot of references to the costume, and I felt that it was really beautiful. A good thing is that it's been out on quite a few exhibits as well, so there was a lot of photos of the original costumes.

I must also say that the thought of a worn and weathered costume appealed to me, all my costumes up to that point had been pretty, or made to look as neat as possible.

One decision that I took early on with this costume was that I only wanted to use natural fibres. I wanted fabrics that could breathe, since I knew that the costume was going to be a hot one anyway. I ordered all my fabrics from broarne.se. It's a web shop with a segment of natural fibres, the bad thing is that they tend to run out of fabrics, and when they are out of stock they don't come back. I also have a feeling that they have less fabrics in their selection now, compared to when I started looking inot them.

The first layer is an undergown in a lightweight crinkled cotton. I made it up as an historical chemise,
undergown
but I don't remember exactly which pattern I used. One thing I did though was to leave out the underarm gussets, instead there are just holes there. I figured that would help a bit with ventilation. When the underdress was finished it got a thorough rest in a tea/coffe/cinnamon bath. I also left some of the teabags in the water when I threw the gown into it, so that they would stain the fabric unevenly.

Building the hood.
The next step was to make the shawl. I decided to make it in two parts; the hood and the shawl.  The hood was build up around the foundation for the mask, I simply cut strips of the fabric and pinned them on top of each other until I had a hood. The rest of the shawl was a bit more complicated, In order to figure out the pattern for the stripes I wrapped myself in an old bedsheet, then I shaped it until I had quite a tight fitting piece around me. I drew the lines of where I wanted the stripes to go, cut up the bed sheet and used it as a pattern. I of course added seam allowance and some extra for the fringes of the strips.
the shawl before sewing it closed at the back

The rest of the fabric parts were pretty simple; tubes of stretch fabric to cover the arms, that I then covered in strips of fabric, a pair of cotton gloves, a pair of boots that I glued strips of fabric to as well. Then in order to get everything really dirty and weathered I too advantage of my job. I work in a historical mine, and it's very dirty. Par of my job is to go into the mine and check on the lamps that we have there. I simply wore the outfit on these rounds, which have made it really dirty. I also use the undergown every year when I'm doing our special Santa tours there. I simply wear the undergown together with a knitted sweater and a Santa hat. The bag was made by a friend, an

The big thing with this costume is the mask though. I bought a kit, the most readily available kit out there, painted and assembled it. I was never really happy with the result. It basically falls to pieces and the glue that keeps the pieces together can't hold it. I am very happy with how I painted the mask though.

The last time I wore the mask was at Celebration Europe II in July. I had actually already sold the mask and gave it and the bag away right after the tusken photo shoots. Since then I have bought a new mask kit, from another maker, and I have made a new leather bag. I only need to find a bone to put in the front. One of my main projects of 2014 is to finish the mask so that I can wear this costume again, it's really funny costume and since we have quite a few male tuskens around it's fun to run around and play out tribal life together.

Status: under reconstruction
A group of female tuskens at Celebration Europe II, 2013
April 2011


Wednesday 27 November 2013

Can Can-trooper

V.1 2010
In 2010 I launched my favorite costume ever, and a costume that I must say I've become quite famous for. It's the can can trooper. It's based on a Star Wars storm trooper, but I've reimagined it as a can can dress, all in plastic fabric. There were several reasons and how I came up with this idea, and it had been brewing since 2005 before I finally set out to make it.


First of all the inspirations for this:

1. Moulin Rouge! I love that film, and it was that film that led me to making corsets. I love all the characters that you see in their character driven can can gowns. I've spent hours looking at them and wanting to make character can can outfit for myself.

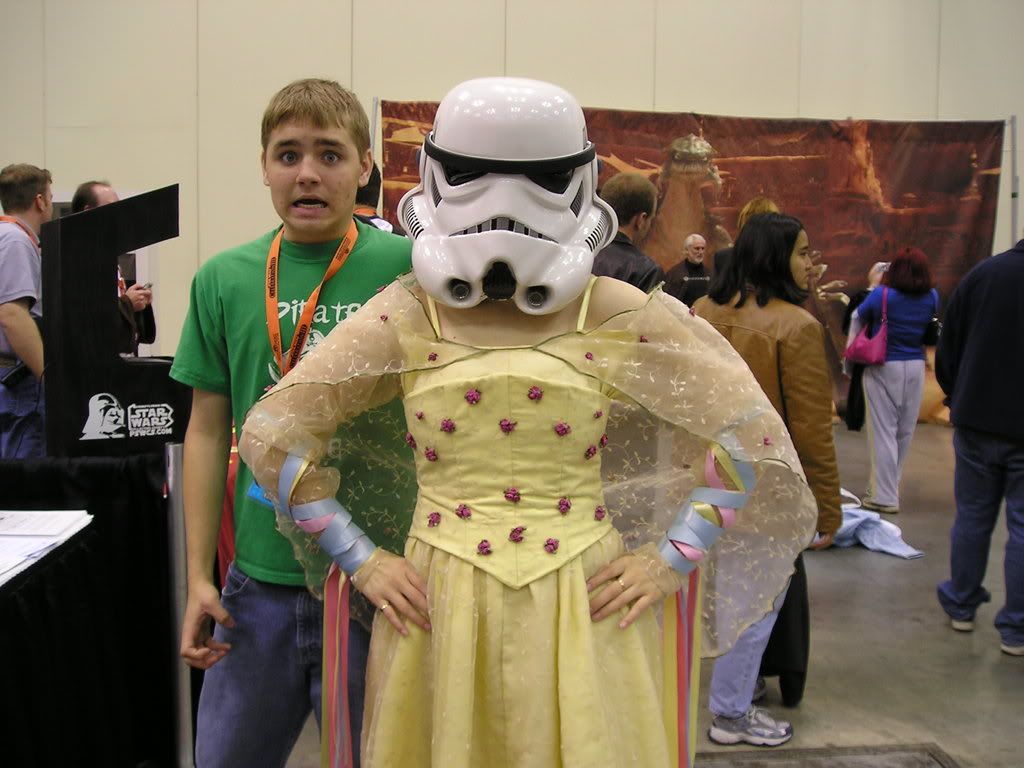
2. In 2005 at  Star Wars Celebration III in Indianapolis I took this picture of a friend of mine. We just loved the face of the guy in the background and we joked around and called it the picnic trooper. Then I started to think that it would be so fun to make a can can trooper, the idea was born.


3. There are a lot of "sexy" Star Wars costumes out there, including the femtroopers (just google femtrooper and you will find a lot of examples). Most of them are basically a Star Wars costume where you show as much skin as possible and show your great looking body. I wanted to make a costume that was sexy, but still covered up and abtainable for us curvier girls. I would never show my midriff for example.

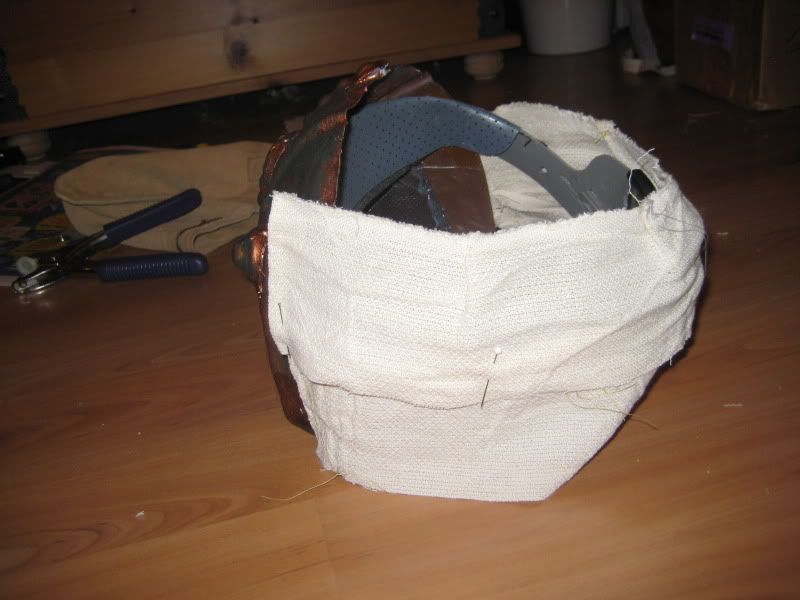
The plan from the start was to get a stormtrooper helmet, make a corset and skirt, add pieces of armour and other things that made it look more like a stormtrooper. The first thing was to get a helmet. Thanks to my contacts in the Nordic Garrison, I wasn't a member there at the time, I heard of a guy selling an FX-helmet. FX is an early brand of fanmade stormtrooper armour, today it's known to be unproportional. The reason why he sold it was the he wanted to upgrade to a more accurate helmet. Since this costume wasn't about accuracy I bought it.

Next thing was the boots. I found them on ebay, they are a pair of platform gogo boots with wide calves and a quite chunky heel, rather than a stiletto heel. They are actually quite comfortable to walk in, and I've worn them for disco parties and stuff like that as well.

Under the gown I wear a pair of black shiny/plastic leggings. The black chemise that is poking out is actually a shiny black 3/4-length sleeved top. I never used it since it ended way too high, but I sewed a skirt to it so that it would be a protection against the corset the whole way down, and the skirt part isn't visible.

The corset is made from my favorite corset pattern, the Truly Victorian 110. The pattern goes together like a charm and fits really well without any alternations. It's made in two layers. One strength layer of coutil, with sewn on boning channels and one outer layer of very heavy and shiny vinyl. It's boned with spring steel on every seam and in the middle of each panel. this is definitely the best corset that I have ever made, I was so proud that I managed to do it in such a tricky fabric as the vinyl. The straps are tacked on by hand, and are simply two layers of vinyl with batting in between, then I sewed down seams to make them look like the ribbed shoulder pieces of the stormtrooper armour.

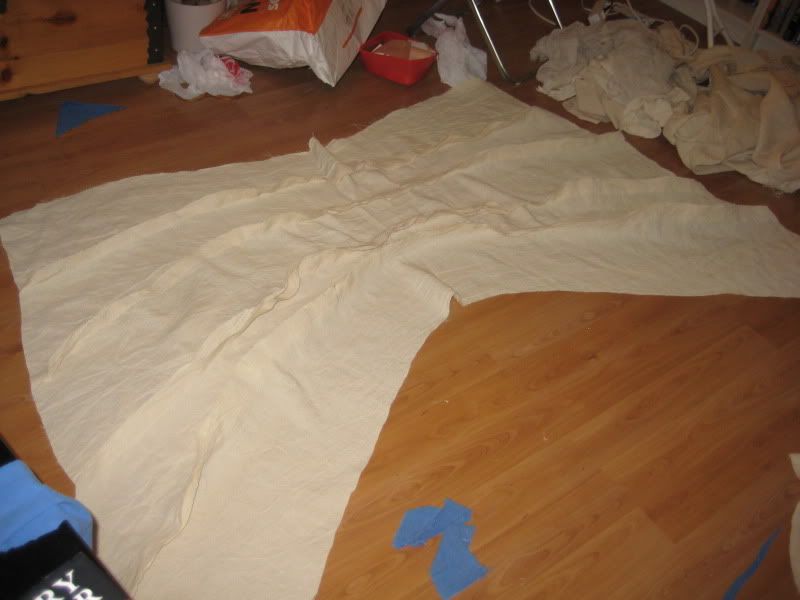
The outer skirt is a full circle skirt of the same vinyl as the corset. And then the main piece of the whole ensemble is the petticoat, which you don't even see in most of the photos. I had decided to make all the ruffles of the petticoat into the shape of the imperial seal. In order for the fabric to be able to hold the ruffles I used a heavy satin, then the ruffles themselves were made out of black and white interlock. I chose interlock because then I didn't have to finish the edges of the ruffles, since it doesn't fray. On the other hand the interlock that I found was quite heavy, which added a lot of weight. In the end I think I cut and gathered around 120 meters of ruffles for the petticoat. In hindsight I could have gathered a lot less with the same result, but I really thought that the tighter I gathered the more poof I would get in the skirt. I spent three months on the petticoat alone, and still the only way you can see the result is to lay it flat on the ground.
around 120 m of handgathered ruffles


Imperial Seal


 Other bits and pieces to the costume is a neckseal of black vinyl, made in the same way as the straps to the corset, but with horizontal seams. For version one I made some ruffles out of the vinyl and attached to the shoulders. Then there are gauntlets of the white vinyl and black satin gloves.

I debuted the costume at Star Wars Celebration V in Orlando in 2010. I entered it into the costume
Me with the original "picnic trooper"
contest and got a lot of applause from the audience, but I didn't win. I also discovered that it was almost impossible for myself to walk on the con floor, but thankfully I had a friend who rescued me and acted as my support/bodyguard for the rest of the day. The thing that made me most happy though were the comments I got from a couple of women who came up and said that I was their favorite costume because I showed that you could be both sexy and classy at the same time, and that sexy doesn't have to equal slutty.

The costume was definitely a success, and I've even been up on a list of the 15 funniest stormtroopers that's been floating the net, there I'm called Lady Stormtrooper. Unfortunately the list itself isn't available anymore, and I was stupid enough not to save it. Also when I wore the costume again at Star Wars Celebration VI in 2012 I was approached by two women who told me that I had inspired them to make their own "Star Wars princess" gowns to wear at local cons. This shows that even if I call it a can can -trooper, it's seen as a princess, or lady-like gown.

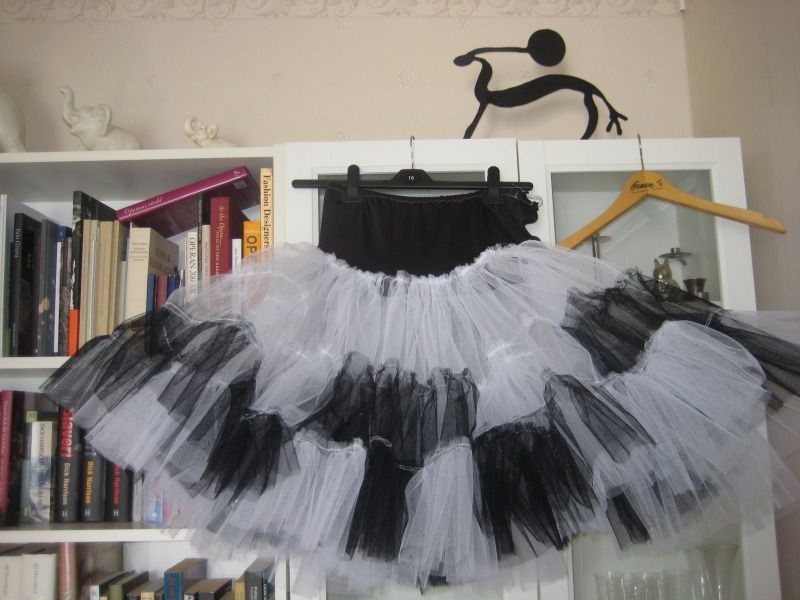
For Celebration VI had done some small alterations. I had cut off the ruffles and just made simple tubes of vinyl to wear on the upper part of the arms, and I didn't wear the heavy petticoat. Instead I had made a simpler tulle petticoat. It isn't the full seal, but it gives the same black and white swoshiness, but with a fraction of the weight of the original petticoat. That's important when you travel by plane.
The "travel" petticoat.


Some things happened at CVI though. A good thing was that the corset is now too big, I can lace it fully closed in the back and it would definitely be possible to lace it tighter. Also some of the boning broke through the channels and is now sticking up in my armpit, not comfortable. I'm planning on wearing the costume at Star Wars Celebration Anaheim in 2015, but that means that I will have to make a new corset. I have also bought a proper stormtrooper backplate, thermal detonator, belt and handplates, and I'm hoping to integrate these into the costume to make it more armorlike. One thing I'm going to ditch though is the helmet. Remember what I wrote up in the beginning that the FX helmet is unproportional. That means that it's 3 cm too big to fit into my suitcase, which in itself is the maximum allowed size. So when I'm flying I need to carry it in some kind of bag, and technically it's too big to be a carry on piece as well, and then cram it by my feet or risk it getting crushed by other bags in the over head compartment. I'm tired of that. My idea for 2015 is to skip the helmet, buy a white wig in a bob hairstyle and simply paint my face white with the helmet markings.


Status: under reconstruction


Sunday 24 November 2013

Maria of Habsburg gown

original costume
 One of my favorite historical gowns that still exist today is the wedding gown worn by Maria of Habsburg in 1520. I have been obsessed with it, in fact already in 20007 I had it as background on my computer. It's not just because I think the dress is beautiful, the fact that it's dated to 1520, which for me is a very important year. I am a medievalist at heart and one of my favorite persons in Swedish history was very much active in 1520, and it's a woman. I could always imagine her wearing something like this.

Anyway on to the gown. The gown is the second oldest intact female garb in Europe. According to tradition it was worn by Maria of Habsburg at her wedding with Louis II. Today the gown is owned by the Hungarian National Museum, and if go to Budapest some day I really wish to see it. It was restored in the 1980's, but already in 1929 the gown was analyzed and in 1962 an article about the gown with cutting diagrams was published. The best information about the gown, and the cutting diagrams themselves can be found here.

As mentioned, I have loved this gown for a really long time. Some years before 2008 I had bought 6 meters of polyester gold brocade, that I didn't really know how to use. Since I had bought it I had gotten a bit more interested in accuracy, and to me the fabric looked too modern to actually make an historical gown from. In 2009 there was a student ball that in a roundabout way celebrated an event in 1523, so I thought that this was my chance to make something out of the brocade, and to finally make a version of Maria of Habsburg's gown. My aim was not to go for total historical accuracy, but rather something that resembled the general look of the gown.

Since I was going to use the gold brocade I decided that I could be quite free and choose my own colour for the details as well. I ended up using some black poly crepe-backed satin that I had in my stash.

The first layer of the gown is a chemise, made from black interlock that I had at home. I basically used the pattern from the link above, but I didn't do it quite as wide as the original, that would be too bulky due to my fabric not being as lightweight as the original. It was the first time I constructed a chemise, and I found that it was actually quite simple, and that the result is a very comfortable piece of clothing.

For the dress I didn't use the cutting diagram that I found online. I was too unsure that I would be able to enlarge the pattern to something that would fit me. I did have a pattern with a bodice that I knew fitted me quite well, so I once again used my McCall's 4491 pattern. Only this time I cut it off at the waist, and I cut the front wide open. I have no idea what pattern I used for the sleeves, but I possible just took the upper sleeves from the pattern and lengthened them to full sleeves. I was a bit worried that it would stay up, so I added some hidden d-rings at the opening of the front and laced it closed.

November 2009
The original skirt of the gown is a full circle skirt, but my fabric wasn't wide enough to accommodate that. Instead I took all the meters of fabric that were left and made them into a large tube. I then used rolled pleats to achieve the look with those heavy folds of the original.

I'm very happy with the final gown. Too bad I don't have any better pictures of it. It definitely gives a feeling of renaissance opulence, even though it's not in any way accurate when it comes to choice of fabric or techniques that I used to make it.

I would still be happy to wear it, if I found a suitable occasion, but I would change the black poly chemise to one of my more comfortable white linen or cotton chemises.

Status: existing, but non-active.

Friday 22 November 2013

1860 ballgown

July 2009
This is what I consider my last (hopefully) costume disaster. All the advances I had made in the previous year was thrown to the wind and the result was an illfitting, badly made mess.

In 2009 it was the 150th anniversary of the railroad between Gävle and Falun, and I decided to make a gown to wear for the celebration. This was my chance to finally make a full "Gone with the wind"-style dress, hoop skirt and all. I had just graduated from university, but was unemployed, and against my better judgement I followed the advice of "you shouldn't spend so much money on a single dress", and the result is very visible. I had also gained quite a lot of weight in the last months, and wasn't comfortable with my body, and to finish it all off I simply procrastinated so much that I ended up rushing to finish it.

Anyway I started with buying a hoop skirt. I found it on ebay, and it was described as bridal hoopskirt that could also work for Civil War gowns. Well sometimes things are too good to be true. It arrived, and the hoops started just above the knee, and it had more of a triangular profile than a nice rounded 19th century hoopskirt. I shortened it so that the hoops at least started somewhere on the thigh, and I also cut up the channels and managed to draw out the hoops a bit so that they got a bit wider.

My choice of fabric was really bad. I simply had to make do with the cheapest I could find, and ended up with a poly duchesse satin. I had wanted to make something out of cotton, more like a daydress, but that was too expensive. I really didn't have any money at all. Also my choice of fabric was limited to what I could find in the local stores, which is basically nothing. So poly satin it was. At least the colour was nice.

I made one petticoat, simply out of bed sheets, not enough to hide the hoops. The main skirt was made from some tutorial that I found online, can't find it now. Basically I sewed four lengths of fabric together, gathered them and sewed them to a waistband. I think I actually tried to make a proper cartridge pleating, and I handsewed both the pleats, and the pleats to the waistband. It was also the first time that I learned to sew a hem facing. I basially sewed a strip of cotton to the fabric, turned it up and sewed the facing to the skirt. Overall the skirt was the best thing with this gown and I learned a lot with. For example I could trust my handsewing and I made the best looking hem I had ever made.

For the bodice I bought the Truly Victorian 442 ballgown bodice. I really like Truly Victorian's
TV442
pattern in general and the instructions are quite clear. The problem here was that I couldn't make a properly fitted bodice on myself, I wasn't thorough enough, and the satin wrinkled as only poly satin can do. I flatlined the satin to a sturdy underfabric, but that didn't help, I probably didn't do it good enough. I was so unsure with making tightfitting clothes that I thought that I had made the bodice too big and added some extra panels in the back, which of course meant that in the end it got too big.

Status: non-existing

I was never happy with the final result. It was a learning curve, and I wasn't ready to make a costume or gown that required good tailoring. I have given the bodice away to my nieces so that they can use it for dressing up, the skirt was basically square pieces of fabric so when I needed fabric for my first try with an 18th century jacket I cut it up and reused it.

A good thing was that eventhough the hoopskirt is not a good 19th century shape, it's a really good shape for Amidala's purple travel gown.from Star Wars Episode I, so I use it for that costume. It has a tendency to collapse a bit under the heavy costume, but when I just stand still it gives a good shape.

I would still like to have a proper Civil War gown one day, but if I make one in the future I will start with making my own hoop skirt. I have the bodice pattern, and now I think I can make something a lot better than my attempt in 2009.

Wednesday 20 November 2013

Classic Princess Leia

March 2009
As a female Star Wars fan, and costumer, it felt more or less compulsory to make the classic white princess Leia costume, with the cinnamon roll hairstyle. I also wanted a costume that would finally be recognized as a Star Wars costume. The gown itself was pretty simple, and the belt wasn't too complicated, but I have struggled a lot with the hair.

The gown is a simple t-tunic. Meaning that I folded the fabric. layed down and draw the arms and width of the costume. The fabric is a poly interlock fabric, the original was made in some kind of cheap 1970's fabric that isn't available anymore. The hood is a trapezoid shape that I made a roll hem on by hand and attached to the neck opening. An important thing with the hood is that it's open in the back, so you only attach the short sides of the trapezoid piece of fabric to the neck. The hood is a bit on the small side, since I managed to burn a hole on one end of it when I tried to press the hem. The collar is simply a piece of fabric folded in two. The side seams go down to about the knees, and then they are open to form two splits. It's in two layers, otherwise it would be too transparent.

The fabric has a tendency to get runs, and it's also too big so I'm not too happy with it anymore. I have fabric to make a new one, and if I remade it I would change a couple of things.
  1.  I would make it smaller. 
  2. I would only attach the two layers at the neck, and then I would attach the lining by simply rolling the hem of the outer fabric over the lining
  3. I would add some kind of interfacing to the collar to make it stand better.
  4. I would possible add some elastic in the waist, so that the blousing wouldn't be controlled by the only the belt.
 The belt is made from faux leather, ordered from Stoff och Stil and a sheet of aluminium. For my first belt I cut both the shape of the metallic plates, and the round things in the middle from the same aluminium. It's soft enough that I could use a pair of cheap ordinary scissors, they got destroyed in the process by as I said they were cheap. For my next belt I had bought button blanks for the round middle things. They were a bit smaller so I had to make the plates smaller as well, since my waist
Bottom is v.1 of the belt, top is v.2.
hadn't changed that meanst that the spaces between the plates are bigger on my second version. I have a big problem with the plates falling off from the belt, I've tried E6000, contact clue and superglue, but I still haven't found something that make them stay properly.

I  need to remake the belt, I've lost quite a bit of weight since I made them, and the last time I had to use saftey pins to prevent if from falling down to my hips all the time. I think I have enough faux leather for one more belt, I definitely have enough aluminium.

There are a lot of tutorials out there to make this costume. I mostly used this one, which has patterns for both the dress and the belt and gives all the measurements in both metric and imperial units.

The most iconic thing with this costume is the hairstyle, and that's also what I consider the biggest challenge. When I made this costume I had come long
Too big buns in autumn 2010

enough in my development as a costumer that I had decided that I couldn't do Princess Leia with blonde hair. Look at my Padmé costumes, I was happy to do the hairstyle with my own dark blonde hair. I decided to go for a wig. I got recommended a wigmaker on ebay and bought a prestyled Leia wig there. It was a huge disappointment when it arrived. The wig itself was nice, and the buns were well styled, but it was way too small. When I put it on the buns were both more or less placed on top of my head, rather than on the sides. My first solution was to buy some fake hair and roll up around the pre-existing buns. This meant that they got way off when it came to proportions, they were huge!

Since then I've bought a really long wig and what I do when it's time to do the buns is that I make a small bun out of fake hair and pin it on to the wig. Then I roll the long hair around that little bun and try to get them as symmetric as possible. It's really hard though, or I'm not good enough with hair, so I rarely have to buns of the same size and shape. What I would like to do is buy a short or medium length wig that I can put on, and put the hair in two ponytails. Then I would just like to make two permanent buns that I can attach over the ponytails. This is the way that many costumers who use their own hair with extensions do it, and I think that would make it easier to get a good look every time.

A good thing with this costume though is that you always pin the hood up so that you can hide the worst of the hairstyle. I do that almost every time when I wear it.

The gun that I'm using is a replica of her DDC defender. It was made by a fellow trooper, and I won't say the name since the trooper isn't making things to sell to other people.

Status: active

I thought I had retired the costume, but our regular Leia in Sweden wasn't available for an event this autumn so I took it out from the closet and used it again. I would love to totally redo this costume, I h
Me in autumn 2013.
material for the gown and belt, and then it's on to buy a new wig and make permanent buns. It wouldn't be too hard, I just need to dedicate some time to it, and I'm so bad with updating my costumes since I think it's funnier to make new ones. Still there might be more chances where a Leia is needed so I think I need to do this in the coming year.

For example I'm doing Leia on Sunday at a troop at Toys'R'Us in Kungens Kurva, when our base's primary Leia can only be there on Saturday.

Also one thing I'd like to add is what I wear under. The dress is a bit see through, even with two layers of fabric. The most common advice is to wear nude underwear, but in fact the best choice is actually bright red. At least if you have fair skin. The bright red against the white fabric creates a perfect invisible shade. Yes, I'm wearing bright red underwear in all pictures of me in the gown.

Monday 18 November 2013

A-wing pilot

So after some year's it was time to get back into Star Wars costuming. I was tired of having to work with hair, and not getting recognized as a Star Wars costume, that was my experience from wearing my Padmé costumes. So instead of beautiful gowns, I decided to make a rebel pilot. I didn't go the usual orange X-wing pilot route, but instead I chose to do an A-wing pilot.

The A-wing has always been my favorite space ship from Star Wars, and one of my favorite characters in the Star Wars books, Tycho Celchu, had flown an A-wing in the battle of Endor. Making an A-wing in 2007-2008 was quite the challenge though. This is a background character, and there were still no HD pictures of the full costume. Since then we have gotten the DVDs and even blurays, and people have put a lot of research into all the background characters. I'm still proud to say that even if I need to upgrade my costume now, with new knowledge out there, when I finished it it was probably the most accurate A-wing pilot in the Rebel Legion.

My first version of this costume was debuted at the Star Wars: The Exhibition in Örnsköldsvik in 2008, which also marked the first proper trooping with the Nordic Base together with the Nordic Garrison. At that time I still hadn't gotten my helmet though.

I first found a bottle green coverall, I'm short but I found one with extra length, which meant that I only had to buy one coverall and still be able to make all the necessary modifications. The modifications included adding a set of square pockets to the thighs, changing the pockets on the sleeves and changing the collar from a classic flip down to a mandarin collar. I aslo changed the cuffs so that they end in points. All the flaps for the pockets were changed to a square shape.

v. 1 June 2008
My first flak vest was made of a grey cotton, with some strange plastic white fabric,  don't remember at all where I found it. At that time the exact look of the A-wing flak vest wasn't really clear, so I made the front as what I saw, but the back looked more like the X-wing flak vest, with thick white straps connecting the pieces. With better images available I made version two of the flak vest, out of fabric that I got from a woolen coat I found in a second hand store. When I lost some weight I was then finally able to totally remove the white straps, so that the vest only consists of the grey wool as a base, and then the front bib in the white plastic fabric. I would have loved to change it a bit more, but I'm now out of fabric, and I will probably never find a matching fabric again, so I'll do with what I have.


My frst chestbox was sculpted from a chunk of oasis foam and a lot of plaster. It weighed a ton. Quite soon after that a friend made me a much better chestbox, basically it's just a plastic shell to so it's a lot lighter. Since then newer and clearer images have emerged and I'd like to upgrade to something else someday.

V. 2 August 2012
For the soft inner helmet I use an antique WW2 AN-H-15 flight helmet that I found on ebay. These surface from time to time, they are very small though. I have a small hat size (55-56) and I have a medium sized flight helmet, and it's too small. If I wear it for a longer period, or wear my glasses I'll end up with bad headaches. I have tried a large one, and that would have been a perfect size for me. Thankfully I spend most of the time just holding it in my hand.

My first helmet was a Y-wing helmet from Richie's armor, at the time that was the only available option for an A-winger. Thankfully A-wing pilots are seen with both A-wing, X-wing and Y-wing helmets, so you can get away with it. I was the first A-wing pilot with anything but an X-wing helmet though. The fun thing with rebel helmets is that you are allowed to make your own paint scheme, as along as it looks like it belongs in the Star Wars galaxy. For my Y-wing helmet I got inspired by my love of Swedish medieval history, and I picked up the colours and some of the detailing from my favorite coat-of-arms, and then instead of wordly heraldical symbol I put the Naboo symbol there instead. It was the same friend that made my chest box that assembled and painted the helmet.


Then came the first handsculpted A-wing helmet, just two years ago, and in 2012 two persosn emerged that can make the A-wing helmets. One is vacuforming a kt that you have to assemble yourself, a kit with greeblies included. The other person makes the helmet out of fiberglass, but you have to make the greeblies yourself. I bought the fiberglass helmet, since it was the first available one, but I bought a set of greeblies from the other maker. They aren't totally compatible, but I really like my new helmet.

I'm even happier with my paint scheme on the A-wing helmet. It took me a really long time to figure out, I knew that I wanted a connection to Falun and Dalarna, but didn't really know how I should do it. When I finally came up with the design it felt very natural though. It's Dalecarlian blue, with all the greeblies painted in metallic copper (I work in the world heritage site of the Falun Coppermine after all)and all around the helmet there is a a vine of "kurbits" (a traditional folk are motive from Dalarna). It was my very talented mother who pained my helmet, I only put on the base layers.

The spats have been changed three times. My first ones where both too light and too baggy, my second pair was too yellow and still too baggy. In the end my final pair was made of teadyed cotton, with an iron on interface to make them stiffer. I've also weathered them a lot with washed out black and brown paints to make them look darker. The spats are permanently attached to the legs of the coverall, this is also because my coverall legs ends just below the knee. That means less bulk in the boots, less fabric means cooler and more comfortable, and I also had to use all the fabric up to just under the knees for the modifications of the flight suit.

I've also made a holster, styled with inspiration from Padmé's Episode II holster, and I wear my Naboo blaster pistol in it. 


Status: active

V. 3 July 2013

Me and Wolfgang from Austria, at Celebration Europe II in Essen this summer. We match each other really well for having worked on our costumes during different time periods and in different countries.


Saturday 16 November 2013

Time to plunge into millinery

I am currently in a sewing hiatus. I've simply forbidden myself to start any sewing until I have finished redecorating living room, and refurbished my sewing corner there. Well this week I will get my new wall papers, so I'm right now putting away all the things I have in the living room. I'm also taking the chance to go through all the boxes and drawers in my sewing table. I found one quite cute unfinished purpe skirt in a purple cotton jacquard, just need to put a lining and a zipper in and hem it. I also found an unfinished cocktail dress made out of scraps. I think I'm going to donate that one to my nieces to play in, it should be a nice princess dress if they tie something around the waist to keep it up. The third piece I found is some kind of tunic in an ugly bed sheet quality of cotton. That one's going to the bin.

Anyway since I'm not allowed to sew, I can do a lot of planning instead. I've realised that since I'm getting more and more into historical costuming, I will probably need to take the plunge and learn some basic millinery skills. Today I've ordered a pattern called "universal round brimmed hat" made by Lynn McMasters. I can at least read the pattern and see if I think it will be possible for me to create my own hats. There are so many lovely versions of hats in the 18th century and it would be fun if I could get a bit more variation than just a round straw hat.


Friday 15 November 2013

LOTR - Arwen's coronation gown

original costume
For my aunt's LOTR-themed 50th birthday party I wanted to make a LOTR-costume for myself as well. I decided on one of my favorite gowns, Arwen's coronation/wedding gown. I did not go all in for buying expensive fabrics, but with my improved skills I still think it looked very good. I also did a bit of a switch, where the original has limegreen velvet with a cream/silver chiffon overlays, I could only find limegreen chiffon and white/silver velour. Still the effect is quite similar.

 I used the same McCall's 4491 pattern for this as I did for my aunt's gown. I didn't want any visible
seams on the overdress though, and since the material was quite stretchy, I simply put the fabric over the finished undergown and traced the contours. That way I ended up with simply a front and back piece that I could then turn into a dress.

The crown that I made was a quick thing I threw together with wire and clay. The lace was a really nice piece of wide gold/white lace trim. I cut it up and managed to puzzle all the pieces to just about cover the undergown.

Status: Existing but inactive

After the birthday party I ripped away the lace and the velvet sleeves. I've used just the satin undergown as a ballgown since then, and I have all the other pieces saved so that I could turn it back into an Arwen costume again.
April 2007 (the flash makes it lighter in colour)


Thursday 14 November 2013

Lord of the Rings - Eowyn's funeral gown

Original costume
I'm not a Lord of the Rings fan, but my aunt is. When she turned 50 she decided to have a LOTR-themed birthday party. I think that's quite cool for a 50-year old. As my birthday gift for her I decided to make a gown of her choice from the films. She wanted Eowyn's funeral gown, so I made it. I did some alterations though, for example my aunt has a very small neck and she simply looked really bad with the original collar. She was also happy to have gown made of plain cotton velvet, rather than the original patterned velvet.

McCall's 4491
 The pattern i used was McCall's 4491, without alterations. The only thing I changed was to leave the front/side seams open from the things down to create slits. I then added a simply half-circle skirt in gold crepe backed poly satin under it.I also added undersleeves, I think those were simply tubes that I attached at the seam on the middle of the sleeve.

To me this costume marks quite an important step in my development as a costumer and as a seamstress. I paid a lot more attention to details, and I finally understood what a difference it can make to properly measure everything, to use the right stitches and to press all the seams.

Status: My aunt still has it, but she doesn't use it. 
April 2007


doll version, Christmas 2008

Out of the leftovers from the fabrics I also made her a doll version of the complete costume, with cape and veil as well. It's been a while now but I think I simply copied the pattern pieces from the envelope of the pattern and then freehanded them to make them fit the doll frame that I had.

Many of the details were so small that I had to sew most on this version by hand.

This doll is more correct since it has the collar, the veil and the full cape. I even managed to find little round sequins to make the belt. I gave the doll as a Christmas gift to my aunt in 2008.

Wednesday 13 November 2013

1880s walking gown

In 2006 there was going to be an historical festival in Falun (Falun Då), with the theme 19th century. I thought that this was finally going to be my chance of making a costume from my favorite historical era, the bustle era. I was a bit overconfident, by now I had made more corsets, and I thought that I was going to be able to print a pattern from the web and enlarge it to fit. Big mistake. Well I managed to get something wearable, thanks to help from my sister, once again a saving angel when I hit a wall. Still I think the final result was pretty good, and I became the public's winner in the costume contest. Probably because it was clearly visible that I wore a corset under it all. Gabardine on a hot summer's day wasn't maybe the best choice though. Or rather I wouldn't recommened gabardine at all today,

July 2006
it stretched and warped in all kinds of directions. If I had been a better sewer I could probably have fixed it with a sturdy lining, but I wasn't that far into sewing yet. I thought it was only the outside that mattered.

The pattern for the bodice started out as this "violin bodice", but I basically removed all the "violin" shapes in the end, since I simply couldn't understand how I was supposed to attach them. The petticoat and skirt were simply tubes that I gathered at the waist.I couldn't quite drape the skirt, simply not enough fabric, over the bustle, but the bodice wasn't too bad.

Status:existing (I think) but inactive

I have turned the light fabric bustle I made into my 1780's bumpad though, so that piece is still active.

 I also found some pictures of the underwear that I made for this costume. By know I had made  two or three corsets and felt quite confident. I decided to try a new pattern. I thought that the Silverado didn't give enough hourglass. I found this free pattern and printed it. Unfortunately this was the first time I hit a realy setback with trying to scale something, and this is the most uncomfortable corset that I have ever worn. Looking at the pictures now the reason for that is quite obvious, just look at how asymmetrical it is. I must have been more lazy than usual when cutting the pattern pieces to get such uneven sides.


Sunday 10 November 2013

Nini Legs-in-the-air Windmill gown

So as mentioned previously I wanted to make a proper cancan gown. The plans were great, the execution not so much. I used decent fabric, but I couldn't get the bodice tight enough, so wrinkles. I never had time to finish the ruffles on the petticoat, and there are a lot of loose threads everywhere, since I just tried to zick-zack the edges of the fabric and cut off most, but definitely not all of them. There are windmills on the skirt, but they look quite crooked.

Original costume
November 2005

Status: non-existing

I still have the petticoat though, and it's a great base for fantasy/gypsy-inspired costumes.


Saturday 9 November 2013

Schadenfreude, but not really

Today I was really tired and I put one of my oldest favorite films in the DVD-player. It's The Scarlet Pimpernel from 1982. This was one of the first films that I watched obsessively as a kid, and I still know quite a lot of the lines by heart. Well knowing the film that well gives makes me look at other tings, like the costumes for example. This film has definitely shaped my interest in the late 18th century fashion.

One thing that made quite happy was actually to see the sleeves of Marguerite's gowns. Quite a few of the had a bit of hump on the back, say from the middle of the shoulder and down. There was also some serious wrinkling going on. This makes me really happy since all my 18th century gowns have suffered from those b´humps and wrinkles, but apparently professional costume makers have that problem too. I am getting better, and hopefully by the next time I sew something 18th century I will be able to eliminate the sleeve hump, it's a matter of easing and gathering the sleeve towards the armscye in the best way. My sleeveheads have simply been too large compared to the armscyes.

Here's a picture that I found, and I've circled the top of the shoulder. It was more visible from the side and the back, but for some reason I couldn't find any screen caps of that.

Friday 8 November 2013

First corset

After 2005 I thought that I wouldn't do that much Star Wars costuming anymore. Me and a friend decided to make can can gowns for a ball though, and I realized that it was my chance to make a costume from one of my favorite costume films: Molin Rouge.

First step was to make a corset though. The friend and I ordered a pattern, from Canada I think, and after much looking we found a place in Sweden where we could order steel and busks for the boning of the corsets. The pattern is Laughing Moon's Silverado. I made a lot of rookie mistake with this corset. First of all I didn't cut the pieces carefully, meaning that the lining and the outer layer weren't exactly the same, which meant that the corset got really wrinkled. Also when I first tried it on I panicked when I couldn't close it, so I added an extra panel in the back, which of course meant that when I laced it properly it was too big. Still it was my first try with a corset, and I was definitely hooked on sewing corsets.

October 2005

Status: Non-existing.

It was last seen when I lent it to a guy for a performance in a student show (studentspex) in 2006)