Showing posts with label embroidery. Show all posts

Wednesday, 18 December 2024

HSM challenge 7 - always in style

I did it! This year I actually completed all 12 HSM challenges, I think that is the second time I have managed that. The final challenge that I needed to finish was the July challenge - always in style

Make a garment or accessory that is appropriate for more than one historical period… or even a historical piece that can be worn with modern clothing! (Note that the piece should still be ‘historical’, not just ‘historically-inspired’
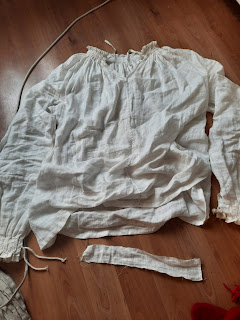
In order to come up with what I should do I started thinking around. I did just finish a shift that would work for several historical periods, a shift that I had forgotten about and found in a box with just the hemming of the neckline left, but that would also be a bit boring. Then I started thinking about mittens. My wrists are always cold so I have an assortment of cuffwarmers, but I can always use more. Fingerless mittens have been used a lot. I have made a pair of long 18th century ones and some folk costumes in Sweden still have them as an accessory. This autumn Lina Odell also released a book all about doing embroidered mittens with inspiration from folk costumes. Now for the HSM challenge it should be historical and not historically inspired, still I didn't copy a specific pair but rather used several historical parts as an inspiration.

Photo by Hilding Mickelsson/Hälsinglands museum, cc-by-nc
Most preserved mittens seems to be black with silk embroideries. I was sure that I had some black wool, but I was wrong, so I was really happy to find this example of a mitten that was made in another colour.

Photo by Hälsinglands museum, cc-by

This pair of mittens has a typical pattern, made with silk and using satin stitch, stem stitch and herringbone stitch, in Swedish plattsöm, stjälksöm och flätsöm. The mittens also has a pointed tip that is folded back and shows a silk lining.

I started with taking a pair of mittens that I use at work and simply trace it to make a pattern. This is a very simple design, just one seam and a hole for the thumb rather than a sewn thumb. The shape has come from several years of use and molding to my wrist and hand.


I cut out the pattern in a scrap of wool and added the point at the top. I also drew out the base for the embroidery, deciding not to be too accurate but instead being ok with not totally symmetric and perfect pattern.

Most of the embroidery actually felt like just doodling with needle and thread, rather than with a pencil. I didn't have any silk so I used cotton, in the colours that I had at home. I also used mostly chain stitch, which is also a common stitch in folk costumes and that I am simply better at than stem stitch. I also used satin sitch. The raw edges were folded under once and also attached with more chain stitch.


The backsid of the mitten with the simple green row of chain stitch. The most tricky part was actually to attach the point in the right spot. For the lining I used a scrap of poly brocade, that is an historical pattern. I was a bit dissatified with the placement of the point, it didn't end up as centered as I would have liked.


Me wearing the finished mitten, that I also now use at work instead of the old grey ones.


The finished pair of mittens. Compared to the originals I have simplified the design, but I also now want to make more pairs that are more inspired by historical examples. It would be fun to have a pair inspired from my mother's folk costumes, which have a lot of circles and flowers in chainstitch and one inspired by the embroidery on the cap and bag for my own folk costume, which has a flowers in chain stitch. All in all it was a fun project and I can definitely see me making more of these out of scraps of wool.

What the item is: a pair of mittens from the second half of the 19th century
How it fits the challenge: The mittens are from the 19th century, but I am using them with my every day clothes at work
Material: 0,4 m wool
Pattern: my own
Year: ca 1850-1880
Notions: cotton floss
How historically accurate is it? 60% - they are not as elaborate and they use cotton floss and poly brocade instead of silk, they are also a bit too long compared to the original.
Hours to complete: Made over a weekend
First worn: to work on December 17th
Total cost: stash project but probably around $6 if bought new

Monday, 2 December 2024

HSM 2024: Challenge 12: The white work apron

 Going through the list of HSM challenges for 2024 I realised that I have project that I haven't posted about, and that would fit with the final challenge "That's a wrap".

December: That’s a Wrap: Make an accessory or garment that is worn by wrapping it around the body.

In september I started to learn whitework embroidery by working on a an old linen apron. I finished the apron in October, just in time for the 16th century party that me and my husband attended. Since it is an apron I wear it by wrapping it around me and tying it in the back, so that's a fit for the challenge.


I also realised that I didn't take any photos of just the apron, or just me, and now I've packed it away for the winter. Anyway you can see the line of whitewok in the botom of the apron.

The Challenge: December "It's a wrap"
Material: An old linen apron
Pattern: My own, I very much used the instructions from the Royal School of Needlework stitchbank
Year: 1520s
Notions: Linen thread, was
How historically accurate is it? Around 95% (all period materials and stitches, I'm just not sure that they were ever combined in this way)
Hours to complete: a month of having the embroidery at hand while watching tv.
First worn: A 16th century party in October
Total cost: This was a pure stashproject and made from a repurposed older apron.

Sunday, 15 September 2024

Learning whitework embroidery

 After coming home from Visby I have been a bit both worn out from sewing, and restless from not having something to do. All the work I put in with making David's landsknecht meant that I got used to sewing a couple of hours every day, at the same time I don't know what to do right now. I don't need any historical clothing, and also don't have the inspiration to make something that I will just put in my storage, and I don't have a huge inspiration for a cosplay project either. I have made some progress with my female tusken, but when it was clear that I am going to miss the remaining conventions in the autumn I don't feel like putting on some extra drive into it.

So I decided to learn how to do whitework embroidery, and started with drawn work. Now I am not a person to make a sample, I am too impatient and wanted to make something I could use. Since I don't have a fine, white 16th century apron I decided to take the apron that I whipped together last year, but didn't have time to do anything with and add embroidery to it.

I started with drawing away threads, and this was the most fiddly bit.

Now I am unto separating bars of the remaining thread and this is slow, but fairly simple work. Quite nice to do while watching tv.

As for whitework and the 16th century there are definitely examples of white on white embroidery from the early 16th century. From the end of the century there are loads of wonderful, lacy aprons and other examples of drawn threadwork, white on white embroidery and pulled threadwork. I don't want to go for the late century though. The Sture-shirts have drawn thread work on them, and they are from the 1560s. It might be that the simply style was just coming into fashion then.


This drawing of Dürer from 1475 shows a faint line on the edge of the apron. It's impossible to say what kind of decoration it is, but at least a line of embroidery shouldn't be too out of place for the early 16th century judging from this. 

To help me learn the teqhnique I am using some of the books I have at home, but I am also very happy for the Royal School of Needlework's stitchbank with their clear instructions and images.


Monday, 3 June 2024

HSM24: Challenge UFO spotter - an embroidered cap

 Back when I made my 1520s court gown I was quite a lot into embroidery, and I wanted to make an embroidered hood, that was not as fancy as my embroidered gold hood. In 2021 the Royal Armory made a challenge to take an object from their collections and turn it into an embroidery for World Embroidery day in August of 2021. 

One of their objects that I've always liked is this prayerbook, probably owned by Malin Sture, it's her family's coat of arms in the front and signed with by her siblings and cousins, she was cousin to the royal family. It is dated to the 1550s/1560s, so a bit later than my preferable time period, but I still took inspiration from the edge decorations and created a cross stitch pattern from it.


The photo above is dated to August 2021. I realized that I wouldn't finish it before the set date for the challenge, and since then it's been an ongoing project. I've packed it up with a plan to finish it, realized that I wouldn't do it and then I've packed it away again. It's also been a project that I've brought to our cosplay meets when I haven't had anything special to work on.

I had finsihed the bottom border just before Christmas 2022, but then I decided that it would look so much better if I doubled it, and then I packed the project away again. Finally I finished the whole embroidery in January 2024, only 2,5 years after I started it with a plan to have it done in a month or so. 

I felt that the empty spaces in the middle of the pattern should have something, and I had two different sets of metallic spangles. The larger ones were to big, but I added a small metallic spangle all the way.


I finally had a finsihed embroidery, with some extra bling. 


To protect the backside of the embroidery, both from wear and from my hair dye I added a strip of linen in the back. This can more easily be removed so that I can wash it if I need to.

Now came the rest of the challenge, and that was to remember how I had planned to make this project into a hood. 


I draped it over my wulsthaube, and it looked pretty good, but I felt that it was too bulky in the middle back ,and the result was also quite poofy, and I want a sleeker look for this hood.

Marlein - 16th century wardrobe has posted about three different kind of hoods, I don't quite understand her explanations, but I used her photos as inspiration for a new try.


I did remove quite a lot of fabric at the back corners to get rid of the bulk. I also hemmed all the edges, both because the fabric had started to fray at the sides during the handling of it over the years and because it means that I don't have to worry about finished them afterwards. It makes it easier to work from the outside.

I folded the fabric double and sewed the first 5 cm of the curved edge together.


The back of the cap, which shows the 5 cm ceam, but it's open above that. I also made eyelets along the edge under the seam, to be able to tighten the hood.


Then I decided to make an experiment and starch the hood before pleating the back. I don't know if hoods were starched, but starch was used for frilled veils in the 14th century, and I like the look and feel of starched linen. It also repels dirt. I used a medium starch, and dipped the hood while holding the embroidered border, I tried to avoid getting starch on the embroidery and spangles.

After pressing the hood it was time to pleat the back.


Folding the extra fabric and pleating it down doesn't have a specific formula. I try to work from the middle and get it even. Personally I like the look of a few larger pleats better than a more and narrower pleats. Since there are so few images of the backside of these kinds of hoods I don't know what was most common back in the day. The fabric was tucked in under the sewn seam in the back and the pleats were tacked in place.


This is what the inside looks like. I pleated the fabric from the outside, so you can see that it got twisted on the inside, but the important thing is that it looks good on the outside.


The hood is held tight by threading a ribbon through the eyelets and pulling it all together. The ribbon is tucked under the embroidered border, and that border is closed with a pin in the back. I used a satin ribbon, but might switch to a linen or silk ribbon later, but I didn't have one at home.


So here are the facts.
What the item is: an embroidered hood
How it fits the challenge: I started it in 2021, and just finished it in 2024 after a lot of procrastination
Material: linen fabric, silk thread, metallic spangles
Pattern: My own
Year: 1540s
Notions: linen thread
How historically accurate is it? around 85%
Hours to complete: It's a UFO so way too many
First worn: At a dinner in January 2024 (making this post was also a UFO)
Total cost: $50

''


Sunday, 23 January 2022

HSM22 challenge: Anniversary choice - the finished shirt

 While I was working on the shirt for my fiancé the challenges for the Historical Sew Monthly 2022 showed up, and the first challenge of the year was the "anniversary choice" - choose any challenge from the Historical Sew Fortnightly 2013. One of the challenges in 2013 was 

Re-make, Re-use & Re-fashion – due September 9.  Sew something that pays homage to the historical idea of re-using, re-making and re-fashioning.  Turn one thing into another.  Re-fit or re-fashion an old gown into something you would wear again.  Re-trim a hat for a new outfit, or re-shape a modern hat to be a historical hat.  Re-purpose the fabric from an old garment (your own or a commercial one) into a new garmen

Since this particular shirt is the third version of this shirt I definitely thought that this was a fitting projekt. To reiterate from the first post on this project the shirt that I started out with was my first simple 15th century shift.

Here worn in Visby in 2018

I had remade it once when I needed a quick solution for a shift to go under my 1520's courtgown. Then I had ripped away the collar and just tacked on a gold ribbon around the neck instead.

Worn under the courgown
Since then I had always planned to redo it in some way, and when my fiancé needed his first 16th century shirt I decided that the easiest and fastest way would be to remake the shift, rather than starting a new shirt from scratch.

I started with cutting off 20 cm off the hem of the shift to make it more suitable to a man. I then used the cut off hem to lengthen the sleeves, so they would get long enough for him, and even some extra puffiness.

The new length of the shift and sleeves

Then I gathered the cuffs and the neck.


I made the cuffs a bit wider, with 6 gathering threads, than the neck, where I only used 4 gathering threads. The sleeves would have looked better if they had been a bit wider, the pleats on them got a bit uneven and sparse. I also took the chance of trying out some new smocking styles on this shift, and saw it as a bit as a training project.

On the cuffs I used stemstitches that I sewed in diagonal lines to try and create the diamond pattern that is common on paintings and woodcuts in the period. For the thread I used four strands of the same linen thread that I used to sew the shirt together. 

The finished sleeve with the visible seam where I have lengthened it and the cuff. I also made some fingerbraided strings to close the cuff.


The neck was gathered and there I used smocking stitches to weave between the pleats. I was not too happy with the look of this. It might work better with a thicker thread or an embroidery yarn.

To close the neck I sewed strings of the fabric to tie with, rather than the fingerbraid strings that I used on the cuffs.


The inside of both the neck and the cuffs are finished with a strip of fabric. Both to protect the backside of the embroidery, to hide the ugly back side, and to make sure that the the cuff/neckline doesn't stretch and get bigger. This has happened to me when I have relied on just the smocking embroidery to keep the size. The strips of fabric were also cut from the hem that I had cut off earlier.

The finished shirt

When I had finished the shirt that small strip of fabric was all that remained from the old shift, but I also hadn't had to use any other fabric than what was in the shift from start.

The Challenge: Anniversary challenge - Challenge "Re-use, re-make, re-fashion"

Material: 1 old kneelength shift

Pattern: No pattern used

Year: early 16th century

Notions: linen thread, wool yarn to make fingerbraid strings

How historically accurate is it? Around 75%

Hours to complete: two weeks

First worn: At a 16th century guild feast on January 22nd.

Total cost: Everything was re-used, but if bought new probably around $25


Friday, 7 January 2022

Reworking another old shift

 In the end of January there is the traditional guild feast with our 16th century guild, and this time I want my fiancé to join us, so he needs something to wear. I have started on a shift for him, which also gives me a chance to try out some new techniques.

Back in 2018 I did a very simple shift.

Me wearing the shift in Visby
It had loose open sleeves, and the neck was just gathered into a collar band, no smocking of anything fancy like that. I have used it quite a lot, and then in 2020 I faked it into a fancy shift by removing the collar and replacing it with a bought gold ribbon instead. The plan had always been to refashion it into something better, and now when David needed a shift I decided to start from the old shift.

The shift was a female length shift, so I cut off around 20 cm from the bottom, and then I lengthened the sleeves instead with the fabric that I had cut off.

Trying out the shorter lenght and longer sleeves on David

Then it was all about preparing smocking at the cuffs and neck

The finished cuff, with the visible seam
where I added the cut off bottom of the shift.

For smocking I decided to do stemstitches on top of the pleats, which can be seen in portraits from the period. I have also read a discussion on how whether the honeycomb smocking that is seen everywhere today is more of a reenactment fashion than what was actually used. Using this also makes it nice to work with white linen thread, which is a look that I have always preferred instead of blackwork. The cuff is closed with two pieces of fingerbraided strings. Now it's on to the other cuff and the neckline.


Thursday, 5 August 2021

What I've been working on

 This summer I knew that I was going to go to Medieval Week in Visby, and that I needed some stuff. I'm leaving on Saturday, and to be honest I have not finished anything, but I have things that are in various states of completion.

The most finished thing is this simple kirtle. It's a standard square pieces with gores, and I'm mostly using the 14th century as inspiration. I have not had time to fell the seams or hem it though, I'm still bringing it with me to use as a nightgown so I don't have to worry about freezing.

I wanted a new hood to wear over my wulsthaube, but I also found an embroidery challenge that I wanted to do. I have a long way to go until I have finished the blackwork, but I'm bringing it with me to work on during the week. I will have to stick with my old hood or just a a veil over the wulst.

I have also cut up an old shift that I'm hoping to sew together in a new version. This one I'm actually hoping to finish until I leave on Saturday.

I will also try to make separate posts about all the projects once they are totally finished.


Friday, 11 June 2021

HSM21 challenge 5 Purple - a traditional pocket

 I have now finished theh pocket for my Vika traditional costume.


Except for the embroidered front piece it consists of a backpiece of the same broadcloth. Both the front and back were lined with a layer of linen. For the backpiece I also added a layer of green wool, that will be visible in the opening of the pocket. The instructions calls for using the same fabric for that piece as the rest, but I thought it would be nice to add a hint of green, especially since there is a lot of green in the skirt and bodice.  Then the opening was bound with a black piece of tape, and finally the front and back pieces were bound with the same tape to attach them together. I'm not sure what kind of tape it is, since this was in the kit for the pocket that was bought almost 20 years ago. It felt like some kind of ribbed cotton tape.


Unfortunately the kit for the pocket was done for a size S or M. For me with an XL waist the tape that was supposed to go around the waist was nowhere long enough. Since this tape isn't supposed to be seen, it is worn under the bands for the apron, I simply took a regular piece of cotton tape and lengthened the original tape. I think I have put the piecing under the apron as well so it shouldn't be too visible.

To finish off the pocket I made a small button loop on the pocket and added a button to the tape for closure. Now the instructions only call for a button, and my sister has a handmade dorset button on hers, but I felt that it would be more me to use one of reproduction 16th century buttons that I had left from my goldhaube project.


And this is the finished pocket, which was basically the last piece to complete my traditional costume. Now I only need to rehem my apron, and make a new shirt but that's a bigger project and I can use my old shirt.

This is a closeup of just the embroidery, since that is what puts the pocket in the HSM challenge.

What the item is: a pocket for the traditional costume of Vika parish, in Dalarna, Sweden.
How it fits the challenge: The traditional costume was codified in the 1920s so it is within the timeline of the HSM and the embroidery is done with a lot of different shades of purple.
Material: 0,25 cm blue broadcloth, 0,10 cm green wool flannel
Pattern: Part of the traditional costume instructions
Year: 1920s (even if it is also worn today)
Notions: Embroidery silk in purple, pink and green, cotton tape for the binding and waistband, 1 button
How historically accurate is it? I have taken a few liberties, like the button, so for the 1920s version of the pocket I would say it is 70%.
Hours to complete: It is an UFO, so technically 20 years, but since I took it up I have probably used around a month.
First worn: I'm going to wear it for the Midsummer celebrations
Total cost: I have no idea since this was part of a kit that was bought 20 years ago by my sister.