Showing posts with label 1780's. Show all posts

Monday, 21 March 2022

HSM22: Challenge 11 - fitting. The 1780s stays

 It took a lot longer than planned, and in the end I hurried them, but I did finish the 1780s stays.


One thing that stalled me was when I couldn't find eyelets with washers in the right side, so I had to handsew the lacing holes instead. Now here I should say that I deviated fromt he instructions and instead followed the instructions from Scroop Patterns Augusta stays, which have instructions for making historically accurate stays. It gave me the confidence to make the lacing holes and that they would be strong enough to hold for the lacing. The stays were then boned with synthetic whalebone, I was lucky to have a roll of it at home and it was just enough to get the stays and the stomacher boned.

I wore the stays at party on Saturday, where I managed to get from the party without a single photo of me in costume. While wearing them it was obvious that they were too long for me, they kept poking me in my armpit. 

It is possible to see the foldlines. Before wearing them again I need to cut the stays down to the foldline and rebind them. One good thing with the plastic boning is at least that it's easy to shorten them.

Here you can see that one of the bones even poked through the fabric.

Overall I am happy with the pattern, even if I need to adjust them. There were some instructions that were really helpful, like how to bind the tabs by machine, while others were a bit unclear. I did also use the Augusta stays instructions when I felt that I didn't quite understand or had the ability to use the pattern. I'm hoping that with some tweaking at the armpit they will become a pair of comfortable stays.

What the item is: A pair of 1780s stays
How it fits the challenge: Stays need to fit well, and they are necessary for the clothes on the outside to fit as well. This pair of stays show that a small miss in fit can be really bad. I tried them a lot when making them, but when I finally wore them for real they were too long and poked me in the armpit, so in the end I didn't wear them for the whole party I had made them for. So fit is important, and this is a reminder to not rush in the end, or think that "it won't be too bad, I will be able to wear them and then go back and fix it". 
Material: 1 m cotton twill, 1 m coutil, 1 m floral patterned cotton
Pattern: Redthreadeds front lacing 1780s stays
Year: 1780s
Notions: plastic boning, cotton bias tape for binding, sewing thread
How historically accurate is it? 50% 
Hours to complete: 1,5 months
First worn: at a party on March 19
Total cost: around $120


Saturday, 5 February 2022

Back to the 18th century

 It is time for me to return to the 18th century. I haven't done anything since the Lady Poe gown, and already when doing that I realised that I needed a shift and a new pair of stays. Now my pair of stays works for the mid 18th century, but I have always loved the later 18th century silhouette, and the only stays I had for that was my Desert Rose stays. And they were done when I was at my tiniest, so I was able to wear them twice before I started gaining back my weight again.


This is my start. The mound of fabric in the lower right is a new chemise. I have sewn it together and is working on felling the seams before hemming  everything. This is a project that I will bring with me to our cosplay meets on Tuesdays since it's a simple thing to just sit and handsew and talk.

Then it's on to the stays. Together with my weight gain I have also had a lot of issues with my shoulders the last few year, and now it is impossible for me to lace up a corset or stays in the back. I need a pair of frontlacing stays. I decided to buy the Redthreaded 1780s front lacing stays instead of fiddling with drafting my own pattern.

For the stays I'm doing more of a theatrical than historical constructions. I'm using coutil as the strength layer. My original plan was to use linen or cotton canvas, but I couldn't find any in my stash. Since I had to order fabric and the place that I ordered from had a sale on coutil if you bought more than 3 meters I decided to use coutil, and buy enough of it so I can make the 1910s corset that I will need to make later in the year. Here is a big difference from the last time I made corsets or stays, brexit has made it hard to order from my favorite supply site, so I now have to go back to Swedish sites. The good thing is that there are now several options selling boning and corset fabrics in Sweden as well, which really wasn't the case when I started making corsets.

For the inner layer I'm using a sand/grey cotton twill from the stash, and since I want my stays to look good I found that floral cotton in the stash as well. It's not 18th century, but I go for cute rather than accurate with the stays.


Sunday, 3 January 2016

18th century winter photos

It's  time  for a last look back at  2015. I decided  to dress  up in as many of the things I  have made the last year. I ended up wearing 7 of the HSM challenges for example.

Let's  go from the inside out.


I'm  wearing my desert rose stays, my new small bumpad, my Kensington shoes and stockings from American Duchess and my sewing secrets pocket.


Then it's the brown pierrot jacket, the new pink petticoat and Demelza cap, worn with an old apron and neckerchief.

Finally since it's winter I added the blueberry muffins and cape to be able to go outside.


Sunday, 27 September 2015

HSM 15 Challenge 9: Brown - The pierrot

I'm finally done with this project. It was supposed to be a quick project, but it's taken me most of the month. The main reason for that is that I decided to do it all by hand, I stalled when I couldn't decide on certain design choices, and I find it too cumbersome to get in and out of the stays when I wanted to test something.

For those who haven't seen the previous posts of the project here is part 1: Start; and part 2: bodice and sleeves. By then it was mostly finishing touches left, but those are always the things that take more time than planned. First I had to decide on how to close the jacket. In the end I decided to close it with pins, hoping that will make it more flexible in adjusting after my body compared to hooks and eyes. Then I had to decide on trimming. I love the look of ruffles and all other 18th century trimmings, but looking at original pieces I felt that those kinds of trims were a bit earlier than my late 1780's aim. Most jackets seemed to have been pretty plain, that made me also decide on not making any cuffs for the sleeves. I'm also thinking that it's easier to add trim and cuffs at a later stage, if I feel that the jacket is too boring.

Now on to the pictures, and as usual I'm sorry for the blur.

Me in the jacket, from the front.
And from the side, showing the peplum.

I then took off the jacket to get some better pictures, but my dressform is too big and curvy compared to me in my stays, so instead I got a lot more wrinkles. So disregard the wrinkles, the fit is a lot better on me than on the dressform.


There are a couple of things that I'm extra satisfied with and those are the sleeves and the fit of the bodice. The sleeves aren't optimal yet, but they fit well in the armscye and there is no poofiness. I think in order to refine the fit of the sleeves it's more about rotating them in the armscye, rather than changing them, they do pull a bit towards the back now. The fit is really nice, I haven't added any boning to it, and it still sits really snug and doesn't move around the boy. I'm hoping that pinning it together will help with that as well.

This is the first tightfitting garmet that I've sewn totally by hand, my Edwardian blouse didn't have nearly the same strain on the seams. I'm hoping this will prove that my handsewing is good enough to stand up to the wear. Still if I do a jacket like this again I'm not sure that I would totally handsew it. I want the visible seams to be handmade, but there are a lot of seams that aren't visible and there is also the lining.

So just the HSM facts:

What the item is: A pierrot jacket

The Challenge: Brown

Fabric: 1,75 m of brown quilting cotton, 1,75 m of unbleached linen

Pattern: My own, from the basic bodice pattern I made in challenge 6

Year: 1780s

Notions: Sewing thread in brown and white, white cotton bias tape to cover the raw edges on the inside

How historically accurate is it? It's my most accurate 18th century thing so far. I did cover the raw edges with modern bias tape, since I hate raw edgest. The fabric is an 18th century reproduction quilting cotton, so it doesn't have quite the same drape as cotton in the 18th century, still I would say 90%

Hours to complete: Hard to say but around 30-40

First worn: Not yet, all my 18th century stuff has been packed away for the winter so I have nothing to wear it with.

Total cost: $50, the cotton was $30 and the linen $20

Saturday, 12 September 2015

Pierrot bodice and sleeves

The work on the pierrot goes on. After I had finished the muslin I decided that I was going to make the pierrot as accurate as possible, meaning fully by hand. I have done handsewn garments before, but this is the first really fitted garment where the seams will be under some strain.

This is what the finished pattern looks like. The one major thng I did was to shorten it with around 3 cm, so that the peplum will be at the proper waistline.


I started with the bodice, and it went together quite easily. I'm using the method in Costume Close-up where you sew the two outer layers and one lining together from the outside, and then then fold the second lining over the raw edges.

The bodice was quite perfect over the bust, but I need to take it in a bit at the waist when I finish the front edges.

With a nice bodice it was time for the sleeves. I've never managed to make a sleeve that I've been happy with. They've always been both poofy and restrictive at the same time. I've said that one of y challenges this year is to create an actual working sleeve pattern. I've spent quite a lot of time googling for sleeve trouble shooting, and the one tutorial that comes back, and is linked back to from various other sites is ikatbag's. Then The Dreamstress linked to a tutorial on medieval sleeves from The completely dressed anachronist. And even if was a medieval sleeve I read through it and there were a couple of things that I got out it.

From ikatbag I took, among other things, the notice that the armscye needs to be snug, you don't get more mobility by making a bigger armscye. From the other tutorial it was the realisation the upper arm's is usually widest a bit down from the sleevehead, meaning that you need to make allowance for that. Looking at the sleeves I've tried to draft it was clear that they were way too narrow in the sleevehead. I wasn't sure on how to start making a new sleeve, but then I realise that I do have a working sleeve pattern that I could adjust. looking at the shape of the sleeve from TV493 it had the same basic shape as a the two piece sleeve in Creating Historical Clothes, just wider. So I traced the smallest size of that pattern and cut a muslin of it. The sleevehead was still bigger than the armscye, but I kept cutting it down until they fit each other.

My new sleeve pattern is in blue, and you can see what a difference it is compared to the previously drafted sleeve pattern. The old sleeve pattern also had a giant dart at the elbow, since with a better fitting sleeve I could make it more snug even without the dart.


The sleeve isn't perfect. Ther are some issues I need to work with when it comes to the fit around the elbow, it's actually bit too big and bunchy there. It's still the best sleeve I've ver made though, and I have gotten rid of the poofyness around the shoulder.

I set the sleeve according to the instructions from American Duchess. I have not finished the neck edge though, so the strap is only attached over the sleeve. For the net time I would like to make the strap longer as well.

I finished the sleeves by covering the raw edges with tape. Not necessary, since the edges were quite often left raw, but I think it looks so much better.

Friday, 4 September 2015

Pierrot jacket start

This week I've packed away my 18th century stuff on the attic. Autumn is Star Wars costume season for me. Still I am a member of the Historical Sew Monthly, and I really want to finish all the challenges this year. The September challenge is "brown", now it's not really a favorite colour of mine, but two years ago I picked up a quilting cotton with a nice 18th century pattern on it, and it's brown wth pink roses. It was quite expensive so I didn't buy more than 2 m (I think), but since then I've always tought it would be wonderful to turn it into a pierrot jacket.

The pierrot jacket was common during the 1780's, exactly where I try to focus my 18th century wardrobe. It's a short jacket with a peplum in the back, but there are some without peplums as well.

http://www.metmuseum.org/collection/the-collection-online/search/80591
The hard thing was to decide what kind of peplum I wanted in the back, and that I would be able to pull off. There are som pierrots where the peplum is cut in one with the bodice.

http://www.flickr.com/photos/8666432@N04/551034851
and there are some where there is a visible waist seam and the peplum is pleated into that.

http://balat.kikirpa.be/photo.php?objnr=109812
When I asked around for advice I got the tip from Åsa to make a compromise, and have the back piece go into the pepluem, but attach the rest of it at the side seam. She has done that in her 18th century caraco. Later Johanna also showed me her jacket constructed in the same way. 

So with that done I got my basice bodice pattern that I made in June and cut out a muslin. I was happy with the back piece, then it was time to cut out the rest of the peplum. On this it was mostly a case of guess work, looking at the kind pattern pieces that Åsa had, and what they look like in Patterns of Fashion, but basically just cutting an elongated piece of fabric and pleating it in different ways until I was happy. I cut the length and shape of the side of the peplum when I was happy with the pleats.


Ignore the bad fit of the muslin. There is no chance that I can get my stays onto my dress form, so it's quite useless for 18th century fitting, but it's still good when I want to attach skirts and the like.

Sunday, 9 August 2015

18th century hair styling

So over the last days I've tried to style my hair in 18th century styles. I can do a decent pouf, as seen here, but that has never been my favorite hairstyle, and at least at the moment my 18th century wardrobe is a bit later than when the pouf was fashionable. Of course I am dreaming of one day having a huge hedgehog hairstyle, but in order to achieve that I would need to style a wig, and now I only had my own hair to work with.

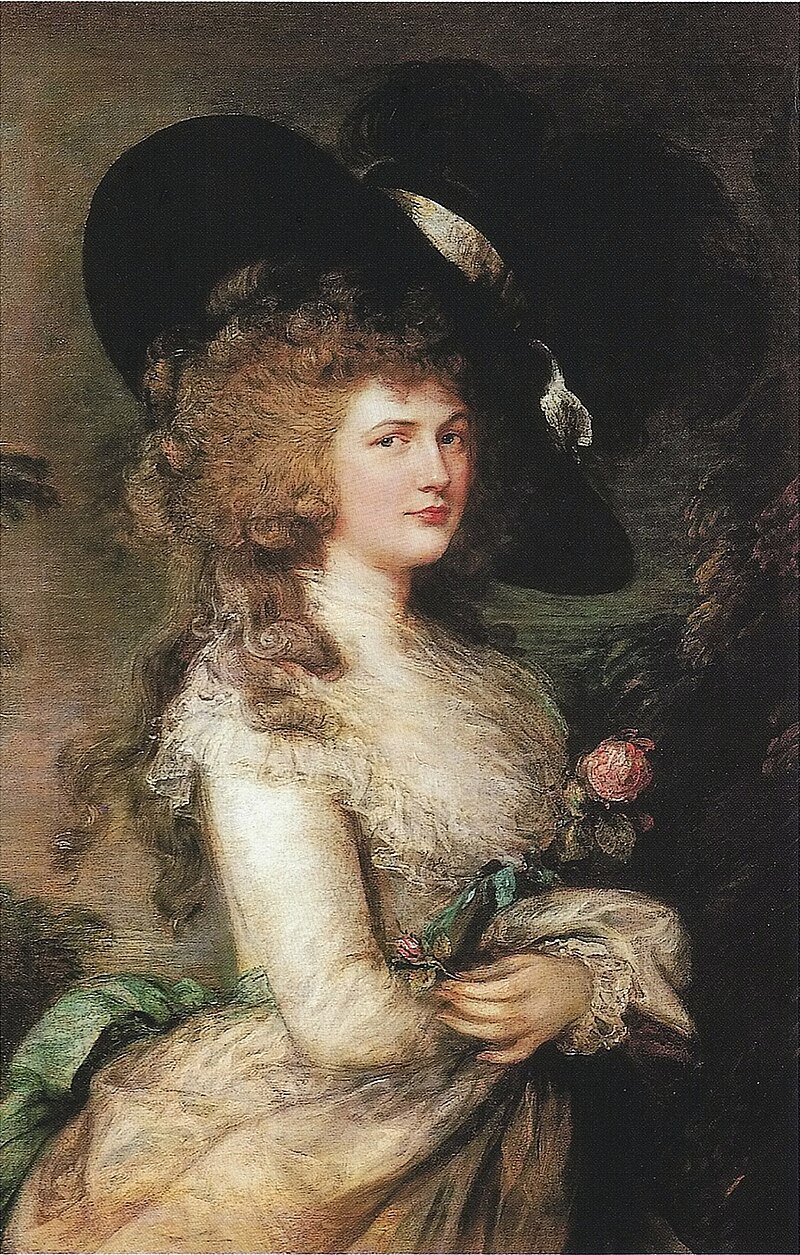
One day my hairstyle will rival the Duchess of Devonshire's.
For the photoshoot at Staberg I started the evening before that and put my hair in a lot of pincurls.

I did the pincurls by first wetting my hair and then rolling it around my fingers. I didn't really have a strategy so I just rolled and pinned the hair up. When all the hair was up I dampened it some more, and then I put it all under a buff so that I would be able to sleep on it without the curls coming loose.
The reason why I prefer pincruls is because when they are pinned up and under the buff there's no problem sleeping on it. I've tried to sleep with the hair bound up on both foamrollers and hard plastic rollers, and it's been so uncomfortable that I haven't slept much at all.

This is what my hair looked like the next morning, when I had removed the pins.
My hair naturally falls in a very visible part, if it's allowed to fall by itself, so to avoid that I pinned the middle section back, and then I simply started to tease the hair as much as I could. I actually think my hair is a bit too long for a really good bushy hairstyle, because it tends to droop down. I tried to solve that by pinning the end of the hair up under the rest of the hair.

This close up from Staberg is the one that shows off the hair best. It's quite nice, but it's not enormous enough. I want more hair. I also think I need to practice teasing the hair better.

Now today I dressed up in 18th century style again, but today I wanted to use my gaulle and go for a 1790's look instead. The event was a small scale affair, and since I went there alone I don't have any pictures from it. I did try out driving in stays though, and since I hadn't cinched them totally that was no problem. the last few kilometers when I had stayed, cinched the stays and put on the gaulle was no fun though.

Anyway for the hair today I realized that after all I have the wonderful 18th century hair & wig styling book, so why not use it. What I really like about this book is that it has both an extensive chapter with photos of portraits and what the hairstyles actually looked like, and then it also has the instructions on how to achieve them. For this hairstyle I mostly followed the instructions for the "Adela - simple short and long hairstyle".  Working with my own hair I knew that I wouldn't be able to achieve the full style, but looking at the reference pictures in the first part of the book I felt that I could achieve something quite good anyway.

Just like with the previous hairstyle I started the day before with rolling the hair up. The main difference is that I was more thorough with how I parted it, making two distinct sections of hair (back and front). I also rolled the curls in front with the help of roll form, it's a spoonhandle from the kitchen. This made the curls a lot more uniform. In the back I used larger foamrolls for the hair. Unfortunately I ran out of foamrollers so I had to braid the hair and hope that I would be able to heat set it with my curling iron in the morning. The curling iron didn't give anything like results of the wetset curls though, so in the end I simply took those bad curls and pinned them up under the rest of the hair to give it some volume.

When I took out the foamrollers and the pins I didn't brush out the looks. I simply used my fingers to shake the out a bit and added a hairband.


I'm quite pleased with this hairstyle, but when I do it again I would like to use a bigger roll form and see what difference that would make to the hairstyle.

Sunday, 2 August 2015

HSM 15: Challenge 7 - accessorise, or the daisy hat

For the accessorise challenge I decided to make a hat. I've also decided that I need to stop, I don't need more than four 18th century hats. Well I started off with my Edwardian hat from May.

It worked quite well from a distance, but I was never happy with it on close up. So I removed everything from it and was back at the base hat, which is a straw hat that I've shortened the side of the crown and added two rows of millinery wire along the brim for stability.

Then it was time to find some fabric to cover it with, and I found a last remnant of the silk from my sister's wedding gown.

Since this was a scrap piece I needed to be a bit creative with how to get the pieces big enough to cover that hat. For the top I pieced two pieces together, hoping that the edge wouldn't be too visible when I added trim.
For the underside of the hat I cut the longest piece that I could get out and pleated it into shape.
Since the fabric is a silk charmeuse, and very soft, the pleats didn't get as crisp as I would have liked. If I ever cover a straw hat again I would also add a layer of fabric between the top fabric and the straw base, to hide more of the straw structure from showing through.  Here is the hat covered in fabric.

Then it was time for the trim. I have a piece of very bright yellow silk. I bought it as a test swatch when looking for fabric for the golden handmaiden, but it was too yellow. I had to buy a yard, but at the same time a yard isn't really enough to make anything out of. Now I cut it up into strips, a narrow strip for the crown and a wider for the brim. I didn't want to hem the strips, both because I hate hemming and the fact that it would look to bulky. So I brushed the edges of the strips with watered down wood glue, which also has the benefit of making the edges a bit stiffer and holding the pleats better. Then I box pleated the trims and tacked them down to the hat.

With its pleats, and its bright white and yellow colours I definitely thought of a daisy when looking at it, so from now on this will be called my daisy hat. If I fnd a suitable fabric or ribbon I might like to add some white trim on top of the yellow, but for now it's done.

What the item is: An 18th century bergére hat
The Challenge: 7 accessorise
Fabric: 0,5 m white silk charmeuse, 0,5 m yellow silk taffeta
Pattern: none
Year: ca 1780
Notions: A straw hat, millinery wire, regular sewing thread for the fabric, buttonhole twist for attaching the millinery wire.
How historically accurate is it? The final look is, but the assembly isn't, so maybe 20%.
Hours to complete: 4-5 days
First worn: Not yet
Total cost: Even if all was from the stash the cost of the hat, the millinery wire and the fabric when bought new would have put it at around $40

Sunday, 1 February 2015

HSM 15 Challenge 1: Foundation

Finally, finally, finally my new pair of stays are done. When I last posted about them I had gotten quite a nice shape, and I was just going to add a lining and binding and they would be done. Well, I cut out the lining, realized that I loved the fabric and it would be sad to just hide it on the inside and decided that I wanted to add that fabric as an outer layer. Well then the problems started. Since I had fitted the stays directly on myself I couldn't get the lining layer to exactly fit, despite following all my notes on the changes. If I wanted to use the lining fabric as an outer layer it wouldn't look good, so back to the original plan. Then it was the binding, and I simply hate binding, and by now the frustration of the whole construction was started to get to me, so I had them beside my sofa for more than a week without even starting to work on the binding.

This weekend I decided to do it though. It's a good thing that it's winter so there was a lot of sports to watch, and then I topped it off with watching the full version of Lawrence of Arabia. So now with bleeding fingers, I really need to get a thimble, I'm finally done. In honour of all the work that was done to Lawrence of Arabia I'm going to rename these stays the Desert Rose pair of stays.

Now as for the HSM challenge. I just don't see this as a foundation garment because it's a pair of stays. My original plan for the challenge was to draft a working 18th century bodice block, but since I'm not happy about any of my stays I felt that I couldn't do a bodice block without taking my measurements on a pair of well-fitting stays. Now I have a pair of stays, and I have a set of measurements so that I can start with the bodice block, which of course will be the the foundation for my 18th century wardrobe.

As for historical accuracy, well there isn't much of it actually. I've used period materials, except for the lining, but they are sewn on the machine, except for the binding, and I used the metal eyelets, since I don't feel like sewing eyelets by hand when the rest of the garment is so obviously made by machine.

Lousy pictures, it's dark outside, the lights of my ceiling have gone out and I only have my phone camera. Photos of me in the stays will have to wait until better lightning conditions.


The Challenge: 1 - Foundation

Fabric: 80 cm of linen, 80 cm of cotton canvas, 80 cm of quilting cotton (for the lining)

Pattern: The backpiece can be traced to the RH833, but the rest is basically frankenpatterned from all over the place.

Year: 1780's
Notions: Thread, cotton bias binding, metal grommets, plastic whalebone, 4 steel bones around the grommets

How historically accurate is it? Style yes, but it's all made by machine and I've used quite a few non-period materials. I would say somewhere around 30%. They still give me my best 1780's silhouette though, compared to my more technically accurate stays.

Hours to complete: 50-60 hours (I'm slow as soon as it comes down to fitting and handsewing)

First worn: Not worn yet

Total cost: The only things I bought was the thread and the bias binding, that was around $10, but I usually count that a corset or pair of stays comes down around $50-60 when I buy new materials.

Sunday, 11 January 2015

red roses stays ca 1780

So in the last days of the holidays, I felt a bit idle after having done the mockup for the gold handmaiden, but I couldn't do more on that project. Then I started to think that the HSF challenge for January is foundations, and I must get a pair of proper fitting stays before embarking on my planned 18th century projects. First a bit of advice, ask yourself these questions before starting a project:

Do I have access to a pattern?
Do I have enough material?
Do I have enough time?

Let's just say that if you answer no to all these questions, it might not be the best of ideas to start it, at least not until you can answer yes to some of them. So I didn't have a pattern, well I did have the RH833 pattern and my notes of what I didn't like with it. Then of course there are a lot of pictures online of stays patterns so I figured I could frankenpattern something. So I took the wide front, regular side, side back and center back pieces from RH833, put them on some fabrics and took a look at a bunch of stays pattern. You can find most of them on my pinterest board. I freehanded the patternpieces and came up with this pattern.

 I did a mockup of bad fabrics and could at least adjust the size and some obvious faults. The main thing was that the front was too high and wide, the side front was too wide and the curve where the side front meets the front was too curved. I knew of course that a soft fabric without boning doesn't really say anything about the fit of the corset, so I cut out the pieces in cotton canvas and a linen that I found, well aware of that I would probably have to do a lot of seam ripping. I boned the front and back pieces fully, since I was quite sure of their fit, but I only boned the middle of the side pieces, so I would have wide margins to work with.

The first full fit was a disaster. I looked like a wine barrel. I started out with taking in the seam between the front and side front, going from a seam allowance of 1 cm up at the bust to 2 cm at the waist. I also straightened the curve of that seam yet again.On the picture above you can see that there is a diagonal crease on the side front, the new seamline actually follows that crease pretty well.

The side back piece also needed to get a lot more shaping, once again taking it in at the waist. The main issue was with this piece, and it wasn't so much the size, but the placement of the boning. I had placed the boning on this piece vertically down, since I thought it would end up mostly on the back. It turns out this is more of a true sidepiece, so in order to get a better shape I unpicked all the boning channels and made new ones, that were placed diagonally on the piece.

When I had done that I felt that I was going to be annoyed that the boning channels on the side front and side back, almost, but not quite, joined up. I wanted to combine these two pieces into one single piece. By now I had run out of fabric though, so the only choice was to take a part the stays, unpick the boning channels of the side back, sew the two side pieces together and make new boning channels, then of course sew the front and back on again.

This is the new side piece.

One thing I hadn't planned to do was to have only backlacing. My front piece was so narrow though that I just wouldn't be able to fit the lacing on it. Backlacing is so annoying though, since it's so much harder to lace up yourself. With a helper I would be able to tighten the stays even more, I can definitely feel that they are sitting a bit loose, or not loose if you compare it to normal clothes but I can definitely cinch them a bit more.


Still I am pretty happy with the fit. They are a bit wide and on the high side over bust, but I think I can solve some of that when I start fiddling with how to add the straps. I also haven't cut out the tabs yet. There is some wrinkling going on at the side pieces, but considering all the wonky seams I've done to get the fit they were expected.

Oh and the name of "red roses stays" comes from the colour of the read thread, and I have a nice cotton with roses on it that I want to use for the lining.


Monday, 13 January 2014

HSF14 Challenge 1 Make do and Mend

The challenge: Make do and Mend
Snow White (October 2013)
 Let’s start of the year with a clean slate, and with a bit of a tidy up.  Use this challenge as an opportunity to get your historical wardrobe in order by fixing any little bits that have worn out and gone wrong. 

For the first challenge of the year I decided to go over my Snow White gown that I made this autumn.

It was a masquerade costume and I wanted to turn it into a more "normal" 18th century costume, also even though it was the newest one I had noticed some things that I wanted to fix.

I started with removing the cape, collar and cuffs. That was simple since I had just tacked them on.


At the bottom of the bodice I had had problems with the silk starting to unravel at the edge, when I had fixed it the white lining had become visible. The neckline was also a tiny bit too wide, meaning that I had to worry about showing too much of my breasts all the time. None of this was about construction, but rather more about hiding the imperfections. The Snow White gown was also quite plain, and the only trims I had were the cuffs, the cape and the collar. I decided to go all out and hide the bottom edge with some trimmings, as well as raising the neckline a bit.


bottom of bodice with the visible white lining.
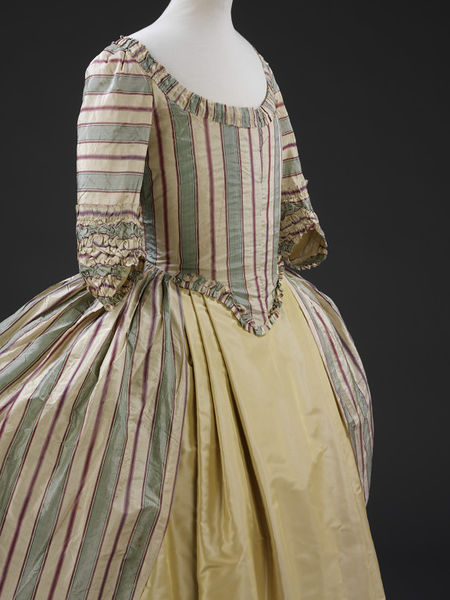
Thankfully I still had saved the bigger pieces that remained of the blue silk taffeta, so I started to cut it up into strips of fabric. My plan was to make a box pleated trim, similar to this gown. You can see the trim at the point of the bodice and along the neckline.

When I had cut the strips of fabric I felt faint when I thought about the amount of tiny hems I would need to make, and decided that that was simply not feasible. Also a hem would make the whole trim bulkier than I wanted, and I've never seen fray-check or anything like that sold in the stores around here. Thankfully I remembered an advice I heard in Kalmar, when the horrors of hemming and trimming many meters by hand were talked about. I can't remember who said it, so I can't give credit to this person, but I am very thankful for it. The advice was to use regular wood glue, but mixed with water to thin it out. Thinking about it I guess one reason why wood glue works is that it's supposed to bond natural fibres, so it won't hurt the textile.


The wood glue worked fine. I mixed the glue with the water until it was really thin, but still had a white colour, then I simply brushed it onto all the edges. First I was quite hesitant and made sure to only brush the edge of the fabric, but after a while I used the full width of the brush. When the glue/water had dried it was invisible and the edge didn't fray.


Then it was on to cutting strips, painting the edges and doing all the box pleats.

I didn't measure my pleats exactly, so they are a bit uneven, but that is something you can see on original gowns as well. I tried to keep the pleats to about the same width as my fingers. Since I was going to sew the trim on in the middle I also secured the trim with some stitches along the middle of the trim, before removing the pins and pressing the whole piece of trim flat. Then I pinned the trim onto the gown and sewed it on by hand.

I'm very happy that I did have enough fabric so that I could go al the way down the sides of the skirt of the gown, as well as replacing the red cuffs with this new pleated trim. I had removed the white small flounces at the sleeves together with the cuffs, I sewed them back on, and all of a sudden they were a lot more visible.

I can only say sorry for the bad photos, I didn't feel like getting all dressed up, and since I don't have a dressform I just put the robe on the floor and snapped some photos.


 The new ending of the sleeve with a pleated trim and a visible flounce.

 The full robe with the trimming along the neckline and the front (with flash)

 The full robe with the trimming along the neckline and the front (without flash)

Fabric: blue silk taffeta
Pattern: none
Year: ca 1780
Notions: wood glue, polyester thread
How historically accurate is it? The trim itself is accurate, but I doubt that they used wood glue and polyester thread.
Hours to complete: 10-15, and most if just sitting and doing the pleats
First worn: never

Total cost: $5 for a small bottle of wood glue, the rest was from my stash.

What did I learn with this project?
The handy thing of using wood glue for the fabric edges instead of having to do tiny hems or cut with my modern pinking shears when I want to do trim will definitely come in handy in the future.

I also saw this as my first try with doing box pleats, and it wasn't much harder than the knife pleats that I usually make. This was my first try with doing box pleats, and with silk taffeta, so in a way it was dry run for when it's time to start on my Gold Handmaiden gown. I definitely want to use the same kind of fabric for it since it was easy to manipulate into straight creases and pleats.

From now on when I talk about this gown I'm going to call it my navy anglaise rather than Snow White.