Friday 29 May 2020

Maids of honour - 16th century inspired tarts

The latest season of The Great British Bake Off had a technical challenge to make "Maids of Honur" which was said to have been a favorite of Henry VIII. Of course I had to try and do this 16th century-inspired recipe.

Since it's not my own recipe I will just provide the link to Prue Leith's Maids of Honour.

So yummy!
The recipe takes some time but was fairly easy. The result is delicious, among the best things I've baked in a long time. For people more into fantasy and cosplay than history this is definitely how I imagine the Lemon cakes that Sansa Stark in Game of Thrones loves so much.

There are some issues with this when it comes to historical accuracy. The major thing is that the recipe uses lemon curd, and from a quick google the earliest reference to lemon curd that I can find is fro 1844. There is an older version called "lemon cheese", and that is when you use lemon juice instead of vinegar (like in Prue's recipe) to curdle the cheese. I couldn't find references to this that were older than the 18th century though, but this was just a  quick check in my regular historical cooking references and google. I'm also hesitant about the use of a rough puff pastry. It's not impossible for the 16th century, the earliest recipes for regular puff pastry dates back to early 17th century and rough puff is just an easier version of it. In my experience it's more common with short crusts or even hot water crusts for tarts in the time period though.

I'm going to make these kind of cakes more, but I'm also curious about experimenting to see if I can find something more close to what they would have been like in the 16th century. First of course I need to check through the historical online recipe books, but I also have some ideas.

I would like to try a version where I use another kind of crust, and instead of lemon curd I could do the cheese curdle mix and add in preserved lemons or bitter oranges (pomerans). After all there are not many lemon trees growing in northern Europe, and we know that preserved citrus fruits were a favorite at the Swedish court in the time period. For spices I would definitely add in saffron and mace to start, but cinnamon, cloves and nutmeg are always good combinations as well. Some of the sugar can be replaced with honey as well, but this cake with its imported fruits and spices would only have been eaten at the court and they would have had access to sugar and not just honey.

Wednesday 27 May 2020

Queen's Peril excitement

In June Queen's Peril by E.K Johnston will be released it's a Star Wars novel focused on Padmé and her handmaidens. When her book Queen's Shadow was released it was a moment that a lot of fangirls had waited for, finally there was a book with Padmé as the main character, and with her handmaidens as fully fleshed out characters as well, it only took 20 years after The Phantom Menace to make it happen. A couple of weeks I was asked by a friend of mine if I wanted to be part of a video to celebrate the release, and of course I wanted to. As a proud member of the Royal Handmaiden Society I of course chose to take part in my Gold Handmaiden costume.

Today the video was released when E.K Johnston posted it on her social media platforms.

You have to click the link


My segment was filmed in my kitchen, with Tom as my cinematographer. And here are some bonus segments from our filming.


Sunday 24 May 2020

1520's courtgown - starting the sleeves

I have started the sleeves of the court gown. It's going a bit slower now, in a way I always slow down when I'm getting closer to actually putting the garment together. I'm simply afraid that I will screw it up.

I want to make a a sleeve that was split at the elbow, like this yellow dress by Lucas Cranach

A HD version of this painting is avaiable at the digital Cranach archive - http://lucascranach.org/DE_SKD_GG1906BB
For the pattern I used my standard S-sleeve pattern, that I now can't find the link for but I made it sometime in 2018. I simply cut it off at the elbow to create an upper and a lower sleeve. 


So far I have made the upper sleeve by first tacking the velvet to the linen lining and then sew it together. I felled the sleeve and hemmed the bottom. The hem at the botto is folded double, because I want it to be sturdy when it's time to add the lacing holes. I am definitely worried about the lacing holes. The HD image of the painting shows a very neat lacing hole, and I can do functional lacing holes but they rarely get totally nice and even. 

Sunday 10 May 2020

The big occupation of my living room floor

After the bodice it was time to make the skirt of the 1520's court gown. It took a lot longer than I had planned, simply because it was boring and uncomfortable.

Back in February I had started with cutting out the skirt in linen. I wanted to make a full circle skirt, to get this very dramatic and beauiful folds that can be seen in art, but without too much bulk around the skirt. The extant gown of Maria of Habsburg from 1520 is a also a full circle skirt. I wanted to make it in two layers, with a base layer in linen to keep the velvet from stretching and warping too much. It also made it easier to use the linen pieces as patterns and adapt the silk velvet to them. The downside is that the skirt is very heavy, due to the amount of fabric in it.


I could not fit a full half circle, or even a quarter of a circle on the silk velvet, but I could get almost a quarter circle, and then add a wedge of fabric at one bottom to create a full quarter circle. The wedge is an historically accurate solution to get a full circle out of fabric that is narrower than modern widths. Since I had a lot of fabric I brought it with me to work and layed it out on the speaker's stage in our biggest conference auditorium. It was also nice not having to crawl on the floor.

The fabric had been folded, in order to remove the fold lines I wet the fabric and then threw it all, both the cut pieces and the remains, in the dryer to tumble on low heat. This is usually the best way of refreshing silk velvet, but the dryer in our house couldn't handle it and simply didn't dry the fabric. We do have a drying room wth a big fan though so I hung everything there. The important thing is that you need some kind of breeze or movement to make fabric move while it's drying. If you have a garden it's great to just hang it outside. Since the fabric is cut as a quarter of a circle there will also be stretching, due to the different grainlines in the circle. Since I was going to fit the silk to a linen base I could finetune the shapes afterwards though.


Then it was time clear out my living room floor and place the skirt on the floor. As you can see my usable space could just fit a bit more than a panel at the time.

I started with attaching the side of the panel with a selvage to a seam on the linen. Then it was a matter of crawling on the floor smoothing out the fabric towards the other sea and cutting off excess fabric where the silk had stretched. I sewed the non-selvage end over the seam of the linen, and then the next selvage end was placed on top of that, in order to get a new straight line and to hide the raw edge of the first piece.


For the final piece I simple folded the raw edge down and sewed it down with prick stitches, the thread disappeared into the pile of the velvet.

It took me really long time to make this, it was uncomfortable sitting on the floor trying to avoid crushing or creating wrinkles in the velvet, but now it's done. I am worried about the weight and how I will attach it to the bodice the best way though.


This is the skirt draped over my ironing board. It's big and heavy. I also haven't hemmed it yet, that will wait until it has been attached to the bodice, and I will let it hang out a bit more as well.

Saturday 2 May 2020

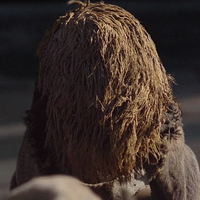
A mudhorn egg for May the 4th

May the fourth is coming up, and even if there are no troops taking place I felt inspired to do some Star Wars stuff,  I also want to clean up my craft space and I have had the stuff needed for my mudhorn just lieing there and taking up space. Now they can take up space in my costume storage instead.

In the tv-series the Mandalorian is dedicated to the search of a mudhorn egg. Apparently jawas go crazy about the innards of these eggs. Since I have a jawa, but I have never gotten any blaster or other accessory I thought it would be fun to do an egg. The jawas' behaviour around the egg is also pretty funny, so it would be a fun thing to act out on a convention.

Mudhorn egg in a screensshot.
So basically it's a big furry egg. I was definitely thinking about doing something like that for NärCon, and the last NärCon there has always been very hot, and since the jawa costume has a covered face and a hood it is warm, I started to think about if I could actually make the prop into something more useful, like a water container.


Around Easter I picked up the largest Easter that I could find, thinking that would be a good starting point for my mudhorn egg.


In order to make it into bag/container I cut a hole on the upper side. I didnt want to cut over the opening of the egg, I also kept the plastic wrapping in order to keep the as much of the structural integrity as possible. For some reason my phone didn't save the photos I took of the next steps, and I didn't discover it until it was too late. But I took some packing tape and covered the opening of the hole, and I also put a generous amount of packing tape around the egg as well, to make it as strong as possible.

The next step was to add the fur. I used the scraps of the faux fur that I had bought for my Obelix vest.  If this was just a prop I think it would have looked best to glue down the fur to have it really flush around the egg, but this to double up as a bag, so instead I sewed a dropshaped bag that I could put the egg in.

This is the general shape of the parts for the bag, I used five of thse panels. The important thing to remember is that you can't have the top tighter than the widest part, since you need to be able to push the egg through the top.

This is the inside of the bag.

At the top I added a tape that I could put a drawstring through, in order to open and close the bag.

It was hard to get all the bottom parts under my presserfoot while sewing, this made me weary that I hadn't quite gotten the bottom seams to all meet up. In order to avoid a hole in the bottom, and to generally strengthen it I added an extra piece of fabric around the bottom. The seam is not visible from the outside since there is so much fluffy fur in the way.


I cut away the excess material at the top, and but a ribbon through the drawstring channel. I folded down some of the top and sewed it down by hand, leaving just a big enough hole for my hand to be able to reach into the inside of the egg.


This is the top with the top drawn together.


I then started to paint the egg. I did run out of brown paint, so it's not finished yet. I also need to sew a D-ring or similar to the top and bottom so that I can add a strap to the egg when I want to carry it around more casually. These are just small finishing touches, that will probably wait until it's time to actually use the egg.


My plan is to buy something similar to a camelbak waterbag and have that inside the egg, with just the drinking tube sticking out. For fun I might go with orange juice or something else yellow to mimic the look of an egg yolk.