
In the tv-series the Mandalorian is dedicated to the search of a mudhorn egg. Apparently jawas go crazy about the innards of these eggs. Since I have a jawa, but I have never gotten any blaster or other accessory I thought it would be fun to do an egg. The jawas' behaviour around the egg is also pretty funny, so it would be a fun thing to act out on a convention.
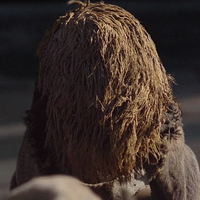 |
| Mudhorn egg in a screensshot. |

Around Easter I picked up the largest Easter that I could find, thinking that would be a good starting point for my mudhorn egg.

In order to make it into bag/container I cut a hole on the upper side. I didnt want to cut over the opening of the egg, I also kept the plastic wrapping in order to keep the as much of the structural integrity as possible. For some reason my phone didn't save the photos I took of the next steps, and I didn't discover it until it was too late. But I took some packing tape and covered the opening of the hole, and I also put a generous amount of packing tape around the egg as well, to make it as strong as possible.
The next step was to add the fur. I used the scraps of the faux fur that I had bought for my Obelix vest. If this was just a prop I think it would have looked best to glue down the fur to have it really flush around the egg, but this to double up as a bag, so instead I sewed a dropshaped bag that I could put the egg in.


I cut away the excess material at the top, and but a ribbon through the drawstring channel. I folded down some of the top and sewed it down by hand, leaving just a big enough hole for my hand to be able to reach into the inside of the egg.

This is the top with the top drawn together.

I then started to paint the egg. I did run out of brown paint, so it's not finished yet. I also need to sew a D-ring or similar to the top and bottom so that I can add a strap to the egg when I want to carry it around more casually. These are just small finishing touches, that will probably wait until it's time to actually use the egg.

My plan is to buy something similar to a camelbak waterbag and have that inside the egg, with just the drinking tube sticking out. For fun I might go with orange juice or something else yellow to mimic the look of an egg yolk.
No comments:
Post a Comment