Showing posts with label padme amidala. Show all posts

Sunday, 27 July 2025

Resources for Leia and Padme costumes

 At Närcon this weekend I talked a lot to a person about Padmé and Leia costumes, and I realized that simply due to the fact that I was around while the Padmé costumes were being analyzed and before social media, I have a lot of information about them, since I followed the progress of my fellow costumers. Today there is a lot of info social media, but it's usually hard to sort through social media posts to find clear and structured information on the costumes. Thankfully though a lot of the early research was done on forums and websites that are still around, if you know where to look, and this post is my way of trying to gather them in one place. So yes, if you want to make one of these costumes, but especially Padmé's, then I really recommend taking the time to read up on old internet post and on forums that were made before the advent of everyone posting videos and short clips of what they are doing.


First of all if you want to make a Padmé or Leia costume, the best way to start is over at the rebellegion. The Rebel Legion standards are lists of required elements if you want to become a member of the Rebel Legion, even if you don't want to become a member those lists are clear instructions on what parts the costumes are made up of. The Rebel Legion also has a forum, where persons making their version of the costumes have posted and are posting their progess, so you can see how other people has tackled a specific costume. Those forums can be found here: Rebel Legion Royalty/Senatorial forums

The most comprehensive website out there for Padmé, and Leia and generic jedi costumes, is Padawan's guide. Maggie, who ran the site, did and amazing job of collecting all available info on the costumes, and it is split between reference images, fanmakes and construcions tips for each costume. She basically summed up all the research that was done and made sure it was available in one place. That it is still alive, even if it hasn't been updated in many years, is a great gift from Maggie to all Star Wars costumers out there today.

A lot of what Maggie posted were summaries on what was discussed on the Jedi Council forums' Costuming and Props board. Back in the early 2000s this was the place where all Padmé costumers gathered and discussed their costumes, and posted their progress. All the Padmé Amidala costumes have their own tag in the forum - so that can be found here. Most of the threads are locked nowadays due to having been inactive for too long, but they are still there and are fill with information. Leia's costumes can be found here.

One costume that I get asked about is the iconic red gown from Episode one, also know among costumers as the "red invasion" costume. Back when blogs were a big thing on the internet Naergi from Germany did an extensive analysis, and the best recreation of the gown I have seen. If you are interested in doing that costume, you need to read her blog post. She also has other Star Wars costumes on her blog, so can be worth looking into for other characters as well. 

With this piece of internet archaeology I hope I can help some people who wants to make their own Padmé Amidala costume, and don't know where to start. Compared to Leia's costumes, that were basically made for a low budget film, all of Padmé's costumes are complicated, either in cut and construction or in materials, or in both so making one will always involve a lot of work and usually quite a lot of money as well. 


Wednesday, 3 May 2017

Vintage Amidala

Last year when I ordered the Greedo print, I also picked up another fabric from Spoonflower. It was a fabric mimicking the fabric in Padmé Amidala's peacock gown from Star Wars: Revenge of the Sith.

If you don't recognize it, it's not so strange. Eventhough it featured in the marketing, and is seen on the film poster, the scene in which she wears the gown was cut out from the final film. The original costume is made is mainly made up of a coat in Brown shot devore velvet worn over a fortuny pleated shot brown/blue satin gown.

To be honest it was never a favorite of mine, but I really liked the pattern of the reproduced fabric. At Spoonflower you can have the pattern printed on a variety of fabrics and I chose to have it done in cotton satin, by recommendation of the creator of the print. I only ordered a meter or so, hoping to be able to some day just make something Amidala inspired from it.

Last spring I also picked up this Vintage Vogue pattern (V2401)
I even took the time to copy and cut out the pattern pieces, but didn't go any further. Now when my silk for my Lady Poe ensemble disappeared I still wanted something new to wear for Celebration. This pattern was similar to the peacock gown, in that it looked to be a coat worn over a petticoat, so I ordered some more of the peacock gown fabric.

Overall the pattern was easy to follow. There were some steps, especially around the collar, that I didn't quite understand but I simply followed the instructions and the result came out good. I had read a review that said that the pattern was fairly tight. It's closed all the way around, so you need to pull it over your head and then get the waist by tying the sash. I don't know why but I had cut out the pattern a size or two too large, so my problem was actually that it was too large and bulky. Since I still wanted to have a fairly large skirt and be able to put it on and take it off with easy I didn't take it in too much though. I made the center back seam more curved and made the darts belowe the waist larger, but kept it fairly large above the waist. One difference to the envelope picture is that the skirt portion is a lot slimmer, which suited me fine but don't expect a traditional big 1950's New Look-skirt from this pattern.

Except for the size adjustment I made three major changes from the pattern. I did not sew the center back seam all the way to the hem. Instead I have a split skirt in the back, making it look more like a coat than dress. I also didn't add the front skirt portion. I wanted to be able to combine the coat part of the dress in different ways. Without the front skirt though it ended just at the waist, showing off my tummy. To hide that I lengthened the bodice front section down to the top of my hip.

At the Ladies of the Legions' tea I wore the coat with a blue summer dress under, to make it look more like the original. I also wore the dress to a party on Friday night, and then I paired it with a pair of tight black trousers instead. I actually prefered the trouser look, but I didn't have any photos of that.

Overall I can really recommend the V2401 pattern. It gives a really nice classic look, and since the skirt is quite restrained it doesn't scream 1950's. There is also no need for buttons or other kinds of fastenings. I made the whole outfit in around three days. If I was to change one thing it would probably be to make the sashes that tie around the waist a bit longer.

This is really an obscure fan fashion, no person that I ran into at SWCO recognized the Amidala inspiration for the outfit. I'm looking forward to wearing it and feeling like a queen at non-Star Wars events though.


Sunday, 30 November 2014

Queen Amidala make up tutorial

One of the most distinguishing features of Queen Amidala is her make up. When I wear my Amidala I'm pretty sure that people don't recognize the costume, but they do recognize the face and understand that it has something to do with Star Wars. Through the years I've come up with a way that is actually pretty quick in achieving the look that I want.

First some background though. On Padawan's guide you can read this about the make up used for Amidala during Episode 1.

The Queen's makeup was designed with a Japanese Kabuki style. For the porcelain white base color makeup artist Paul Engelen used RCMA Ivory (He found clown white was too bright and made the eyes look red). The powder applied after the ivory base was Channel 01 Aube Power Lumiere PressÈ. The circles on either cheek were done with red "lake" lip pencil. This same color was used on her top lip and the center section of her lower lip. Nars "Fire Down Below" is the brand and exact color. A white base color was used on either side of the red mark on the bottom lip. Other makeup used included Lancome Elancil black mascara and Givenchy Prizm Topaz (eyeliner?). The eyebrows were sculpted in brown/black.
Now of course it's not just go out to hunt for the make up listed above and start applying it, because if you look at Amidala in her different costumes it's clear that the make up isn't the same on all her costumes.

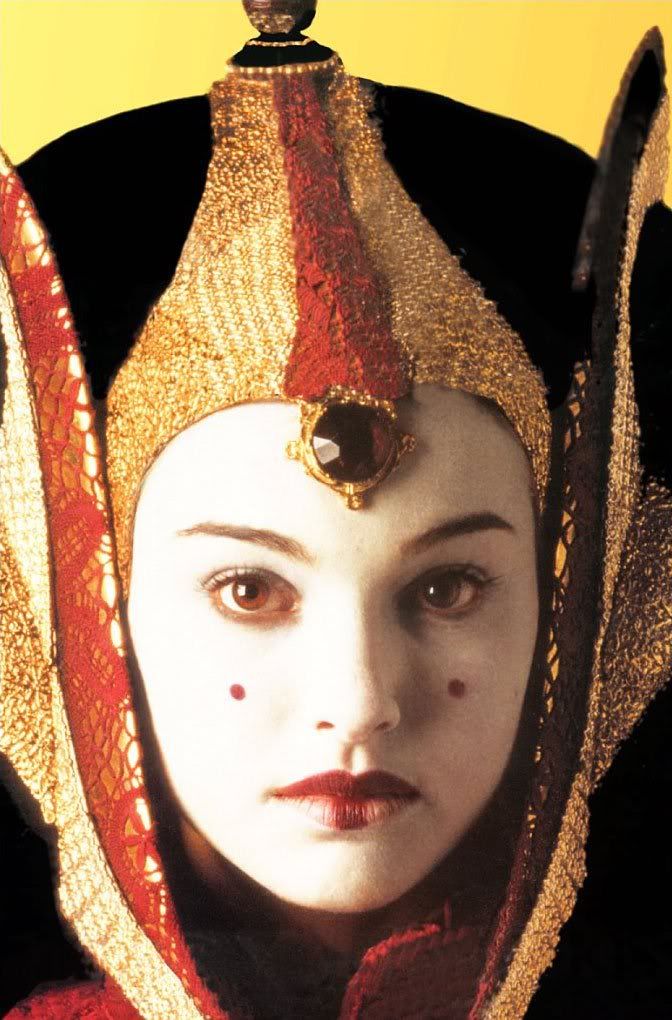
 In her most iconic red dress you definitely have the porcelain white face.
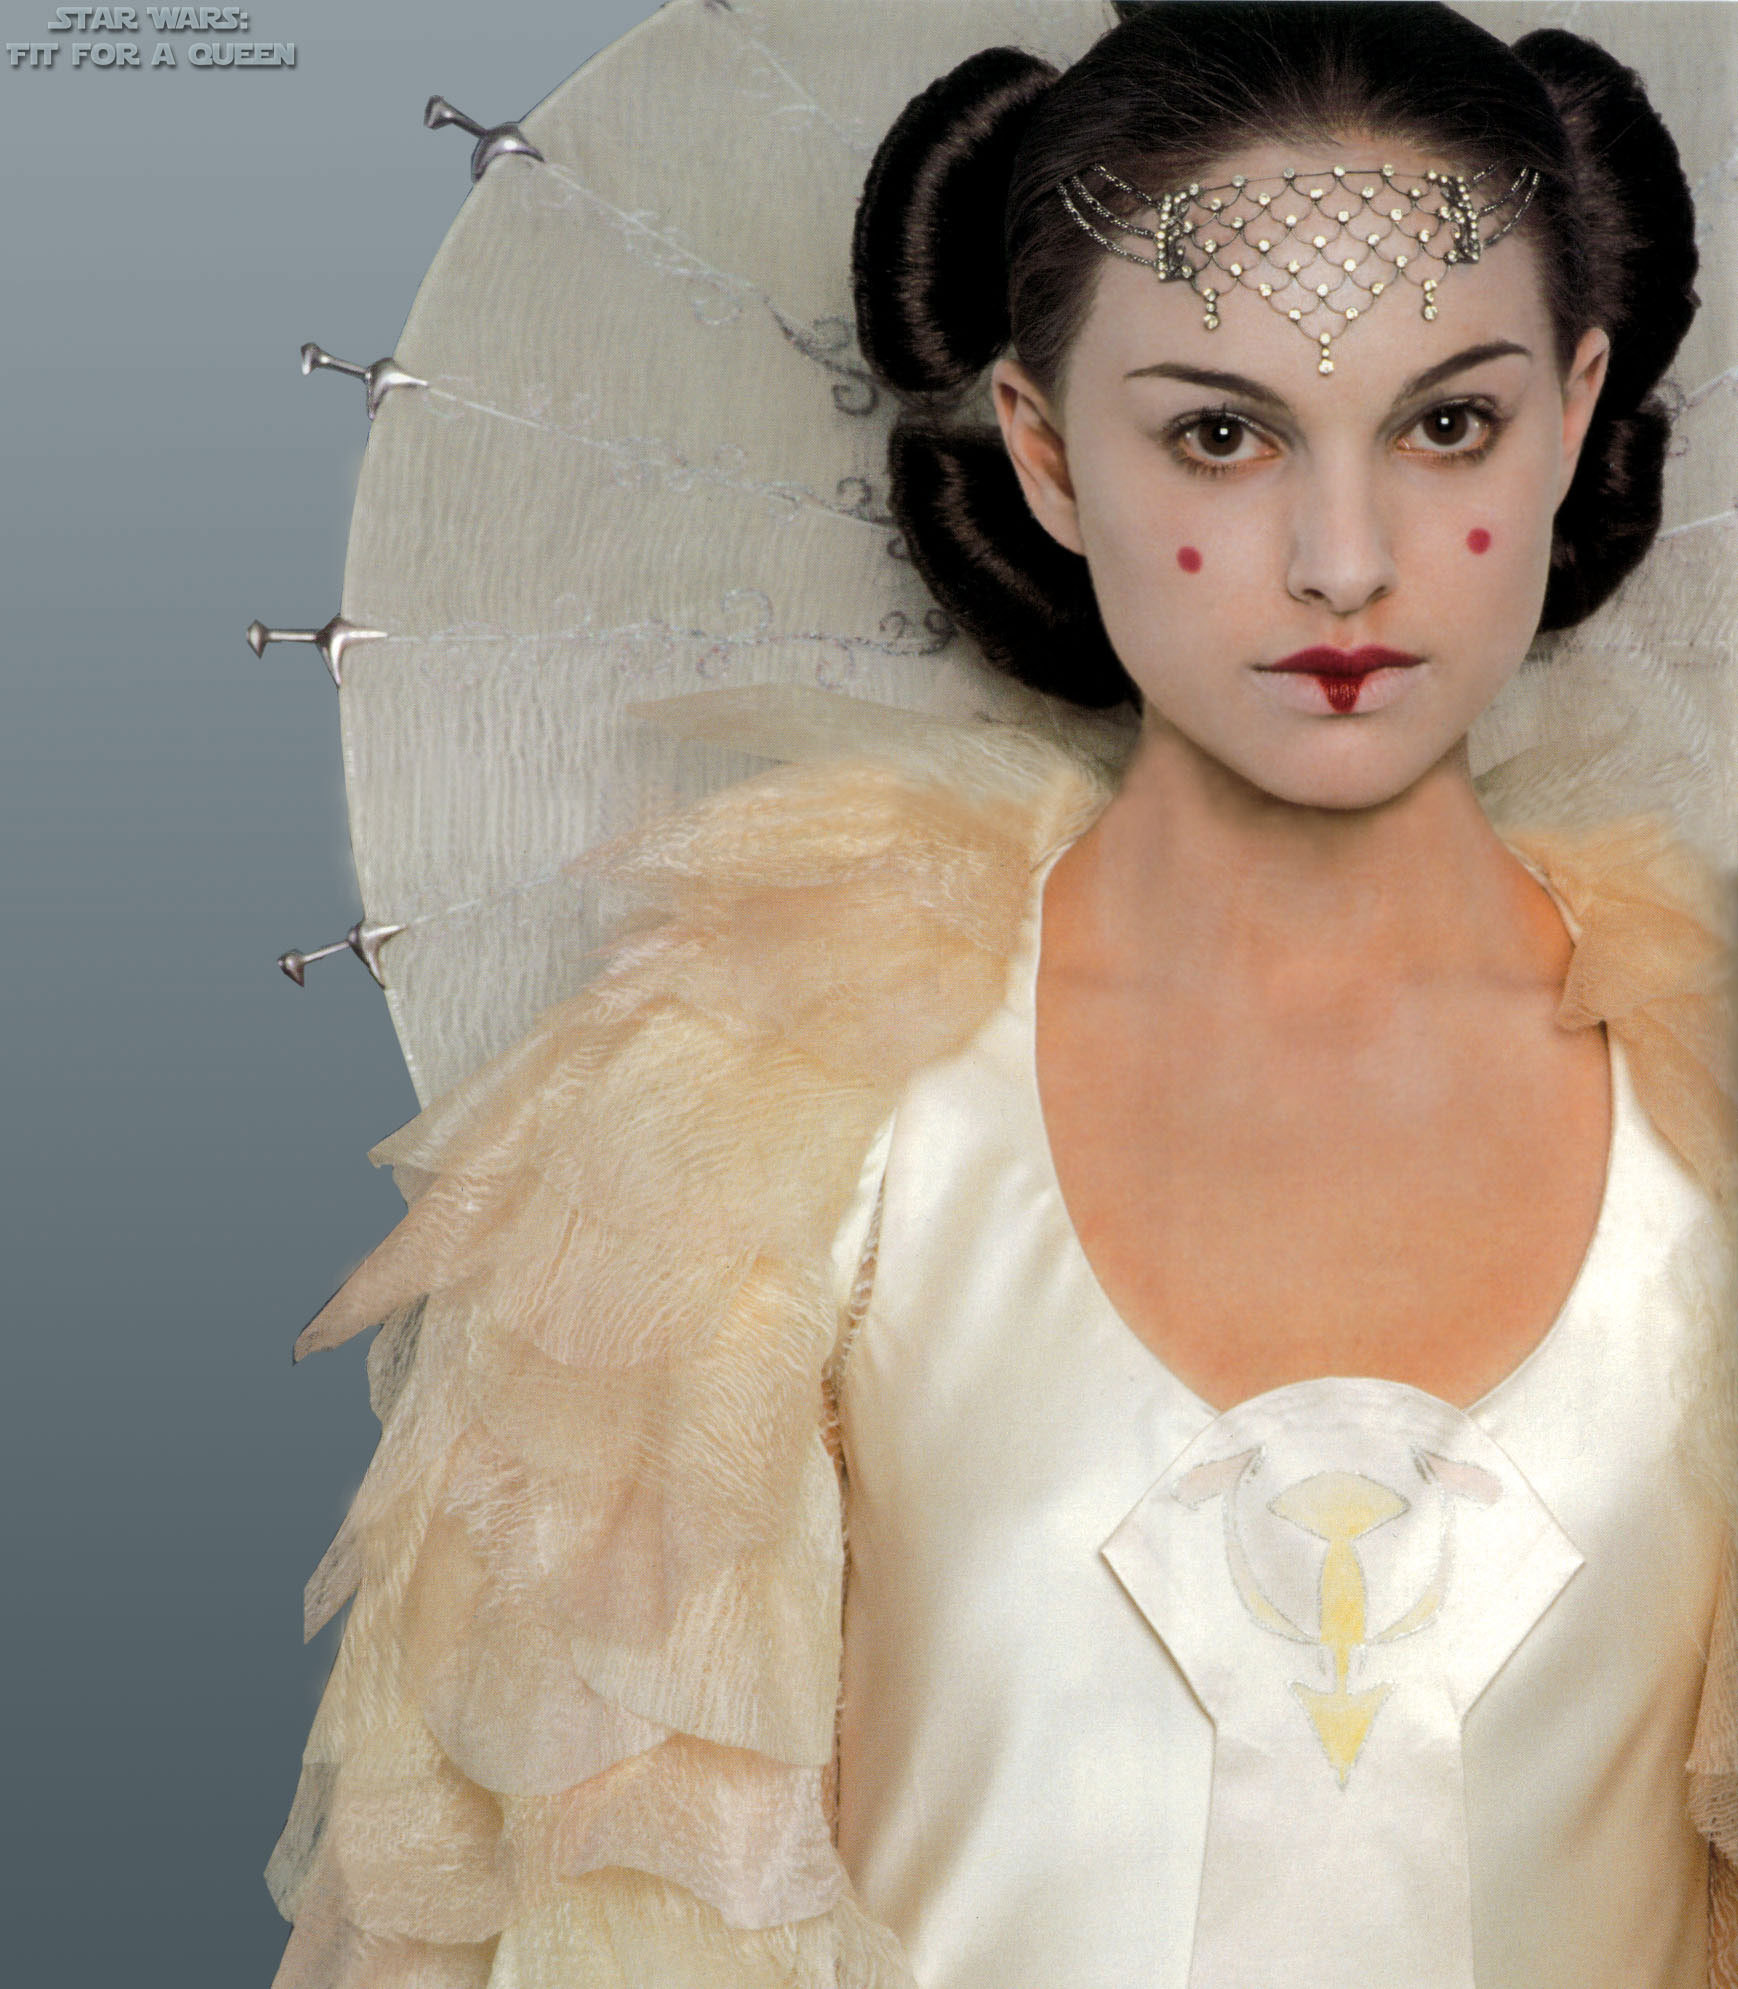
In her travel gown, the one I've made, her face is not as bright white and her skins shows through a bit.
In her parade gown at the end of the film she uses even less make up, in fact I think the advice for this to go rather for a very pale foundation rather than applying white make up.

Now I'm doing the make up that's inbetween the porcelain-doll look and just the pale face. For make up I'm using things that I've picked up in different make up stores, hobby stores and party stores. I don't think the specific brand names are really important, since most brands carry similar products.

The first thing I do is to apply a layer of foundation primer. This is just to even out my skin, and protect it from the coming layers of make up . Then I apply white eyeshadow around the eyes, both above and under, and along the sides of the nose. I've learned that those places are hard to get fully covered otherwise.


As you can see I have also attached the hairbuns that will keep the veil in the right shape. This was actually an experiment, since I've gotten headaches from my previous hairpiece. This time I tried to just pin two foam donuts in shape, and it worked. No headaches at all. They were a bit too big, but now when I know that they can work I will create something more proportional, and attach combs to them instead of just pinning them on.


Anyway, the next step is to to apply the base layer of white make up. I'm using Kryolan aquacolor, meaning that it's water soluble and is applied with a sponge. The trick is to put it on smoothly, the worst that can happen is that the sponge is wet enough to leave a mark, I've found it's almost impossible to blend and smooth out such an edge. For that reason I'm using as little water as possible on the sponge and goes all over the face dabbing it lightly on.

The next step is to finish the eyes. I'm using black cake eyeliner and black mascara for the eyes and a darkbrown eyebrow shadow.

After that I use a cream white clown make up on the lips. The clown make up stays on a lot better on the lips than the cake make up. It's quite thick though so I only try to put very little on. For the clown make up I'm using my fingers to apply it. From the lips I work very think layers of clown make up onto the face, to blend the line between the lips and the rest of the make up, and also to sculpt the face a bit. I try to put a bit more on the cheeks for example. If there are any spots that are uneven I also work with my fingers to mask them. I finish everything by powdering baby powder all over the face to make the white make up set.


Then comes the tricky part, the part that I love to have help with, but I mostly need to make do on my own. It's the red dots on the cheeks. For this I'm using Lumene Lingonberry Lip Lacquer, and this is the only place where I really recommend a certain brand. When this one runs out I'm going to have a hard time finding anything like it. It's quite wet and shiny, and the applicator is round. That means that I only have to put it straight on, and I get a nice circle. In order to aim I try to just look straight ahead in the mirror and put it under my pupil. This is tricky, especially when you need to get another dot on the same level on the other side of the nose. I love it if I have somebody else around to help me. I have a tendency to make my dots a tiny bit too small, but I rather have two small but uniform dots than if I have to keep adjusting them, by making them bigger. Trying to remove the dots inevitable needs to the whole makeup disappearing and I have to start over with the white make up.


Then I go and put the rest of the costume on, leaving the lips until the very last thing I do.

I think this picture of me attacking an unsuspecting AT-ST driver is probably the best close up of the make up, at this time it had been worn for 1,5-2 hours. You can see that the upper lip has rubbed off on the lower lip, but otherwise it's holding up.


 This photo of me posing with a jawa was taken at the same time and shows the whole face, and that the buns are too high on the head..


Sunday, 1 December 2013

Amidala's purple travel gown

Original costume
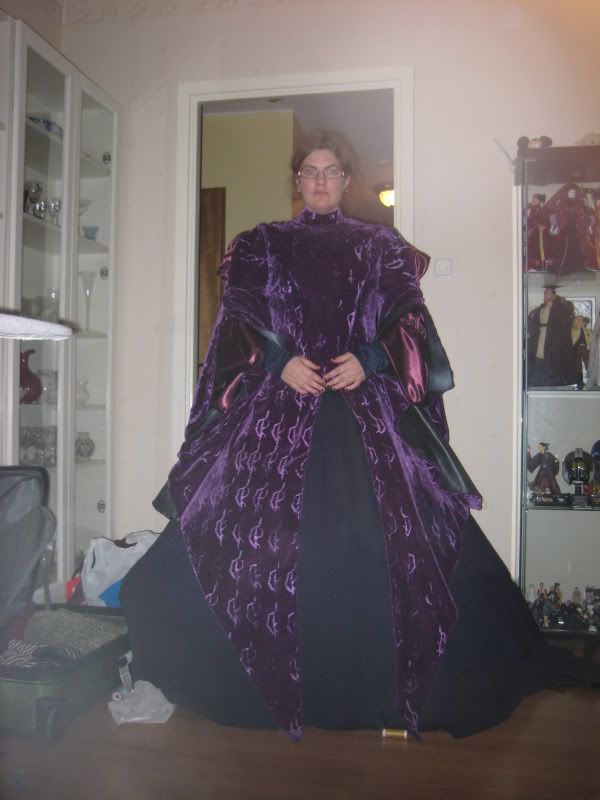
2011 was my most intense costuming year, and still the female tusken was the only one I finished during the year. Most of the summer, autumn and winter 2012 was spent on making Amidala's purple travel gown from Star Wars Episode I, also known as the funeral gown.

This was a costume that I had dreamt about since 2000, but I never thought that I would actually make it. It would be too expensive, it would be too hard and so on. In 2011 I decided that it was time to make this dream costume though.be  I also decided that I shouldn't be cheap or take short cuts, which explains why it took so long. This is my most expensive costume, and the one that I've worked the most with.

Most of the photos I used as reference photos for the project can be found here. They were taken when I saw this dress at Star Wars the Exhibition in London in 2007 and Örnsköldsvik 2008. All my progress photos were gathered in this photobucket album, and it also includes the failed first tries with the tiar.

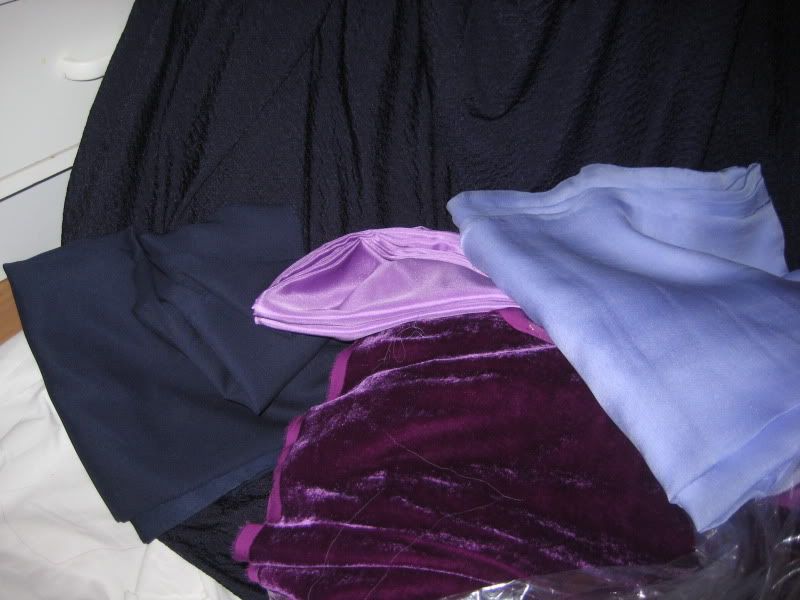
The first thing was to find a suitable fabric, and that took me several months before I finally decided on a shade of purple. In fact I had it custom dyed, which means that I still have a lot of nice, purple silk velvet in my stash, since the minimum order was 10 meters. The skirt is a navy, brocade jersey. I wanted to have a fabric with a really nice structure, the jersey means that the skirt is quite heavy and doesn't "flow" though. All the other fabrics were different silks that I found on ebay, I bought a lot of swatches and chanced before finding fabrics that I was happy with. In fact I could make a full ball gown just out of the fabrics that I had ordered but never used for this project.
First photo try to compare the fabrics with and without flash
The fabrics that I used in the end was custom dyed silk velvet for the outer coat, navy jersey brocade for the skirt (the bottom fabric in the picture above), some kind of blue dense and shiny fabric for the innermost sleeve (the lighter navy fabric above). That was the only fabric I just stumbled upon in a store, the rest were bought online. The pink/purple fabric was my first swatch of fabric for the middle sleeves, both the colour and the fabric itself was too light though so I exchanged it for a darker purple silk satin. For the veil I used a very light purple silk chiffon. One common thing with these fabrics are that they are almost impossible to photograph and get the right colour. Depending on light the velvet goes from almost navy to bordeaux, and the silk chiffon varies between blue and pink. On the other hand on my photos of the original gown the colours are very different as well depending on light.

The first step in the construction was to have suitable undergarments Teenage Natalie Portman is a lot flatter than me, so I first made a pair of 18th century stays just to flatten and smooth out my upper body. This was my first try with making stays, and I tried to enlarge a pattern from marquise.de. Unfortunately I once again failed with this, so I got a pair of stays that were way too big in the front. Still they worked for this purpose of just providing a shape. Some kind of boned support undergarment is necessary to carry the weight of the skirts and the coat. I've tried to wear it once without the stays, since I was in a hurry to get dressed, and in the end my back hurt a lot. With boned stays it's the bones that carry the weight, and of course also gives you that regal posture that a queen should have.


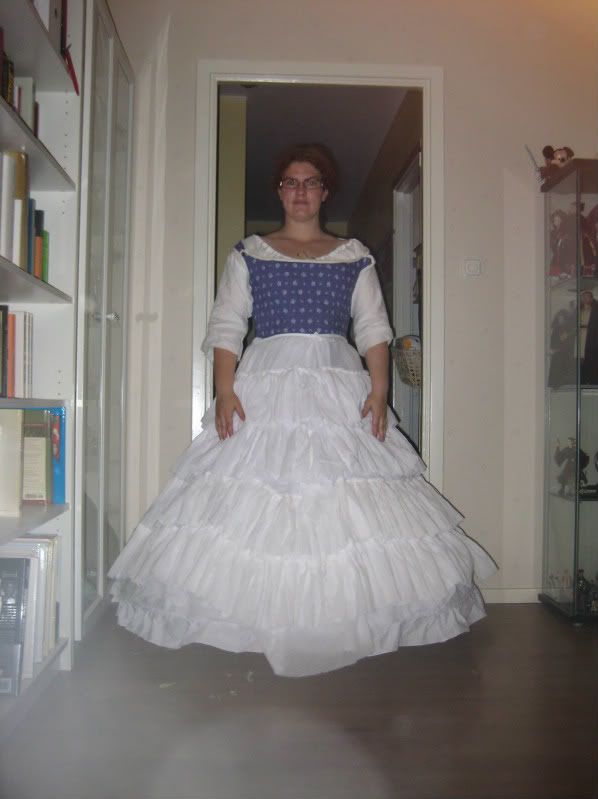
Under the stays I'm wearing a linen chemise. It will never be possible to wash the velvet coat, that would ruin it, so the chemise is essential to make sure that sweat and dirt don't get to the coat. I used linen for comfort, there is a reason why that has been used for undergarments through all times. For the petticoat I used the bridal hoop skirt that I had bought for my 1860's ballgown. The pyramidal shape mimics the original quite well. Here it is also a question of proportions. My skirt is bigger than the original, but since I'm also wider than Natalie Portman I felt that a full hoop skirt gave me the best proportions. Over the hoopskirt is a flounced petticoat in cotton voile. The bottom ruffle was made out of the same fabric as the skirt, so that it wouldn't be visible if it peeked through. Unfortunately the heavy jersey in the skirt means that the hoops are visible when I walk, even through the petticoat, and the hoop skirt gets quite flattened.* It looks good when I'm standing though.


pattern base for the coat
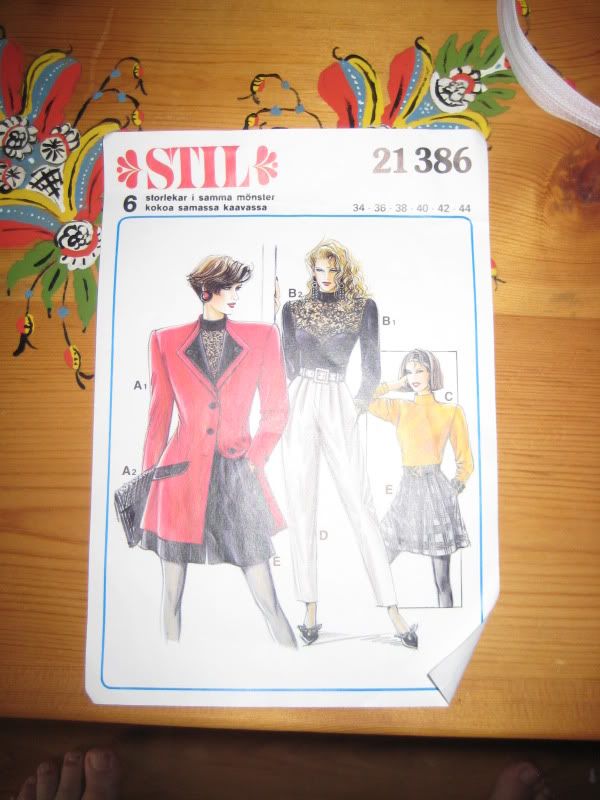
The main challenge was the outer velvet coat. I would never try and drape my own pattern, but give me a pattern as a starting point and then I can change it so that it's almost impossible to recognize. For the coat I started off with this pattern, from my sister's stash. It's some kind of quite ugly 1980's ensemble and I chose to work from the red coat/jacket pattern. What I looked for though was a front with darts instead of several pieces, a flared skirt and a seam at the center back.

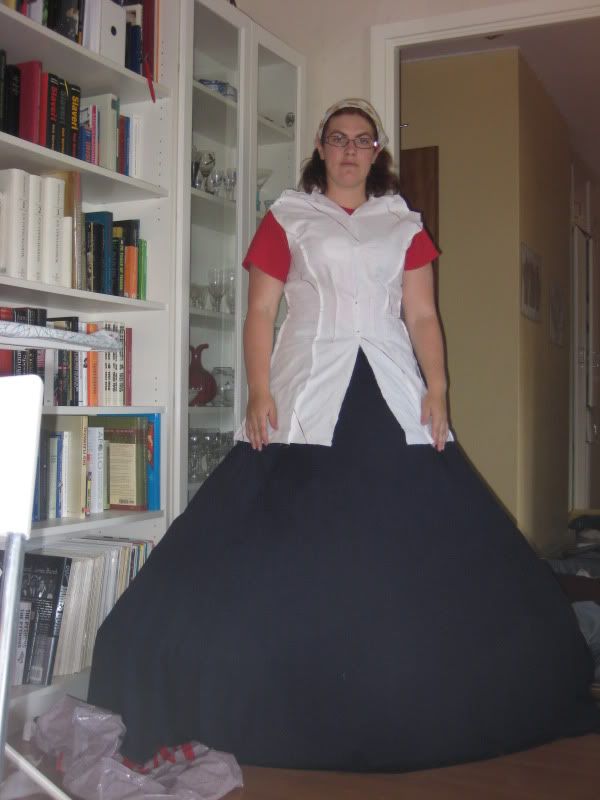
Then I started to fiddle with the pattern, and a lot of old beds sheets. I sewed up the center front seam, so I had to remove excess fabric from the turned up collar. I had to change the seam at the shoulder and remove excess fabric, since I wasn't going to use shoulder pads. Then I had to make sure that the whole bodice fit tight, and not like a coat.
first stage of the muslin
 I added extra fabric to make the full length points of the coat in the front and the back. One important thing here is that the front point aren't really angled. They are as straight as the center front seam, and it's only the huge skirt under that make them point to the sides. For the sleeves I used the sleeve pattern from McCall's 4491, my Lord of the Rings pattern, sewed it up according to the pattern, and then cut it up where I wanted the openings to be. The full sleeve is open all along the upper part of the arm.

last stage of the muslin
When I had pieced together my first muslin I cut it up and made a version two of the muslin, where I made sure that the front, back and sleeve were all in one piece each. For this stage I only made half the muslin, since I only wanted one pattern piece that I could use for the final pattern.


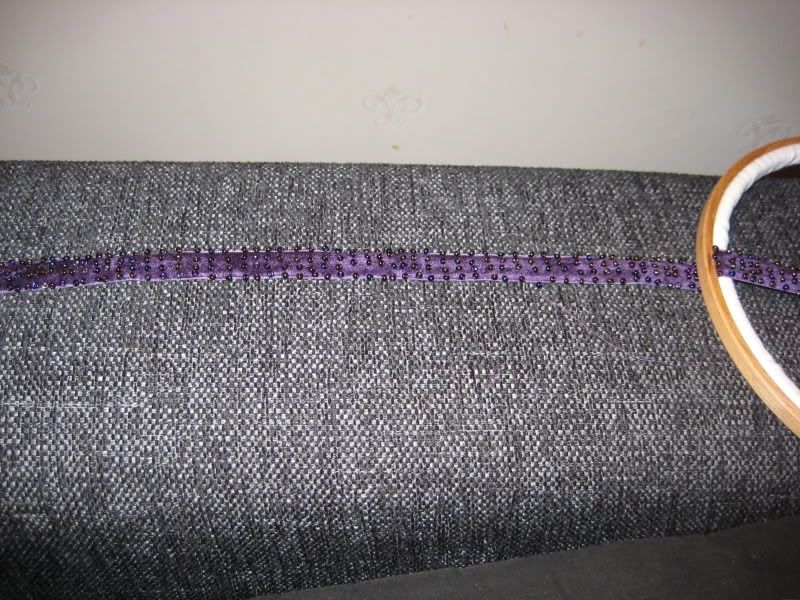
 When I had gotten this far I was actually quite nervous to start cutting into my very expensive velvet. Instead I turned to making the beaded trim that criss-crosses around her "hairbags". I couldn't find any beaded trim, so I bought several rolls of velvet ribbon and then I sewed on a couple of thousand beads to them. Just this stage took me around 1,5 month to finish.

beading, beading, beading
Then some things happened in my personal life that simply made me take a break on the project. That meant that when I finally had energy to start again, well then it was only two months left until the 3D premiere of Star Wars Episode I, and that was my set date for the whole costume.

The colour is totally impossible to photograph correctly
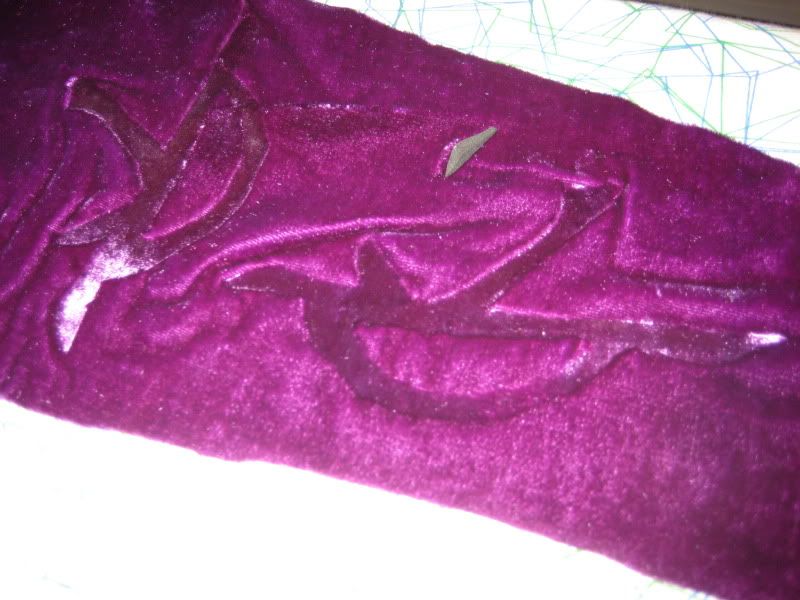
I cut the fabric, but that wasn't enough. Before I started to assemble the coat I had to print the pattern all over the fabric. I read up quite a lot on printing/stamping velvet, and I didn't dare work with chemicals for embossing it. In the end I made a simple stamp out of craft foam and used an iron. The stamp also had to be strengthened with some wire to keep its shape. The technique is to first wet the velvet, then you put the stamp on your ironing board, put the fabric over the stamp, with the right side down, press straight down with a hot iron until it stops hissing and then lift the iron. I used an old iron that I borrowed from my mother, that didn't have any steam function. And I should also say that I turned the coating of my ironing board purple after pressing a lot of damp velvet on to it. This also took me around one month to finish.

Then it was on to the sleeves. They consist of three layers. Two inner sleeves and the outer velvet
one finished inner sleeve, the other without the tucks
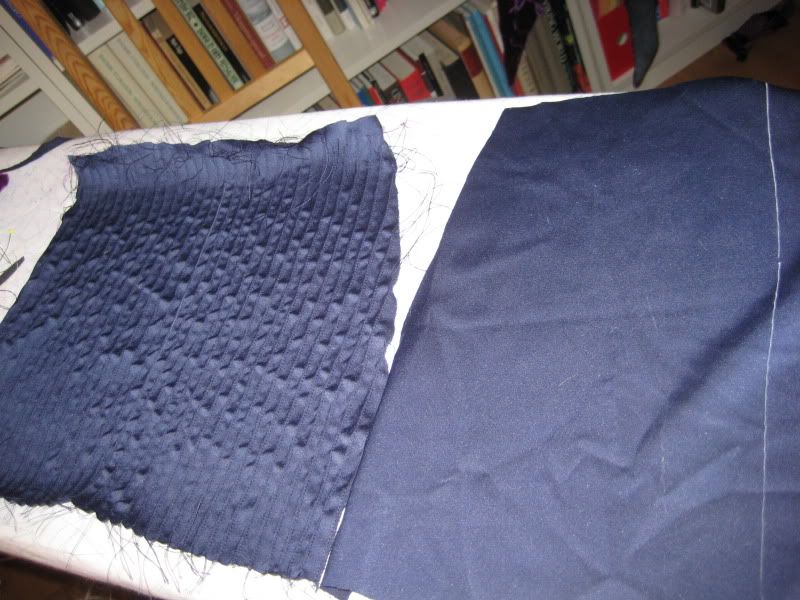
sleeves. For the first layer of sleeves I made narrow tubes from the elbown and down to my hands. The original sleeves are ribbed, and I recreated that by doing row after row with pin tucks, my pin tuck presser foot was a life saver here. The middle layer is a big, puffy sleeve with a petal shape opening that is then folded back. It's a bit hard to explain, but Cassandra has a good explanation of the sleeves in her costume diary.


big, puffy sleeve
 I can't really remember, but I think I used the sleeve pattern from McCall's 3797 for the puffy sleeve, and freehanded the petal shape. I then sewed the narrow inner sleeves to this middle sleeve.

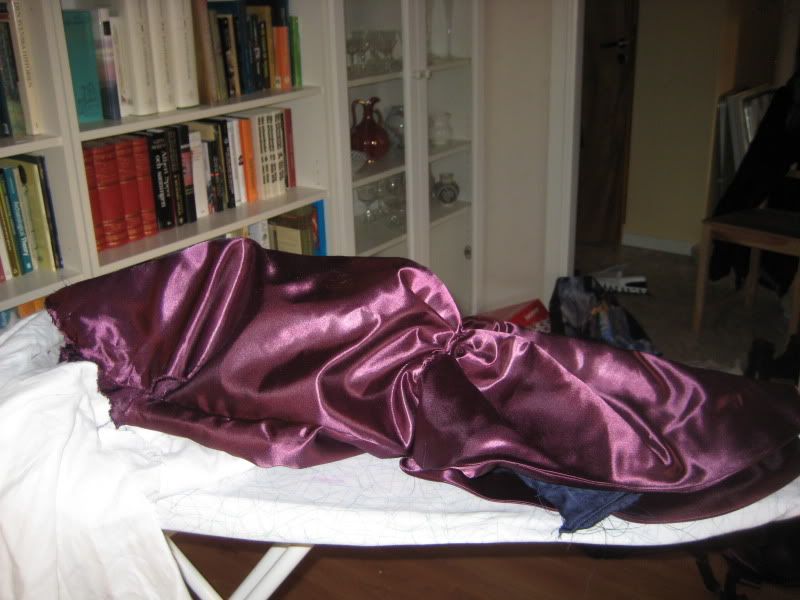
With the inner sleeves done it was only to start assemble the whole coat. The points of the coat and the big hanging parts of the sleeves where lined with faux leather. I know that the views on this are divided among us who have made the costume. I only say that the leather/faux leather makes the coat very heavy, but it helps a lot with keeping the shape of the points, especially in the front where the tip of the points are actually on the floor, in front of the gown itself. The faux leather was originally black, but I dusted it with a thin layer of gray/silver spray paint to give it a lighter and more shiny apperance.

At the front there is also a stomacher, which is basically a triangle that goes from the shoulders and end below the waist. I think that in the original it's fastened on, and then you have to closure of the gown under it. I sewed it on permanently though and have a zipper in the back to get in and out of the costume. The zipper can't be seen under the veil. From the shoulder seam and down the sleeves there are also a row of buttons, self covered in the same fabric as the coat. These buttons are the only thing keeping the sleeves shut, and still allowing the undersleeve to peek through. I have sewn everything though and just added the buttons as non-functioning decorations.
finished skirt and coat
The veil silk chiffon that's draped over a hairpiece. Or rather in my case it's actually just an alice band with a structure of craft foam glued to it. One day I would like to make a proper hairpiece, but to be honest it's invisible anyway. Framing the face are two "hair bags". They were trickier than I thought. I first made a bag, but it was too round. In order to get the flat shape I cut it out in batting, covered that in one layer of the silk chiffon, and then I made a casing for them out of a second layer of chiffon. I want to emphasize that quilting batting, the flat kind, is a lot better to give the right shape rather than just sewing a tube and stuffing it with something else. The hairbags should be flat.

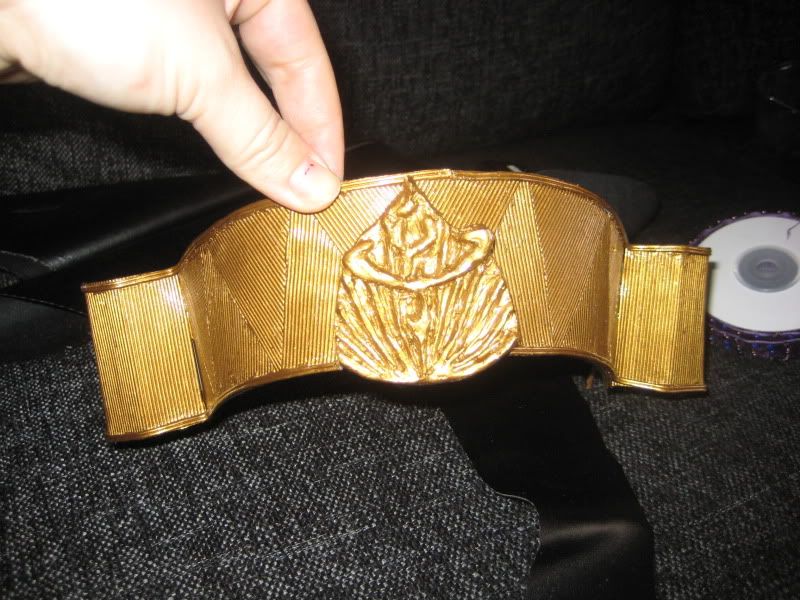
Then the beaded ribbons were sewn on to the hair bags. If there is one thing I want to change with this costume it's the veil and the hair bags. I was in a bit of a hurry when I made them and there are are some issues with the hair bags. Also the original is made in a changeant chiffon, that I simply couldn't find. I have the right texture, with small ribs in the fabric, but I would love to get my hands on changeant chiffon for this.** Also the original has some kind of beaded decoration in the corners of the veil, and I haven't added that. The wonderful tiara was made by a friend of mine who gave it to me as 30th birthday gift.


The tiara
All in all this is the costume that I'm most proud of and I definitely think it's worth all the time and money that I put into this.

Status: active

* The problem I've mentioned at the top with the hoops of the hoopskirt being visible went away when I added another petticoat in 2013. I simply added one of my thin cotton voile petticoats from my 18th century wardrobe and that was enough. Since all the petticoats and the hoopskirt is tied with ribbons around the waist it gives a bit of bulk there, but it's hidden under the sleeves. In hindsight I would have made several thin petticoats rather than the quite bulky flounced one.

**When I was in London in December 2013 I got my hands on changeant chiffon so I'm hoping to have time to redo the veil and the hairbags some time during the year.

Posing with another Amidala in Stockholm 2013

side back view

back view


February 2012

February 2012

Tuesday, 5 November 2013

Padmé's Mustafar

Before the premiere of Star Wars Episode III Revenge of the Sith I wanted to make a costume for the premiere, or rather for Star Wars Celebration III that was held the month before. I think I had gotten a bit better by now, and the shape and fabric choice for the tunic wasn't so bad. I couldn't make a good looking collar though. I also made proper hairstyle for the first time.
original costume
April 2005

Status: non-existing

Monday, 4 November 2013

Padmé's picnic gown

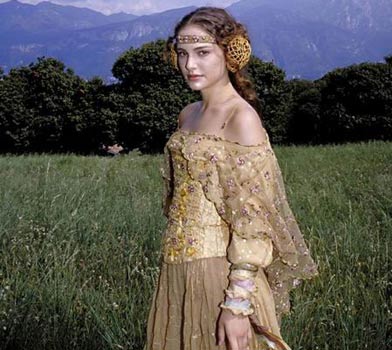
This is probably the most beloved and most beautiful of all Padmé Amidala's costumes from the Star Wars prequels. There were quite a few of us who totally obsessed about it, as soon as the first pictures of it were published. I can't say that I was anyone of those who really contributed, but it was a wonderful thing to be part of the analyzing and breaking down of the costume that took place at the Jedi Council Forums. The discussion about the dress went on for almost 4000 posts, and the rundown, and latest thread can still be found here. A sign of how loved it is is that I think it has won every time a version has been entered into the Star Wars Celebrations costume contests.

My first attempt wasn't even close, the thing is though, when I made it I thought that it was really good. I simply hadn't trained my eyes to "see" what the costume looked like. I had a bodice that was just a bodice, not a boned corset, it ended in a point and was too short, compared to the long and rounded original corset. I used synthetic crepe satin and polyester chiffon, and the cape was some netting that I tried to tea dye. I got the shape of the skirt and blouse right though, and I had the correct ear buns. Even if the shape of the corset isn't right I'm also proud of the embroidery that I did on it.

Status: non-existing. I have gathered materials and have both the exact right ribbons for the sleeve wraps and the correct sequins for the skirt, so one day I'm going to make this one properly one day. I just need to buckle down and prepare for all the hand embroidery on both the corset and the dress itself.
April 2004

TPM battlemaiden outfit

The costume that I finished in 2004 was the Star Wars Episode I The Phantom Menace Handmaiden battle outfit, also known as the battlemaiden. I've been a fan of the handmaidens since they started, they are in the background but they are cool, have nice costumes and can fight. To quote one of them "We are brave, your highness". This costume was the most I had spent when it came to fabrics, I probably bought fabric for around $120. Still I was happy to buy fabric that was "as close as I could find" rather then totally accurate. This was a velvet fabric that I found in a local store, and I was so happy to have found red velvet. I also chose simple gold trim, instead of the embroidered gold trim that was on the original. I never made a lining for the coat, I had planned to, but never got to it, and I never made the proper under shirt, or hairpiece. Still this is probably the first project where I felt that I spent a lot of money on the fabric, and I spent a lot of time researching possible patterns, and then mashing them up to get one good pattern. It was definitely a step forward compared to the previous costumes.

original costume
October 2004
At least I got the fullness of the coat and sleeve right
Status: Existing but inactive

I still have the coat and the pants, but I'm never going to finish it. I can use it for something else, but it's not accurate enough to call it a Star Wars costume.


Friday, 1 November 2013

SW:AOTC blue Tatooine poncho

original costume
 I can't find any photos of my first ever try of a Star Wars costume. I made a jedi     costume out of old bedsheets and wore it to a Halloween party in 2000. So the first costume that I can find pictures of is Padmé's blue Tatooine poncho from Star Wars Episode II Attack of the Clones.

The underdress was a crinkle dress that I had, and dyed blue. The outer poncho is made of fabric that I found at home by my parents, in fact I still remember that one of the inspirations for this dress was that I found the fabric in the perfect colour among my mother's curtains. This is the dress that got me accepted into the Rebel Legion in 2002, meaning that it was also the first costume from the Nordic Countries, and in a way the start of the Nordic Base. I don't have any original pictures myself, but I found this at Padawan's guide. At that time I didn't really care about hair colour or much of hairstyling, after all I had long hair myself and I just tied it back a bit.

Last summer I decided to upgrade the costume, so that I could still have it in my Rebel Legion profile. I lengthened the dress to a correct length, changed the neckline of the under dress, refined the embroidery a bit and added a lining to the main tunic. I also made sure to style my hair in a better way.
Status: existing but inactive.

I have it. At the moment my hair is blonde though so I'm not using it. Also this is a costume that would never get recognised by the general public, so it's no fun wearing it. I also see too many of my early mistakes in it, so I'm not too happy about the quality anymore.

August 2012
June 2002