Showing posts with label hair. Show all posts

Monday, 29 December 2025

A quick hairpiece under the hainet

 When trying out my 16th century hairnet I realised that my own hair wouldn't be enough to fill it out. I have quite long and thick hair, but each hairstrand is so thin that when I braid it the braids ends up as tiny stumps. Good when you are wearing a full wig, bad when you want to a hairnet without just a lot of air inside it. I decided to make a hairpiece that I can easily put on and wear under the hair net. Since this is a piece that's supposed to go under the net I also felt that I didn't have to be too picky about it, loose strands and uneveness would be hidden anyway. This is also good because since I switch haircolour from time to time, even if it's within the red spectra, I didn't have to worry about an exact colour match, this is just for volume.


Back in 2016, for Star Wars Celebration in London, I made this Tudor version of princess Leia, and I still had those red hairpieces that I had used for the buns.


For the hairpiece I used the two old hairpieces and a long piece of cotton tape.

I combined the two hairpieces into one and braided them together with the cotton tape. I started in the middle and braided outwards from that.
Then it was just playing around with the shape of the braids until had a bun that I was happy with.

The bun was sewn into shape with some thick thread. I also found a some extra hair tuffs that I twisted together and added to the middle of the bun.

The finished piece was dosed with a generous amound of hairspray. When wearing it I tie the tape around my hair, and then I do my usual braiding of my own hair, which is also braided with some tape, and then my own braids are laid around the fake bun. 

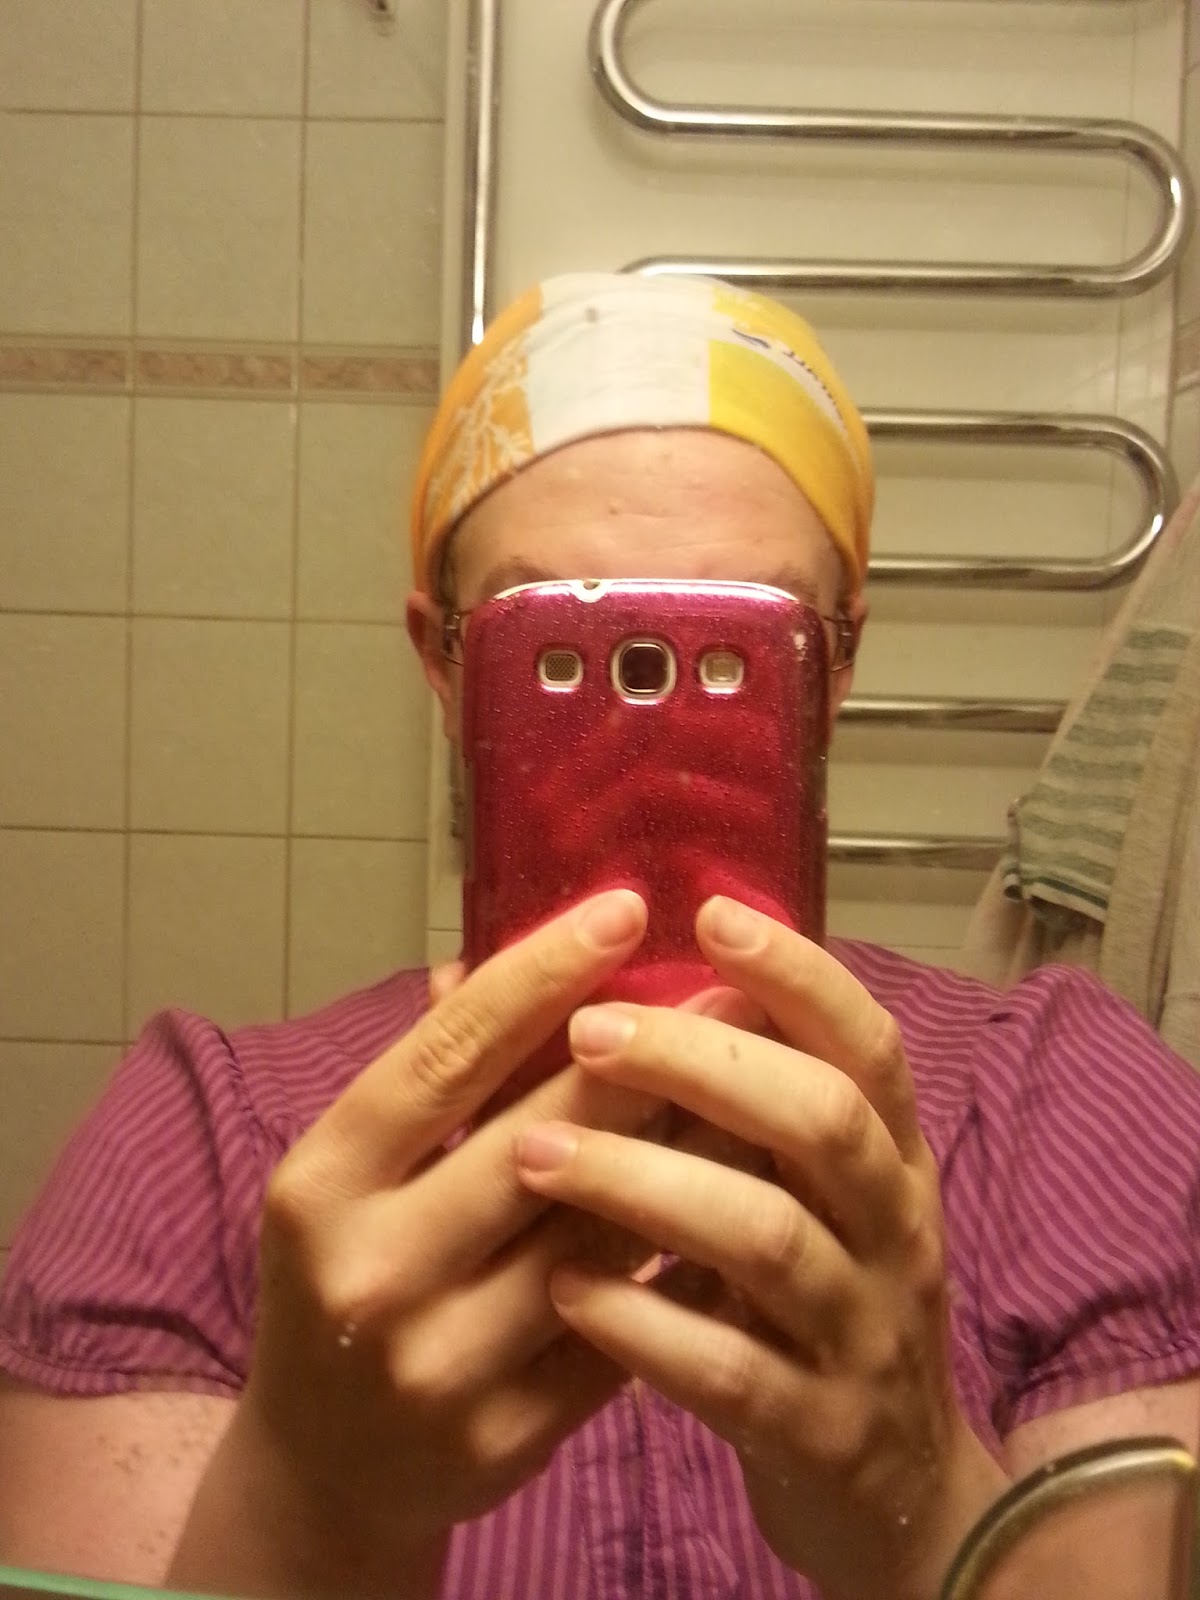
This is a quick test of the bun, when wearing it properly I will make sure that I use black tape for my own hair as well. I'm also thinking that if I want to make the bun wider I can add the hairpiece and then use my own hair to make two buns on the side of the hairpiece. All in all it took me around 30 minutes to make this hairpiece, it's not the most tidy and perfect, but for volume under a hairnet it will do.


Sunday, 28 December 2025

HSM challenge "accessorize" - a 16th century hairnet

 The reason I started sprang is that I really want to have a hairnet similar to the one worn in the portrait of Katarina on Bora, wife of Martin Luther, in her portrait by Cranach.

I set out to try and make my own hairnet, after having failed on the male nets. I made mine in black wook, and it was quite a lot harder to work black compared to yarn in brighter colours. I got a net done, with just one row of mistakes. I still consider this as a proof of concept and that I can continue working on it, most importantly I want to make it in a finer yarn.

For the ribbon at the edge I decided to learn a new skill and that is tablet weaving. I had gotten a set of tablets in Christmas craft calender so I felt that I was a sign to actually try making my own ribbon.

Warping took longer than actually making the ribbon. It's definitely wonky, but it is a first try so if I want to I can make a tablet woven band in the future. I also liked that I found this pattern with squares in stade of the more normal v-shapes that are common in tablet weaving.

The band was sewn on to the sprang net for 2/3 of the way around, and for the final third I added a fingerlop braid that I weaved through the loops of the sprang, so that I could tie it in the back and adjust the size.

 
Just slapping the net on to my head made me really happy, even if it's just a text piece it actually gave me the shape I wanted and I could definitely see me wearing this at a 16th century event. I need to wear something under it to fill out the hairnet, my own hair is not enough.


Here is what it looks like on my tiny styrofoam head.

What the item is: a 16th century hairnet
How it fits the challenge: It is an accessory
Material: 2 ply wool yarn
Pattern: My own, but very much from the instructions by Carol James' paper on 16th century hairnets
Year: 1530s
Notions: Just the yarn
How historically accurate is it? I think it's mostly a matter of me lacking the skills so far that really make it into something that would fit in the 16th century, but the materials and techniques are all accurate, so 85%?
Hours to complete: 3 days
First worn: Not yet, this is more a proof of concept until I dare doing this in finer and more expensive materials.
Total cost:

Friday, 10 July 2020

On my head at HIldasholm

For my visit at Hildasholm I needed to do my hair, and find a hat. I did some very quick solutions, that I was actually really happy with.


The hat is a regular sun hat from H&M. I bought it two or three years ago, and I use it regularly during summer. In order to pimp it for the early 20th century I added some trim though. The band around the crown and the bow are made from cheap poly satin. I made a tube and turned it inside out for the band, and then I pressed it. The bow is made from two rectangular pieces, one larger than the other one, and then I put another smal tube of the same fabric around it in the middle to create a bow shape. The bow wasn't pressed, since I didn't want it to loose it's quite fluffy appearane. I also found a plume of ostrich feather, that I didn't know that I had. It's made from two feathers sewn together to create volume.


Everything was just tacked on the hat with regular sewing thread.I didn't do it too well, since I want to continue to use the hat for more regular wear.

Under the hat I also needed to make something about my hair of course.

The hairstyles of the later 1910s had lost the big pouf and rolls of hair from the earlier Edwardian era. It was still an updo though, not a short cut style.


The evening before I washed my hair. I pinned the front part into smaller pin curls and the rest of the hair on large foam rollers, and then I slept on it. The rollers created quite a lot of volume, that I rolled into a bun in the back. I basically parted the back hair in three parts, the middle part was bigger and made up the most of the bnn, the side parts were twisted and pinned into the larger bun, and also hid the hairpins that kept the larger bun in place. The pin curls in front were drawn and pinned into place, on one side I was quite happy with the waves they created, but the other side didnt get that much of definition to the waves. Still it was a very simple and fairly quick hairstyle, if you exclude the time the hair was on rollers.

Thursday, 5 December 2019

A quick fix for a cheap wig

On Sunday it's time for the annual Christmas fair at work, which is one of the most respected and well-known fairs in Sweden to be honest. Since last year we have worked with creating a more "historical" atmosphere. Our problem is lack of money and the fact that the costume department at work is basically just me, outside of my regular work. I will probably make a longer post about the differences between being a serious historical costumer and having to work within the confines of a small budget, lack of knowledge and lack of time.

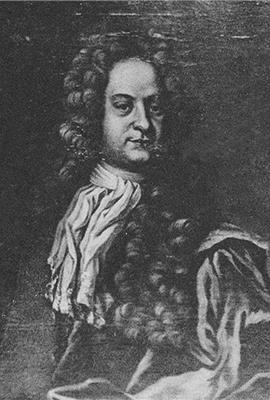
Anyway one of the things that was a last minute thing to create a decent costume for a person to portray Anders Swab, the head administrator in the year 1719. There is a portrait of him looking like this

A wig was essential. The original plan was to borrow a decent outfit, but when that fell through I had to make things work. This I realized on Monday, yes this Monday. The only opportunity was to go out to one of the cheap party shops that I can rely on delivering within one or two days, and so I did. I found this awful and cheap pirate wig, but it was still the best option they had. Don't get me started on what they called their 18th century wigs or layer/judges wigs.


Even before it arrived I had a plan though. I tried to take photos of the process, but the bad light in the shower at work didn't really show any differences between the stages. I started out with a can of cheap white spray-on haircolour. I emptied the whole can, and that was enough to turn the wig from a shiny black monster and into something decent. The next step was to apply generous amounts of hair powder. I didn't use my proper 18th century hairpowder for this, but instead I mixed potato starch (potatismjöl) and baby powder (talc) in equeal amounts. To make the hair powder stick I used a regular strong hairspray. I sprayed the wig and then brushed the powder on with a regular paintbrush in layers. I finished it all off with a generous dose of hairspray.

This was the end result


I haven't styled the wig at all, so it will stay in the same shape as I bought it, but the new colour, shine and texture of it has really turned it into a believable 18th century wig, instead of a cheap party wig.

Cost - wig $25, haircolour spray $5, potato starch $1, baby powder $2. Total cost - $33

Tuesday, 2 July 2019

Obelix - the quest for a red moustache

One thing I'm lacking and that I will need to fake for y Obelix costume is facial hair. This is actually the part of the costume that I'm not looking forward to wearing. I simply will have to wear some kind of fake moustache. It turned out that it wasn't easy finding a moustache in red, especially not a red that mimics my own current hair colour.

I ordered a bunch of different cheap moustaches from the party shop Partykungen.se, none of them looked realistic or in the right colour. Thankfully Obelix is a comic figure, so I don't have to worry too much about the realism factor, but I still want it to look good and not just slap some orange fuzz on my face.

In the end I decided to go with the blonde moustache and try to dye it red.

Since it's a matter of a limited amount of hair I simply used sharpies to colour the moustache, the important thing is that the inc is alcohol based. You can see in the picture above where I did a first test.


I started with a sharpie in "poppy" colour. I really like this colour and think it would work great for a version of the comic style Obelix. My own hair has a lot more purple tones in it though, so to make it look more like my hair colour I had to paint it again.


This time I used a sharpie in "magenta" and this is really close to my current hair colour.

Now I can only cross my fingers that I will be able to make the moustache stick to m face when it's a warm summer's day, I've never worked with facial hair before. I have bought proper moustache and hair glue though.

Tuesday, 11 June 2019

Making my 1762 hairstyle

I was so happy with my hair for the 1762 ball, it's definitely the best 18th century hairstyle I've ever managed to make.

In order to get the result I'm mainly indebted to two sources - Madame Isis' Toilette and the book 18th century hair and wig styling by Kernda Van Cleave. I used Isis' instructions for the products that were used in the time, and Kendra's instructions for actually styling the hair.

The big difference for my hair styling result was that this was the first time I actually worked with hair powder, previously I have skipped it or used dry shampoo. When I tried to make a test run of the hairstyle a couple of weeks ago I realized that it wouldn't work. My hair is really red with bright pink sparks, and it definitely would both clash with my bright orange dress and definitely looked too modern. I would need to dampen the colour of the hair in some way. Well hair powder it was. Thankfully Isis has some recipes for hair powder and there was enough time to order ingredients from Swedish shops. There are shops out there selling all the finished products, but they are mostly based in the US so that wasn't an option for me.

In the end my hair powder was more of a "take what you have in your pantry" than an exact powder according to original recipes. I used a mix of corn and potato starch (I ran out of starch) and powdered chalk. I also added some ground cloves and cinnamon to give the hair powder some fragrance.

In order to get the hair powder to stick to the hair you need to have some products. In historical times they used pomade, and I had tried to make my own pomade a couple of years ago. That pomade wasn't a success though, but I found an off hand comment that you could use modern cold cream instead of pomade. Cold cream is also mainly made from beeswax and fat after all.

Then it was time to actually start the styling. The day before the ball I curled my hair. I used pincurls for the front part and bigger foam rollers for the back. I wetset them and had them in all the time until I got to the hotel.

I started with taking out the pin curls and got this messy hair. I then took a small strand of hair, put on the cold cream and brushed generous amounts of hair powder on it, with the biggest powder brush that I had. It is messy and the powder will get on you and around you. I'm just wearing my shift here. I was glad that I had added the cloves and cinnamon to the hair powder since I didn't like the smell of the cold cream and they helped mask it.

Here is my hair with cold cream and powder. I still have the foam rollers in for the back of the hair. I then followed Kendra's instructions to create the "tete de mouton" style, with tight sausages in the front. One thing that I want to emphasize is that you need a really tiny roll form to roll the "sausages". I have long and fluffy hair, and the first time I tried it they got too big. This time I used a chop stick, that's how small it needs to be.

The front of the hair was finished and it was time to start with the back.

This messy photo is to show the difference between the shiny and brighter hair straight out of the foam roll, compared to the powdered hair that is matte and a toned down in colour.

Here the back hair is powdered as well. Now what the hair powder does is that it builds volume, a lot of volume. I have a lot of hair, but it's very fine. As soon as I put it in a bun or a braid it shrinks and I get very small and sad hairstyles. When I did my test run of the hairstyle I made one braid in the back that I started a the nape and then pinned to the top of my head. Now with the powder applied I could make two fairly thick braids instead.

The final step was to add some flowers in the hair, not the least to mask the tip of the braids. I used two small hair ornaments and a small flower crown. The flower cown was attached to an elastic, that I cut off so that I only got the flowers and then I pinned them on to the hair. For the make up I used a gloss highlighter to give shiny and paler look, some of my regular rouge and a very red lip gloss. It would have been better with a more red rouge, bu this was what I had at thome.

The hair from the back
The hairstyle held extraordinary well. In fact I slept on it and it still looked good when I woke up. I was worried on how I was going to get the cold cream and powder out of the hair, but there was no reason to fear. It was actually more simple to get it all out, compared to when I've used strong modern hair products. I washed my hair with regular shampoo and conditioner and it was no problems at all to get all the products and tangles out of the hair. In fact my hair feels silky and smooth like if I had paid for a very expensive treatment of it. The last time I was at my hairdresser I did that, but this gave they very same effect. Cold cream and hairpowder for the win.

If I'm ever going to do a big historical hairstyle again I'm definitely going to use pomade and hair powder. It was a bit messy and it took some time, so I don't think I'm going to do it for more casual historical events though.

Wednesday, 18 May 2016

Some Edwardian hair

It was dark and I just have grainy photos of how I did my hair on Sunday, but here it goes.


 I started off with doing quite large pincurls. Previously I've used my curling iron for rolling up the hair, but this time I used my fingers and made the curls almost double the size as usual. I also tried to pin all the curls up fairly high up on the head. I damped the hair by just squirting some water on it before I started with the curls.


The bad thing with the big curls is that I couldn't sleep on them, so I let them out before going to bed. I squeezed some hair clay in them to keep them in shape. This had worked fine earlier in the week.

Now though they got quite a lot flatter when sleeping on them. Still the hair was fluffy so I just gently teased it and added some more hair clay.


Instead of a hair rat I used a weft of loose hair that I have and pined it like a halo on my head. The colour isn't an exact match for my hair, but close enough that it wouldn't be visible if it just peaked out a little bit.

I also added a hair donut to the back of the head. Everything was pinned on with hairpins.

After that it was only a matter of taking the hair and place it over the halo of fake hair and pin it to the donut. I knew that I was going to wear a hat so I didn't worry too much about how it loked up at the bun. I finished off by using my home made pomade.

About the pomade. It definitely held the hair very well, stronger than hairspray. I don't know if it's me or the pomade but it tended to clump some hairstrands together and made them look very greasy, as well as making the fluffiness disappear. It was also a bit lumpy, so I had some small white spots in the hair. I was worried that it was going to be hard to get it out of the hair, but just a regular hairwash with shampoo and conditioner took care of that. I think that I am going to try and remelt the pomade and add some more shea butter to it, maybe it's simply too much beeswax in it. I also think it would work great for 18th century hairstyles, if I add some kind of powder to the hair.

I thought my hair looked ok, but I would like to have a lot more volume at the sides so I need to come up with some way of doing that.


Friday, 13 May 2016

Trying out some Edwardian hair care

This Monday I realized what kind of person I am, and how obvious it is that I tend to want to dive quite deep into things when I get the chance. On Sunday it's a 1900's fair at the National Railway Museum, and I'm going there. I was not happy about my hair the last time, so I wanted to do it better now. I started reading a lot of tutorials on Gibson girls' hair-dos, and when reading up on historical hair it's inevitable that you also run into a lot of posts about 18th century hairstyling. Both Edwardian and late 18th century hairstyles are very much about adding volume, so I figured I could pick up stuff there as well.

One thing that is clear, especially when reading about 18th century hair, is that you can't do without pomatum and powder. Pomatum is simply an older name for pomade, a grease that you add to the hair to make it more moldable, but also to make the powder stick to the hair. The powder acts as a dry shampoo, and helps keep the head clean and add volume.

I then tried to find out how to make your own pomatum/pomade, since there wasn't a chance that I would get it shipped here in time, the only sellers of pomatum that I've found are in the US. One thing led to another, and in this blogging World we live in I found a lot of recipes of pomade for people wanting to live more "natural" and avoid chemical stuff, like modern shampoo and hair styling products. Reading them I thought "hmm, this doesn't sound too complicated", I found a Swedish place selling the ingredients and made an order. Today the things I needed arrived, so I set off to make my own pomade.

A note that what I've done is not an historical recreation, originally pomatum was made from lard and animal fats. I'm using modern ingredients, but I here the end result, a simple hair product to help with styling, was more important than historical accuracy.

The recipe I used was from The Hippy Home-maker

3 tbsp beeswax
2 tbsp shea butter
2 tbsp coconut oil


 I put the beeswax and the shea butter in a metal bowl and placed it in a pot with boiling water and let them melt. When they had melted I kept it on the heat for 20 minutes. I also added some ground cinnamon and cloves to the fat to give it some scent. It would of course be better to have used whole spices, and I was sure that I had some but apparently I had used them up when baking for Christmas.

After 20 minutes I poured the fats into a plastic bowl, added the coconut oil and whisked it all with an electric beater until it cooled into a fluffy consistency.

Here is the finished result scooped up into a small jar. The ground spices add some brown dots, but that won't be visible in my hair since it's quite dark.

Making this was easy, but of coure I haven't tried it out yet so I don't know how well it works. It took me a lot longer to get the spoons and bowls that I used free from the fat and grease. And in case the pomade doesn't work with the hair it's probably very good for your hands, since my skin now feels very soft and moist after having worked with it.


Tuesday, 10 November 2015

TFA Leia hair - a messy tutorial

Update! - This tutorial was done based on my interpretation of a pre-production photo. It was wrong. The result of this tutorial is not an accurate version of Leia's hair in The Force Awakens.

I've been asked how I did my hair for TFA Leia and this is an attempt to go through the steps I did. There are a few things to be aware of though:

1. There are no clear pictures of the back and left side of the head, so this is really my interpretation of the hairstyle.
2. I don't have a proper wig block and I didn't even try to be careful about hiding pins or fixing stray hairs. It's messy, but I hope it shows how I did, then you can practice and get it good.

1.
Supplies
One lace front wig in ash/grey

One matching loose ponytail
The ponytail was simply twisted into a bun at the top, but with around half the hair loose under the bun. It's held together with loads of hairspray and some hairpins.

2. Pull the hair back from the forehead and fasten it with a pin or two.
3. Attach the ponytail/bun with some pins so that the bun just sticks up over the top of your head.
4. Braid around a third of the hair into a braid on the right side of the face.
5. Cross the braid over the head to the other ear. This is the tricky part, and if you have an extra pair of hands that's really helpful. The synthetic hair is also very slippery so it's hard to really secure it in place.
6. Braid all the remaining hair, including the hair from the ponytail/bun into one thick braid on the left side of the face. If possible you should try and get the end of the braid that you've pinned in place over the head into the thick braid as well.
7. Loop the braid over itself, so that the end of the braid can be hidden under the top part of the braid.
8: Pin down loose hair and put some extra pins where you need some stronger attachments.


Sunday, 9 August 2015

18th century hair styling

So over the last days I've tried to style my hair in 18th century styles. I can do a decent pouf, as seen here, but that has never been my favorite hairstyle, and at least at the moment my 18th century wardrobe is a bit later than when the pouf was fashionable. Of course I am dreaming of one day having a huge hedgehog hairstyle, but in order to achieve that I would need to style a wig, and now I only had my own hair to work with.

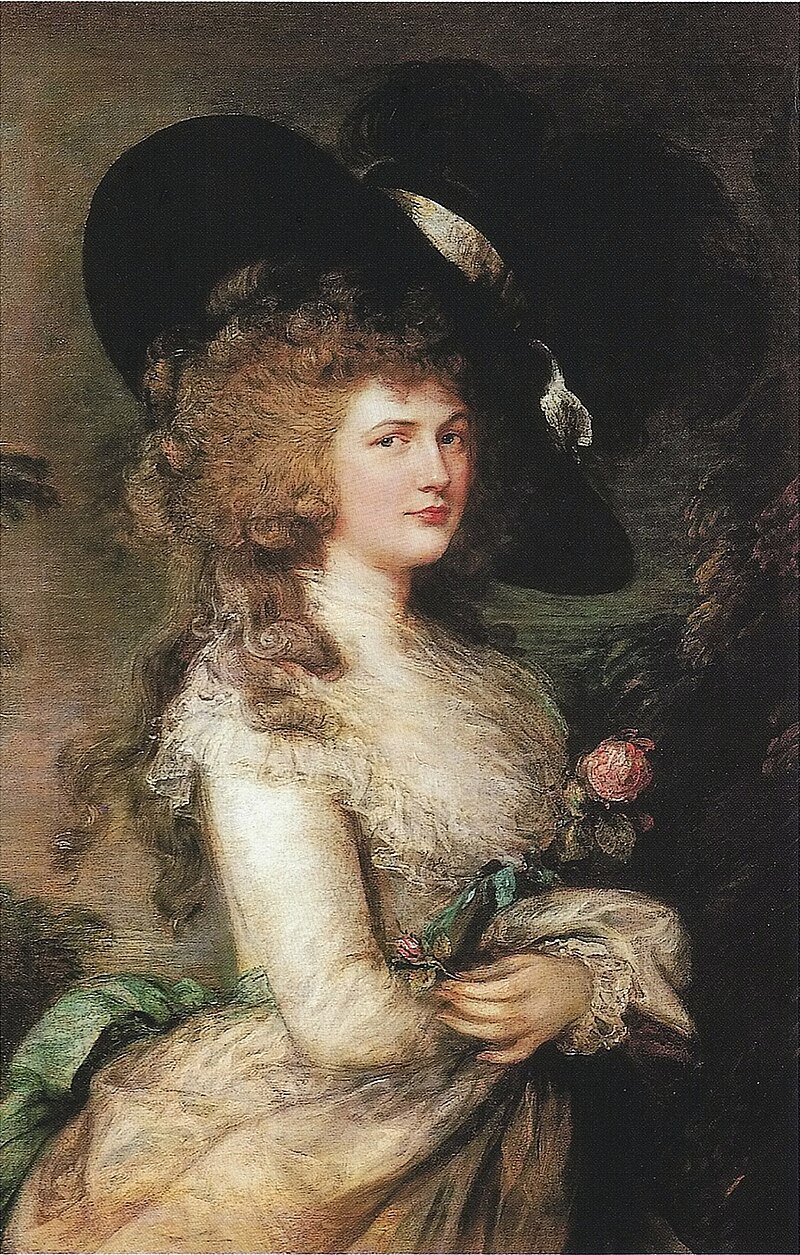
One day my hairstyle will rival the Duchess of Devonshire's.
For the photoshoot at Staberg I started the evening before that and put my hair in a lot of pincurls.

I did the pincurls by first wetting my hair and then rolling it around my fingers. I didn't really have a strategy so I just rolled and pinned the hair up. When all the hair was up I dampened it some more, and then I put it all under a buff so that I would be able to sleep on it without the curls coming loose.
The reason why I prefer pincruls is because when they are pinned up and under the buff there's no problem sleeping on it. I've tried to sleep with the hair bound up on both foamrollers and hard plastic rollers, and it's been so uncomfortable that I haven't slept much at all.

This is what my hair looked like the next morning, when I had removed the pins.
My hair naturally falls in a very visible part, if it's allowed to fall by itself, so to avoid that I pinned the middle section back, and then I simply started to tease the hair as much as I could. I actually think my hair is a bit too long for a really good bushy hairstyle, because it tends to droop down. I tried to solve that by pinning the end of the hair up under the rest of the hair.

This close up from Staberg is the one that shows off the hair best. It's quite nice, but it's not enormous enough. I want more hair. I also think I need to practice teasing the hair better.

Now today I dressed up in 18th century style again, but today I wanted to use my gaulle and go for a 1790's look instead. The event was a small scale affair, and since I went there alone I don't have any pictures from it. I did try out driving in stays though, and since I hadn't cinched them totally that was no problem. the last few kilometers when I had stayed, cinched the stays and put on the gaulle was no fun though.

Anyway for the hair today I realized that after all I have the wonderful 18th century hair & wig styling book, so why not use it. What I really like about this book is that it has both an extensive chapter with photos of portraits and what the hairstyles actually looked like, and then it also has the instructions on how to achieve them. For this hairstyle I mostly followed the instructions for the "Adela - simple short and long hairstyle".  Working with my own hair I knew that I wouldn't be able to achieve the full style, but looking at the reference pictures in the first part of the book I felt that I could achieve something quite good anyway.

Just like with the previous hairstyle I started the day before with rolling the hair up. The main difference is that I was more thorough with how I parted it, making two distinct sections of hair (back and front). I also rolled the curls in front with the help of roll form, it's a spoonhandle from the kitchen. This made the curls a lot more uniform. In the back I used larger foamrolls for the hair. Unfortunately I ran out of foamrollers so I had to braid the hair and hope that I would be able to heat set it with my curling iron in the morning. The curling iron didn't give anything like results of the wetset curls though, so in the end I simply took those bad curls and pinned them up under the rest of the hair to give it some volume.

When I took out the foamrollers and the pins I didn't brush out the looks. I simply used my fingers to shake the out a bit and added a hairband.


I'm quite pleased with this hairstyle, but when I do it again I would like to use a bigger roll form and see what difference that would make to the hairstyle.