
 |
| Snow White (October 2013) |
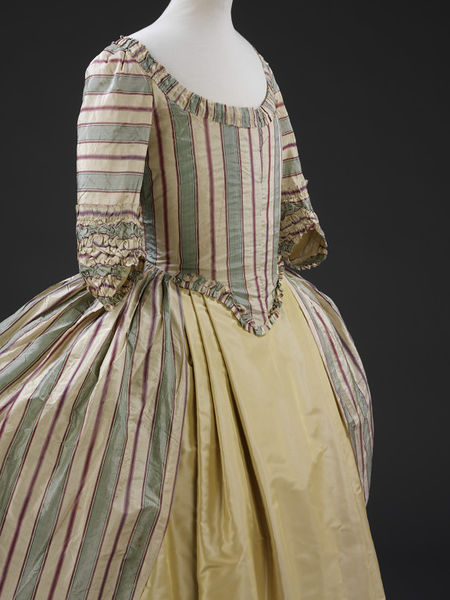
For the first challenge of the year I decided to go over my Snow White gown that I made this autumn.
It was a masquerade costume and I wanted to turn it into a more "normal" 18th century costume, also even though it was the newest one I had noticed some things that I wanted to fix.
I started with removing the cape, collar and cuffs. That was simple since I had just tacked them on.
At the bottom of the bodice I had had problems with the silk starting to unravel at the edge, when I had fixed it the white lining had become visible. The neckline was also a tiny bit too wide, meaning that I had to worry about showing too much of my breasts all the time. None of this was about construction, but rather more about hiding the imperfections. The Snow White gown was also quite plain, and the only trims I had were the cuffs, the cape and the collar. I decided to go all out and hide the bottom edge with some trimmings, as well as raising the neckline a bit.
 |
| bottom of bodice with the visible white lining. |

The wood glue worked fine. I mixed the glue with the water until it was really thin, but still had a white colour, then I simply brushed it onto all the edges. First I was quite hesitant and made sure to only brush the edge of the fabric, but after a while I used the full width of the brush. When the glue/water had dried it was invisible and the edge didn't fray.
Then it was on to cutting strips, painting the edges and doing all the box pleats.

I didn't measure my pleats exactly, so they are a bit uneven, but that is something you can see on original gowns as well. I tried to keep the pleats to about the same width as my fingers. Since I was going to sew the trim on in the middle I also secured the trim with some stitches along the middle of the trim, before removing the pins and pressing the whole piece of trim flat. Then I pinned the trim onto the gown and sewed it on by hand.
I'm very happy that I did have enough fabric so that I could go al the way down the sides of the skirt of the gown, as well as replacing the red cuffs with this new pleated trim. I had removed the white small flounces at the sleeves together with the cuffs, I sewed them back on, and all of a sudden they were a lot more visible.
I can only say sorry for the bad photos, I didn't feel like getting all dressed up, and since I don't have a dressform I just put the robe on the floor and snapped some photos.

The new ending of the sleeve with a pleated trim and a visible flounce.


Fabric: blue silk taffeta
Pattern: none
Year: ca 1780
Notions: wood glue, polyester thread
How historically accurate is it? The trim itself is accurate, but I doubt that they used wood glue and polyester thread.
Hours to complete: 10-15, and most if just sitting and doing the pleats
First worn: never
Total cost: $5 for a small bottle of wood glue, the rest was from my stash.
What did I learn with this project?
The handy thing of using wood glue for the fabric edges instead of having to do tiny hems or cut with my modern pinking shears when I want to do trim will definitely come in handy in the future.
I also saw this as my first try with doing box pleats, and it wasn't much harder than the knife pleats that I usually make. This was my first try with doing box pleats, and with silk taffeta, so in a way it was dry run for when it's time to start on my Gold Handmaiden gown. I definitely want to use the same kind of fabric for it since it was easy to manipulate into straight creases and pleats.
From now on when I talk about this gown I'm going to call it my navy anglaise rather than Snow White.
No comments:
Post a Comment