I would never have been able to build this, so the fact that I have something menhir-like is because of my friend Mathias.
It started with him telling me that he had gotten a stack if styrofoam sheets from a friend. I had planned to buy this kind if sheets, but now I had gotten them for free. It's the dense kind of styrofoam used for insulation, not the white stuff that crumbles into small spheres.
 |
| A stack of styrofoam |
It was heavy, but doable. So we decided to make a massive menhir rather than try to hollow it out.
Next thing was to draw the shape of the menhir and cut it out through all the layers.
Now we had something that looked like a menhir from the front and back, but we had to work on the sides. In order to do that Mathias joined the sheets with a metal rod. Then we realized that it would take ages to cut the shape with the knife. So Mathias simply took his chainsaw and freehanded it.
No it's not going to be a fullsized menhir, but it will hopefully still be impressive. Also by now we had moved inside Mathias and Anne-Sofie's barn. A big barn filled with powertools is not something that I have around my apartment.
The chainsaw worked since the styrofoam is so dense. We got a lot of blue fluff, but it didn't just crumble.
The next day I I started with the final shaping and evening out the worst surface bumps.
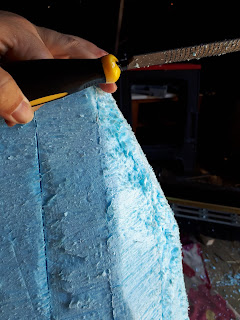
This photo shows the difference between the front that I have worked on and the unworked side.
I then used a heatgun to seal the surface. Now this is plastic you are melting, and there are definitely noxious fumes when you do it. I was in the barn, so basically outside. You definitely need a well ventilated area. I used lightweight filler (lättspackel från biltema) to fill in the cracks. The top and bottom sheets had separated a bit so we used long screws to secure them. I covered the heads of the screws with foam clay.
After two days of work this is where we are. Next weekend is painting, modifying the backpack and attaching the menhir to the backpack.


No comments:
Post a Comment