Monday, 9 December 2013

1780 Robe à l'anglaise (blue)

For the second year in a row I was invited to an 18th century event, with masked ball. Since I did
know about this more than a month in advance I decided to make a more advanced gown this time. I also knew about a big 18th century masquerade that was going to take place in the autumn, and felt that this smaller event would be a good reason to try out a new pattern, before making a proper costume. I ordered Reconstructing History 822 and 6 meters of really cheap poly satin. I did the lining in some muslin that I found in my stash, and I first cut out the muslin before cutting the satin.

 The pattern itself is one of the readily available ones. It's obviously inspired by the same gowns as Arnold has in Patterns of Fashion, so if you are more confident than me when it comes to scaling there is no need to buy this pattern.

One thing that is obvious is that the back of the gown to the right has a waist seam, something that isn't in the pattern. For this first trial version I decided to stay close to the pattern and used the "en fourreau"-styled back. There are a couple of issues with this pattern, but for this first version I decided to stay quite close to it. I't s also quite some time since I made it, but I think I only did some small adjustment at the sides seams, mainly taking it in. I possibly cut the neckline wider as well, since I felt that it was too demure for my taste.

One main problem with the pattern was the sleeves though. I don't know how they have been scaled, but they are huge. Thankfully I sewed them in muslin first, and eventhough I tried to ease and gathered the sleeves according to the instructions I ended up with something more like late 19th century leg-of-mutton sleeves than 18th century. I tweaked the pattern by pinning, drawing with pencil and cutting away at the shoulder head. You can see the picture where I've put the original sleeve under the new one that I managed to created.


 Here you can also see when I have pinned both sleeves on to the bodice. Even with my tweaking of the pattern I still got quite a bulge at the back of the sleeve. After having done this pattern three times I've started to realize that I need to work more with the shape of the arm scye, but I didn't know that at this stage. An unfortunate side effect of the tweaking of the pattern is that the sleeve also got a lot shorter. It used to go below the elbow, now it ends just right at it. With this gown I could hide that by adding some flounces in the same material as the gown.

For the flounces I also used the pattern that was included, but I've gotten better result from some online tutorials on flounces on ruffles. Since this was a test dress I didn't hem the flounces but simply used my modern pinking shears. The trim around the neckline and down the front was a wide ribbon that I made by sewing a tube of fabric together and boxpleated. It's a bit too bulky, so if I want to make a box pleated trim in the future I want to either make tiny hems or use bought ribbon.

Just before leaving for the event my pocket hoops broke though, and the damage was irreparable. I dug up my old "travel bustle" from my 1880's walking gown, adjusted some of the ribbons that held it in shape, and voilá I had a suitable 18th century bumpad. The thing with the "travel bustle" was that it was just made from soft materials, no boning, it's basically a stuffed pillow with some flounces over it, and that made it easily adjustable.

I reused the petticoat from the previous year, it didn't hang properly without the pocket hoops, but nothing that wasn't impossible to fix with some safety pins.


All in all I was pretty satisfied with my first attempt at with a robe anglaise. The problems that I had, mostly with the wrinkling were things I anticipated due to the quality of the fabric. It's nice and shiny, and I get more attention and comments in this one from people than when I wear my more accurate cotton anglaise.

I'll use this as my "the public want's a pretty and shiny dress"-gown.

Saturday, 7 December 2013

A pair of stays (18th century corset)

Individual pieces, with the boning channels
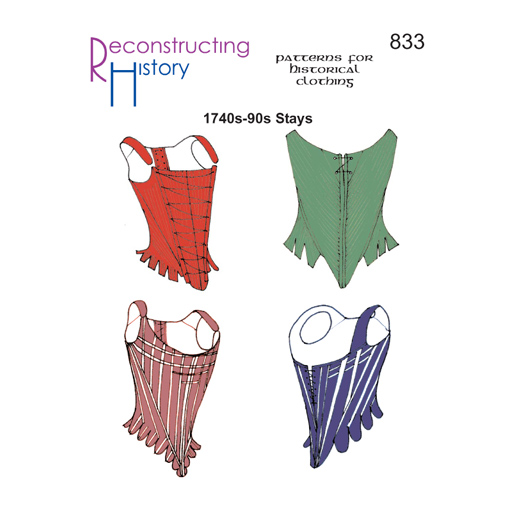
This winter I realized that if I wanted to go on and make proper 18th century gowns, then I needed proper underwear. I ordered a corset pattern from Reconstructing History, and material from my favorite corset supplier, VenaCava Designs in the UK. I wasn't too impressed with the pattern. In the end I didn't care much about the instructions, but rather followed my instincts and what I have learnt from years of making corsets. One thing that the pattern wasn't clear on was the boning placement, so I improvised and I'm not totally happy about the final result. If you buy a pattern from Reconstructing History you should be aware that they run big. Instead of just picking a size, I made sure to measure my upper body and then pick a size. Still the stays ended up too big, so I had to take in quite a lot from the side seams. Not an easy thing since I had made all the boning channels before sewing the pieces together. I had aimed for a gap in the back of about 10-15 cm, instead I just have a gap of around 5 cm, so if I loose weight I might not be able to adjust it much.

I will say though, that even if I sound critical I'm really happy with the quality of my work and the final look of the stays.


Finished stays
For the strength layer I used heavy cotton canvas, and the outer fabric is a piece of fabulous silk brocade that my mother bought when she visited China in 1992. I just had a scrap left, but it was enough to make the stays. For the first time I used synthetic whalebone for the boning. Up until now I've been weary of using plastic, having preferred to use steel boning. The synthetic whalebone works great though. The stays are fully boned, I can't guarantee that it would work as good on half-bone stays. I also used steel boning around the eyelets in front and the back. The eyelets by the way are not accurate, I simply used metal grommets instead of handsewing the eyelets. Metal grommets do hold up better in my experience than handmade ones.

Me with the stays one
My next historical costume will probably be a white gown, so I might have to do new stays, since the strong purple colour might show through the white fabric. If I make a new pair of stays I will definitely change the placement of the boning, so that they go more diagonally in the front, in order to get a better 18th century shape. To me the final shape of the stays are a bit early, more baroque than late 18th century. They do wonders with my boobs though.

Endor Rebel Trooper

Original Endor Rebel Troopers
After having worked on detailed costumes, it's always fun to do something totally different. My project for the spring 2013 was the Endor Rebel Trooper, from Star Wars Episode VI Return of the Jedi. Ok, it was really my autumn 2012 project, but I switched it for Endor Leia instead. These are the strike force that beats the Empire, together with the Ewoks. Funny enough some of the original costumes were made from snow jackets from the Swedish military in the 1940's. Not so easy to get hold of today, but I had a friend who managed to acquire a pair.Not many people in the Rebel Legion go with the snow jacket version though, because it's almost impossible to find them outside Sweden today.

A big differernce with this project, compared to my other costumes, is that this is a costume where you more or less buy ready made parts and just put them together with some finishing touches. The one thing that involved a bit of construction is the helmet. It consists of two parts, a soft inner helmet based on the WW2 AN-H-15 flight helmet. I own one such flight helmet, since it's used for the A-wing costume, and that was a really good help when I needed to make my own version of it from scratch. To make the soft helmet I used this pattern and tutorial.I don't know if it has to do with the pattern being made in American measurements, and then printed on a printer with European measurements, but the size is gigantic. I had to more or less remove most of the middle section, thankfully the ugly seams that were the result of that are hidden beneath the ribbed part that goes over the top of the head. That ribbed part and the bill are differences from the original flight helmet, and the reason why I didn't use my original helmet for this costume. The hard part of the helmet, "the donut" was bought from a maker on the Rebel Legion. This project was a good example of how costumers help each other. I'm a seamstress, so I made the soft inner helmets, and in exchange another costumer gave me the snow jacket, and painted the hard plastic helmet for me.

April 2013
The only thing except for the soft helmet that I made myself were the gaiters, the tubes of fabric that go from the shoes and up the lower leg. Everything else was found, and most of it on ebay since I don't live close to any military surplus store. I've heard of people simply walking into such stores and more or less coming out with all the parts needed for a costume. The gun is a repainted and slightly modified Hasbro rebel blaster nerf gun.

Even if I didn't construct the costume parts, I still had to camouflage paint them, to get a proper pattern. Pre-made camouflage fabric is wrong both in colour and when it comes to the patterning. I bought a couple of cans with spraypaint in different green shades, from olive to light green. I then covered my whole bathroom with plastic and started to spray. I had also teadyed the snow jacket before starting the camouflage painting.

I debuted the costume at Model Expo in Finland 2013, where the Fins had built a whole Endor set, including a speeder bike and an AT-ST in life size.

This is also a fun costume in that now I have the basic configuration, but then you can basically add as many bags, pouches, guns and other details as possible. I hope to one day have a proper, big, rifle for example and I want to make a vest to go over he snow jacket as well.

Status: active
Me vs. AT-ST

Tuesday, 3 December 2013

SSFGFC Stockholm, costume report


So this weekend it was the largest annual event in Sweden, and one of the largest in the Nordic Garrison's/Base's troops. It was the Scandinavian Science Fiction, Games and Film  convention in Stockholm. This year there were more than 50 troopers from the Nordic Base and Garrison, as well as our friends from the Russian Outposts (both Rebel Legion and 501st). It's definitely so that our stand is one of the main attractions of the conventions. Usually there is a photoshoot opportunity, with Star Wars characters, and a the chance to shoot stormtroopers with nerfguns, blast-a-trooper. This year we were bigger than ever so we had two photo backdrops. One with a death star corridor, where you could get photographed with the Nordic Garrison and one with the Endor bunker, where you had the Nordic Base.

Costumewise I had decided to use my Amidala Purple travel gown. I love that costume, it's impressive, and I also realized that I hadn't trooped it at a major event. Then I also wanted to premiere my jawa. Well then I heard the news that we were going to have the Endor backdrop, and that we would have members costume as Return of the Jedi Han, Chewie and Luke, so I felt that I really had to bring Endor Leia as well.

The thing is though that I got scheduled quite a lot to be in the photostand with my Amidala, since it's a face character and people usually want to have photos with face characters. On Saturday I realised that it simply was impossible to change quickly between Amidala and Leia, due to the fact that Leia's hair takes a good 30-40 minutes to get right.

So here's the costume breakdown.
Mara Jade, R2D2 and Queen Amidala
I wore Amidala on Saturday morning and almost all of Sunday. Most reactions I get is "look at the pretty princess", but that's ok. The costume is a bit hard to pose in fun ways, after all it's a regal and sombre costume so I'm mostly just tsnding there. It's starting to show that it's almost  two years old, and even if I haven't worn it a lot I should make an overhaul of it. There are a bunch of small things that needs fixing.

One thing I did this time was to add two of my 18th century petticoats, and what a difference those made. With just one ruffled petticoat there has been a tendency for the hoops to show through and to have the outer skirt stick on to the hoop skirt. With two simple petticoats and a ruffled petticoat I had the best silhouette and behaviour of the dress that I have ever had. I also need to do something about my hairpiece. It's set on to a hard plastic alice band, and it presses on the sides of the my head and gives me headache. I'm thinking about doing two individual hair "buns" that I can clip on to the top of my head and get rid of the alice band.

Endor Leia and ewoks
Endor LEia is one of my favorite costume, since it's so comfortable, and you can act out a lot more than with Amidala. The tricky thing is the hair, and I was lucky to get help to fix the hair, wich meant that I didn't get neckpains, since I have a tendency to pin the braided buns on too low. I need to redo the closure of the shirt, like many busty girls I have a bit of a problem with gaping and I fix it with safety pins, but it would be nice to have something more permanent. The boots are in for a replacement, they have started to burst, but an alternative would simply be to cover some cracks with black paint.

I also had to take care of the ewoks in this costume. One is a doll, but the other is a a child of our Finnish members, and when we had a parade the ewok could go in it if I looked after it.


this jawa found a broken droid
The third and final costume was my jawa. I didn't have time to wear it for any official things, but in the last hour of the con, both on Saturday and Sunday, I could slip into it and just run around on the con floor. I can hardly see in it, but I can orientate myself, and the hood has three layers and is pretty hot, but the robe and shoes are really comfortable. Now with the convention being held at the start of the holiday season I also decided to do a gingerbread jawa. I simply pinned some white strips and roundels of white fabric on to it and ran around handing out gingerbreadcookies

and this jawa handed out cookies


Monday, 2 December 2013

Endor Leia

Original costume
2012 was probably my most productive costuming year, yet. I ended up making one final costume. In preparation for the 30th anniversary of Return of the Jedi, I wanted to make a costume from that film. A bunch of us in the Nordic Base had agreed on making Endor Rebel Troopers, but I also wanted to make Endor Leia. Technically it's the costume that she wears at the briefing scene before going down to Endor, since I haven't made the poncho for Endor yet. This also shows how much comfortable I am with sewing than anything else. The Endor Rebel Trooper is basically a costume made up of ready-to-wear items, that just need some camouflage paint but I still finished Leia quicker, even though that involved sewing the pants, the blouse and the vest from scratch.

I can't really say what patterns I used, both the trousers and the shirt were copied from the sewing magazine Ottobre Woman. The trousers are in a light blue stretch twill, and I must say that wasn't easy to find, but in the end I found it on ebay. This was my first ever pair of fitted trousers and it worked quite well. I've also sewn a piece of elastic that I can put under each foot to make sure that the trousers don't move up the legs. For the golden stripe along the leg I first used shiny satin ribbon, but I didn't like that. I upgraded the costume for Celebration Europe II when I simply cut a long piece of a dull, but gold coloured, fabric I had in my stash and sewed it on instead. One difference between the original costume and my trousers are that I also had to add in darts in the back. I simply have to take a lot more curve into account than the person who did the costume for Carrie Fisher.

finished shirt
The shirt was also a pattern from Ottobre Woman. The most important thing when I looked for the pattern was that I needed a pattern with the correct collar shape, all other things could be fixed. Leia also has two pockets, one on each sleeve, and I followed the instructions that I found on this site. The pattern that I used was very similar to the pattern on that site as well. The finished shirt looks really good, but the fabric is quite warm and doesn't breathe.

For the vest I used the pattern for the shirt, but I removed the collar and the darts. I then freehanded where the stitchlines should be. All the seams on the vest are purely decorative in my version. Finding fabric for the vest was one of the thing that finally made me give up on ever finding a good fabric in any of the two fabric stores in town. I went in and asked if they had any twill fabric, and the people looked at me as if I was crazy. In the end I had to make do with an old grey bedsheet that I flatlined to grey hobby felt to give it some weight. If there is one thing I'd like to redo on this costume it's the vest. I've studied the original a bit more and realised that some of my decorative stitching should actually be seams for a pocket, and I would like to do it in a better fabric.

To make the hairstyle I took my Leia wig, that I had bought for the cinnamon bun hairstyle. I divided it into four parts and braided them. Those braids where then looped in a figure 8-pattern at the nape of the neck. I have to put it quite low or else my own hairline would be visible. I then took some loose hair and made two single braids. Those two braids are then pinned from under the figure 8-bun, over the crown of the head and then back under the bun. Leia can wear this hairstyles in two ways, either without or with a leather cord braided into the front braids. She has the leather cord in the hair in the scenes after she's been to the ewok village.

The belt was picked up on ebay, the wrist communicator and the rank badge were made by two different friends. The boots were found at a local thrift store, I'm still on the lookout for black boots with a wood coloured heel though, and the blaster was made by a person who did a run of Leia blasters over at the Rebel Legion forums.

The I had it finished in December 2012, unfortunately those pictures disappeared when my computer crashed in January, but I wore the costume to Celebration Europe II in July 2013. For CEII I had upgraded the costume to a new stripe on the legs, my first was a shiny satin ribbon, this new is made from a duller fabric. When I wore it at CEII it was heatwave, so ignore my sweaty and blank face, and that my wig didn't stay on properly. In fact I almost got a heatstroke from wearing this much clothes and a wig that day, thankfully my hotel was close enough that I could rush home, drink a lot of water and take a really long, cold shower. The holster and the pockets are made out of faux leather and without any real patterns. If I learn how to work with leather it would be great to upgrade them to proper leather instead.

This is a very comfortable costume, but to be honest I always feel very self-conscious when I wear it. I feel as if people are staring and judging that I don't have the same bodytype as Carrie Fisher. I'm happy to wear it in a group of other Endor rebels, but it's not as fun to wear when I'm on my own. The pictures below are from Celebration Europe II, unfortunately I had a computer crash just when I had finished the costume in 2012 so I lost most of my construction pictures and pictures of the original finished costume. I look a bit tired and blank because these pictures are taken during a 30 degree day in Germany, and I'm wearing a full wig, leather boots and two layers of warm clothing. In fact after this photo I more or less had to rush over to my hotel and take a shower because I was on my way of getting a heatstroke.

Status: active (and I really want to make the poncho that goes with it as well)

July 2013
July 2013

18th century; a striped and a fancy jacket

After the purple travel gown I thought I would take it easy with sewing complicated things for a while, but then I got invited to an 18th century event, including a masked ball. I hadn't done any historical costumes since my failed pink ballgown, but I had always wanted to do some 18th century.

With the time frame I had I realized that I wouldn't be able to make anything too complicated, but I still wanted to give it a try. I also was lucky in that I already had a pair of stays, 18th century corset, that I used under the purple travel gown. In the end managed to whip up two costumes in less than a month.

As mentioned I already had a pair of stays and I used this pattern to make a pair of pocket hoops. The shape was really good, but for some reason they had a tendency to collapse. If I go back to this style of dress I will definitely make a new set of pocket hoops and see if I can figure out what didn't work with this first pair.

1760s everyday dress
The under garments were the same for the two costumes, and then I made one day and one evening ensemble. The day ensemble was a simple jacket, made out of a pair of curtains I found at my mother's home. I was very happy when I went to the V&A museum in London later that autumn and found a jacket in very similar colours and stripes. This is actually the most accurate of the two costumes that I made, even if it isn't the most flattering for any figure. I used the these instructions from Durán Textiles. It is lined with unbleached cotton. The petticoat was made from fabric I found on sale, and the only thing I spent some money on was the straw hat. I also added a fichu and apron, out of cotton voile to complete the ensemble.

Status: active (I also lend it out to people who want to try 18th century, since it's fits almost any body and size)

The other costume was a fancier jacket. Or rather it looks fancier, when in fact it's less accurate and I did a lot more of experiments with it. For this I actually cut up the skirt from my 1860s ballgown and cut up the fabric. This was a test, so I didn't care that much about the quality of the fabric, and in fact I've already cut up the jacket to use the sleeves as a pattern for other 18th century gowns. The pattern was the jacket C from Pattern of Fashions I, page 26. My sister had this pattern, but she's a petite and I'm not. We enlarged the pattern, and I think it worked ok. It got a bit small, so I had to add a stomacher in the front, but the sleeves were really good. All the wrinkles come from the fact that there is no boning in the front so it isn't stretched properly, and the awful satin of course wrinkles if you only look at it.
1760s fancy jacket

To pimp the jacket a bit I added some white voile that I cut up and simply gathered to make a collar, and some more of the voile was used to make the flounces.

The skirt was also fabric on sale, I found it online and thought that it would be a lot more blue than it was. Still I like the skirt and would definitely like to make a new jacket to go with it some day. I'm not going to use the jacket again, I have lent it to a friend who wanted to try 18th century once, but I have journeyed on from this first attempt. I have cut out the lining of the sleeve so that I will be able to use that sleeve as a pattern for any future sleeves though, since this is my best historical sleeve pattern so far.

Status: inactive


Sunday, 1 December 2013

Amidala's purple travel gown

Original costume
2011 was my most intense costuming year, and still the female tusken was the only one I finished during the year. Most of the summer, autumn and winter 2012 was spent on making Amidala's purple travel gown from Star Wars Episode I, also known as the funeral gown.

This was a costume that I had dreamt about since 2000, but I never thought that I would actually make it. It would be too expensive, it would be too hard and so on. In 2011 I decided that it was time to make this dream costume though.be  I also decided that I shouldn't be cheap or take short cuts, which explains why it took so long. This is my most expensive costume, and the one that I've worked the most with.

Most of the photos I used as reference photos for the project can be found here. They were taken when I saw this dress at Star Wars the Exhibition in London in 2007 and Örnsköldsvik 2008. All my progress photos were gathered in this photobucket album, and it also includes the failed first tries with the tiar.

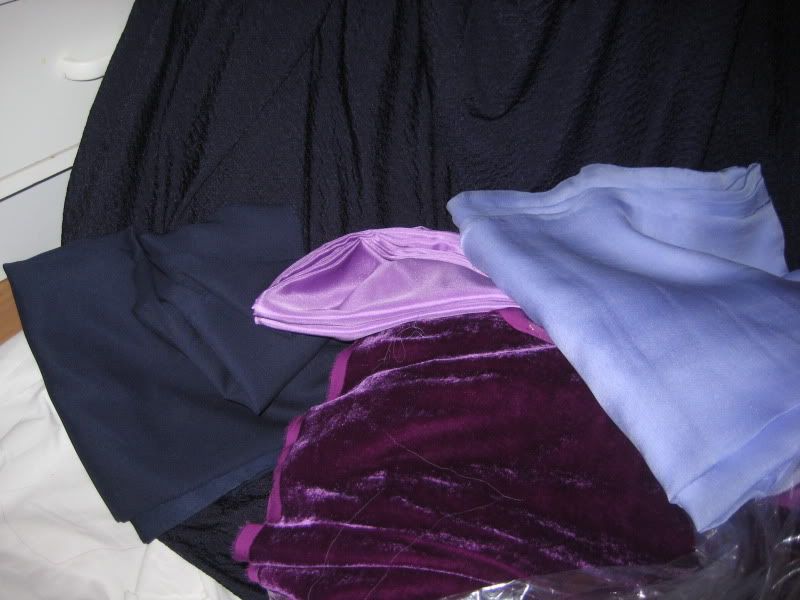
The first thing was to find a suitable fabric, and that took me several months before I finally decided on a shade of purple. In fact I had it custom dyed, which means that I still have a lot of nice, purple silk velvet in my stash, since the minimum order was 10 meters. The skirt is a navy, brocade jersey. I wanted to have a fabric with a really nice structure, the jersey means that the skirt is quite heavy and doesn't "flow" though. All the other fabrics were different silks that I found on ebay, I bought a lot of swatches and chanced before finding fabrics that I was happy with. In fact I could make a full ball gown just out of the fabrics that I had ordered but never used for this project.
First photo try to compare the fabrics with and without flash
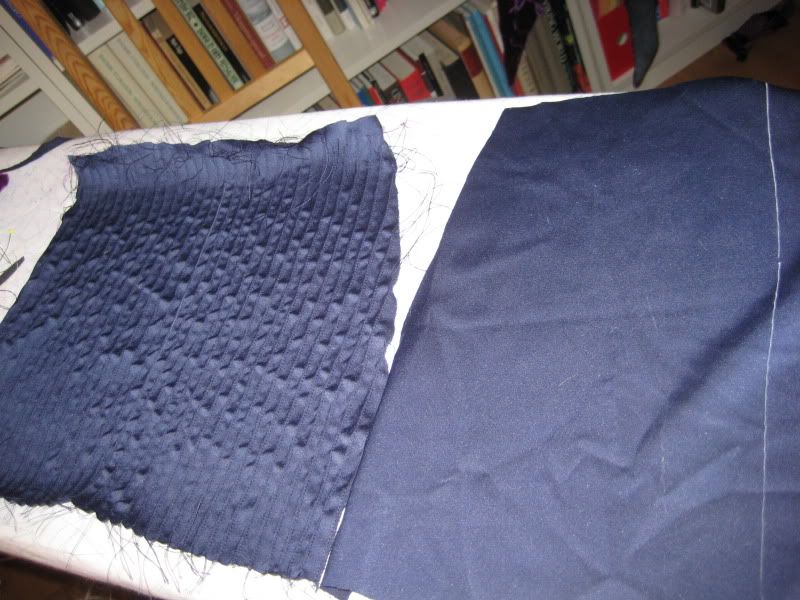
The fabrics that I used in the end was custom dyed silk velvet for the outer coat, navy jersey brocade for the skirt (the bottom fabric in the picture above), some kind of blue dense and shiny fabric for the innermost sleeve (the lighter navy fabric above). That was the only fabric I just stumbled upon in a store, the rest were bought online. The pink/purple fabric was my first swatch of fabric for the middle sleeves, both the colour and the fabric itself was too light though so I exchanged it for a darker purple silk satin. For the veil I used a very light purple silk chiffon. One common thing with these fabrics are that they are almost impossible to photograph and get the right colour. Depending on light the velvet goes from almost navy to bordeaux, and the silk chiffon varies between blue and pink. On the other hand on my photos of the original gown the colours are very different as well depending on light.

The first step in the construction was to have suitable undergarments Teenage Natalie Portman is a lot flatter than me, so I first made a pair of 18th century stays just to flatten and smooth out my upper body. This was my first try with making stays, and I tried to enlarge a pattern from marquise.de. Unfortunately I once again failed with this, so I got a pair of stays that were way too big in the front. Still they worked for this purpose of just providing a shape. Some kind of boned support undergarment is necessary to carry the weight of the skirts and the coat. I've tried to wear it once without the stays, since I was in a hurry to get dressed, and in the end my back hurt a lot. With boned stays it's the bones that carry the weight, and of course also gives you that regal posture that a queen should have.


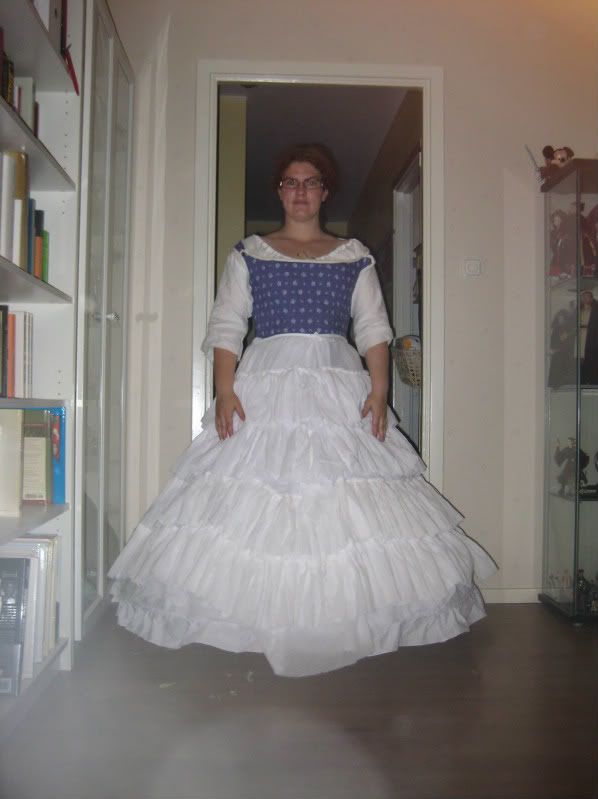
Under the stays I'm wearing a linen chemise. It will never be possible to wash the velvet coat, that would ruin it, so the chemise is essential to make sure that sweat and dirt don't get to the coat. I used linen for comfort, there is a reason why that has been used for undergarments through all times. For the petticoat I used the bridal hoop skirt that I had bought for my 1860's ballgown. The pyramidal shape mimics the original quite well. Here it is also a question of proportions. My skirt is bigger than the original, but since I'm also wider than Natalie Portman I felt that a full hoop skirt gave me the best proportions. Over the hoopskirt is a flounced petticoat in cotton voile. The bottom ruffle was made out of the same fabric as the skirt, so that it wouldn't be visible if it peeked through. Unfortunately the heavy jersey in the skirt means that the hoops are visible when I walk, even through the petticoat, and the hoop skirt gets quite flattened.* It looks good when I'm standing though.


pattern base for the coat
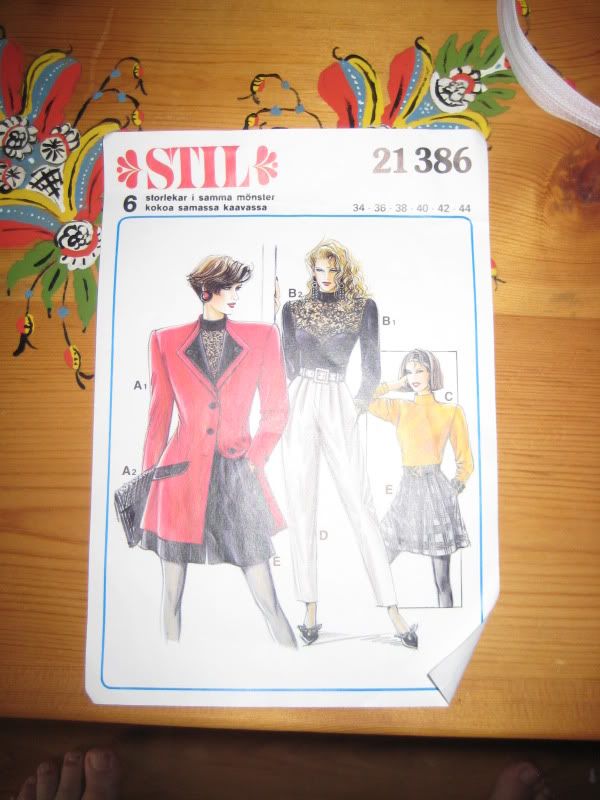
The main challenge was the outer velvet coat. I would never try and drape my own pattern, but give me a pattern as a starting point and then I can change it so that it's almost impossible to recognize. For the coat I started off with this pattern, from my sister's stash. It's some kind of quite ugly 1980's ensemble and I chose to work from the red coat/jacket pattern. What I looked for though was a front with darts instead of several pieces, a flared skirt and a seam at the center back.

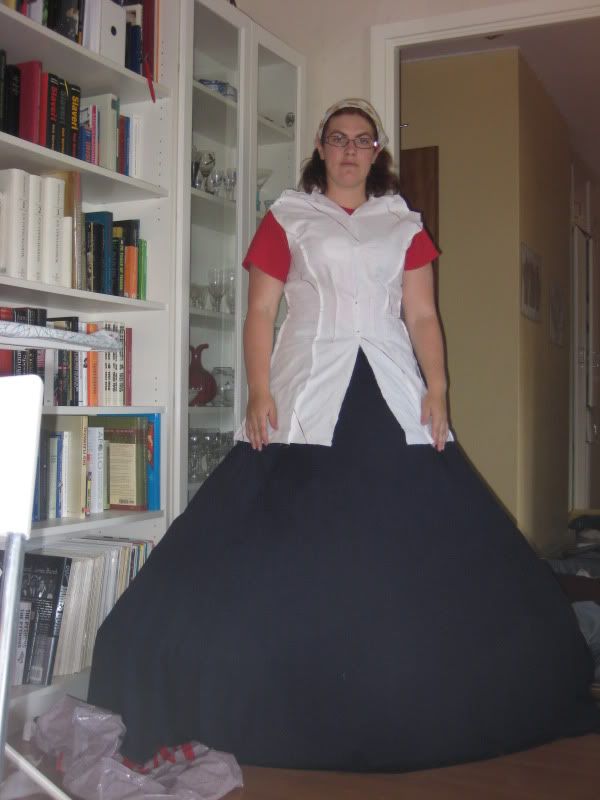
Then I started to fiddle with the pattern, and a lot of old beds sheets. I sewed up the center front seam, so I had to remove excess fabric from the turned up collar. I had to change the seam at the shoulder and remove excess fabric, since I wasn't going to use shoulder pads. Then I had to make sure that the whole bodice fit tight, and not like a coat.
first stage of the muslin
 I added extra fabric to make the full length points of the coat in the front and the back. One important thing here is that the front point aren't really angled. They are as straight as the center front seam, and it's only the huge skirt under that make them point to the sides. For the sleeves I used the sleeve pattern from McCall's 4491, my Lord of the Rings pattern, sewed it up according to the pattern, and then cut it up where I wanted the openings to be. The full sleeve is open all along the upper part of the arm.

last stage of the muslin
When I had pieced together my first muslin I cut it up and made a version two of the muslin, where I made sure that the front, back and sleeve were all in one piece each. For this stage I only made half the muslin, since I only wanted one pattern piece that I could use for the final pattern.


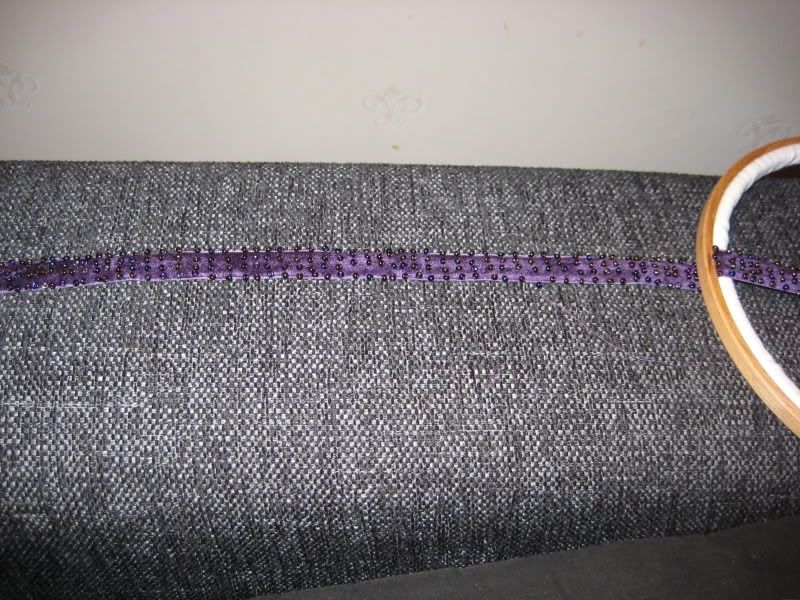
 When I had gotten this far I was actually quite nervous to start cutting into my very expensive velvet. Instead I turned to making the beaded trim that criss-crosses around her "hairbags". I couldn't find any beaded trim, so I bought several rolls of velvet ribbon and then I sewed on a couple of thousand beads to them. Just this stage took me around 1,5 month to finish.

beading, beading, beading
Then some things happened in my personal life that simply made me take a break on the project. That meant that when I finally had energy to start again, well then it was only two months left until the 3D premiere of Star Wars Episode I, and that was my set date for the whole costume.

The colour is totally impossible to photograph correctly
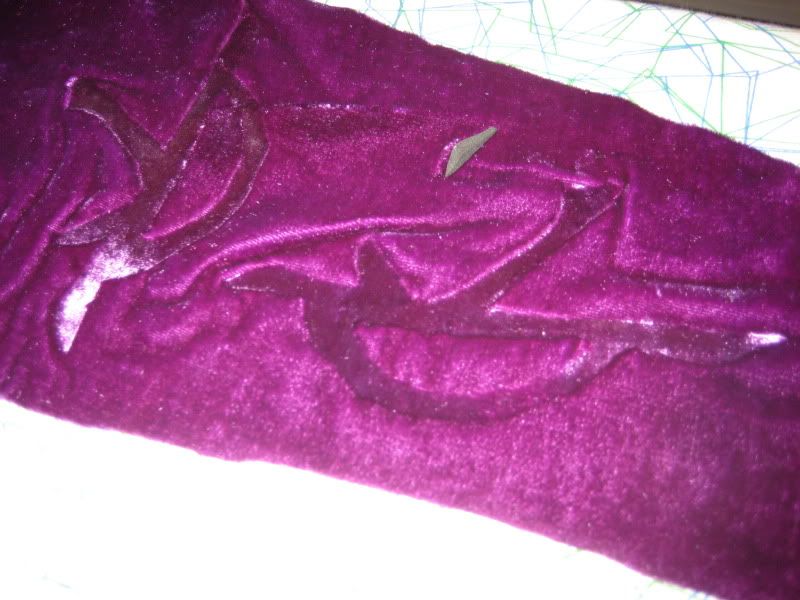
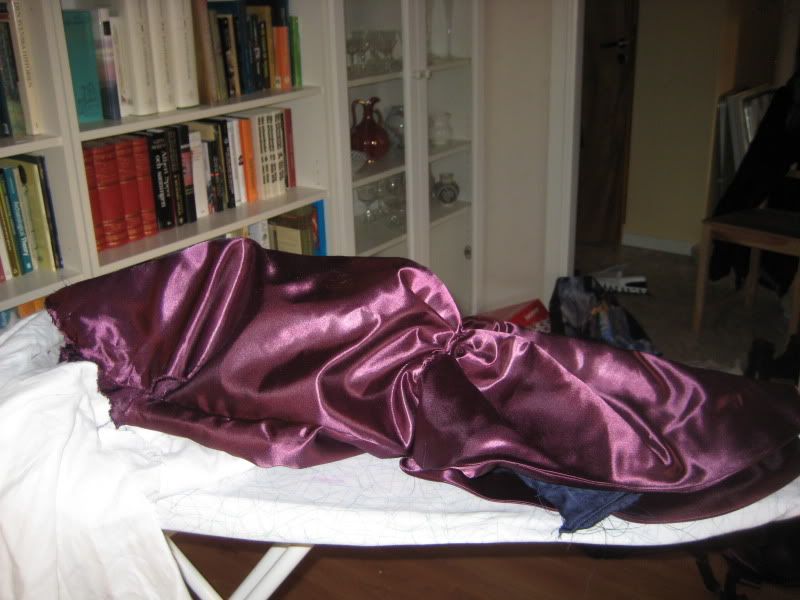
I cut the fabric, but that wasn't enough. Before I started to assemble the coat I had to print the pattern all over the fabric. I read up quite a lot on printing/stamping velvet, and I didn't dare work with chemicals for embossing it. In the end I made a simple stamp out of craft foam and used an iron. The stamp also had to be strengthened with some wire to keep its shape. The technique is to first wet the velvet, then you put the stamp on your ironing board, put the fabric over the stamp, with the right side down, press straight down with a hot iron until it stops hissing and then lift the iron. I used an old iron that I borrowed from my mother, that didn't have any steam function. And I should also say that I turned the coating of my ironing board purple after pressing a lot of damp velvet on to it. This also took me around one month to finish.

Then it was on to the sleeves. They consist of three layers. Two inner sleeves and the outer velvet
one finished inner sleeve, the other without the tucks
sleeves. For the first layer of sleeves I made narrow tubes from the elbown and down to my hands. The original sleeves are ribbed, and I recreated that by doing row after row with pin tucks, my pin tuck presser foot was a life saver here. The middle layer is a big, puffy sleeve with a petal shape opening that is then folded back. It's a bit hard to explain, but Cassandra has a good explanation of the sleeves in her costume diary.


big, puffy sleeve
 I can't really remember, but I think I used the sleeve pattern from McCall's 3797 for the puffy sleeve, and freehanded the petal shape. I then sewed the narrow inner sleeves to this middle sleeve.

With the inner sleeves done it was only to start assemble the whole coat. The points of the coat and the big hanging parts of the sleeves where lined with faux leather. I know that the views on this are divided among us who have made the costume. I only say that the leather/faux leather makes the coat very heavy, but it helps a lot with keeping the shape of the points, especially in the front where the tip of the points are actually on the floor, in front of the gown itself. The faux leather was originally black, but I dusted it with a thin layer of gray/silver spray paint to give it a lighter and more shiny apperance.

At the front there is also a stomacher, which is basically a triangle that goes from the shoulders and end below the waist. I think that in the original it's fastened on, and then you have to closure of the gown under it. I sewed it on permanently though and have a zipper in the back to get in and out of the costume. The zipper can't be seen under the veil. From the shoulder seam and down the sleeves there are also a row of buttons, self covered in the same fabric as the coat. These buttons are the only thing keeping the sleeves shut, and still allowing the undersleeve to peek through. I have sewn everything though and just added the buttons as non-functioning decorations.
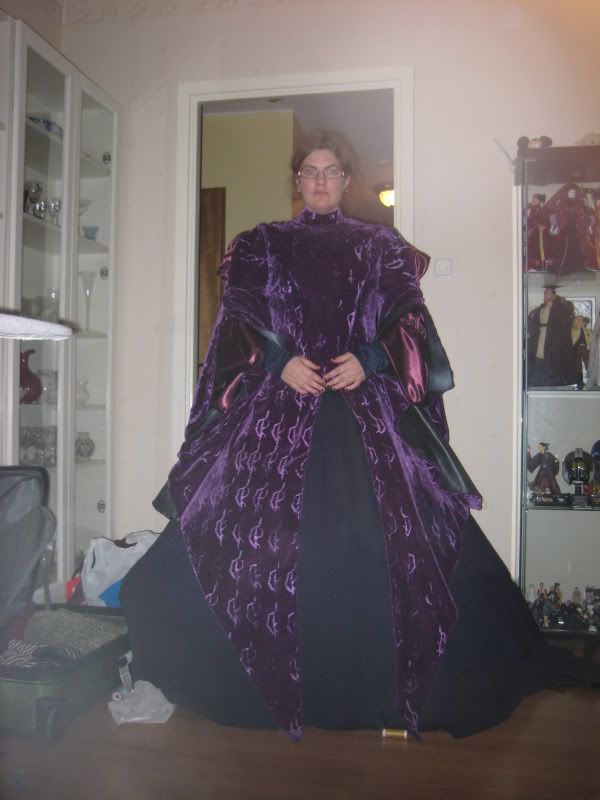
finished skirt and coat
The veil silk chiffon that's draped over a hairpiece. Or rather in my case it's actually just an alice band with a structure of craft foam glued to it. One day I would like to make a proper hairpiece, but to be honest it's invisible anyway. Framing the face are two "hair bags". They were trickier than I thought. I first made a bag, but it was too round. In order to get the flat shape I cut it out in batting, covered that in one layer of the silk chiffon, and then I made a casing for them out of a second layer of chiffon. I want to emphasize that quilting batting, the flat kind, is a lot better to give the right shape rather than just sewing a tube and stuffing it with something else. The hairbags should be flat.

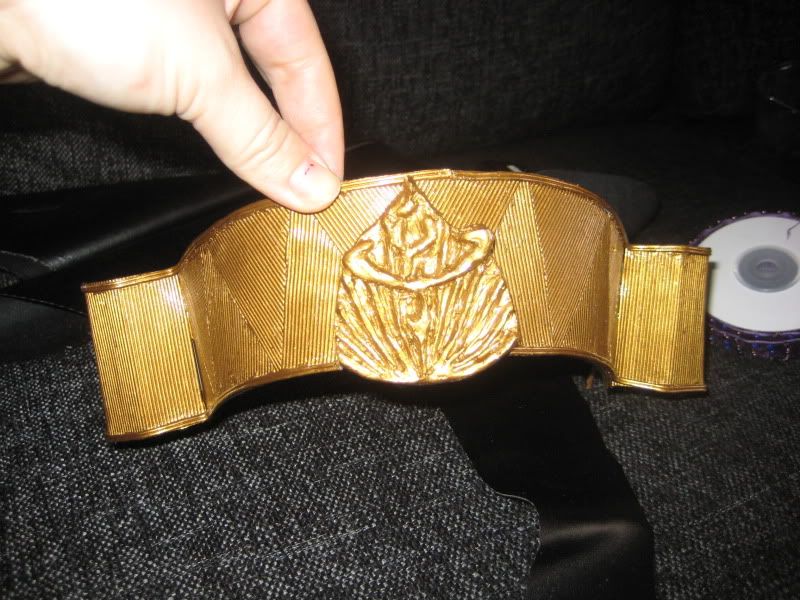
Then the beaded ribbons were sewn on to the hair bags. If there is one thing I want to change with this costume it's the veil and the hair bags. I was in a bit of a hurry when I made them and there are are some issues with the hair bags. Also the original is made in a changeant chiffon, that I simply couldn't find. I have the right texture, with small ribs in the fabric, but I would love to get my hands on changeant chiffon for this.** Also the original has some kind of beaded decoration in the corners of the veil, and I haven't added that. The wonderful tiara was made by a friend of mine who gave it to me as 30th birthday gift.


The tiara
All in all this is the costume that I'm most proud of and I definitely think it's worth all the time and money that I put into this.

Status: active

* The problem I've mentioned at the top with the hoops of the hoopskirt being visible went away when I added another petticoat in 2013. I simply added one of my thin cotton voile petticoats from my 18th century wardrobe and that was enough. Since all the petticoats and the hoopskirt is tied with ribbons around the waist it gives a bit of bulk there, but it's hidden under the sleeves. In hindsight I would have made several thin petticoats rather than the quite bulky flounced one.

**When I was in London in December 2013 I got my hands on changeant chiffon so I'm hoping to have time to redo the veil and the hairbags some time during the year.

Posing with another Amidala in Stockholm 2013

side back view

back view


February 2012

February 2012