Monday, 5 October 2015

HSM Challenge 10: Sewing secrets - inspiration

I'm aiming to have a new costume for Stockholm Comic-Con at the end of October, that means that I can only make a small thing for the HSM challenge 10, especially since three of the weekends in October will be spent like this.

That's me at the K90-ski jumping hill in Örnsköldsvik where I spent Saturday as a distance measurer and Sunday as a jumping judge, next weekend I'm organizing the 90th anniversary for the ski jumping club in Falun, and the weekend after that I'm off to Stockholm to judge a ski jumping competition there.

But back to sewing, and finding a small project that fits the challenge. The challenge is "sewing secrets" - hide something in your sewing, whether it is an almost invisible mend, a secret pocket, a false fastening or front, or a concealed message (such as a political or moral allegiance).

My plan is to make an 18th century pocket. The one I have is a nice one that I've embroidered. When I use it I'm a bit worried that it won't hold up for a totally incorrect phone, or that the embroidery will fray.  I want a pocket that's a bit more plain, but also sturdier. Pockets were supposed to be worn under  your clothes, so in that way they are secret, but I'm hoping to add something more that won't be obvious even for the people that I might show the pocket to, a proper sewing secret.

With that in mind I dived into Digitalt Museum - which is a great database of digitzed collections from Swedish museums. Of course that means that you have to search in Swedish, and there is no really set terminology, it's just what happened to be written either by the person who collected the object into the collection, or the person putting it up in the database.

A lot of the pockets that have been saved are fancy with beautiful applications, but there are a couple of ones that I feel are closer to what I would like.

Foto: Eriksson, Elisabeth / Nordiska museet
This pocket (kjolväska is the search word in digitalt museum) is dated to the late 18th century and it's from Älvdalen in northern Dalarna, the region I'm living in. I like that it doesn't have too much trim, I've seen these kinds of pockets that are totally covered with applications, and I really like that it's made up of several different fabrics that have been pieced together. I would not be able to make the metal hanger though. The fact that it comes from Älvdalen has also given me an idea on what kind of secret I could hide in it.

Eriksson, Elisabeth / Nordiska museet
This is another pocket of fabric that's been pieced together. The shape looks more like the shape of pocket in Costume close-up. I guess that shows that this kind of pocket was simply quite a universal thing in the western world. This one is from Småland, so not from Dalarna.


The third pocket is from Värmland, and as you can see it's rectangular and not rounded like the other two. This pocket is made out of leather, but what I like about it is the letters, they are probably the initials of the owner, and date.

With that in mind my general idea is to make a pocket out of some scraps that I have. There is a craft café next Monday, and since my other major projects is all about machine sewing this could be a nice thing to work with.

Sunday, 27 September 2015

HSM 15 Challenge 9: Brown - The pierrot

I'm finally done with this project. It was supposed to be a quick project, but it's taken me most of the month. The main reason for that is that I decided to do it all by hand, I stalled when I couldn't decide on certain design choices, and I find it too cumbersome to get in and out of the stays when I wanted to test something.

For those who haven't seen the previous posts of the project here is part 1: Start; and part 2: bodice and sleeves. By then it was mostly finishing touches left, but those are always the things that take more time than planned. First I had to decide on how to close the jacket. In the end I decided to close it with pins, hoping that will make it more flexible in adjusting after my body compared to hooks and eyes. Then I had to decide on trimming. I love the look of ruffles and all other 18th century trimmings, but looking at original pieces I felt that those kinds of trims were a bit earlier than my late 1780's aim. Most jackets seemed to have been pretty plain, that made me also decide on not making any cuffs for the sleeves. I'm also thinking that it's easier to add trim and cuffs at a later stage, if I feel that the jacket is too boring.

Now on to the pictures, and as usual I'm sorry for the blur.

Me in the jacket, from the front.
And from the side, showing the peplum.

I then took off the jacket to get some better pictures, but my dressform is too big and curvy compared to me in my stays, so instead I got a lot more wrinkles. So disregard the wrinkles, the fit is a lot better on me than on the dressform.


There are a couple of things that I'm extra satisfied with and those are the sleeves and the fit of the bodice. The sleeves aren't optimal yet, but they fit well in the armscye and there is no poofiness. I think in order to refine the fit of the sleeves it's more about rotating them in the armscye, rather than changing them, they do pull a bit towards the back now. The fit is really nice, I haven't added any boning to it, and it still sits really snug and doesn't move around the boy. I'm hoping that pinning it together will help with that as well.

This is the first tightfitting garmet that I've sewn totally by hand, my Edwardian blouse didn't have nearly the same strain on the seams. I'm hoping this will prove that my handsewing is good enough to stand up to the wear. Still if I do a jacket like this again I'm not sure that I would totally handsew it. I want the visible seams to be handmade, but there are a lot of seams that aren't visible and there is also the lining.

So just the HSM facts:

What the item is: A pierrot jacket

The Challenge: Brown

Fabric: 1,75 m of brown quilting cotton, 1,75 m of unbleached linen

Pattern: My own, from the basic bodice pattern I made in challenge 6

Year: 1780s

Notions: Sewing thread in brown and white, white cotton bias tape to cover the raw edges on the inside

How historically accurate is it? It's my most accurate 18th century thing so far. I did cover the raw edges with modern bias tape, since I hate raw edgest. The fabric is an 18th century reproduction quilting cotton, so it doesn't have quite the same drape as cotton in the 18th century, still I would say 90%

Hours to complete: Hard to say but around 30-40

First worn: Not yet, all my 18th century stuff has been packed away for the winter so I have nothing to wear it with.

Total cost: $50, the cotton was $30 and the linen $20

Saturday, 26 September 2015

On stage with Weird Al

Last Thursday (September 24) I got do to something I have dreamt about as a Star Wars fan, but thought I would never be able to do, since I live in Sweden. I've heard about the 501st being invited to be on stage with Weird Al Yankovic, but I never thought he would come to the Nordic countries. When it was announced that he was going to perform at Gröna Lund, and the Nordic Garrison got invited, I of course volunteered to be part of the show. The preference was for Vader and stormtroopers, but as long as you had had a character with a mask you could sign up for it. My jawa got into the team, and so I took half of Thursday off to go to Stockholm.

At Gröna Lund I met up with the rest of the troopers, and we even had time go on a couple of rides. I loved their wooden rollercoaster, much more fun than their "big" one. We also got instructions from the stage manager on what we were supposed to do, I guess you could call it choreograpy. We did practice a few times, with and without masks/helmets on, but on the street behind the stage, not on the stage itself.


The Nordic Garrison was just going to be on stage for The Saga Begins, which was the first encore. So we had time to watch the beginning of the show. A lot of the show is showing clips of him and other funny things, and a lot of his performance is trying to mimic his classic music videos. We had to leave to get changed before any or my favorite songs came though (White and Nerdy, Amish paradise).

Then it was time to get dressed. I think this picture shows what quite a lot of trooping is about, cramming a bunch of people with oversized luggages and plastic stuff into a small room and wait. The jawa is a very easy costume for transport and getting changed into, so I only had a small soft bag with me.

Then it was time to go on stage. Only one problem, it had gotten dark. I realized that I couldn't see a thing in my mask, except for Thomas that was in front of me. Getting on the stage wouldn't be too hard, but I got really nervous about getting off, since I was supposed to walk off first and lead the way. Still getting out on stage in front of 6000 cheering people was so much fun. If you want to see me in videos of the performance you have to look carefully though. I'm standing to the far left, out of the main spotlights, in a dark costume, so the only thing you really see are my glowing eyes.

In the end it wasn't so hard to get off the stage either, I guess they are used to taking care of characters with limited vision. There was a guy standing there blinking to me with a small flashlight, and when I got close to him he grabbed my arm and led me down from the stage.

The show was being over, and then we waited, and waited and waited, but finally Weird Al showed up, thanked us for being there and signed some autographs.


Had I known that we were going to get autographs I would have brought my "Running with scissors" CD, the one with The Saga Begins on, that I have some fond memories buying in a record store in Ireland when I was there with the family on holiday and got exctatic about finding.

I'm happy that I got my stage pass signed at least though.

Then it was going back to Falun again. I'm very grateful to my aunt who had planned to go from Uppsala to Falun on Thursday, and she waited until evening, picked me up in Stockholm and then drove to Falun, so I was home and in bed around 3 am.

Saturday, 12 September 2015

Pierrot bodice and sleeves

The work on the pierrot goes on. After I had finished the muslin I decided that I was going to make the pierrot as accurate as possible, meaning fully by hand. I have done handsewn garments before, but this is the first really fitted garment where the seams will be under some strain.

This is what the finished pattern looks like. The one major thng I did was to shorten it with around 3 cm, so that the peplum will be at the proper waistline.


I started with the bodice, and it went together quite easily. I'm using the method in Costume Close-up where you sew the two outer layers and one lining together from the outside, and then then fold the second lining over the raw edges.

The bodice was quite perfect over the bust, but I need to take it in a bit at the waist when I finish the front edges.

With a nice bodice it was time for the sleeves. I've never managed to make a sleeve that I've been happy with. They've always been both poofy and restrictive at the same time. I've said that one of y challenges this year is to create an actual working sleeve pattern. I've spent quite a lot of time googling for sleeve trouble shooting, and the one tutorial that comes back, and is linked back to from various other sites is ikatbag's. Then The Dreamstress linked to a tutorial on medieval sleeves from The completely dressed anachronist. And even if was a medieval sleeve I read through it and there were a couple of things that I got out it.

From ikatbag I took, among other things, the notice that the armscye needs to be snug, you don't get more mobility by making a bigger armscye. From the other tutorial it was the realisation the upper arm's is usually widest a bit down from the sleevehead, meaning that you need to make allowance for that. Looking at the sleeves I've tried to draft it was clear that they were way too narrow in the sleevehead. I wasn't sure on how to start making a new sleeve, but then I realise that I do have a working sleeve pattern that I could adjust. looking at the shape of the sleeve from TV493 it had the same basic shape as a the two piece sleeve in Creating Historical Clothes, just wider. So I traced the smallest size of that pattern and cut a muslin of it. The sleevehead was still bigger than the armscye, but I kept cutting it down until they fit each other.

My new sleeve pattern is in blue, and you can see what a difference it is compared to the previously drafted sleeve pattern. The old sleeve pattern also had a giant dart at the elbow, since with a better fitting sleeve I could make it more snug even without the dart.


The sleeve isn't perfect. Ther are some issues I need to work with when it comes to the fit around the elbow, it's actually bit too big and bunchy there. It's still the best sleeve I've ver made though, and I have gotten rid of the poofyness around the shoulder.

I set the sleeve according to the instructions from American Duchess. I have not finished the neck edge though, so the strap is only attached over the sleeve. For the net time I would like to make the strap longer as well.

I finished the sleeves by covering the raw edges with tape. Not necessary, since the edges were quite often left raw, but I think it looks so much better.

Friday, 4 September 2015

Pierrot jacket start

This week I've packed away my 18th century stuff on the attic. Autumn is Star Wars costume season for me. Still I am a member of the Historical Sew Monthly, and I really want to finish all the challenges this year. The September challenge is "brown", now it's not really a favorite colour of mine, but two years ago I picked up a quilting cotton with a nice 18th century pattern on it, and it's brown wth pink roses. It was quite expensive so I didn't buy more than 2 m (I think), but since then I've always tought it would be wonderful to turn it into a pierrot jacket.

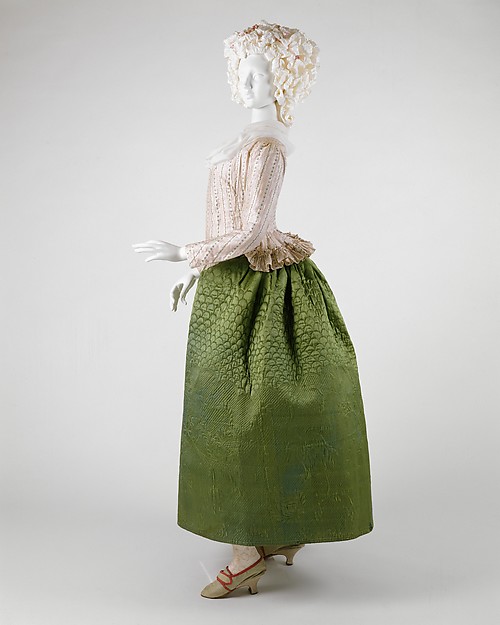
The pierrot jacket was common during the 1780's, exactly where I try to focus my 18th century wardrobe. It's a short jacket with a peplum in the back, but there are some without peplums as well.

http://www.metmuseum.org/collection/the-collection-online/search/80591
The hard thing was to decide what kind of peplum I wanted in the back, and that I would be able to pull off. There are som pierrots where the peplum is cut in one with the bodice.

http://www.flickr.com/photos/8666432@N04/551034851
and there are some where there is a visible waist seam and the peplum is pleated into that.

http://balat.kikirpa.be/photo.php?objnr=109812
When I asked around for advice I got the tip from Åsa to make a compromise, and have the back piece go into the pepluem, but attach the rest of it at the side seam. She has done that in her 18th century caraco. Later Johanna also showed me her jacket constructed in the same way. 

So with that done I got my basice bodice pattern that I made in June and cut out a muslin. I was happy with the back piece, then it was time to cut out the rest of the peplum. On this it was mostly a case of guess work, looking at the kind pattern pieces that Åsa had, and what they look like in Patterns of Fashion, but basically just cutting an elongated piece of fabric and pleating it in different ways until I was happy. I cut the length and shape of the side of the peplum when I was happy with the pleats.


Ignore the bad fit of the muslin. There is no chance that I can get my stays onto my dress form, so it's quite useless for 18th century fitting, but it's still good when I want to attach skirts and the like.

Wednesday, 26 August 2015

HSM Challenge 8: Heirlooms and heritage

Wow, I've finished a challenge with several days to spare. In June you might remember that I posted about my traditional costume, or you can read it here. For the heirlooms and heritage challenge it was a pretty easy decision for me to try and finally adjust my costume so that it actually fits.

This was the fit before the alteration. Now it's not meant to be a tight laced bodice or so, but you can see that it was way too big, especially at the bust. With some help from my sister, who is the one who actually sewed the gown originally, I ripped up one of the side seams. She then pinned the bodice closer to the body. I then handsewed the side seams and attached the skirt again.
Here you can see how much fabric I could remove. It's uneven because I wanted the stripes in the fabric to still match, even with a tigher fit, so I had to take more from one side than another. Also I didn't want to cut away the excess fabric, maybe someone in the future will want to make it bigger, so I just folded and pressed the extra fabric down. I sewed the pieces together by sewing the two outer layers and one of the linings together, and then covering the raw edges with the other piece of lining.

It's a bad picture, but you can see that the fit at the bust is a lot better now.
Here is the gown on my dressform, and eventhough it's not usable for my corseted measurements it's very cose to my natural measurements.

Now this project was taught me quite a few things. It was the first time I used waxed linen thread, and sewing with nice but not too fine linen fabric. I was surprised to see that I could make stitches that were basically invisible against the fabric. I actually enjoyed the handsewing, and now I'm looking forward to doing more of it.

What the item is: a refitted traditional costume from Vika parish, Dalarna, Sweden.

The Challenge: 8 Heirlooms and Heritage

Fabric: Linen

Pattern: none

Year: This is a hard one. The costume was reconstructed in the 1920's, but is supposedly reconstructed from older fabrics and dress pieces found in the parish, but it's still very much used today.

Notions: Black and white linen thread, bees wax.

How historically accurate is it? It's accurate to how the traditional costumes were done in the 1920's. Over the years they have been made in different ways, this is more old fashioned since it's completely handsewn.

Hours to complete: 3, including the fitting.

First worn: Not yet.

Total cost:


Sunday, 23 August 2015

Plastic phantastique report

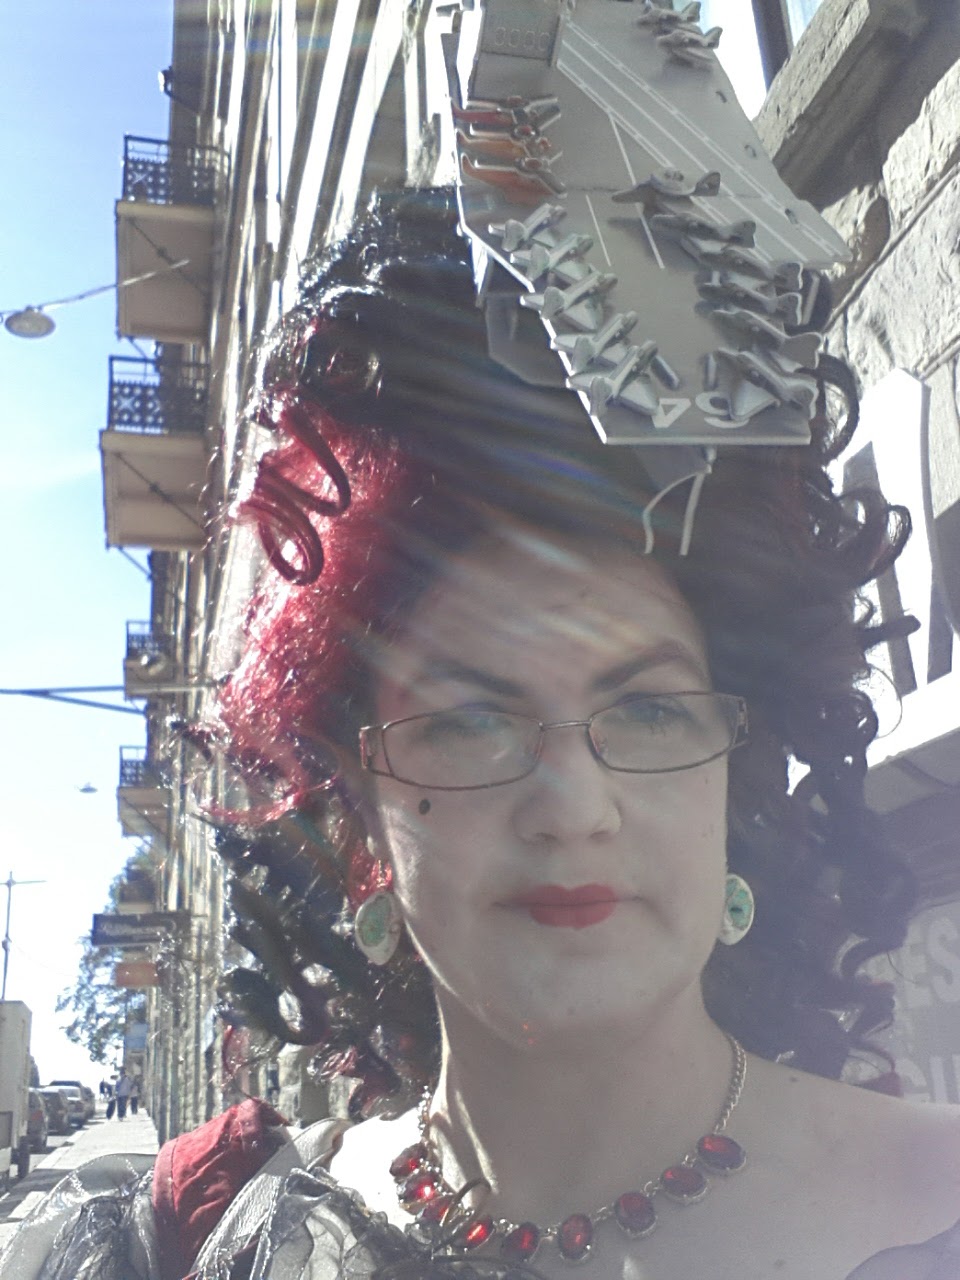
So Saturday it was finally time for Plastic Phantastique. Over my greay tuille pannier and organza chemise I gad made a short gold skirt, by simply sewing a tube of fabric and pleating it to a waistband. Over the skirt I had attached more of the black nylon lace that I had used for the sleeves on the chemise. Over that I wore my desert rose stays, with the rose side out. I went with a rose them so I also wore a pair of tights with roses on them. My main piece was the hair though, since yhis meant I was finally able to fulfill a costume dream of mine.
Two or three years ago me and some people joked about the 18th century fashion of wearing miniature warships in the hair and said that it would be fun to show up to an event with a modern battleship instead of  an 18th century one...Now was the time. I found a 3d puzzle in cardboard and a huge wig om ebay. The carrier was assembled, I had to glue some of the planes on, and tied to the wig with the kind of wire that is used for flower arrangments.
There is something about a hairstyle where I had to be careful not to get stuck in tree branches when walking in a park. Still some people jokingly said that my costume was actually looking too good to fit in. And I must say the creativity that had gone into some of the costumes was amazing.

 Thay is a full robe francaise out of plastic bags from a fabric store chaim.
 Plastic pigs for the right Petit Trianon feeling.
 Thr pink and blue costumes in front are made in bubble wrap.
 Another black plastic bag number
 That there are even fabrics made in those colours.