Friday, 24 January 2014

Costuming elitism

At the moment I'm in a discussion on a forum that could very well be regarded as the height of costume elitism, and I felt that I wanted to get my opinions on this written down.

The first thing I want to say is that it's so easy to be elitist, to judge a costume more according to its faults than its merits, see the flaws in the details rather than the full picture. I know I'm myself has a tendency to do that when I see someone's costume, and I hate myself for it. I'm very conscious about not criticizing someone or bash them. I am part of two organisations 501st Legion and Rebel Legion that can at times be considered very elitist, and in my point of view that's correct when it comes to some individuals within the organisations as well. I think one reason why I haven't joined any historical costuming/recreation groups is probably because I don't want to get involved in the nitpicking of details in yet another field. I can say that I was definitely put off medieval costuming after having read some discussion forums were the use of anything machine sewn was bashed to the ground.

One important thing to remember is that for many people who are new to costuming, they don't "see" the same things as those of use who's been costuming for a long time. I've definitely learnt to pick up on details over the years. A good example is my old picnic gown.
When I did this costume I felt that I had nailed it and I looked exactly like in the film. Then you can compare it to this Rebel Legion's member's recreation of the same gown.
This is the most breathtaking version of the gown that I've seen, and I was lucky to see it forba real at Star Wars Celebration Europe II. If I were to remake the picnic gown this is what I want to strive towards today, but I don't want to forget that once I was very happy with my version.

When I see another costume remember that you don't know what skill level the costumer is  on, and there might be a lot of hard work behind a costume, even if you think it's bad. Not everyone hold to the same standard as you do, and the important thing is to have fun. For the record I've had more fun in my shiny, polyester blue anglaise than in my more correct printed cotton anglaise, since the public sees the shiny blue one as nicer than than the more correct one.

 So what is my point really? I guess it comes down to this:

Never bash another costumer,

instead be happy that there are so many people out there that likes dressing up, or else you would be very lonely in your perfect costume.


Monday, 20 January 2014

Weekend tidbits

My fingers are itching to get started on a project, but I need to wait until my next paycheck until I can order the fabric I need. I might be able to start cutting out some pattern pieces, but that's it.

The last weekend I've spent researching though and here are are some tidbits:

  • The obi on the gold handmaiden gown is definitely smocked (yay for close up photos)
  • The velvet swatch I ordered is too light so I will have to get the velvet for that one custom dyed.
  • The dangly, chainlike things on the revolutionary gown are called equipages or chastellaines in English, would love to find the Swedish name for them. If anyone reading this knows the Swedish term I would be really grateful.
  • I've decided on most of the fabrics for the revolutionary gown, and I'm going to exchange the green colour of the waistcoat in favor of blue. 
  • I've figured out how I'm going to do to the closure on the main gaulle of the revolutionary gown.

Oh, and my sister wants to finally make a corset. I gave her the Truly Victorian 100 pattern some years ago, and she got as far as to buying a busk, but now she wants to make one. Even if I need to make a pair of stays rather than a Victorian corset it will be fun if we can work together on our projects.

In a way I love this phase of just looking at a lot of pictures making plans, then at least they can't go wrong, which tends to happen when you are working on things in reality.

Also I might have to cut back a bit on my sewing for the coming month since I have a writing deadline for a chapter in a book to finish, and I'm writing it in the free time that I can usually use for sewing.

Friday, 17 January 2014

Is costuming expensive?

Costuming is my hobby, and by now I spend a lot of money on it, I can't help it. At the same time I want to make it clear that it is possible to do costuming on a limited budget, I started when I was a student and didn't have much money to spare, and I've seen gorgeous things done on a shoe string budget.

In costuming there is a mantra, and I think it sums things up very well:
a costumer wants a costume
  • fast
  • cheap
  • accurate
it's only possible to pick two out of three though.

This post is my reflections on the cost of costuming, and what the alternatives are, remember though that I only deal with Star Wars and historical costuming from the 18th and 19th centuries, I have no idea for example what it costs to put together an anime or manga costume. Also for all my costumes I've sewn them myself, meaning that I've only counted the cost of fabric, I've never hired a seamstress to do it, something that I know is common and of course gives a costume project a different price tag.

Star Wars
I started out with Star Wars and here you have so many costumes in all price ranges. A general rule of thumb is that armoured costumes are more expensive than fabric costumes.  For that reason rebel costumes tend to be cheaper than imperial costumes. Also since the first films were made on quite a low budget it's easier to find things in the real world that you can use, compared to the prequels where basically everything was made specifically for the films.

I have made good looking Star Wars costumes for under $100, but I would say that most of my costumes are somwhere in the $100-300 range, with Queen Amidala probably around $500-700. These are only estimates. The cheapest costume is Princess Leia, where most of the cost has actually been paying for wigs/fake hair. If you are a natural brunette this is a cost you wouldn't have to worry about. In fact the fabric for Leia's classic white gown was a cheap typical 70's polyester, that isn't even made anymore. As a comparison a Darth Vader or Boba Fett can end up way over the $3000-5000 range.

Historical costuming
When it comes to historical costuming there are a lot of choices to make. What time period, what class in society, can you accept using synthetic fibres? In historical costuming it's actually quite easy to work on a very low budget. I've scrounged my mother's curtains, thrift stores and the like to find suitable fabrics. Today there are a lot of beautiful brocades and the like made in synthetic fibres that cost a fraction of what accurate silks cost.

The cost that's hard to escape is the cost of the underwear. You need a proper corset to wear under it all to make it look good, and unless you are very thin and have no curves, there is, in my view, no alternatives to using proper boning. Still I count that the material costs for a good corset usually end up around $50 for me.

It's when it comes to historical costuming that I've seen my costs go up, up and up though. The reason for that is that after I've tried my hands on working with pure linen, cotton and silks, I simply can't go back. There is something about the feeling of those materials, and the way that they behave when I'm working on them, that I just won't be able to make something out of polyester again. Also it's much more fun to make clothes for the upper classes, and then I want to use silk and nice cottons or linens.

As a comparison here are probably my two most accurate historical costumes.

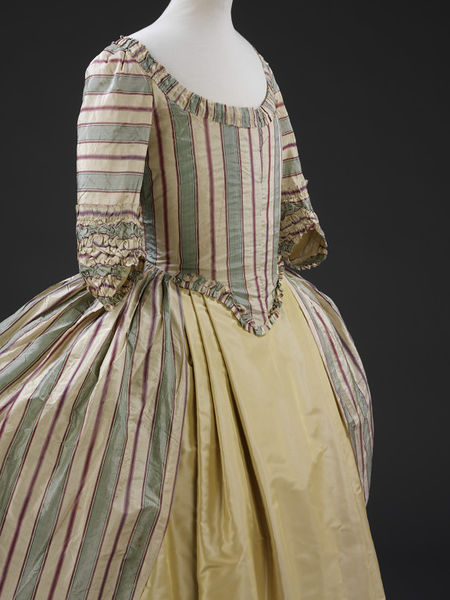
 Here is my mother in my cheap, but accurate costume. She isn't wearing any stays or other underpinnings, since it's a loose fitting jacket. The cost of the material was probably around $10 for the skirt, but the striped fabric for the jacket were a pair of worn out curtains that I got for free. This would still be an appropriate dress for lower upper class or upper middle class women, so it's not a working woman, but it's not exactly something you would wear to court either.

Then there is Snow White on the other end of the spectrum. The materials for this one cost probably around $150, excluding the wig. I also made a new pair of stays and new petticoats for this outfit, but I don't count them into the total since I can use them for other outfits as well. This is totally an upper class gown.

Tools and things
Other costs that come up, but I see rather as investments, are the tools needed. If you want to make everything historically accurate pre 1850 then of course you sew everything by hand, but otherwise a good sewing machine is very useful. I'm on to my second sewing machine since I started, thankfully I've gotten them as presents when the whole family has teamed up for them. The thing is though my first sewing machine was a basic one, and I could never make it do what I wanted. I thought it was because I was pretty much a novice, but since my mother has my old machine now I've tried it there and it simply isn't good. My second machine, and then one I'm using now, is actually a second hand from my sister. It cost probably twice as much as my first, but it's still a non-digital machine with just the basic seams. My sister and I calculated that she must have bought it 12-13 years ago. It's been serviced twice, but I have also put it through some dreadful things, and it still works really well. I guess what I'm trying to say is that if you are going to buy a sewing machine it's worth the extra cost of getting a good quality one.

Another investment that I need to do this year, and I'm thinking about doing it as a birthday present for myself, is a dressform. I've managed without one up until now, and I know so many people that can make gorgeous things without one, but in order for me to get better I think I need to be able to pin and drape fabric onto something else, not just try it on myself.

Using the costumes
One cost that also has a tendency to go up is travel expenses I want to use my costumes, and that means traveling all over Sweden, Europe and the USA. Even for a small event in Sweden it usually means taking a day off work, so I can travel on Friday, paying for train tickets and hotel, and then you add food and drink to that.One big reason why I do costuming though is because I love wearing the costumes and meet other like-minded people. The cost for balls and conventions are so far a lot higher than the costs for the costumes themselves.

Conclusion
When it comes to how I choose between fast, cheap and accurate, I definitely go for cheap or accurate, or I at least try to divide my costs so that I don't have to pay for everything at the same time. I buy one piece of fabric one month, and another piece another month. It takes longer time, but I've learnt the hard way that I'm going to value what I do a lot higher if I spend the extra cash on say a pure silk rather than a polyester. I also like the planning process so I don't mind if it's usually quite drawn out, this of course also means that at the moment I'm already considering costumes for 2015/16.

In the end you can do costuming on any budget, but it's a hobby that tends to get more expensive the deeper you get into it. It's of course also not necessary to go the USA to wear your Star Wars-costumes, but to me wearing the costume is such a big part of the hobby that I'm happy to save up money for all the costume-related events that I go to


Wednesday, 15 January 2014

The rest of the HSF14 challenges

A couple of days ago the rest of the HSF14 challenges were posted and here they are, my comments are in italics after the challenge.

  • #8: UFOs & PHDs – due Thur 1 May.  Use this opportunity to finish off something that’s never quite gotten done, or stalled halfway through.  Check out the post from last year for more information on how to interpret this challenge.  It might seem strange but I don't have any UFOs or PHDs, since I'm only working on one project at a time I finish them before moving on. This might have changed when we get into May though.
  • #9: Black and White – due Thur 15 May.  Draw on the opposite ends of the shade spectrum to create something in black and white, or black or white. This is perfect, both challenge-wise and timing-wise for the main gown to my 1787 revolutionary gown
  • #10: Art – due Sun 1 June.  Make your own masterpiece based on a work of art. Of course if a fashion plate can be seen as art, then I can probably to the accessories for the gown here, I'm thinking the gauntlets and those things hanging from the vest.
  • #11: The Politics of Fashion – due Sun 15 June.  World affairs have both affected, and been affected by, fashions.  Craft something that demonstrates the interactions between dress and political history. This would be the final reveal of the whole 1787 revolutionary.
  • #12: Shape & Support – due Tue 1 July.  Make a garment that changes the silhouette of the human form through shaping and support. I will probably take a break here.
  • #13: Under $10 – due Tue 14 July.  Whip up a fabulous item for under $10 (we’ll use US$ as the de-facto standard) I'm looking forward to finding something in my stash and use it for this challenge.
  • #14: Paisley & Plaid – due Fri 1 August.  Plaid is the most universal pattern, found in the textiles of almost all cultures and periods.  Paisley is more unique and recent, but has had a lasting impact on design.  Make something that utilises one or both of these patterns. I'm not a fan of either paisley or plaid so I'm skipping this one.
  • #15: The Great Outdoors – due Fri 15 August.  Get out into the weather and dirt with an item for outdoor pursuits. No idea what this could be
  • #16: Terminology – due Mon 1 September.  Explore the etymology of fashion by make something defined in the Great Historical Fashion & Textile Glossary (new terminology posts and items will be added throughout the year). No idea, but I guess I'll go through the glossary and see if I find something.
  • #17: Yellow - due Mon 15 September.  Embrace the sunny side with something in any shade of yellow. Not a fan of yellow, but I have that really nice yellow wool I bought in London.
  • #18: Poetry in Motion - due Wed 1 October  Find inspiration for a garment in poetry and song. No idea
  • #19: HSF Inspiration - due Wed 15 October.  One of the best things about the HSF is seeing what everyone else creates, and using it to spark your own creativity.  Be inspired by one of the challengers item from HSF ’13 or HSF challenges 1-18 to make your own fabulous item. I'll have to wait and see if I get some inspiration.
  • #20: Alternative Universe – due Sat 1 November.  Create a garment from an alternative universe: fantasy, steampunk, dieselpunk, etc.  Your item can be perfectly historically accurate within our own universe as well. Considering I'm in for making SW costumes I can probably get something to fit here.
  • #21: Re-do – due Sat 15 November.  Pick any previous challenge and re-do it (or do it for the first time).  It could be one that you didn’t finish, one that you wish you’d had more time for, or any time for, or one where you loved the theme so much you want to do it again. I'll see what happens
  • #22: Fort-nightliers Choice – due Mon 1 December.  This one is up to you!  In June I’ll ask for suggestions for a theme, and we’ll vote to pick the one you most want to do as our 22nd Challenge of the year. Of course I can't decide until I know what the challenge will be.
  • #23: Modern History – due Mon 15 December.  Make something historical or historically inspired that is wearable in an everyday context. Here I think I already know what I want to make. I really like the mittens from Costume Close Up, and I use similar kind of mittens anyway so they wouldn't look out of place in my wardrobe.
  • #24: All that Glitters – due Thur 1 January.  Celebrate your completion of HSF ’14, and the New Year, with a glittery, glitzy, sparkly, shiny, something. No idea
I have a lot less ideas for the challenges of the second half of the year, but that's because my main historical costume is supposed to be done by that and I haven't decided on any other historical projects. I also have a couple of SW costumes to finish in that period so I'm not sure how much historical costuming I'm going to do. On the other hand these challenges may convince me to keep going with historical costumes until the end of the year.

Monday, 13 January 2014

HSF14 Challenge 1 Make do and Mend

The challenge: Make do and Mend
Snow White (October 2013)
 Let’s start of the year with a clean slate, and with a bit of a tidy up.  Use this challenge as an opportunity to get your historical wardrobe in order by fixing any little bits that have worn out and gone wrong. 

For the first challenge of the year I decided to go over my Snow White gown that I made this autumn.

It was a masquerade costume and I wanted to turn it into a more "normal" 18th century costume, also even though it was the newest one I had noticed some things that I wanted to fix.

I started with removing the cape, collar and cuffs. That was simple since I had just tacked them on.


At the bottom of the bodice I had had problems with the silk starting to unravel at the edge, when I had fixed it the white lining had become visible. The neckline was also a tiny bit too wide, meaning that I had to worry about showing too much of my breasts all the time. None of this was about construction, but rather more about hiding the imperfections. The Snow White gown was also quite plain, and the only trims I had were the cuffs, the cape and the collar. I decided to go all out and hide the bottom edge with some trimmings, as well as raising the neckline a bit.


bottom of bodice with the visible white lining.
Thankfully I still had saved the bigger pieces that remained of the blue silk taffeta, so I started to cut it up into strips of fabric. My plan was to make a box pleated trim, similar to this gown. You can see the trim at the point of the bodice and along the neckline.

When I had cut the strips of fabric I felt faint when I thought about the amount of tiny hems I would need to make, and decided that that was simply not feasible. Also a hem would make the whole trim bulkier than I wanted, and I've never seen fray-check or anything like that sold in the stores around here. Thankfully I remembered an advice I heard in Kalmar, when the horrors of hemming and trimming many meters by hand were talked about. I can't remember who said it, so I can't give credit to this person, but I am very thankful for it. The advice was to use regular wood glue, but mixed with water to thin it out. Thinking about it I guess one reason why wood glue works is that it's supposed to bond natural fibres, so it won't hurt the textile.


The wood glue worked fine. I mixed the glue with the water until it was really thin, but still had a white colour, then I simply brushed it onto all the edges. First I was quite hesitant and made sure to only brush the edge of the fabric, but after a while I used the full width of the brush. When the glue/water had dried it was invisible and the edge didn't fray.


Then it was on to cutting strips, painting the edges and doing all the box pleats.

I didn't measure my pleats exactly, so they are a bit uneven, but that is something you can see on original gowns as well. I tried to keep the pleats to about the same width as my fingers. Since I was going to sew the trim on in the middle I also secured the trim with some stitches along the middle of the trim, before removing the pins and pressing the whole piece of trim flat. Then I pinned the trim onto the gown and sewed it on by hand.

I'm very happy that I did have enough fabric so that I could go al the way down the sides of the skirt of the gown, as well as replacing the red cuffs with this new pleated trim. I had removed the white small flounces at the sleeves together with the cuffs, I sewed them back on, and all of a sudden they were a lot more visible.

I can only say sorry for the bad photos, I didn't feel like getting all dressed up, and since I don't have a dressform I just put the robe on the floor and snapped some photos.


 The new ending of the sleeve with a pleated trim and a visible flounce.

 The full robe with the trimming along the neckline and the front (with flash)

 The full robe with the trimming along the neckline and the front (without flash)

Fabric: blue silk taffeta
Pattern: none
Year: ca 1780
Notions: wood glue, polyester thread
How historically accurate is it? The trim itself is accurate, but I doubt that they used wood glue and polyester thread.
Hours to complete: 10-15, and most if just sitting and doing the pleats
First worn: never

Total cost: $5 for a small bottle of wood glue, the rest was from my stash.

What did I learn with this project?
The handy thing of using wood glue for the fabric edges instead of having to do tiny hems or cut with my modern pinking shears when I want to do trim will definitely come in handy in the future.

I also saw this as my first try with doing box pleats, and it wasn't much harder than the knife pleats that I usually make. This was my first try with doing box pleats, and with silk taffeta, so in a way it was dry run for when it's time to start on my Gold Handmaiden gown. I definitely want to use the same kind of fabric for it since it was easy to manipulate into straight creases and pleats.

From now on when I talk about this gown I'm going to call it my navy anglaise rather than Snow White.

Sunday, 12 January 2014

18th century hairstyle

When donning an historical costume, it's of course important to get the hair at least a bit accurate. So far I haven't cared that much about make up, but for those who are interested in 18th century make up the go to place is Madame Isis's toilette. And since she's from Sweden she gives a lot of advice on how to find everything you need, and it's nice to read something that isn't American based for once.

But now it was about hair. For information my own hair reaches a bit past the shoulders, is somewhat curly and very fine. I have a lot of hair, but since each strand is so fine if I squeeze it, it basically disappears. I will never be able to make a wonderful thick braid for example, I always end up with short and silly stumps. Still the amount of hair strands is a good thing to work with when trying to do something 18th century like.

My first try of making an 18th century hairstyle was for my first 18th century event in 2012. I basically tried to follow these instructios; How to create a simple 18th century pouf and some video I found by searching "Marie Antoinette hair". All of these tutorials rely on hair pieces though, something I didn't have, I had to work with my own hair. (I found it a bit annoying when tutorials keep saying "just buy a cheap hairpiece", since the cheapest hairpiece I've found in Falun cost $20+).

What I did though was to sew a little bag of tuille and stuff it, I then pinned it onto my hair at the crown of the head, teased my hair and pinned the hair up to the bag. I then got help with adding some pearl and feather to the hair.

By now I have refined this style and come up with something that is a bit of a mix of the "pouf" and the later, and bigger; hedgehog style. I tried it the first time in Kalmar in October, and thought that the result was ok, and I have some ideas on how to improve it further. Also be prepared for crappy selfies coming further down.

Step 1: I rolled up my hair in order to get a lot of curls.


Step 2. I removed the rollers, and had a mass of curls. In fact I think this would look quite good for a regency hair style. Just arrange the curls a bit and use some ribbons.

Step3. I took each individual curl, and in some cases I also split the curls and teased them as much as possible. I saved one so that I could hang free at the back.

Step 4. Instead of the bag of tuille that I had tried in Sala I have bought a set of bump its.
I put the larges piece on top of the head, and thew two middle sized ones to the sides of that. Then it was just to pin all the hair up, except for a curl that I kept in the back. I got help to make sure that I covered the bump its, and nothing was impossible. The person helping me also lent me a flower to put up in the hair to make it a bit more fancy.

I didn't get any close ups, but all in all I thought it looked really nice. I think that in the future I'm going to skip on the big bump it in the middle, and only use the two smaller ones at the sides. I want to learn how to make a proper hedgehog style with my own hair, and that would be a start.


And for those of you wondering this is what I looked like when I came home and untangled the hair.


This kind of style isn't my favorite though. When it comes to 18th century hair nothing beats a beautiful 1780's hedgehog style, to me at least. The name hedgehog is not an accurate term, but it's being used all over the place when talking about this style. It was a bit of counterstyle to the severe and clearly styled hairstyles of the previous decades. The goal was to look "natural", but of course with everything "natural" in fashion it takes a lot of work and unnatural add ons to create the hairstyle.


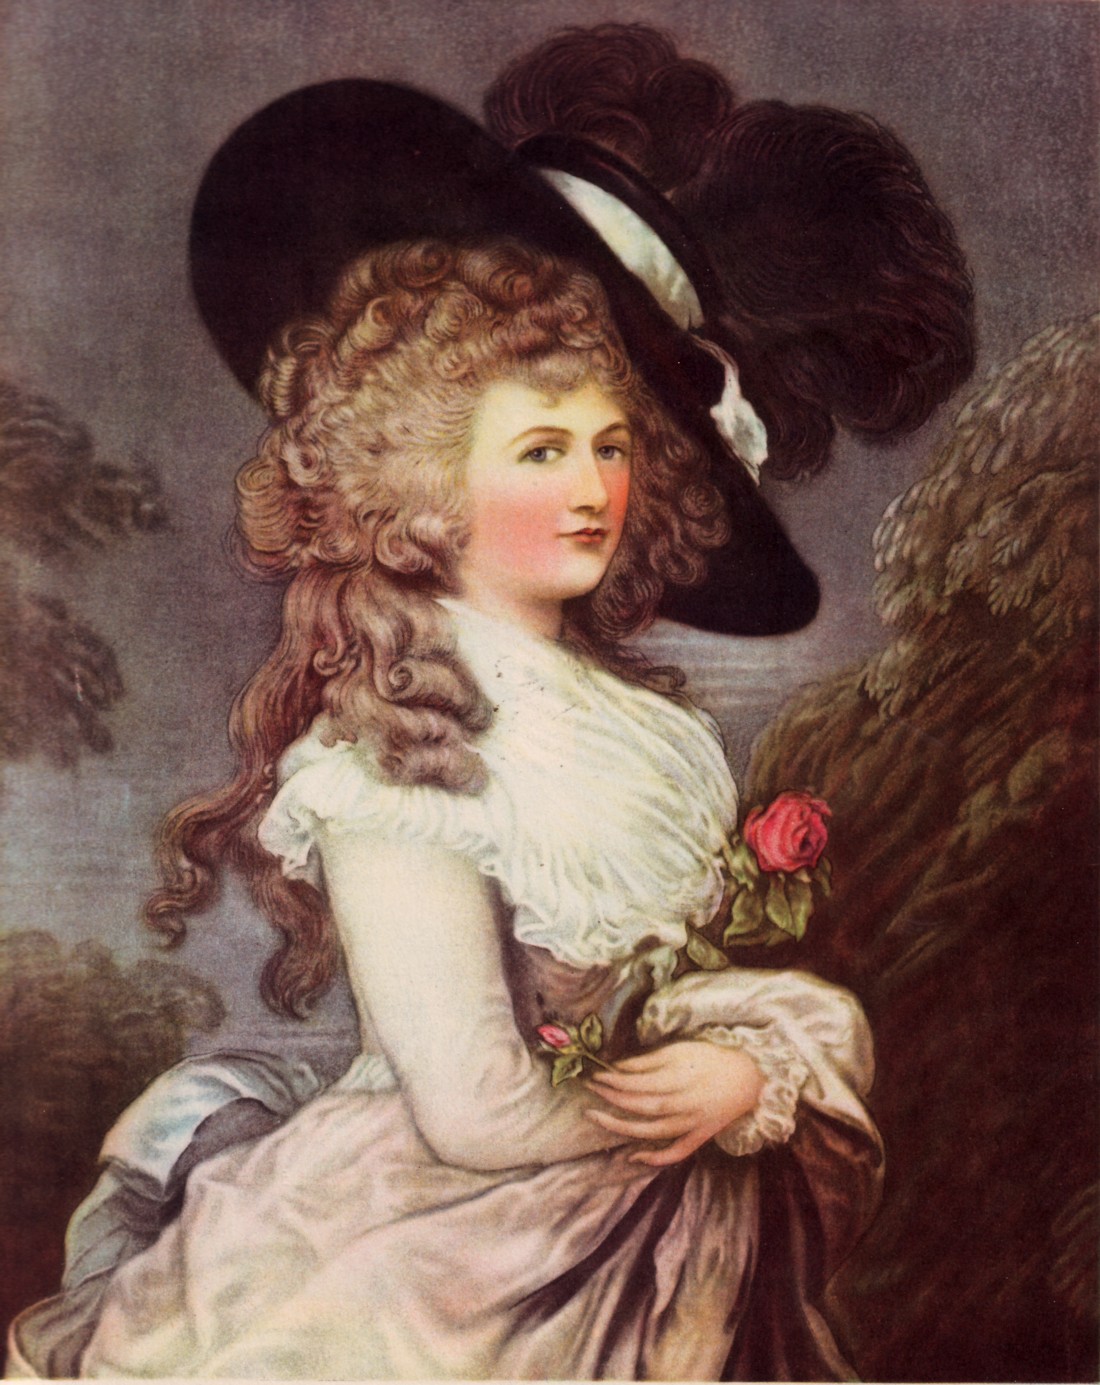
Here is a painting of the Duchess of Devonshire from 1787 to show what a "hedgehog" is all about.

 
I love this giant explosion of hair around her head. What I see as distinct features of the hedgehog is that the hair is a mass of soft curls, "natural" curls, it's wider than it's high, and there are a couple of loose curls hanging down in the back.

If you look at the pic of myself above, after I had removed the "pouf" I think I could probably achieve a decent hedgehog by pinning the hair up to the sides, possible over the two middle bump its. I have a suspicion that my hair is actually a bit too long, and the weight of the hair, fine as it is, wouldn't make it possible for the hair to just fluff out and keep its shape properly. I'm hoping to try one day though.

For my Snow White that I wore in Kalmar I really need black hair, and instead of trying to dye my own hair I decided to go with a wig. I have dyed my hair with quite disastrous/humorous results before, and didn't want to repeat that, also I like being blonde at the moment, and I don't think really dark would suit me that well.

Now I just happened to have a wig in my costume closet. It was a wig that I bought several years ago, when I wanted a long, curly, dark wig to go with my Padmé costumes, but without having to dye my hair all the time. I don't remember what the wig cost, but it was probably around $50. The quality of the hair was definitely better than the cheap wigs you can find in costume shops, unfortunately the wefts of hair were sewn on so sparsely that there were clear gaps, the curls were definitely not natural looking, and it wasn't big enough. When I put it on, my own hairline was clearly visible at the neck.

Since I didn't use the wig for anything I thought it was a good way to try if it was possible for me to style the wig and turn it into something completely different. I took most of my inspiration from this tutorial over at American Duchess.

In order to cover my hairline at the neck I saved a few curls at the bottom and tied them into a ponytail. Then, just like with my own hair above, I started to tease all the individual curls, sometimes dividing them into thinner curls. After an hour of teasing the hair looked like this.

I then simply shaped the hair with some strategically placed bobby pins, mostly just making sure that the hair in the front was tied back, and that the top was a bit flattened. I'm very happy with the result, and an unexpected side effect when I looked at myself in the mirror was that I thought I looked very much like Jane Seymore as Marguerite Blakeney from The Scarlet Pimpernel (1982). This was probably my favorite film as a child, and I thought Marguerite was just so beautiful and interesting. Now of course I can't help but start thinking that maybe I should recreate one of her gowns from the film, now when I have the hair.


As always there is room for improvement. I haven't dared to cut some of the excess hair off from the wig, and I could probably add some hairpieces to get even more volume into the hair. Just look at the Duchess of Devonshire above, I have a bit to go until I'm there. I'm also tempted to buy a blonde wig and try to style it in a similar way. That way I could blend my own hair into it, at least when I'm blonde, and make it bigger, and also not having to worry about the sharp edge between the wig and my own hairline.


Friday, 10 January 2014

Costume breakdown - Revolutionary

It's time to launch my big spring 2014 project, and at least get my thoughts and planning about the gown in writing. I also want to see if I can fit as many HSF challenges into this as possible, so that's a good reason to have a time plan.

General Time plan
I want to finish this dress for the end of June, since there are a couple of 18th century events taking place then. Plenty of time, shouldn't be a problem right? No, I don't think it will be a problem, but I also know that I have all weekends up until the end of March booked for other things* and I'm usually bad with sewing on week nights.

Layer by layer
1. Stays
I want to make a new pair of stays for this one. I love my purple 18th century stays, but due to how I placed the boning they ended up a bit too early period wise, and I want to be able to wear the white gown by itself, and I think dark purple might shine through.
Pattern and materials - I have the RH833 pattern for 1740-1790s stays, and I want to use the shortwaisted pattern. I might have enough cotton canvas to squeeze another pair of stays out of it, but I need to order more boning.
Time plan - HSF 2014 challenge 4, due Marsh 1st, is called "Under it all", so a pair of stays would fit that really well.

2. Gaulle
The main part of the costume will be the white gown. I want to be able to use the gown on itself so I want to make a proper gaulle dress. I like the fitted bodice of the gaulle, rather than just gathering a lot of fabric I'm not exactly a tall column when it comes to body shape so I need to use as much tailoring as possible to hide my curves. My main inspiration for the gaulle will be this portrait
I love the tight fitted sleeves and the quite light gathering in the bodice, so it's not too bulky or blousy.  American Duchess has made a great costume analysis of this gown, that I really recommend.
Pattern and materials - materials is easy, I will use a lot of natural cotton voile. For the pattern I will need to draft a pattern more or less from scratch for the first time. I have the sleeve pattern, my 18th century sleeve, and for the main gown I'm going to use the drop front regency gown on page 48-49 in Arnold's Pattern of Fashion 1 as my main inspiration for the bodice. It's later, 1798-1805, the bodice needs to be lengthened among other things.
Time plan - some time in April/May. I need to buy a proper dress form before beginning to draft a bodice, and I'm not going to do that this month.

3. Coat and Vest
This is the part of the outfit that I've thought the least about so far.
Patterns and material - the closest pattern that I have to work out from is the men's coat on page 92 of Costume Close up, there are also a couple of vest patterns in that book that I can use for inspiration. For the red coat I want to find a nice red, but thin, wool. My dream would be to find a nice striped cotton for the vest, but so far I've had no luck in finding that so I might settle for a solid coloured fabric. I'm not a big fan of green so I will likely change to another colour.
Time plan - this could fit into the HSF challenge 5, due March 15, "bodice". But I don't think I'll be able to finish this part of the project so soon after the stays. Also it would of course be better to finish the gown before adding garments over it.

4. Hat
One thing that makes this whole costume stand out is the huge, ridiculous?, hat. I have never made antyhing resembling a hat in my whole life, but I have the Lynn McMasters pattern for a universal round brimmed hat and that's a starting point.
Pattern and Materils - the Lynn McMasters pattern, for materials I will go with what it says in the pattern, I think it's felt and buckram. I'll also need to find some nice ostrich plumes.
Time plan - HSF challenge 7, due April 15, is called "Tops and toes" so perfect for making a hat.

5.Accessories
The little gauntlets on the wrists, the little things hanging from the vest, a huge hedgehog hairstyle, those will be the finishing touches when I've done everything else.

*I'm busy working with world cup/continental cup contests in ski jumping and nordic combined throughout February/March