Wednesday, 20 May 2015

Gold handmaiden sash

I still have a post or two to sum up my gold handmaiden.

One of the parts of it that I wondered about for a very long time was the sash around the waist. This is one example where I'm very happy that I waited to make it until I was good enough to be able to come up with what was going on.

At first I thought that all the vertical lines came from ribbons that were sewn together. I had no idea on how I would find those kinds of ribbons. Well a couple of years later I've gotten better with identifying fabrics manipulation. Looking at my reference pictures I got convinced that the sash has been smocked. The lines comes from the smocking threads. After the smocking the sash has been folder time and time again when it's been wrapped.

Another thing is that this costume is obviously worn by columnshaped models, while I'm not. If figured that the sash would be very important to creat an illusion of a body without many curves. The answer was to make an underbust corset, that I would then attach an outer layer of fabric to.
This is a bad photo of the inside. The pattern was a very old underbust pattern that I dug up from my pattern archive. I actually think it started out as a pattern for an underbust Drndl bodice from a Burda magazine. I boned it with what pieces of boning I had in my stash, reused from old corsets. The important thing was to make a busk of several bones in the middle, to keep the tummy in check. The fabric was my last remnant of coutil from last summer's corsets.

For the outer fabric I used a silk charmeuse that I dyed with the same dye as the rest of the undergown. In fact this piece of fabric was actually my first test of dying in this project. I then sewed long gathering stitches all over the fabric. When I gathered the fabric I did make a mistake though, I simply gathered it too much. This made the fabric quite bulky when I tried to fold it, and the horizontal lines were hardly visible. Still this was the last thing I had to do before leaving for Anaheim, so I wore it like this at Celebration.
When I came home, and after some discussion with the RL costuming judges who didn't know about the smocking, I eased the tension a lot. In fact I could remove around 50 cm of fabric and it still covered the whole underbust.
I then simply folded the excess fabric and in order for the fabric to lie as flat as possible I also sewed down the folds to the foundation layer.


Sunday, 17 May 2015

Some days off in the wilderness

On Wednesday I went up to the family cabin in the mountains. It's so wonderful and peaceful to be there, not the least because my phone operator doesn't have coverage so I'm impossible to reach when I get up there. It's still quite a lot of snow up there when come to the higher elevations.

Not a view from the cabin
 On Friday me and my mother decided to go down to Idre, which is the closest locality. Going in to Idre it's also mandatory to stop by the local clothes and fabric shop.
This is a really fun shop. A house where one part is a clothes shop and one part is a home furnishing store. It's basically stacked from floor to ceiling with stuff so you have to search to find things. I don't always find stuff there, but when I do it's usually some clothes that people like because they don't like things both from H&M or other major retail stores. I did get some wadding from the fabric section, so I can make a bum pad to wear on Saturday.

As a costumer you also realise that you are not always after qualities that modern clothesmakers find good. I found a nice piece of blue fabric up on a stash, but too high for me to feel it. When I asked the assistant what it was she answered "it's a mix of polyester and acrylic, it's great because it falls nicely and doesn't wrinkle". Not the right answer for a person that only wants natural fibres.

Except for talking nice walks, but on the roads and out in the nature, and cooking (it's always so fun and challenging to cook where the nearest food store is 30 km away, so you need to make it work with what you have), I spent most of my days in this spot sewing on my 1900 shirtwaist (when not having the table laid for waffle eating).
I used the pattern for the bodice of my 1911 corset cover, but I added extra width to the front. The front was pleated to make it fit. For the sleeves I used the largest size from Truly Victorian 493 - simple bodice. It's a fitted two piece sleeve, but by cutting the largest size I got a bit of pouf up at the shoulder. I had to take in the sleeve at the wrists though. It's all handsewn, but I'm getting better and better with handsewing.
In order to finish the shirtwaist I need to sew a waist tape to keep it fitted, sew cuffs and a collar and add buttonholes and buttons.


Wednesday, 13 May 2015

They're back!

For years I've oogled the American Duchess shoe shop, and of course followed her blog, knowing that one day I would buy a pair of her shoes. Already from the start I fell in love with the Kensington, and in particular the oxblood Kensingtons, but they've been sold out. Many times I've thought about maybe buying a pair of black Kensington, which would be a lot more practical, or maybe the ivory and dye them myself. Today I checked my facebook during breakfast and this was on my wall.

http://www.american-duchess.com/shoes-18th-century/kensington-18th-century-shoe-oxblood-red
The Kensington is back in oxblood!

I'm so happy, and decided to buy them straight away. Now I can't wait, even if I'm always nervous about ordering shoes online.

I'm taking the rest of the week off though. Ascencion day is a holiday in Sweden, and I've taken the Friday off from work. I'm off to the mountains with my mother. I won't stay idle though, since I need to make the blouse for my 1900 outfit. I'm really looking forward to going up there, just sitting in the glazed veranda and relax and handsew for a couple of days.

Friday, 8 May 2015

Gold handmaiden robe

So I still have a few posts about the construction of the gold handmaiden. Now since I was stressed about finishing it in time for Celebration I worked a lot, but didn't take a lot of photos of the process.

The robe was constructed from velvet. I chose to do a separate hood and robe. The robe itself had a few challenges, not the least in the sleeves. Whenever I looked at pictures I had a feeling that there was simply too much fabric. I saw a lot of folds, but couldn't really see if they belonged to the sleeves or the body of the robe.

Above is one of my photos where I simply tried to trace all the folds and pieces of fabric. I also went looking for a lot of other kinds of costumes to see if I could find something similar. Since I think the costume has quite a clear Japanese influence I looked up different kinds of kimonos, and come upon the more ceremonial kind called "furisode"
The picture above was the closes I could find in getting the same kind of folds in the fabric. The thing with a furisode is that the sleeves are big rectangles of fabric.

When I had cut out the velvet it was time to put the symbols on. I was very happy that KayDee had been to the Power of Costume exhibition in Seattle, and she had taken a lot of pictures of the sleeves for me, including pictures that showed the whole markings.

This is my sketch of the symbols. It consists of the same symbol repeated four times in a square. For the symbols on the hood I used a single symbol, but for the sleeves and robe markings I used the square. Now this sketch is not proportional, it's actually too big. I did not have enough space to be able to have three sets of symbols, in a _I_ formation, but had to only use a _ _ formation, or else one of the symbols would have ended up on my sleeve.

Painting the symbols was actually quite simple. The velvet I used was transparent enough in a strong light that I placed the sketch under the fabric, under a kitchen lamp. and then simply traced the symbols with a red fabric pen.

Here is one half of the robe, showing the symbols and the shape of it.

When sewing the robe I interlined the velvet with a gold organza and used an old gold satin as lining. The lining is not attached to the robe at the hem, but hangs loose. The sleeves are not sewn totally shut, instead they are tacked together at the front, just above the symbol, and then the back of the sleeve is sewn together. This creates two "points" at the bottom of the sleeves, that are clearly visible in this reference photos.
There is gold braid piping all along the sleeves and the opening of the robe, but not the hem.

These last two photos show the finished robe, and hood.


Wednesday, 6 May 2015

1911 Corset Cover

Now in my search for patterns for an Edwardian blouse I happened to stumble upon this little gem.
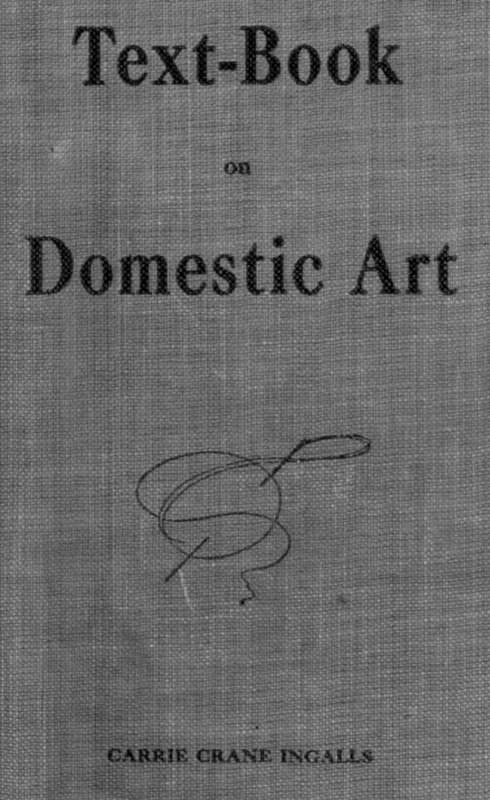
Text-Book on Domestic Art by Carrie Crane Ingalls. (Carrie Ingalls is not the Carrie Ingalls from The Little House books by Laura Ingalls Wilder, I had to look it up when I saw the name). The book was first published in 1911 it goes through all the basic sewing that a young girl of the time should know. It also contains a lot of instructions on how to draft a pattern. I was really happy when I discovered that it had a pattern for a shirtwaist, and since it's a very educational book it first had instructions for how to make a corset cover out of the same pattern. Or rather it's the other way around, since it's one pattern and first you practice the general fit on the corset cover, then you should go on and make a nightgown to practice sleeves before actually making a shirtwaist.

The instructions were actually quite easy to follow, and didn't use up as much paper as when I've done patterns from Creating Historical Clothes. The only thing that was a bit hard was that you need to measure yourself on a lot of points, and I failed taking the correct measurements on my back. The result was that the back of the pattern was 5 cm too short, but it was easily fixed.
I used around 1 m of cotton voile that I had in my stash. I followed the instructions in the book, so I would say that this is quite historically accurate. I even made the button holes by hand, that wasn't my plan but my sewing machine refused to do them as I wanted so in the end it was actually easier to make them by hand. 

I'm really happy with the lace around the neck opening. It's actually two pieces of antique lace, probably from my paternal great grandmother, so it's accurate for the time period. It's handmade, but I don't know if it's crocheted or bobbin lace. I have a few pieces of lace in my stash from her, but it's not really my style. I felt though that this was a perfect way to use it. I didn't want to cut he lace though, so I had the two pieces overlap in the back so I could use their full length. The lace is offwhite, so I dunked the whole corset cover in a quick teabath to make it less bright before adding the lace.

The pattern worked nicely, the armholes are comfortable, so I'm definitely ready to make a shirtwaist from the same basic pattern. For a shirtwaist I want to add more fabric to the front, so I can gather or pleat it nicely, and I would also lengthen the skirt portions, under the waistband, to make sure that they don't come untucked when wearing it.


Monday, 4 May 2015

Edwardian May

So May will be a trip to the Edwardian era for me. Now that's not exactly an era that I have thought much about, but sometimes things just happen.

In February I got invited to be part of the celebrations when the Swedish national railway museum celebrates its 100th anniversary. They wanted people to come dressed in clothes from the period 1900-19115. I signed up, and then it was time to start thinking about how I could achieve the look.


What I have:
Late Victorian corset, made from TV110.
1895 skirt and petticoat
Foundation for a hat, only needs trimming.


 So with that I felt that I had the foundations, and I would go for an early look, about exactly the year 1900, before the S-bend silhouette was too dominant. The 1895 skirt is a silk and with a train, so a bit too fancy to use as a walking skirt, but my plan is to keep what I'm wearing on the upper part of the body quite simple, so that it evens out the fancy skirt.


What I need to make
Corset cover - the corset is an old party corset so it's colourful and I need something to cover it or else it will show through
Shirtwaist  - I have bought a nice embroidered cotton for this. The smart thing is that I have found a pattern that uses the same basic pattern for both the corset cover and the shirtwaist, so I can practice on the corset cover first.


 If I have time:
Belt - I want something to accentuate the waist.
I have the TV 493 - 1896 Plain bodice. I think it wouldn't be too hard to convert this into a jacket to wear over the shirtwaist. I have a deep purple fabric that I could use for that.
Chemise and drawers 

Saturday, 2 May 2015

HSM 15 Challenge 4: War and Peace

When I posted my sewing plans earlier this year I said from the start that this was the HSM challenge that I had no inspiration for, coupled with the fact that April was all about Celebration I felt that this was probably the challenge I was most likely to skip.

Still when I was at the hat making party one of the organizers was really kind and gave me her pattern for a tricorn hat, in three sizes. That seemed like a suitable project, that wouldn't take too much time when I got home from Celebration. Well, I got home from Celebration suffering from severe jet lag and in the last days in the US I had gotten an acute inflammation in my shoulder, bad enough that I couldn't lift my arm up for two days. So I missed the deadline of April 30, but I have finished the challenge, only two days late.

The tricorn started out as a military hat. Worn by soldiers who cocked up their widebrimmed hats. In Sweden it was part of the military uniform from the 17th century. The fashion with cocked hats spread and in the 18th century it was worn by all classes, and also by women. My quick search seems to suggest that women wore the tricorn mostly as part of a riding habit. Its popularity diminished during the second half of the 18th century, and was later replaced by the bicorn as part of military uniform. In Great Britain the fashion for women to wear tricorn hats faded around the middle of the 18th century, but remained for some decades longer on the continent.

For my tricorn I decided to go for a fashionable 3/4-sized hat. This means that it will really be quite unusable as headwear, but might look good when anchored on top of a big hairstyle. I once again went back to the blue cotton velvet that I've used for quite a few challenges now.

This is the pattern that I used. After having finished the hat I think if I want to do a more fashionable hat again, then I woiuld make the brim a bit more narrow.

As a base for the hat I used a stiff fabric that I've had in my stash for a long time. I think I bought it when I first tried to make a bustle back in 2006. I have no idea about fiber content, but it feels pretty similar to buckram, but it's a bit flimsier than that though.

I first sewed the crown together of the stiff fabric. Then I glued the velvet top part of the crown onto the fabric. I sewed the velvet side of the crown on to the top. I also added a piece of millinery wire at the bottom of the crown, to help keep the shape.

The I covered the stiff fabric with velvet on both sides and sewed them on. This was the only place where I used the sewing machine. I had planned to use it more, but it was too fiddly so in the end it was easier to do the hat by hand.

The raw edge of the brim was covered with blue cotton tape, and then I sewed it onto the crown, using buttonhole thread. Then it was simply a matter of folding and pinning the sides of the hat until I felt that it looked good, then I used a couple of stitches to make the brim keep its shape.

As you can see on this picture of myself it definitely needs some big hair to look good. I have also sewed in two thread loops on the inside so it will be easier to pin it in place on the hair.

What the item is (and how it is a product of war or a lengthy period of peace:
A tricorn hat, a fashion that went from military uniform to being worn by both men and women in the 18th century.

The Challenge: 4 - War and Peace

Fabric: 0,5 blue cotton velvet, 0,5 m of some stiff mystery fabric

Pattern: Handed to me by a friend

Year: Middle of the 18th century

Notions: 1 m of blue cotton tape, blue sewing thread, buttonhole thread, 30 cm of millinery wire

How historically accurate is it? Except for the stiff mystery fabric I think it's pretty accurate. A proper milliner would use more layers to make it into a proper hat, but I would say 75%

Hours to complete: 8 hours, could have gone a lot faster with a healthy shoulder.

First worn: Not yet

Total cost: It was all from my stash, but if bought new the cost would probably have been around $15-20