
But now it was about hair. For information my own hair reaches a bit past the shoulders, is somewhat curly and very fine. I have a lot of hair, but since each strand is so fine if I squeeze it, it basically disappears. I will never be able to make a wonderful thick braid for example, I always end up with short and silly stumps. Still the amount of hair strands is a good thing to work with when trying to do something 18th century like.
My first try of making an 18th century hairstyle was for my first 18th century event in 2012. I basically tried to follow these instructios; How to create a simple 18th century pouf and some video I found by searching "Marie Antoinette hair". All of these tutorials rely on hair pieces though, something I didn't have, I had to work with my own hair. (I found it a bit annoying when tutorials keep saying "just buy a cheap hairpiece", since the cheapest hairpiece I've found in Falun cost $20+).
What I did though was to sew a little bag of tuille and stuff it, I then pinned it onto my hair at the crown of the head, teased my hair and pinned the hair up to the bag. I then got help with adding some pearl and feather to the hair.

By now I have refined this style and come up with something that is a bit of a mix of the "pouf" and the later, and bigger; hedgehog style. I tried it the first time in Kalmar in October, and thought that the result was ok, and I have some ideas on how to improve it further. Also be prepared for crappy selfies coming further down.
Step 1: I rolled up my hair in order to get a lot of curls.


Step3. I took each individual curl, and in some cases I also split the curls and teased them as much as possible. I saved one so that I could hang free at the back.
Step 4. Instead of the bag of tuille that I had tried in Sala I have bought a set of bump its.


And for those of you wondering this is what I looked like when I came home and untangled the hair.

This kind of style isn't my favorite though. When it comes to 18th century hair nothing beats a beautiful 1780's hedgehog style, to me at least. The name hedgehog is not an accurate term, but it's being used all over the place when talking about this style. It was a bit of counterstyle to the severe and clearly styled hairstyles of the previous decades. The goal was to look "natural", but of course with everything "natural" in fashion it takes a lot of work and unnatural add ons to create the hairstyle.
Here is a painting of the Duchess of Devonshire from 1787 to show what a "hedgehog" is all about.
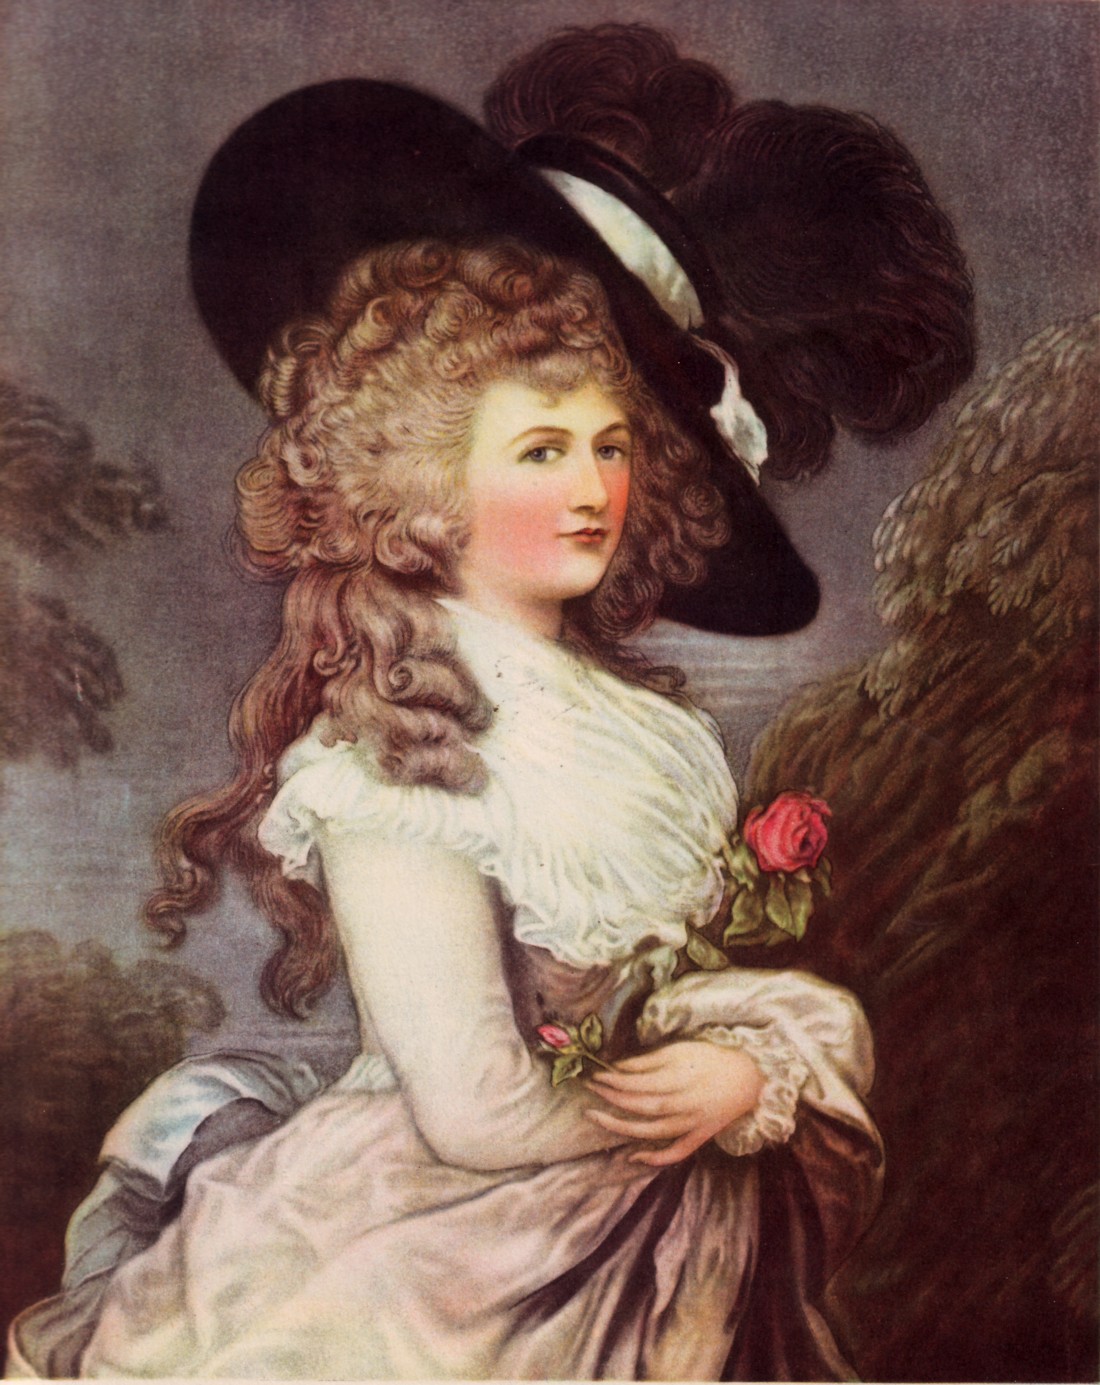
I love this giant explosion of hair around her head. What I see as distinct features of the hedgehog is that the hair is a mass of soft curls, "natural" curls, it's wider than it's high, and there are a couple of loose curls hanging down in the back.
If you look at the pic of myself above, after I had removed the "pouf" I think I could probably achieve a decent hedgehog by pinning the hair up to the sides, possible over the two middle bump its. I have a suspicion that my hair is actually a bit too long, and the weight of the hair, fine as it is, wouldn't make it possible for the hair to just fluff out and keep its shape properly. I'm hoping to try one day though.
For my Snow White that I wore in Kalmar I really need black hair, and instead of trying to dye my own hair I decided to go with a wig. I have dyed my hair with quite disastrous/humorous results before, and didn't want to repeat that, also I like being blonde at the moment, and I don't think really dark would suit me that well.
Now I just happened to have a wig in my costume closet. It was a wig that I bought several years ago, when I wanted a long, curly, dark wig to go with my Padmé costumes, but without having to dye my hair all the time. I don't remember what the wig cost, but it was probably around $50. The quality of the hair was definitely better than the cheap wigs you can find in costume shops, unfortunately the wefts of hair were sewn on so sparsely that there were clear gaps, the curls were definitely not natural looking, and it wasn't big enough. When I put it on, my own hairline was clearly visible at the neck.

Since I didn't use the wig for anything I thought it was a good way to try if it was possible for me to style the wig and turn it into something completely different. I took most of my inspiration from this tutorial over at American Duchess.
In order to cover my hairline at the neck I saved a few curls at the bottom and tied them into a ponytail. Then, just like with my own hair above, I started to tease all the individual curls, sometimes dividing them into thinner curls. After an hour of teasing the hair looked like this.


I then simply shaped the hair with some strategically placed bobby pins, mostly just making sure that the hair in the front was tied back, and that the top was a bit flattened. I'm very happy with the result, and an unexpected side effect when I looked at myself in the mirror was that I thought I looked very much like Jane Seymore as Marguerite Blakeney from The Scarlet Pimpernel (1982). This was probably my favorite film as a child, and I thought Marguerite was just so beautiful and interesting. Now of course I can't help but start thinking that maybe I should recreate one of her gowns from the film, now when I have the hair.


As always there is room for improvement. I haven't dared to cut some of the excess hair off from the wig, and I could probably add some hairpieces to get even more volume into the hair. Just look at the Duchess of Devonshire above, I have a bit to go until I'm there. I'm also tempted to buy a blonde wig and try to style it in a similar way. That way I could blend my own hair into it, at least when I'm blonde, and make it bigger, and also not having to worry about the sharp edge between the wig and my own hairline.
Tack så mycket för länken!
ReplyDeleteOm du kan få tag i det så rekommenderar jag hårcrepe (kräpp). Det finns i massor med färger, är lätt och kan fluffas upp ordentligt.
Tack, det ska jag leta efter.
ReplyDelete